Create new test suite and add test cases
This document shows you how to create a test suite with a test case.
Create your test suite by clicking on + Test Suite within the Test Directory.
- Go to in the sidebar. The Test Directory appears.
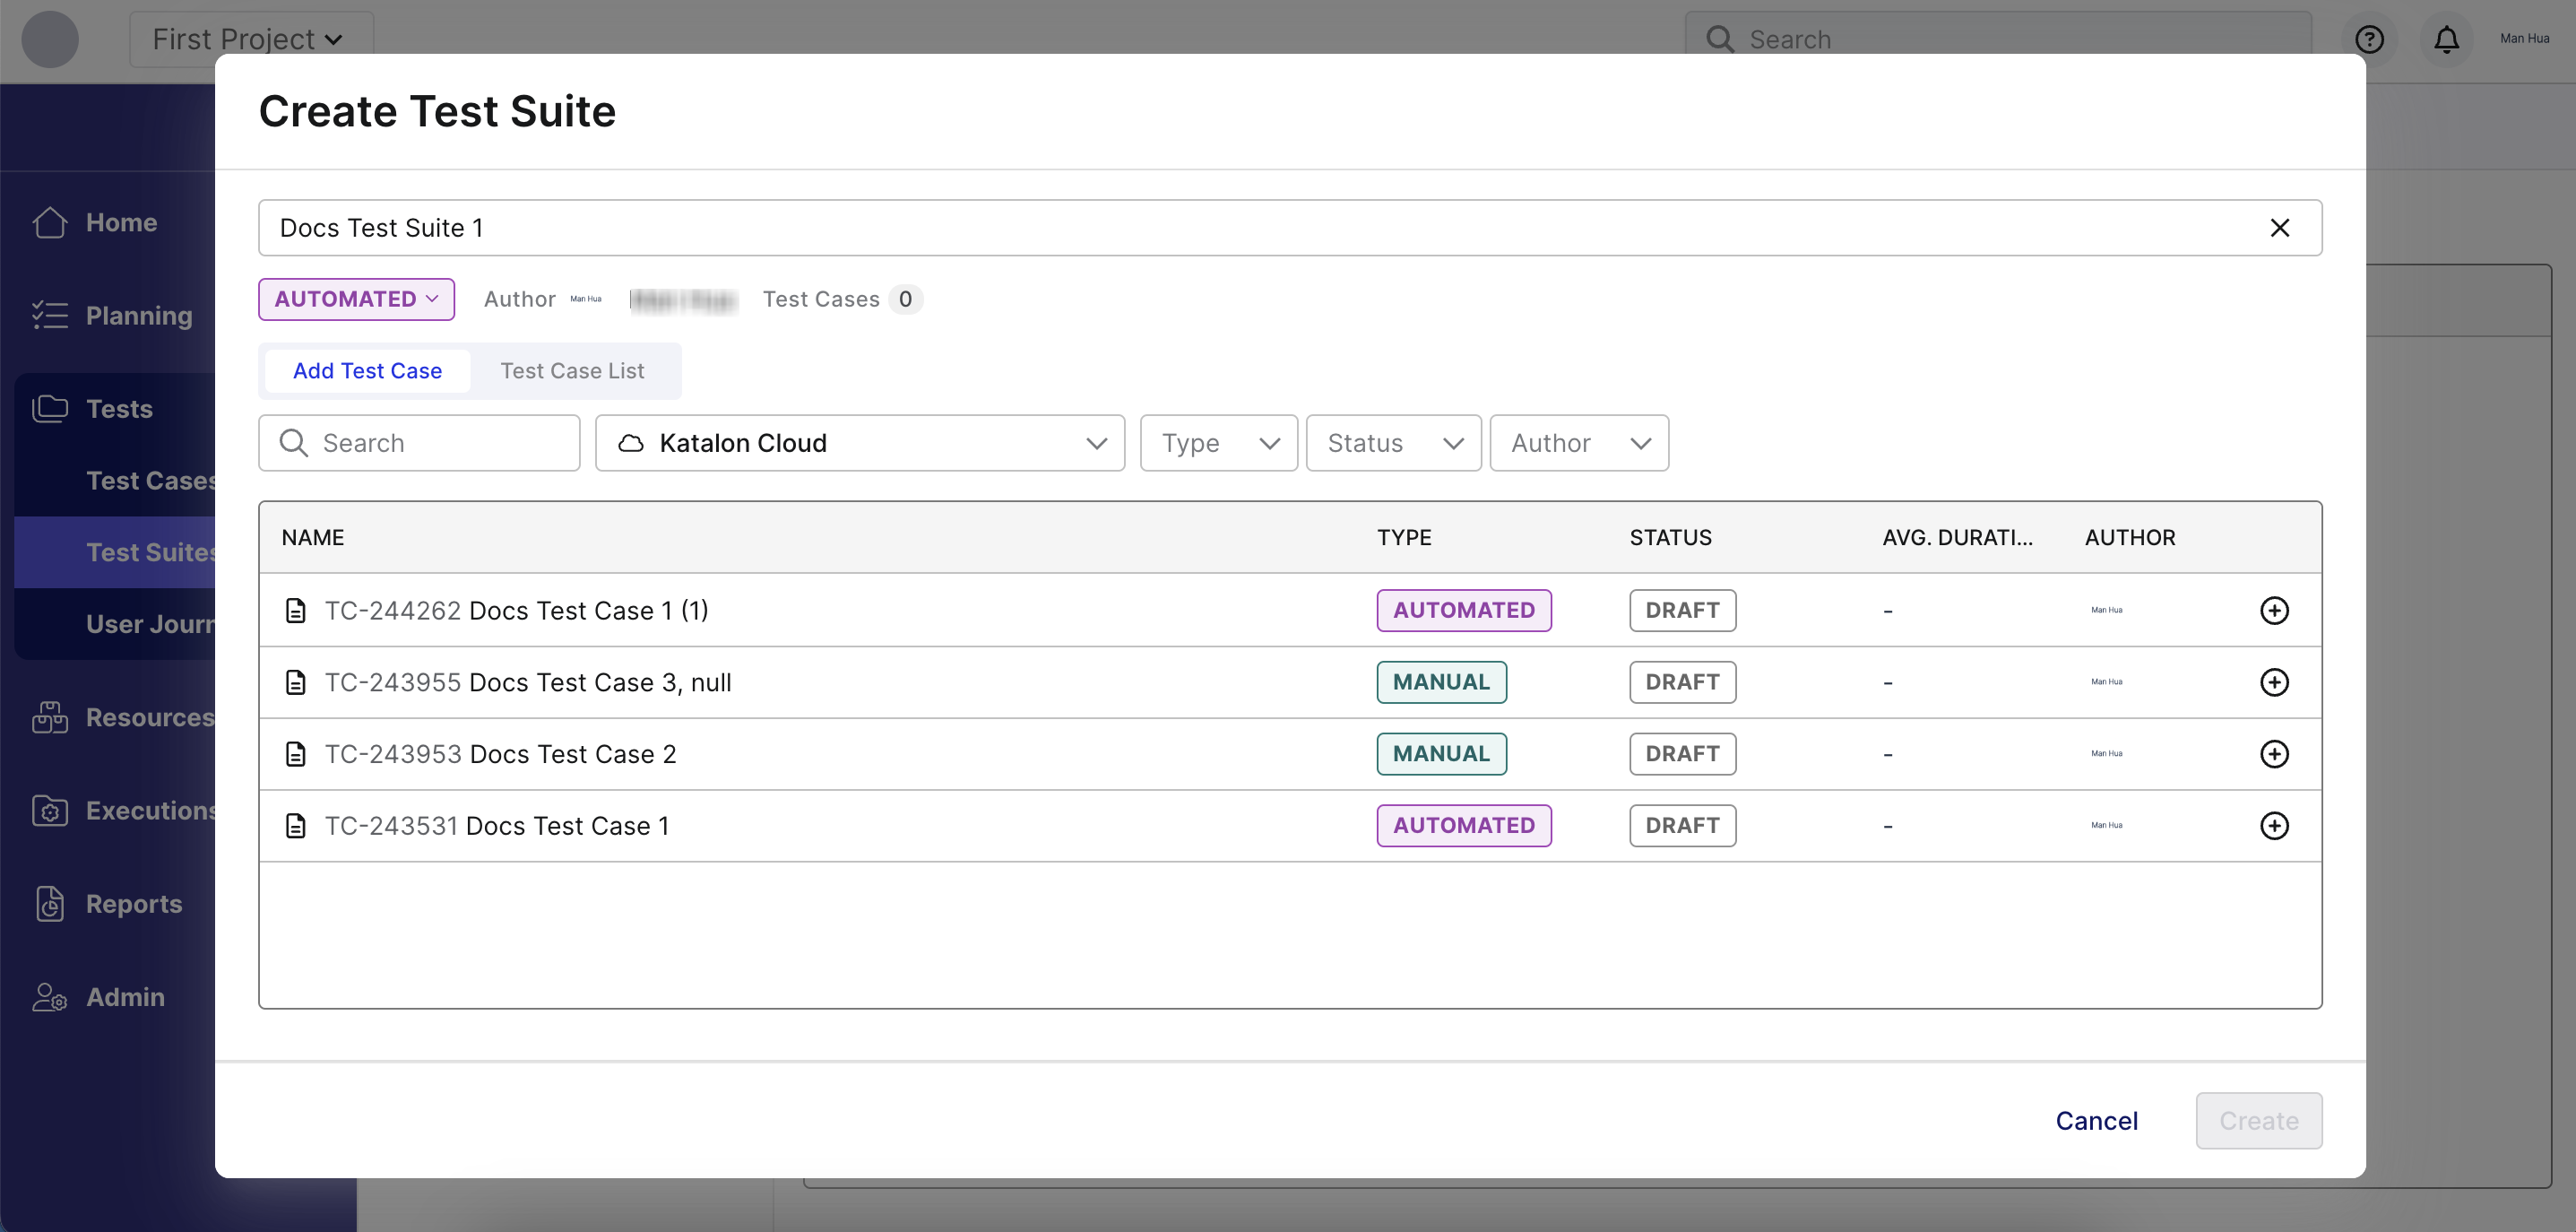
- Click on the + Test Suite button. The Create Test Suite dialog box appears.
- Enter the test suite name in the text box.
- Right below the name, click on the tag and select between Automated or Manual.
- Optionally, enter search filters to make it easier to find the test cases you want to add.
- Search: allows you to match text to the name of your test case.
- Repository: allows you to specify from which repository you would like ot fetch your test cases from.
- Type: allows you to filter test cases to only show the ones with your selected tag.
- Status: allows you to filter test cases based on the working status you've ticked.
- Author: Allows you to select test cases that have been authored by a specific individual.
- Upon identifying the test cases you'll add to the test suite, click on the Add (+) button that's at the rightmost column of every test case row.
- Verify that your test cases have been added by going to Test Case List and checking manually.
- Click Create.
A toast notification confirms the successful creation of your test suite. Additionally, the newly created test suite appears in the list within the Test Directory page.