About the sprint/release timeline
This document explains how you can use the sprint/release timeline's features to plan and manage resources related to Jira directly within TestOps.
Sprint/release timeline
Connect Jira to TestOps first. Ensure your sprints have a start and end date, otherwise they might not show up in TestOps. (Or connect to another ALM.)
- Go to Plans. Your sprints and releases appear in a timeline. The current ongoing sprint is highlighted like in the photo below. Note:
Use the Today button to hop to the current sprint/release.
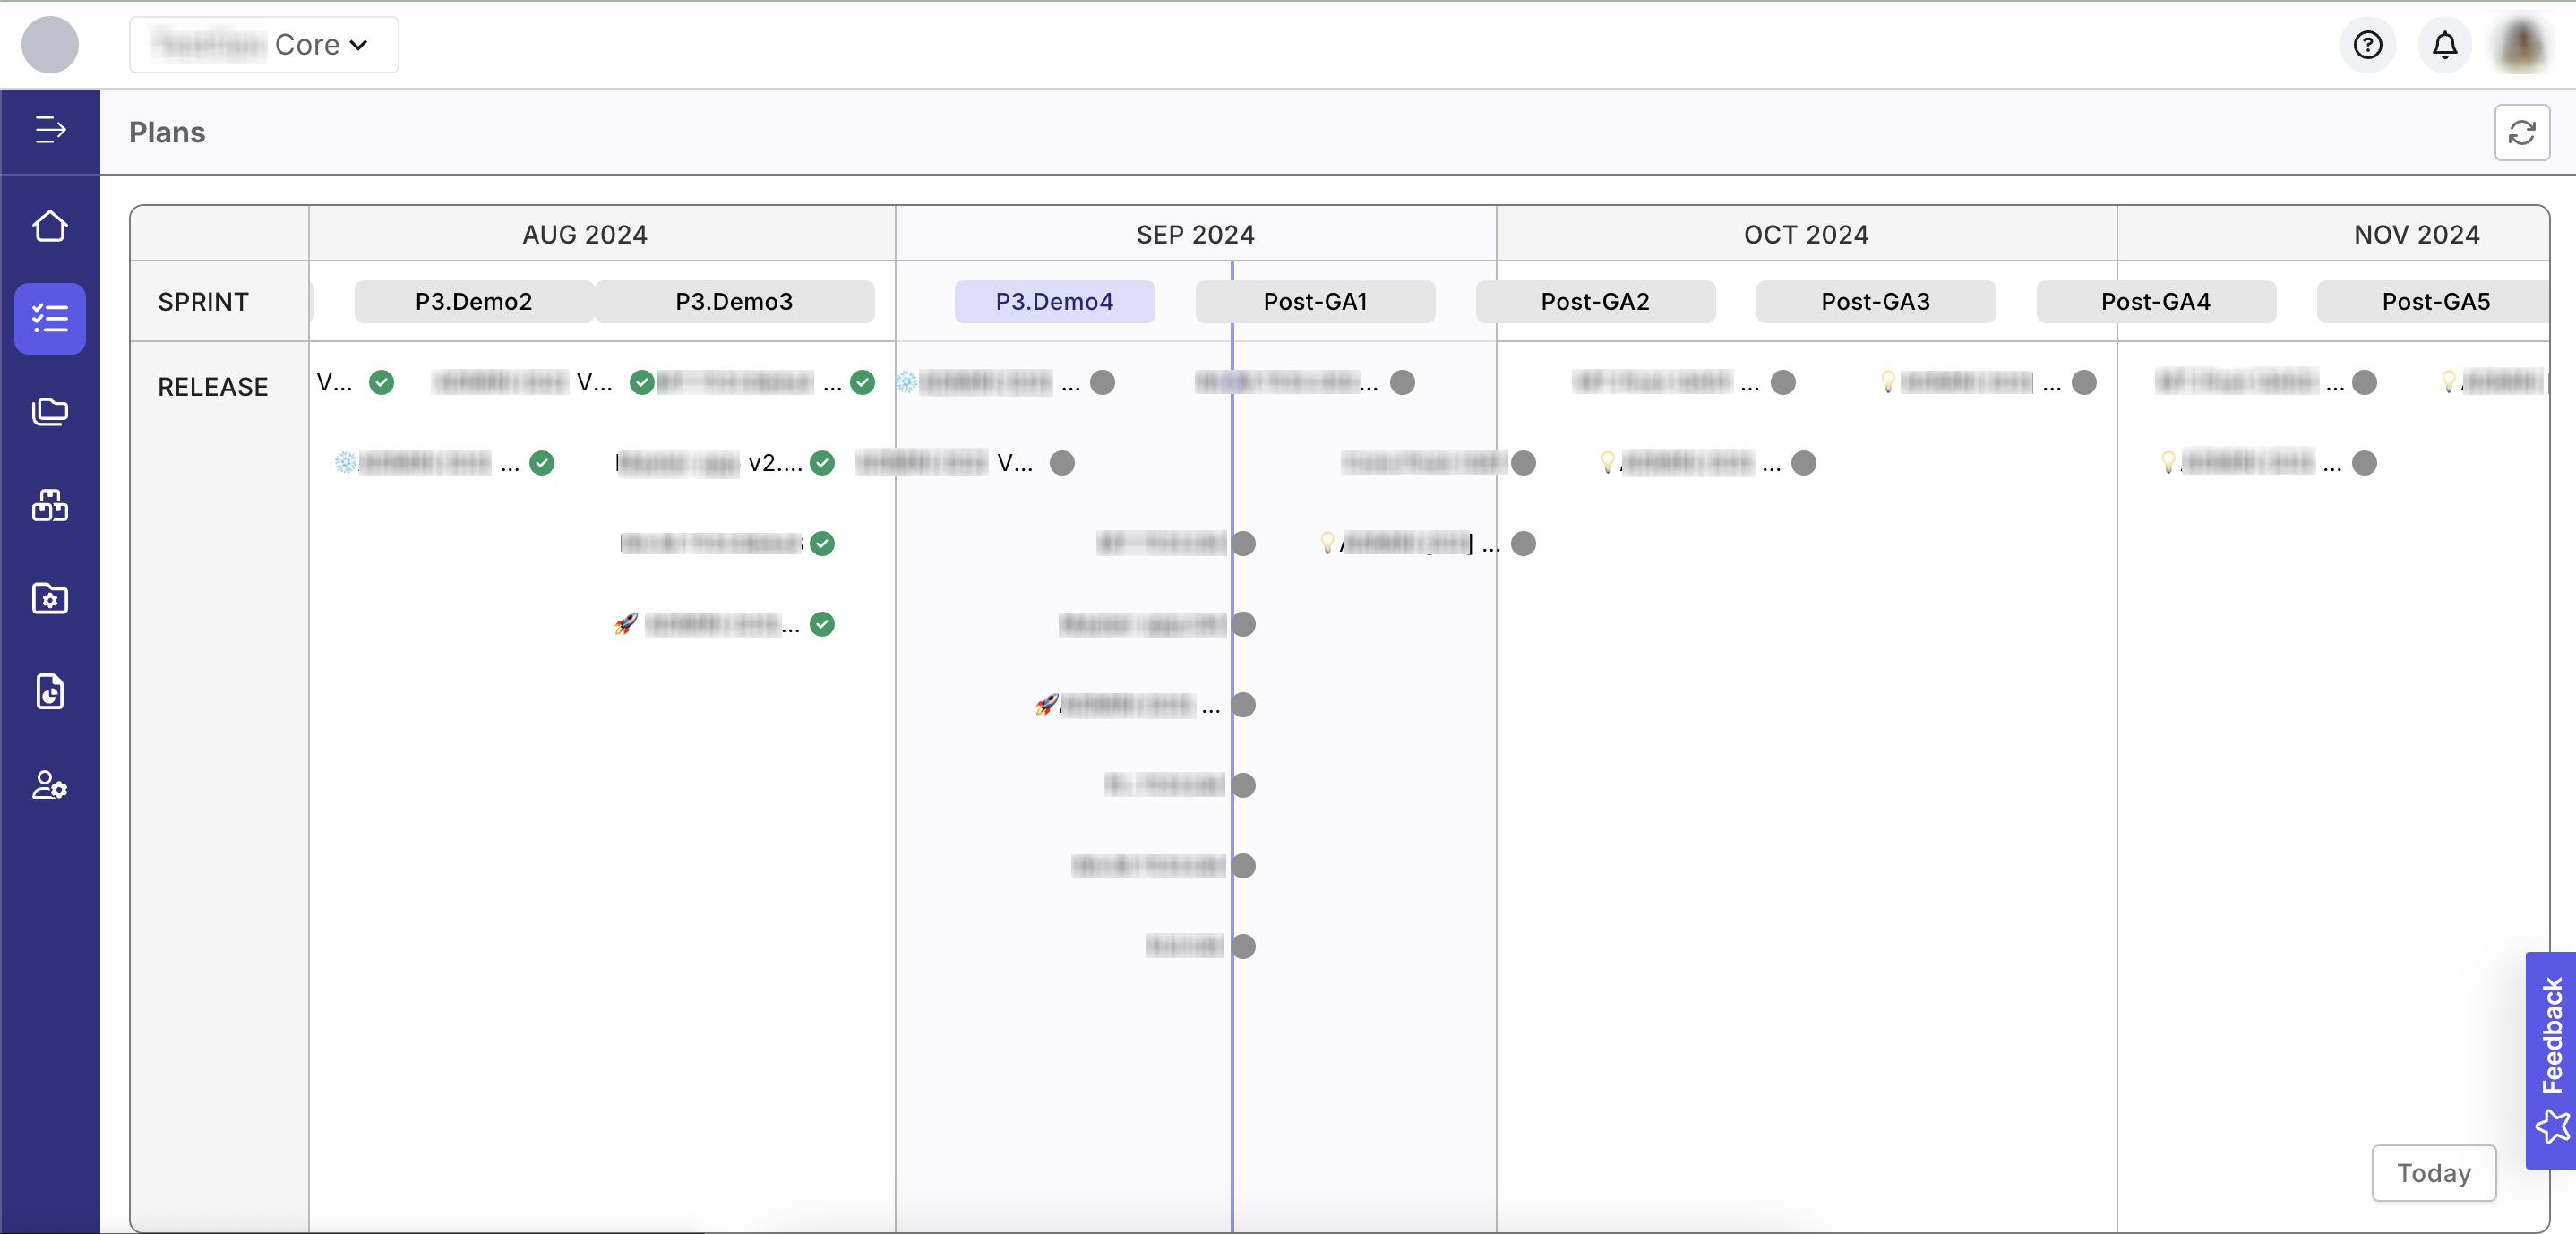
- TestOps and Jira sync in real-time, but if there are issues you can refresh by clicking on the Refresh button in the upper right corner, above the timeline.

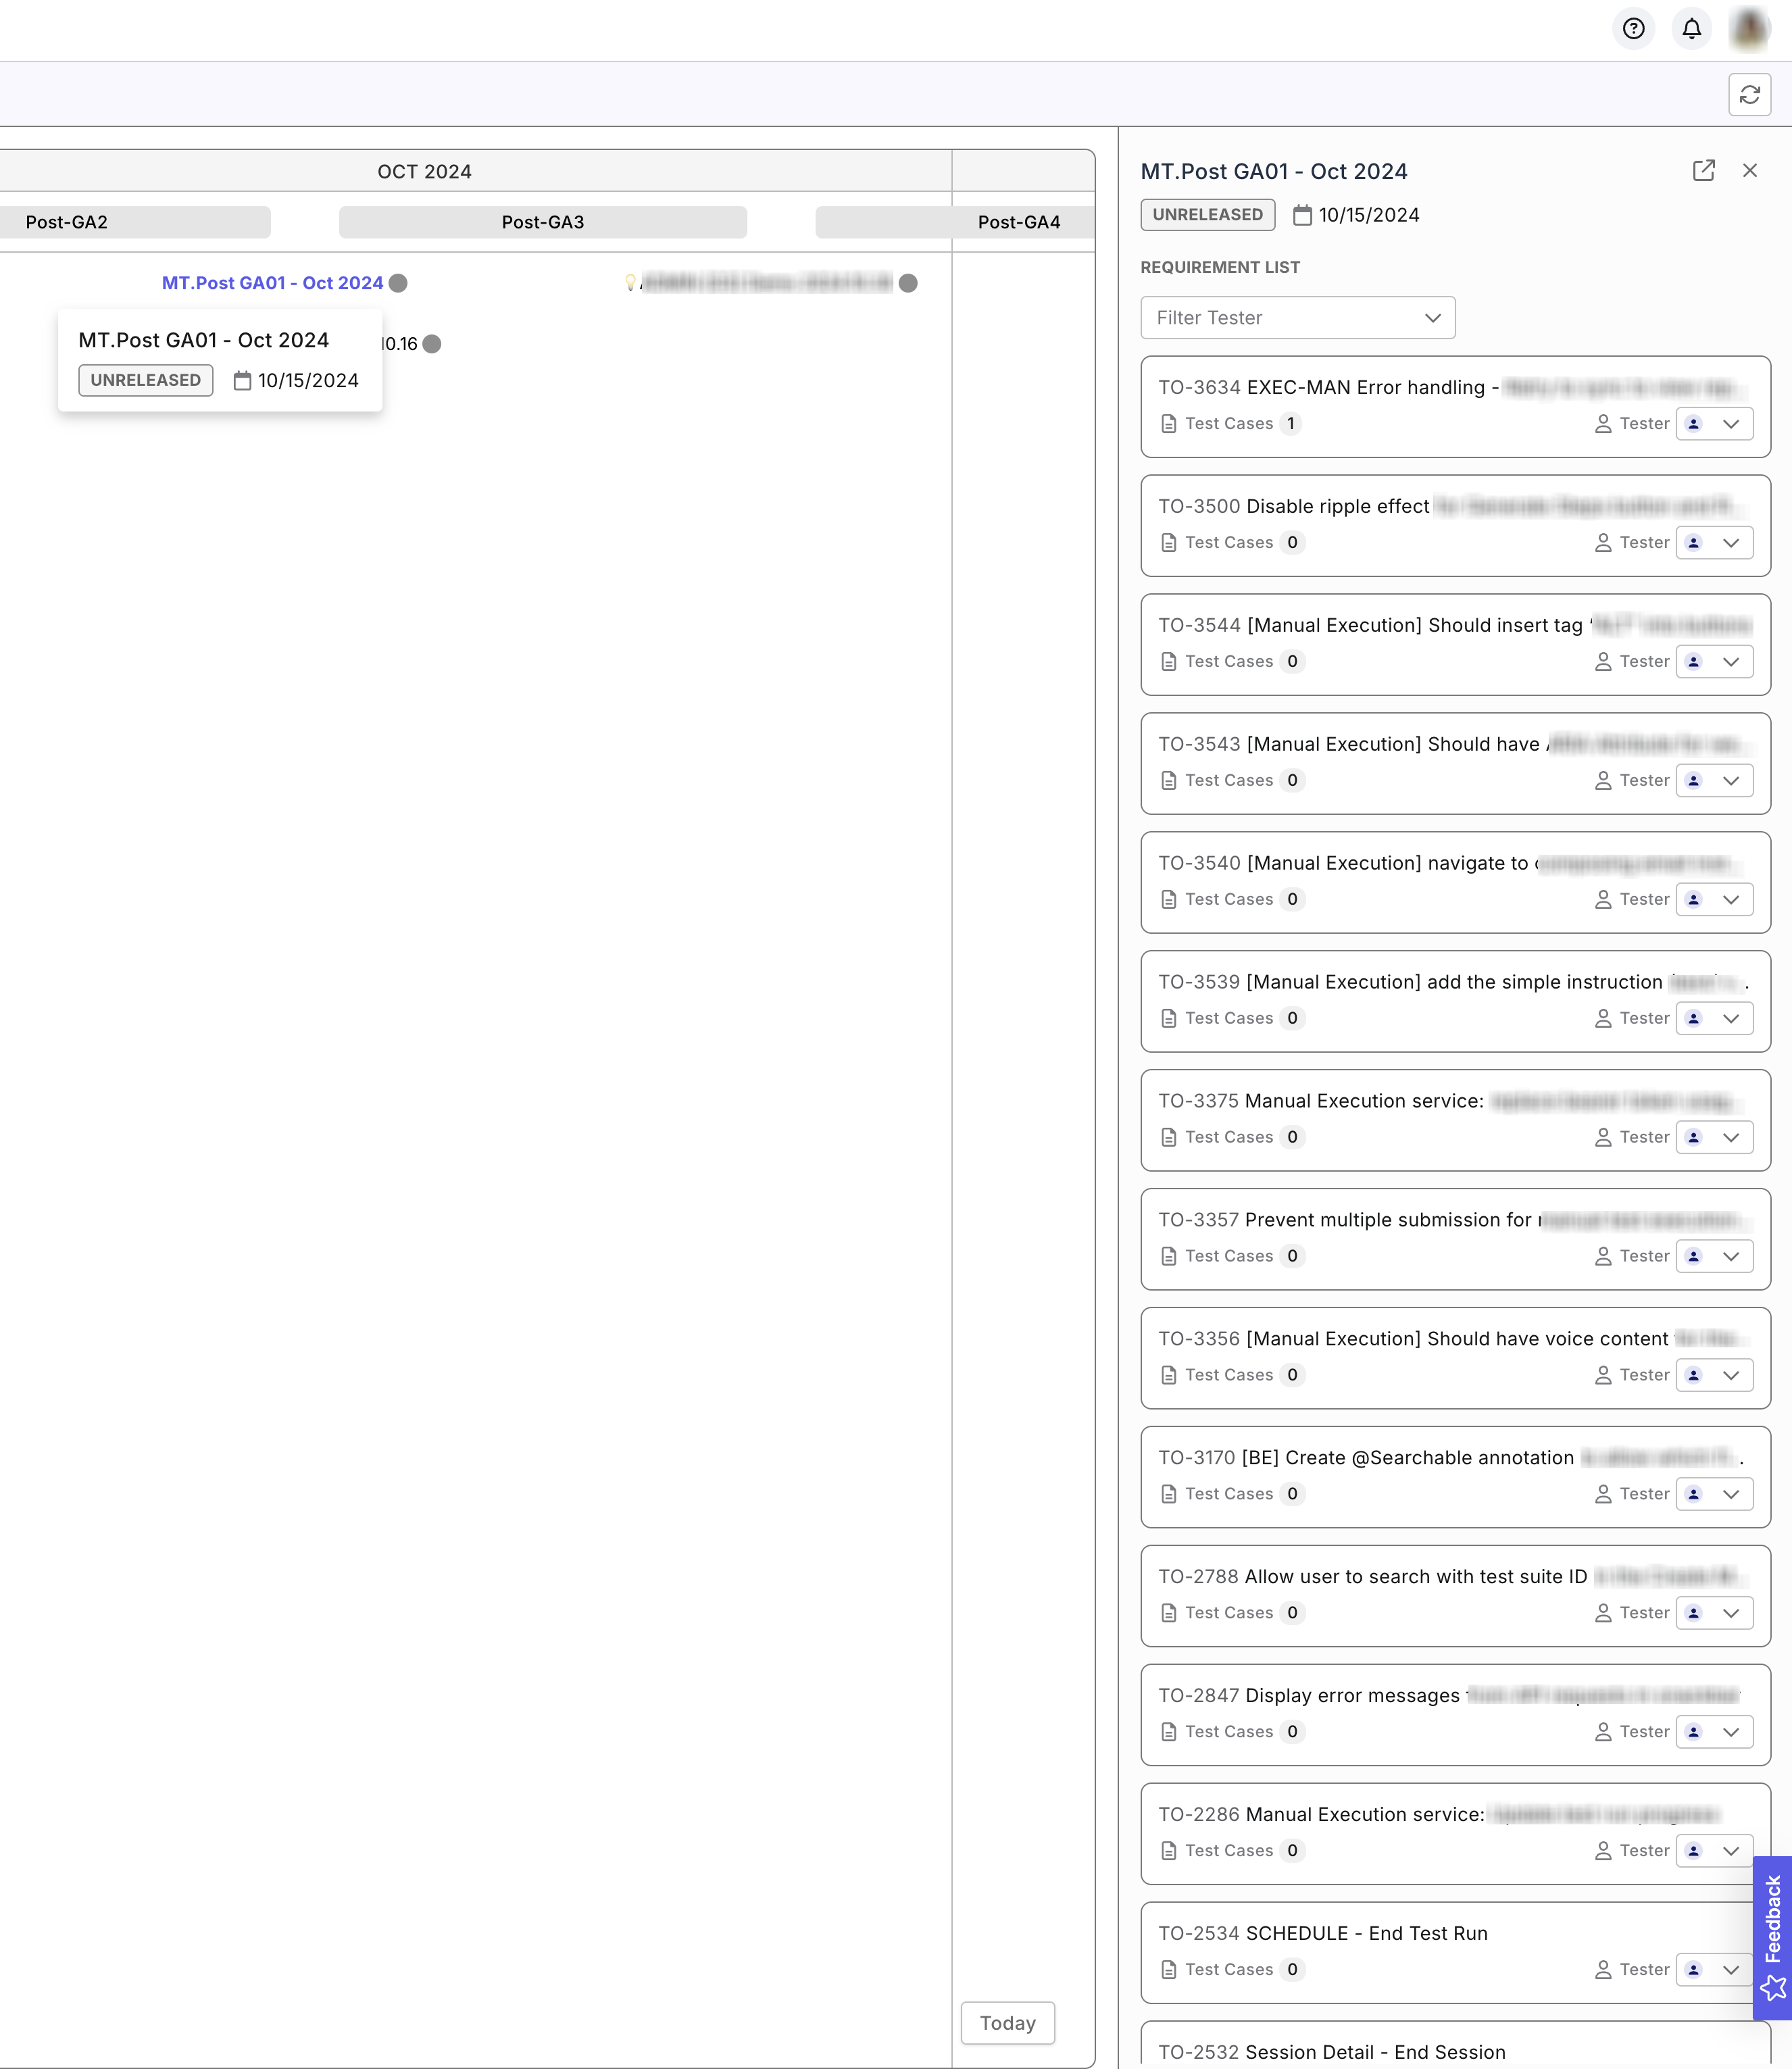
- Clicking on a release or sprint opens a drawer that shows all its requirements.
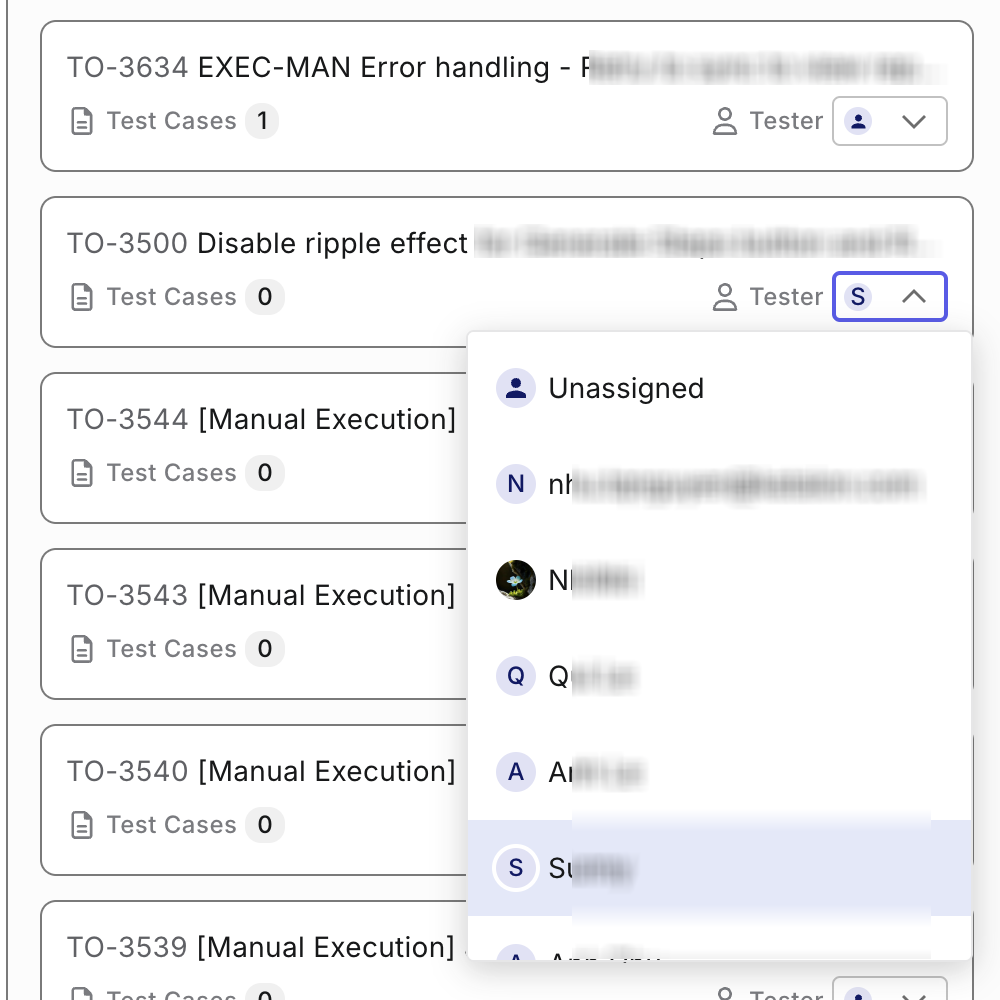
- Assign a tester to a requirement by clicking on the dropdown menu labeled Tester and selecting a User.
View requirement details
- Click on the sprint/release where your requirement is attached to. The requirements list is displayed.
Note:
To view this requirement within Jira, click the outbound icon at the upper right side of the screen.
![]()