Enable TestOps - Jira integration for test management (Legacy)
This document covers TestOps Legacy version only.
Link Jira requirements and Jira defects
Link test runs to Jira releases
Write BDD scenarios in Jira tickets
View test results from linked Katalon Studio test cases in Jira
This article shows you how to configure Jira integration in Katalon TestOps.
Requirements
- In Jira, install this plugin from the Atlassian Marketplace website: Katalon Studio and TestOps integration.
- You must be the Owner or Admin of the Account.
Enable TestOps - Jira integration in Katalon TestOps
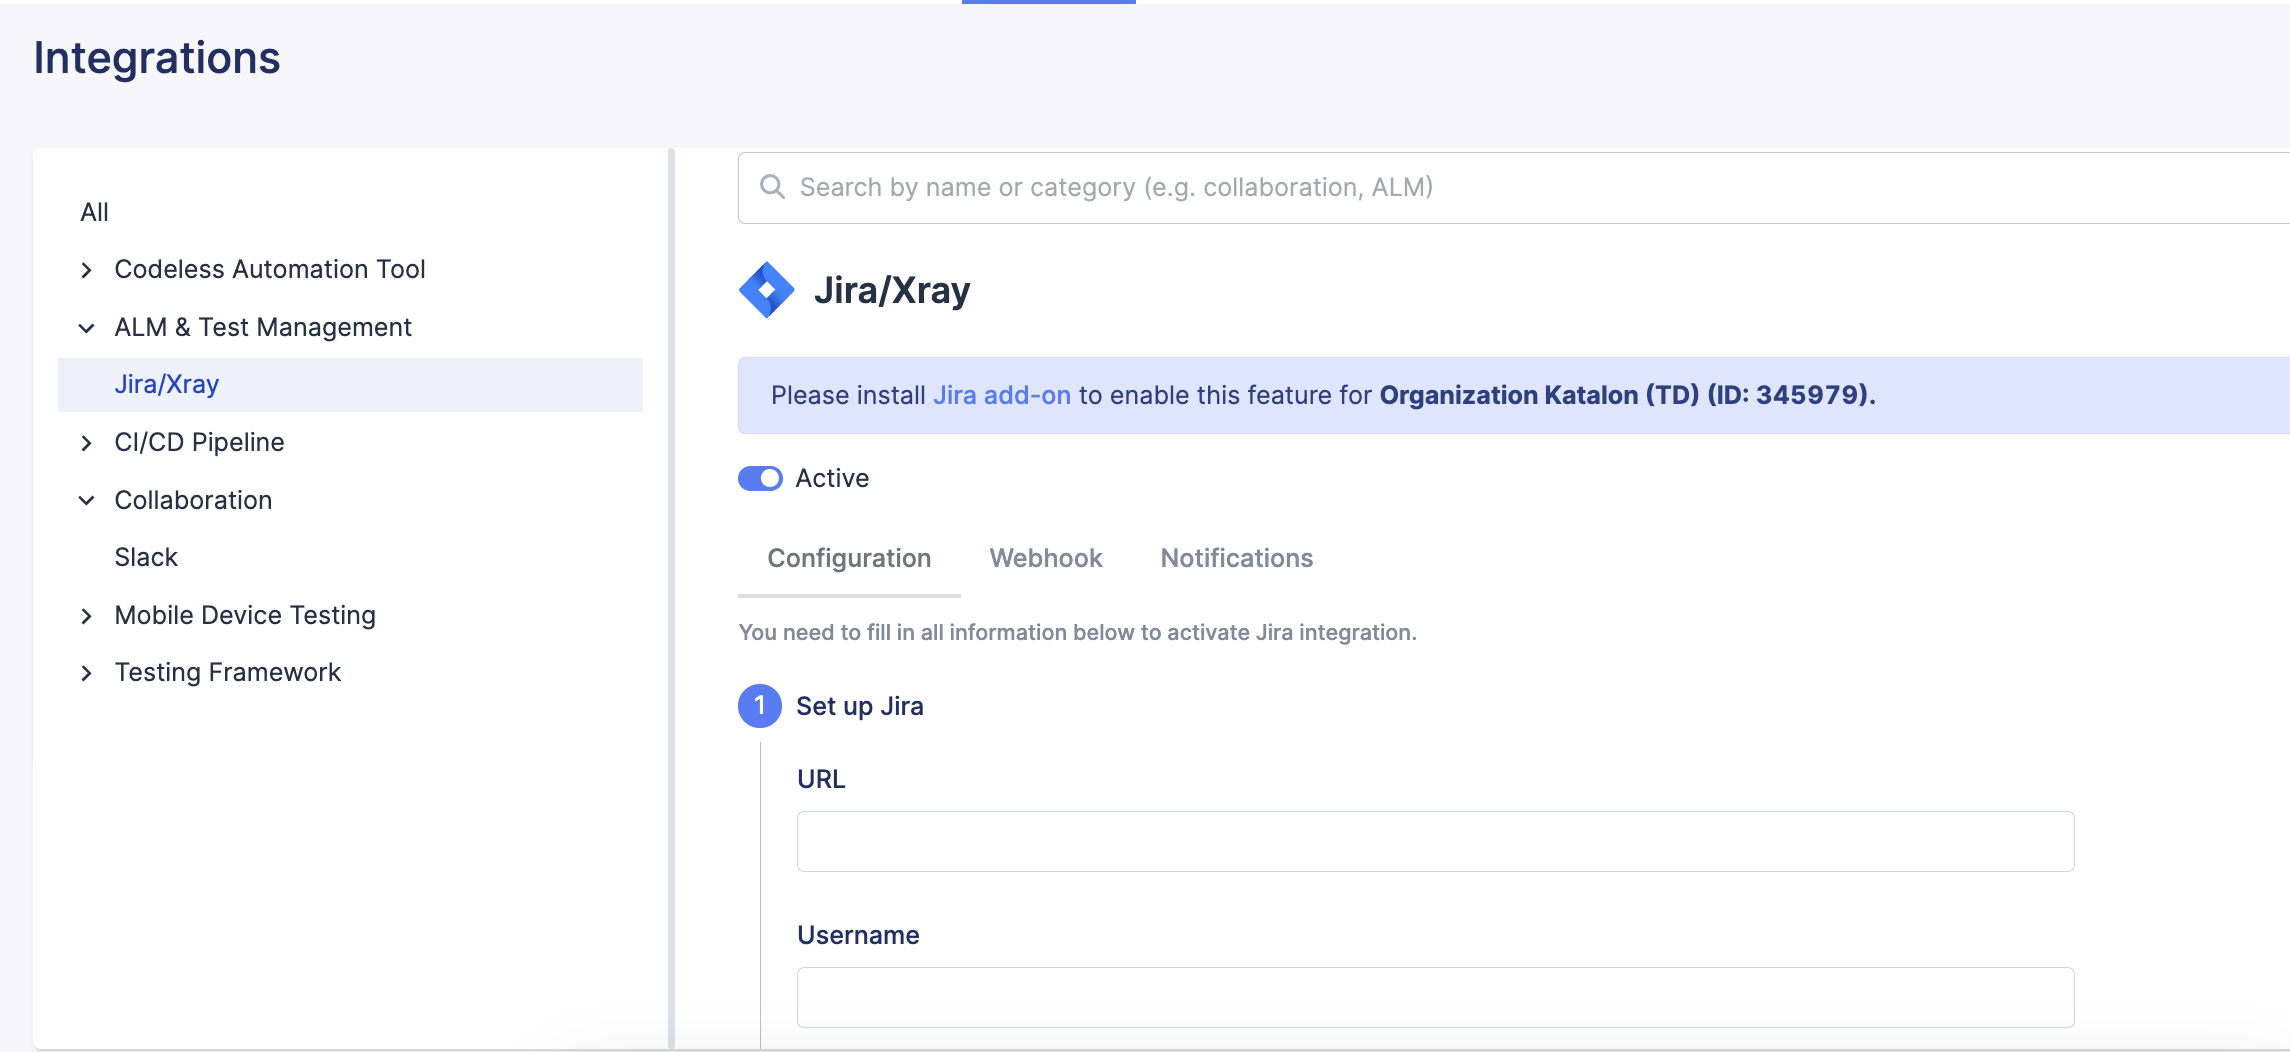
- In the Dashboard, select Settings > Integrations.The Integrations page appears. Expand the menu to the left in the page for a full list of integration options.

- Select Jira by typing it in the search bar or by clicking ALM & Test Management and then selecting Jira/Xray.
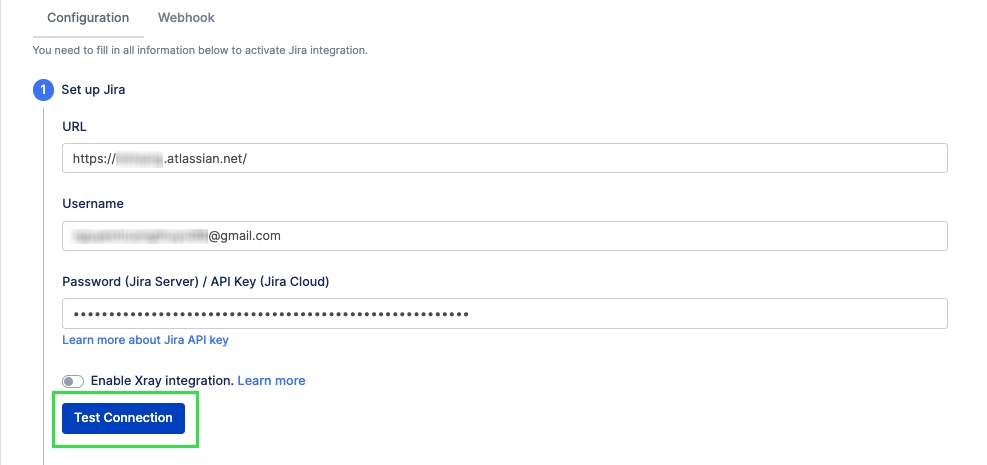
- Click Test Connection to check if the connection is successful.
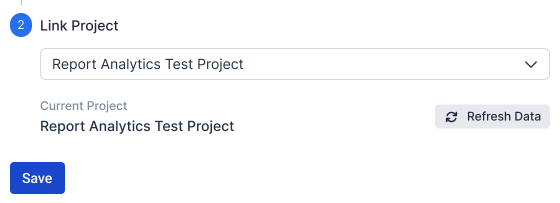
- Link your Jira project by selecting it from the drop-down menu. This step is required as this is the source from where your tickets will be fetched.
 Note:
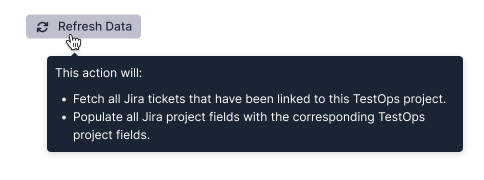
Note:You can click Refresh Data if your projects are not showing or if you want to fetch your data again.
Create WebHook for TestOps - Jira integration
You are the Owner or Administrator of your organization
- In TestOps, go to Click on the WebHook tab.

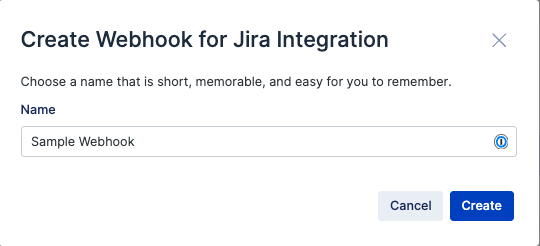
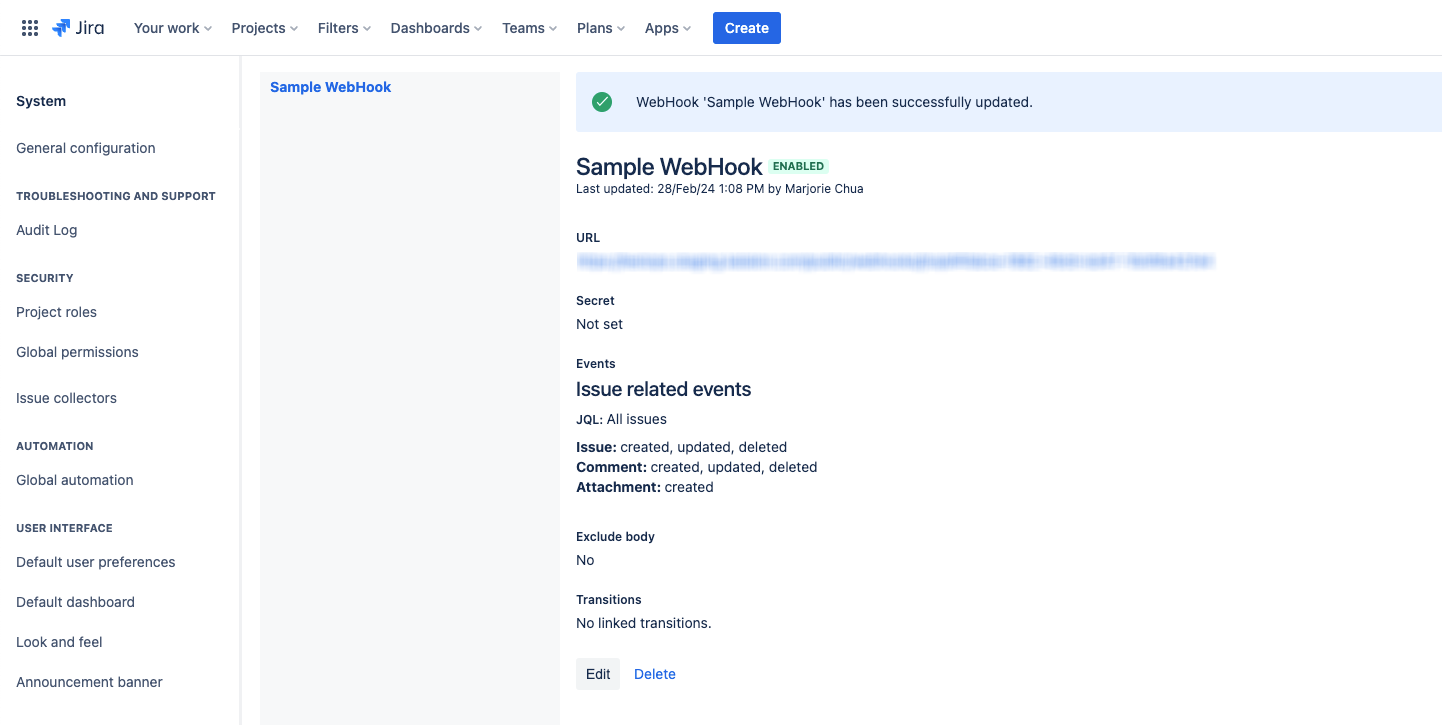
- Select Create WebHook and input your WebHook name. The label "Sample WebHook" is used as shown in the image below.
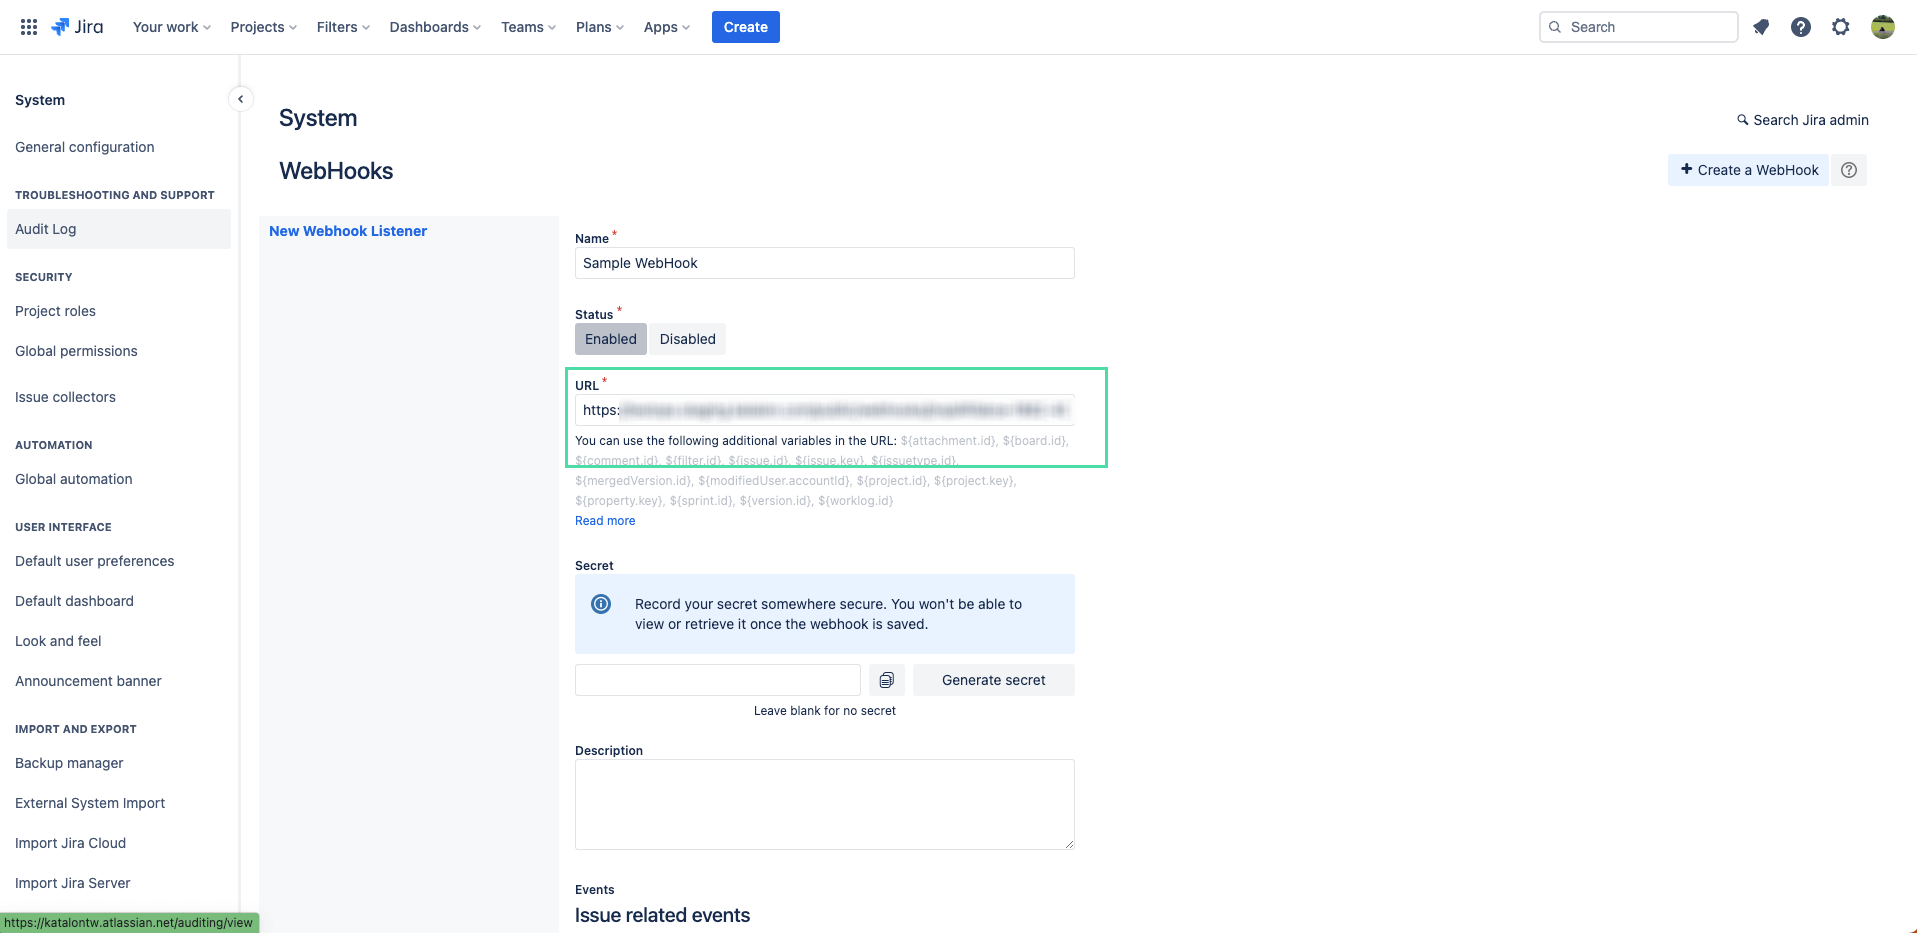
- Open your Jira portal, go to . Paste the WebHook URL from TestOps into the URL field.
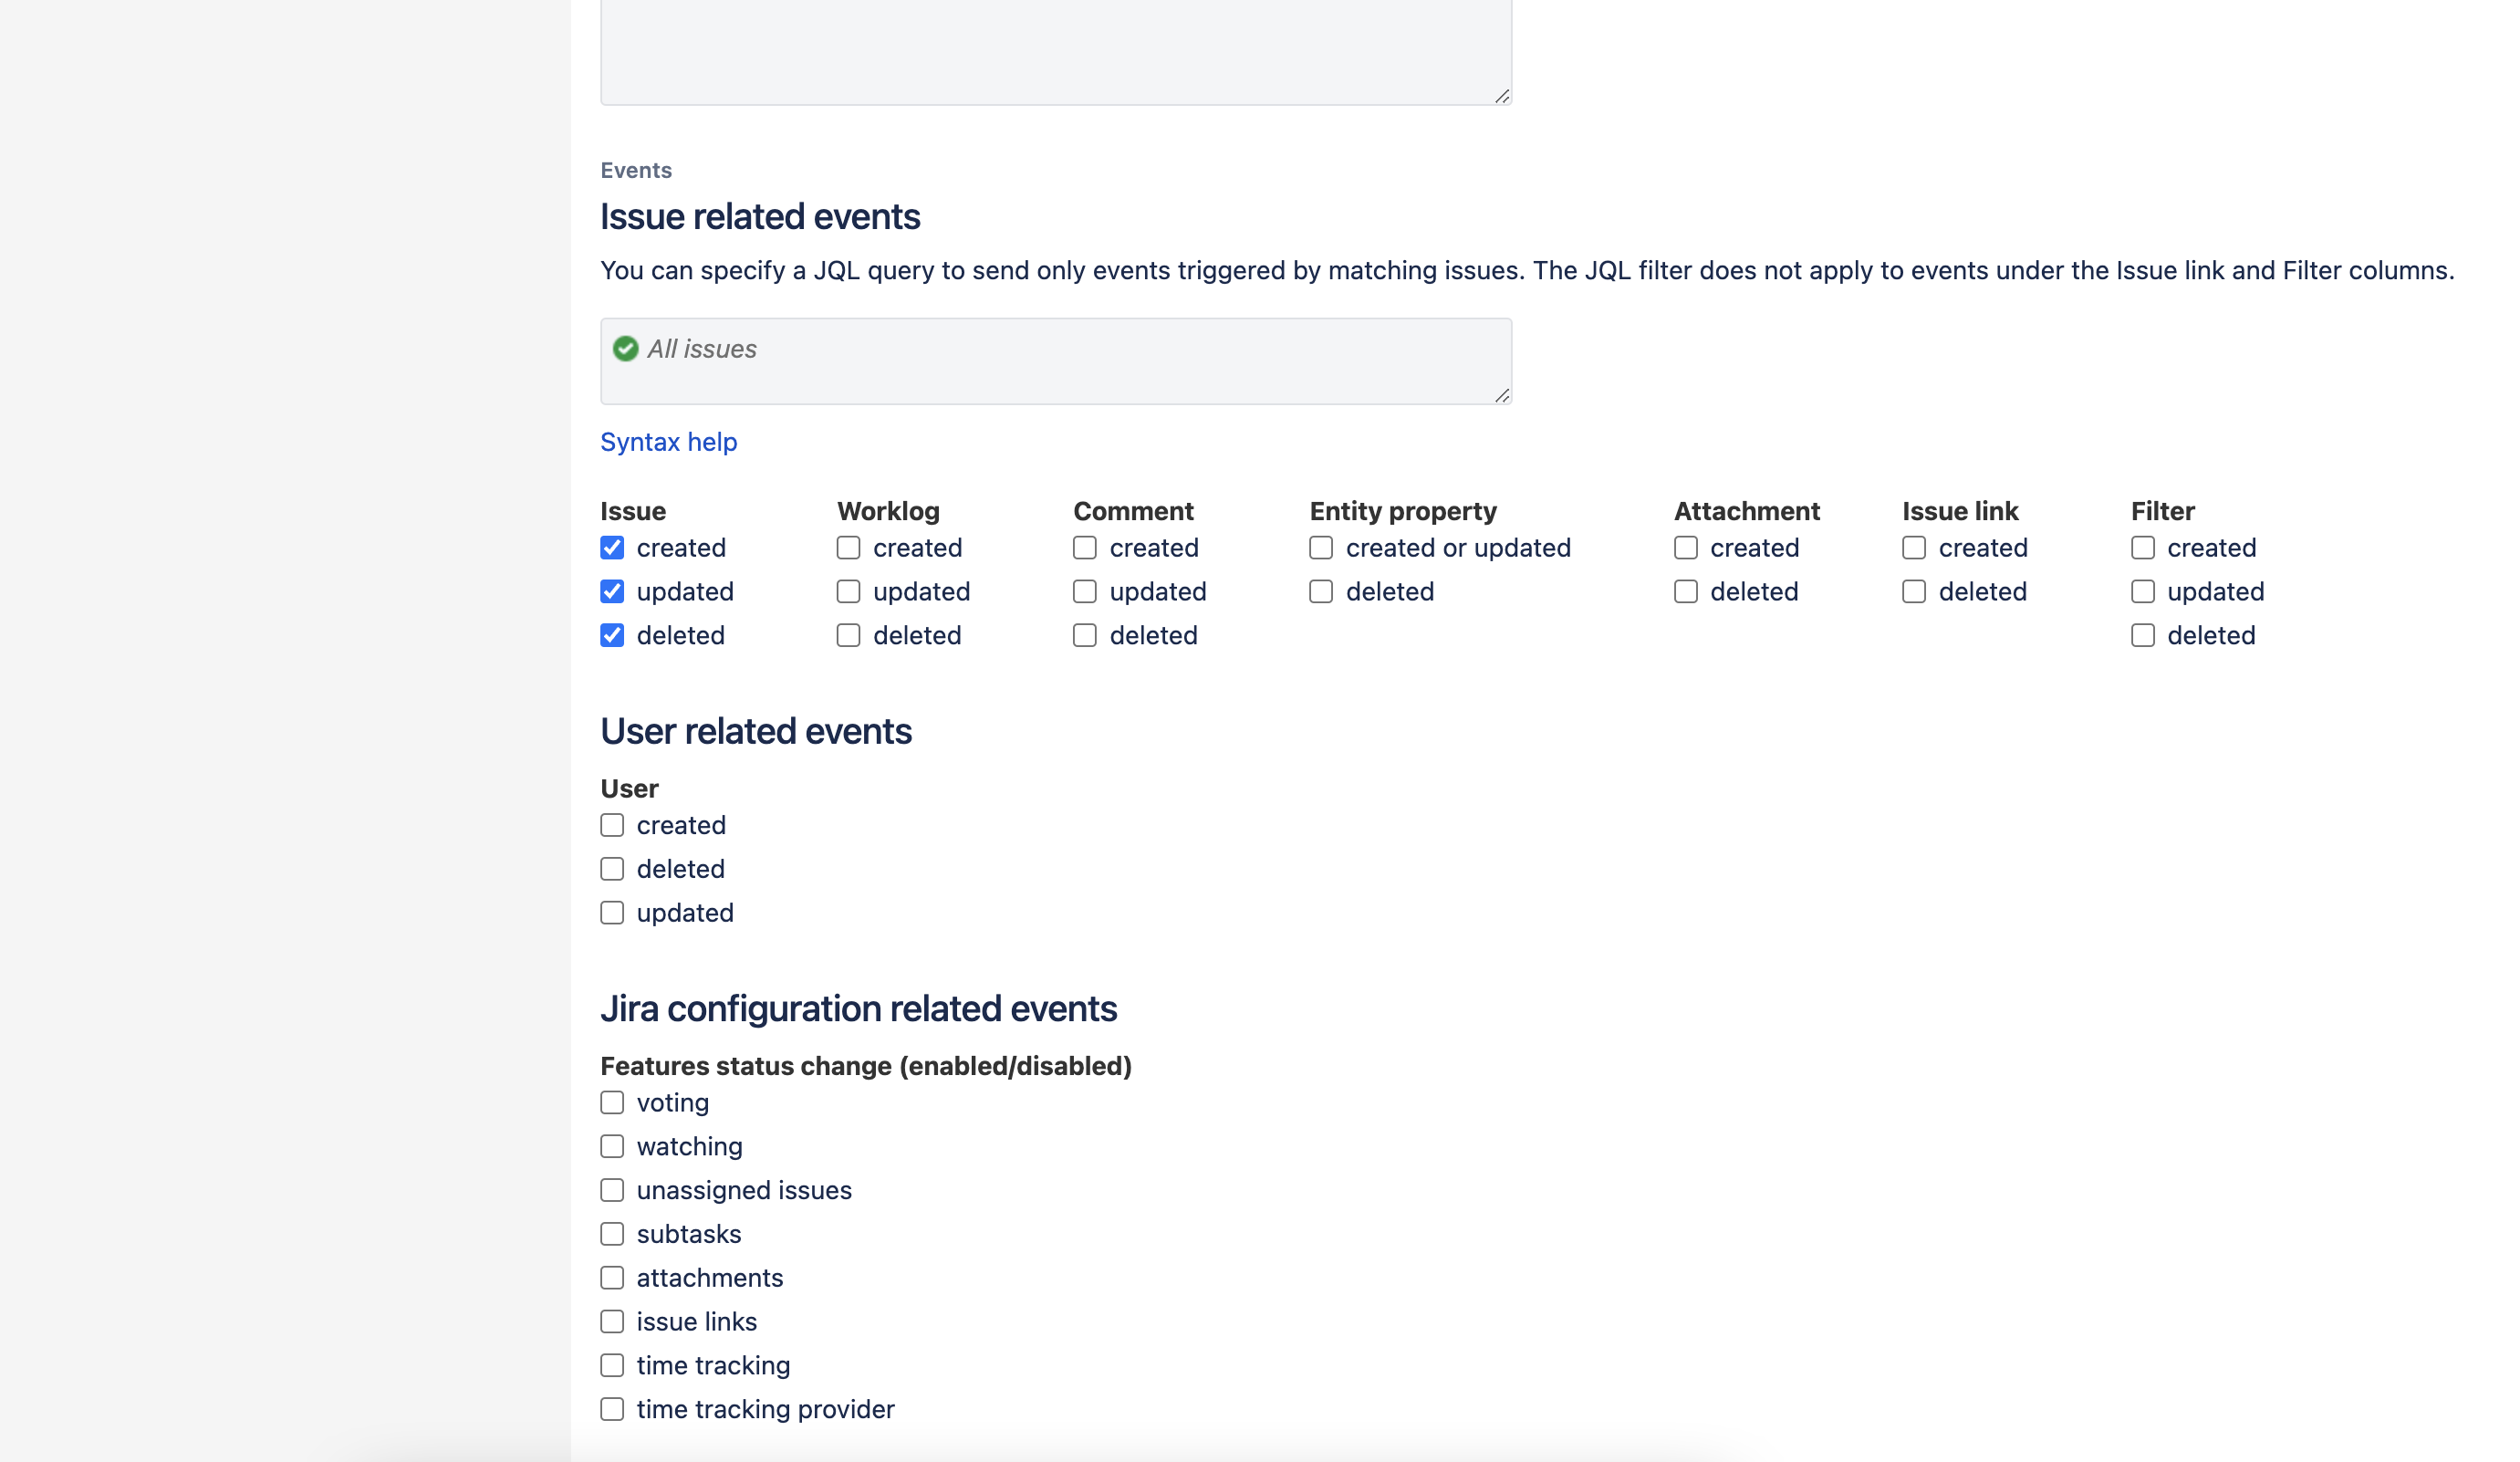
- Set up Jira events scope for the Webhook by selecting the following items under the Issue column: created, updated, deleted.
 Uncheck the Exclude Body option:
Enable - TestOps Jira integration in Jira software
You can configure TestOps - Jira integration for test management in Jira. This configuration allows you to write BDD scenarios in Jira tickets and view test results from linked Katalon Studio test cases in Jira.
This integration is only available for Jira Cloud.
To enable TestOps - Jira integration in Jira software, follow these steps:
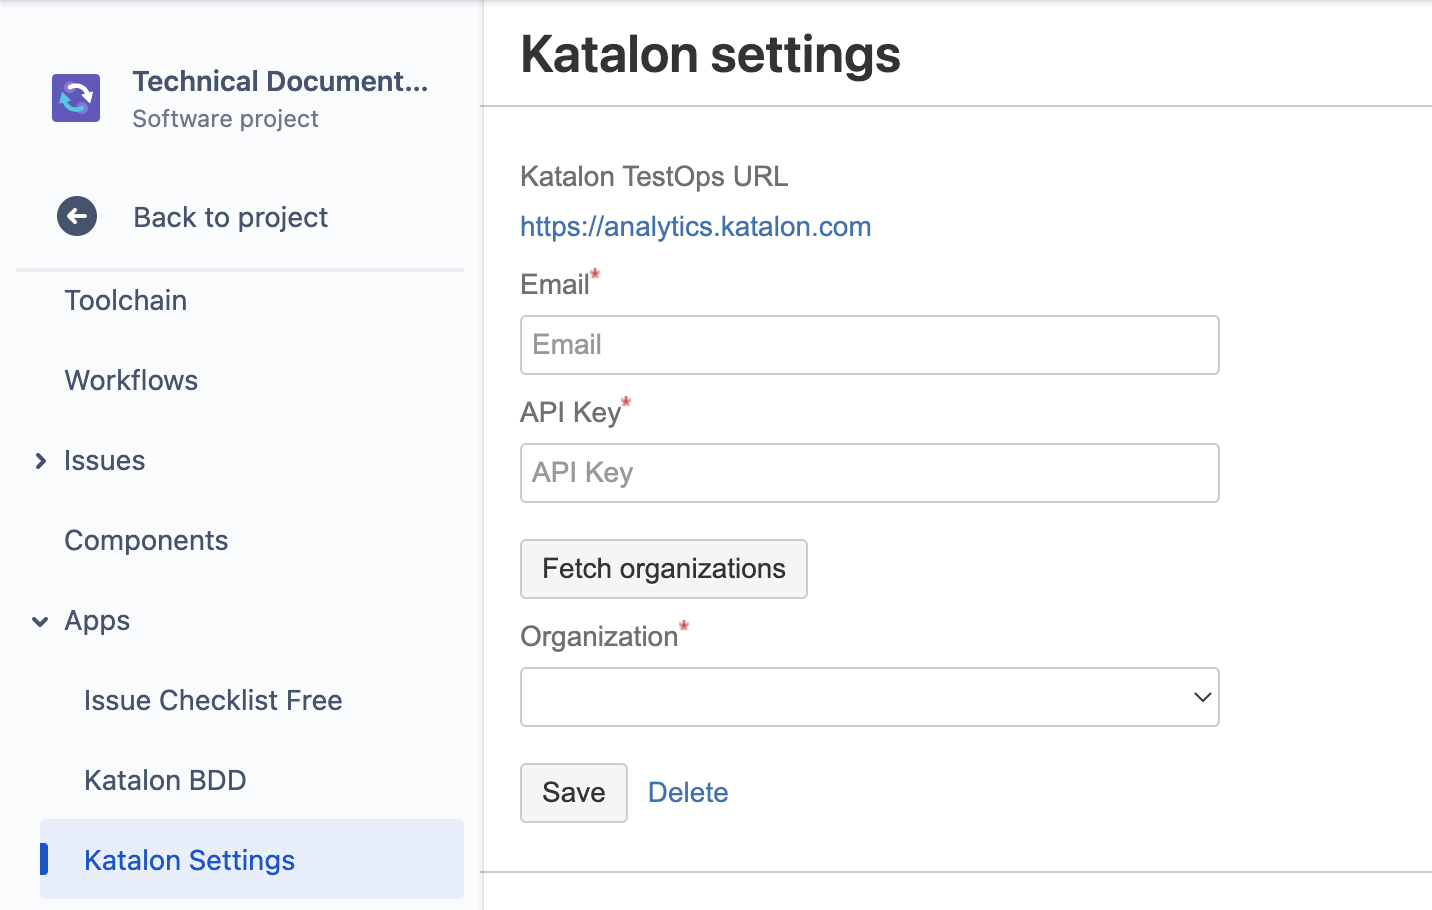
- Scroll down the left panel, expand the App section and select Katalon Settings. The Katalon settings page appears as below.
Configure installed Jira projects
Enabling the Katalon - Test Automation plugin on Jira shows the Katalon Manual Tests (Beta) feature and a section for Katalon Platform's tests by default in all Jira projects. This can be reconfigured to be hidden instead.
You have installed the Katalon - Test Automation plugin. To learn how to install a marketplace app, see: Atlassian's guide.
You must be a Jira system administrator.

To do so, follow these steps:
- Click on Apps at the top menu bar.
- Select the Katalon plugin.

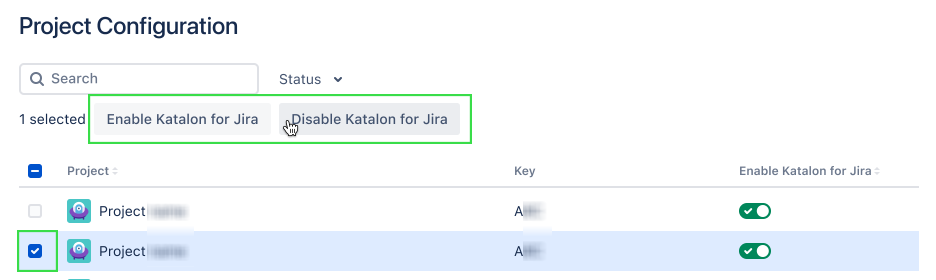
This brings you to the Project Configuration page.
- Select the Katalon plugin.
- Tick on the projects you would like to modify.
- Select either Enable Katalon for Jira or Disable Katalon for Jira depending on which setting you prefer.