Manage Releases and Requirements
This document explains how to use the Plans module in Katalon True Platform to plan for releases and manage requirements synced from your ALM tools (such as Jira or Azure DevOps).
In the Plans section of Katalon True Platform, you can:
- Track release and sprint schedules from your connected ALM.
- Create releases in Katalon True Platform, as an alternative to ALM releases.
- View upcoming or ongoing sprints in a visual timeline or structured releases table.
- Assign testers to requirements directly within Katalon True Platform.
- Create and manage releases with test runs.
Overview of Plans Views
The Plans module offers two viewing modes:
- Timeline (default): A visual calendar view showing sprints and releases chronologically.
- Releases: A structured table view displaying all releases with detailed information including status, test runs, and dates.
Switch between these views using the tabs at the top of the Plans page.
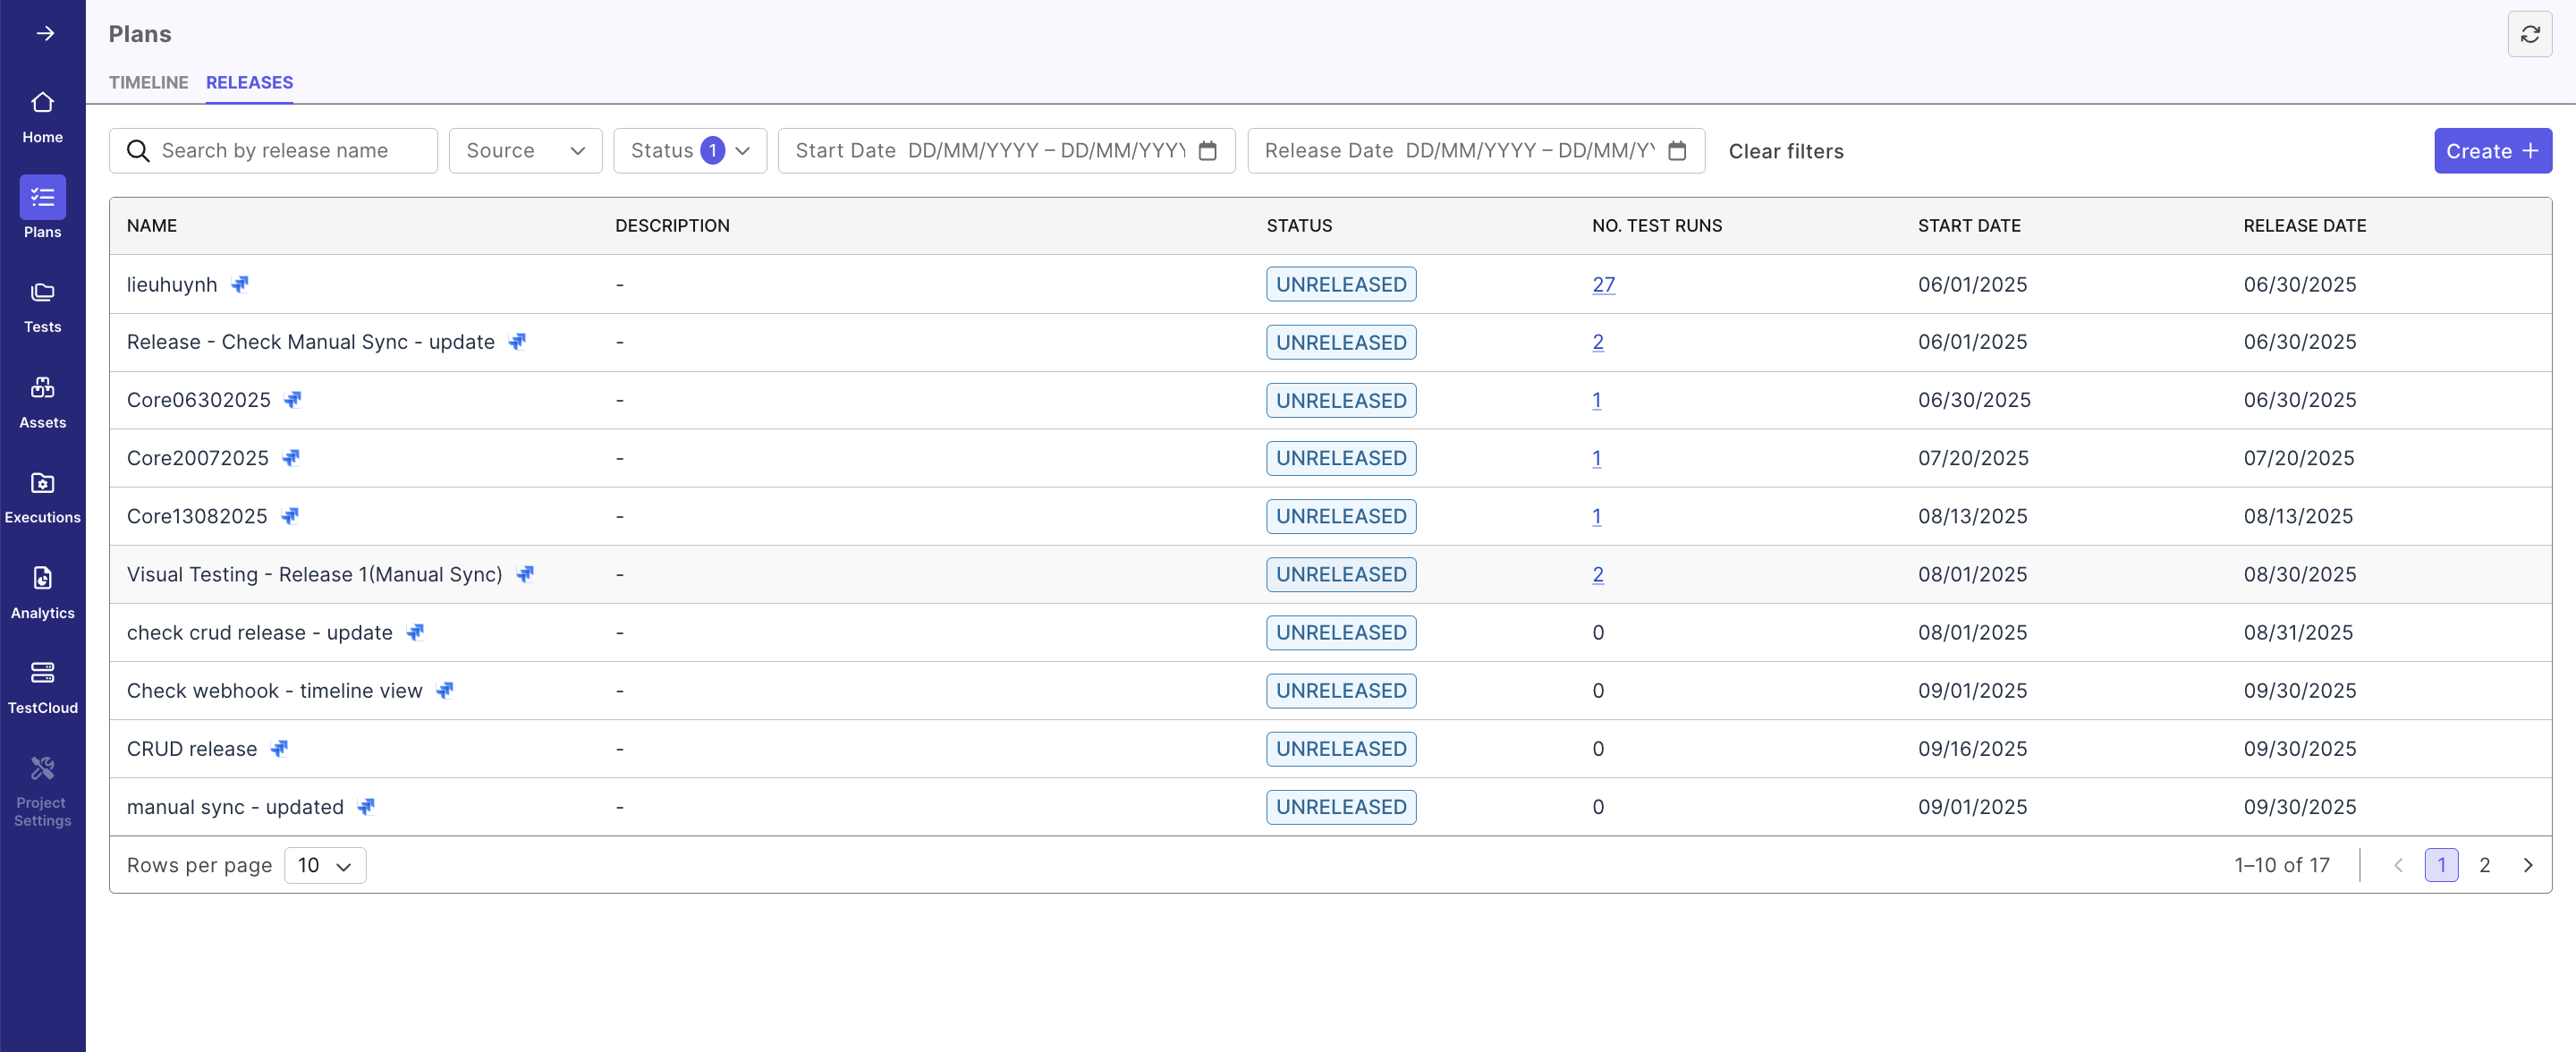
Use the Releases View
The Releases view provides a comprehensive table of all your releases with the following information:
- Name: The release name with a pin icon indicating linked releases.
- Description: Optional details about the release.
- Status: Current state of the release (e.g., UNRELEASED).
- No. Test Runs: Number of test runs associated with the release.
- Start Date: When the release begins.
- Release Date: Target completion date.
Releases can be filtered by Status and Source.
Release dates are displayed according to the selected calendar date in Katalon True Platform, regardless of the viewer's time zone.
Create a Katalon True Platform Release
To create a Katalon True Platform release:
- Click the Create + button in the top-right corner of the Releases view.
- In the Create Release dialog, fill in the following fields:
- Name (required): Enter the release name.
- Start Date (optional): Select the start date using the date picker (DD/MM/YYYY format).
- Release Date (optional): Select the target release date (DD/MM/YYYY format).
- Description (optional): Add any additional context or details about the release.
- Click Create to save the release, or Cancel to discard.
Katalon True Platform releases can be filtered out using the Source filter > Katalon True Platform, and can be linked to a test run when scheduling/creating a manual test run or automated test run.
Use the Timeline View
The timeline view puts together all releases created inside Katalon True Platform or synced from your ALM tools as a timeline.
Explore the Timeline View with our interactive guide:
- If you have multiple ALM tools connected, select the appropriate integration from the Integration dropdown at the top-right of the screen.
- Click on any sprint or release to open a drawer displaying all linked requirements.
From here, you can:
- Assign testers: Click the Tester dropdown to assign a user to a requirement.
- Filter by tester: Use the Filter Tester feature to view only requirements assigned to you or others.
Link Test Cases to Requirements
Explore with our interactive guide:
- In Timeline View, click the release to open its requirements list.
- Click on a requirement to open the requirement details page. Here you can view the requirement's details to assess and link test cases to it.
- Link existing test cases: click
Link Test Case, then select one or more from the list. - No suitable test case: click
+ Create Test Caseand fill in the required fields to create one. Assigned
- Link existing test cases: click
Manage Test Runs in Releases
Each release can have associated test runs that help track testing progress:
- View the number of test runs in the No. Test Runs column.
- Click on a release name to view detailed information about its test runs.
- Test runs are linked to releases to provide traceability between testing activities and release schedules.
Best Practices
- If data feels outdated, click Sync button at the top right corner to re-sync data from your connected ALM tool.
- Regularly update release statuses to reflect current progress.
- Use the filtering options to focus on specific timeframes or statuses.
- Assign start and release dates to all releases for better tracking in the Timeline view.
- Use either Katalon True Platform release or release synced from your ALM tool, not both, to avoid overlapping.
- Leverage the search functionality to quickly locate specific releases.
- Monitor the test runs count to ensure adequate test coverage for each release.