Custom Fields and Tags
Custom fields & tags are great tools to create and label meta-data to your Katalon test artifacts such as test case, test run schedule, and test execution. You can create as many attributes to your test entities as you need, then categorize, organize or filter them with ease throughout the testing cycle on Katalon Platform.
Custom field is a pair of key and value meta-data that you can assign to then differentiate among your test entities, for example: testPriority: High, or, scriptLanguage: Java.
Tag is a single-word string value (not including a white-space), similar to a hashtag, that you can assign to tests entities and query with them later on.
Custom fields can only be created in Configurations section of Katalon Platform, while Tags can be created on-the-move in the test case detail, test run detail and test result detail module.
- Assign custom fields and tags to your test case and query your test case by them.
- Assign custom fields and tags to test run schedules or test run results.
- Assign custom fields and tags to a test execution via Katalon Runtime Engine command-line interface.
- Assign custom fields and tags when you manually import your test run results to TestOps.
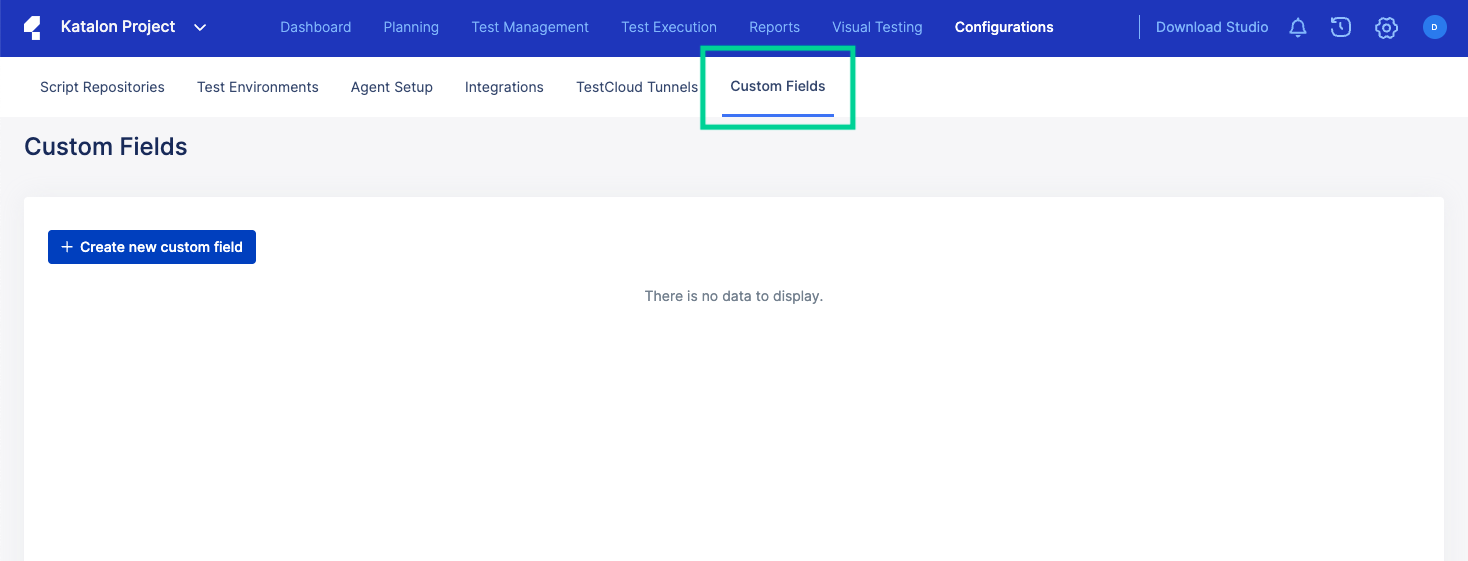
Create Custom Fields in Configurations
- Login to Katalon TestOps, then navigate to Configurations > Custom Fields.The Custom Fields page appears.
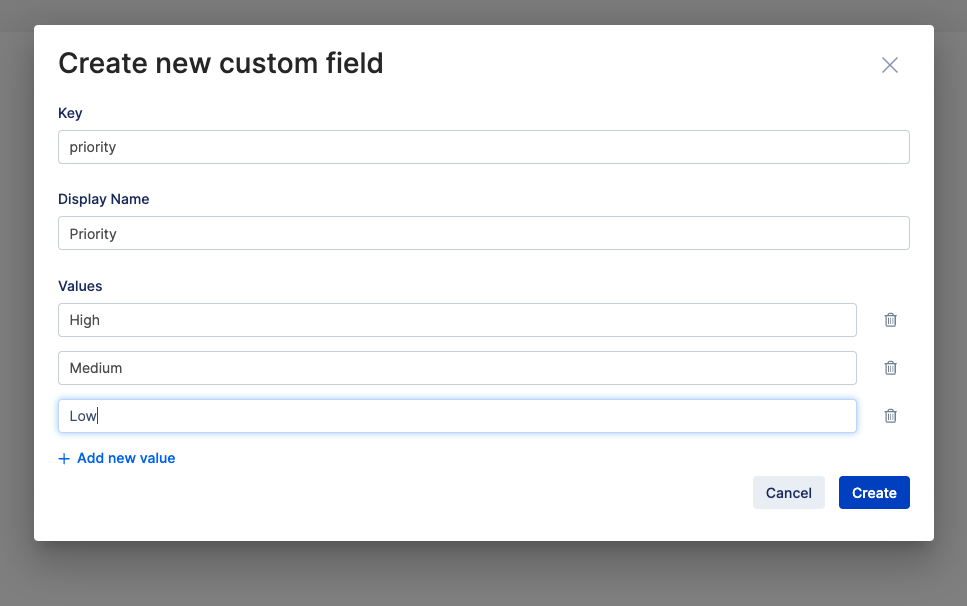
- Click the + Create new customer field button.The Create new custom field dialog appears.

- For Values, enter a value for your key, for example High, Medium or Low for Priority key; API or Regression for Testing Type key. You can create multiple values for a key by selecting + Add new value.
Edit your Custom Fields
- To edit your custom field, select the Edit button.
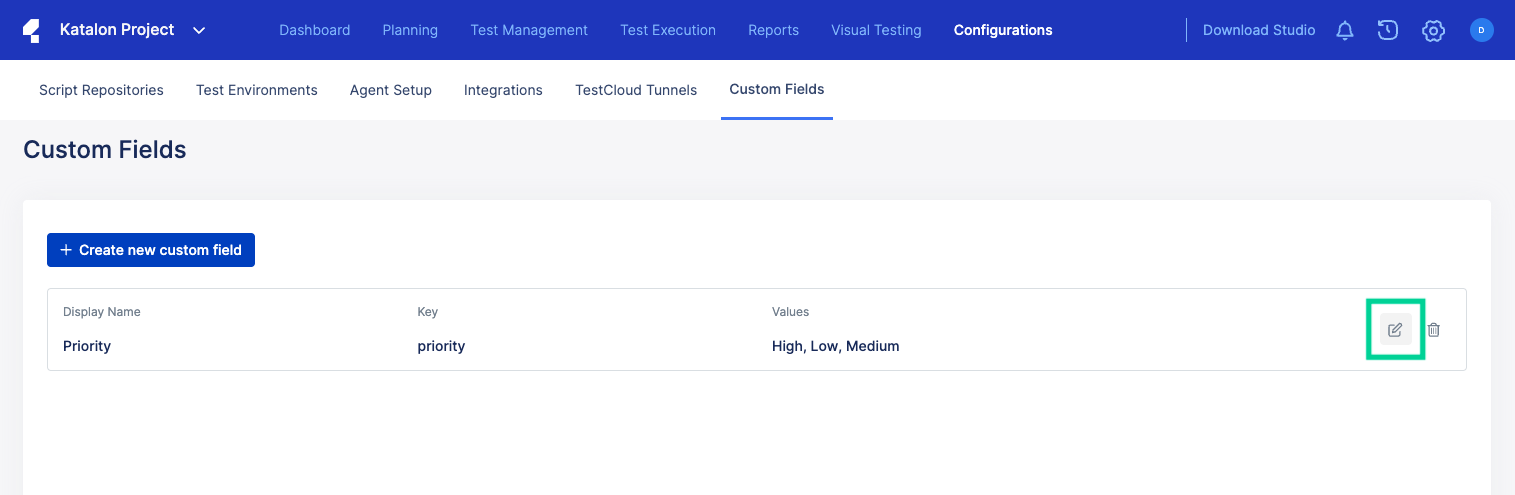 The Edit custom field dialog appears.
 - You can edit display name and values of your custom field, but not the key. When you finish editing, select Save Changes.

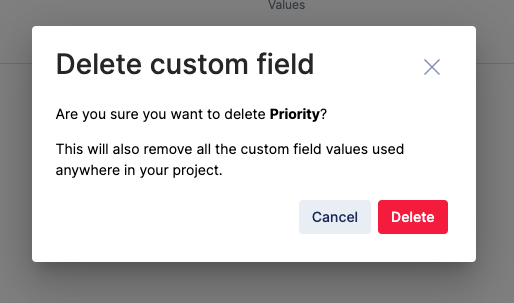
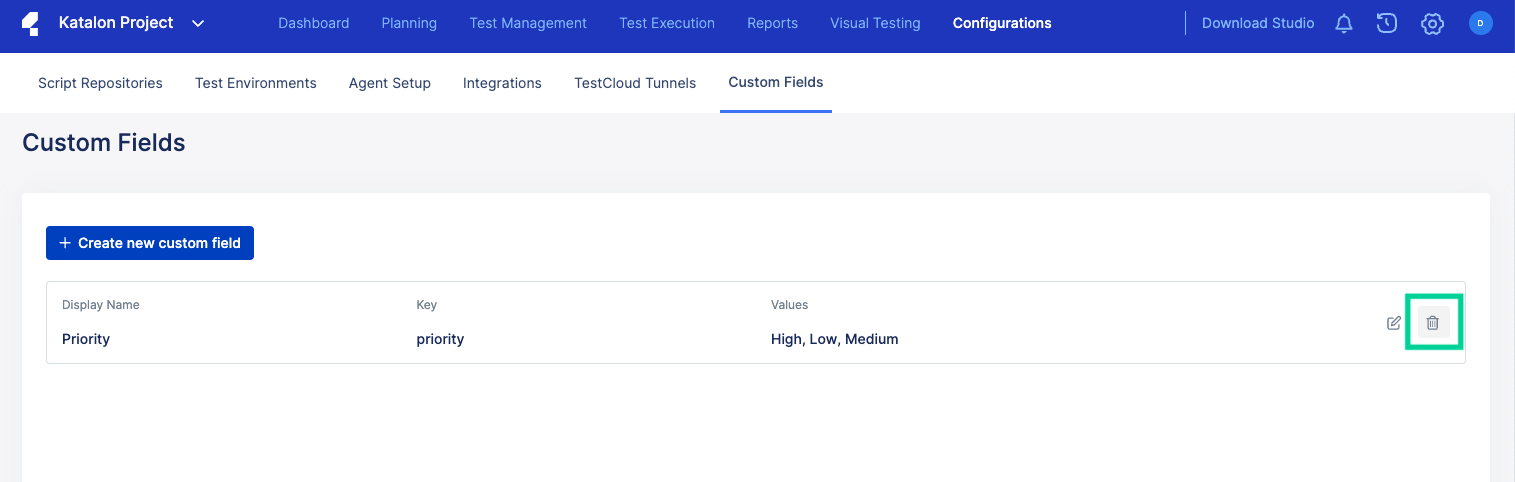
Delete your Custom Field
- To delete your custom field, click the Delete button.
 The delete custom field warning dialog appears.
 - Deleting a custom field will also remove it from any test entities such as test case, test run in your project. When you are sure, select Delete.