Configure environments for test cases
This document shows how to configure environments in Katalon Studio.
Environments
When executing a test case or test suite/test suite collection, you can choose a test environment based on your project type:
-
For web projects, you can run in either Browsers and Browsers (headless) mode. The headless mode makes test runs more quickly and CI/CD friendly. See Configure headless browser environment for details.
-
For mobile tests, pick either Android or iOS. See: Supported mobile operating systems (OS) to see if your device is supported.
If you see no device, make sure you already turned on your phone's Developer Mode. Then try to unplug, and reconnect several times until you are prompted to accept/ trust this device.
-
For Windows app test, pick Windows.
-
The Cloud Execution option is for executing test suites and test suite collections. See Katalon TestCloud overview for more details.
-
The Custom is for if you want a specific environment and not the defaults as above.
For an advanced setup on each environment, see Introduction to desired capabilities for more details.
Headless browser environment
Headless browser testing means running tests without showing the user interface. It helps save project teams a tremendous amount of time and smoothly integrate into the CI/CD process.
In case you need to add more desired capabilities to those headless browsers:
- Go to Project > Settings > Desired Capabilities > WebUI > Chrome (headless)/ Firefox (headless).
- Add your desired capabilities.
For example, if you want the headless browser to have a window size of 300x400 (px):
| Name | Type | Value |
|---|---|---|
| args | List | [--window-size=300,400] |

You can learn more about desired capabilities in this document: Desired capabilities.
Chromium browser environment
Besides Chrome/Edge Chromium browsers, you can configure to execute tests in a custom Chromium-based browser. The example below uses Brave Browser as an example - any Chromium-based browser can be added.
On Windows
- Go to: Project > Settings > Desired Capabilities > Custom
- Create a custom browser configuration for your browser, as shown in the screenshot below.
The value ofbinarymust point to the installed Brave browser executable on your machine.
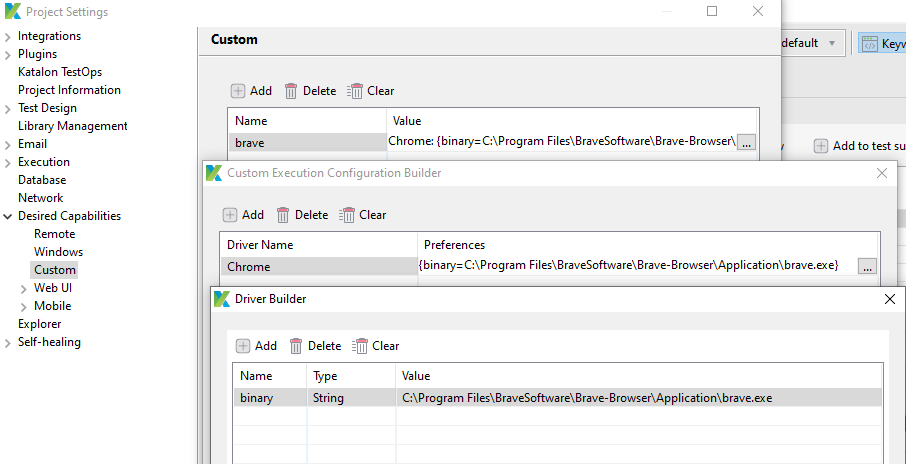
- Update the Chrome WebDriver to match your Chromium version.

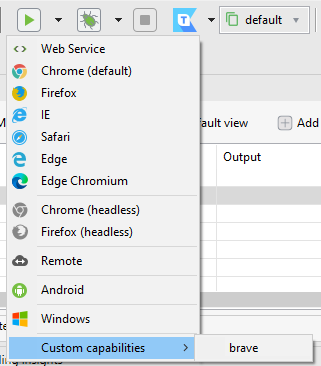
- Run the test using the added browser's configuration.
On macOS
Create a custom browser configuration similar to the example below.
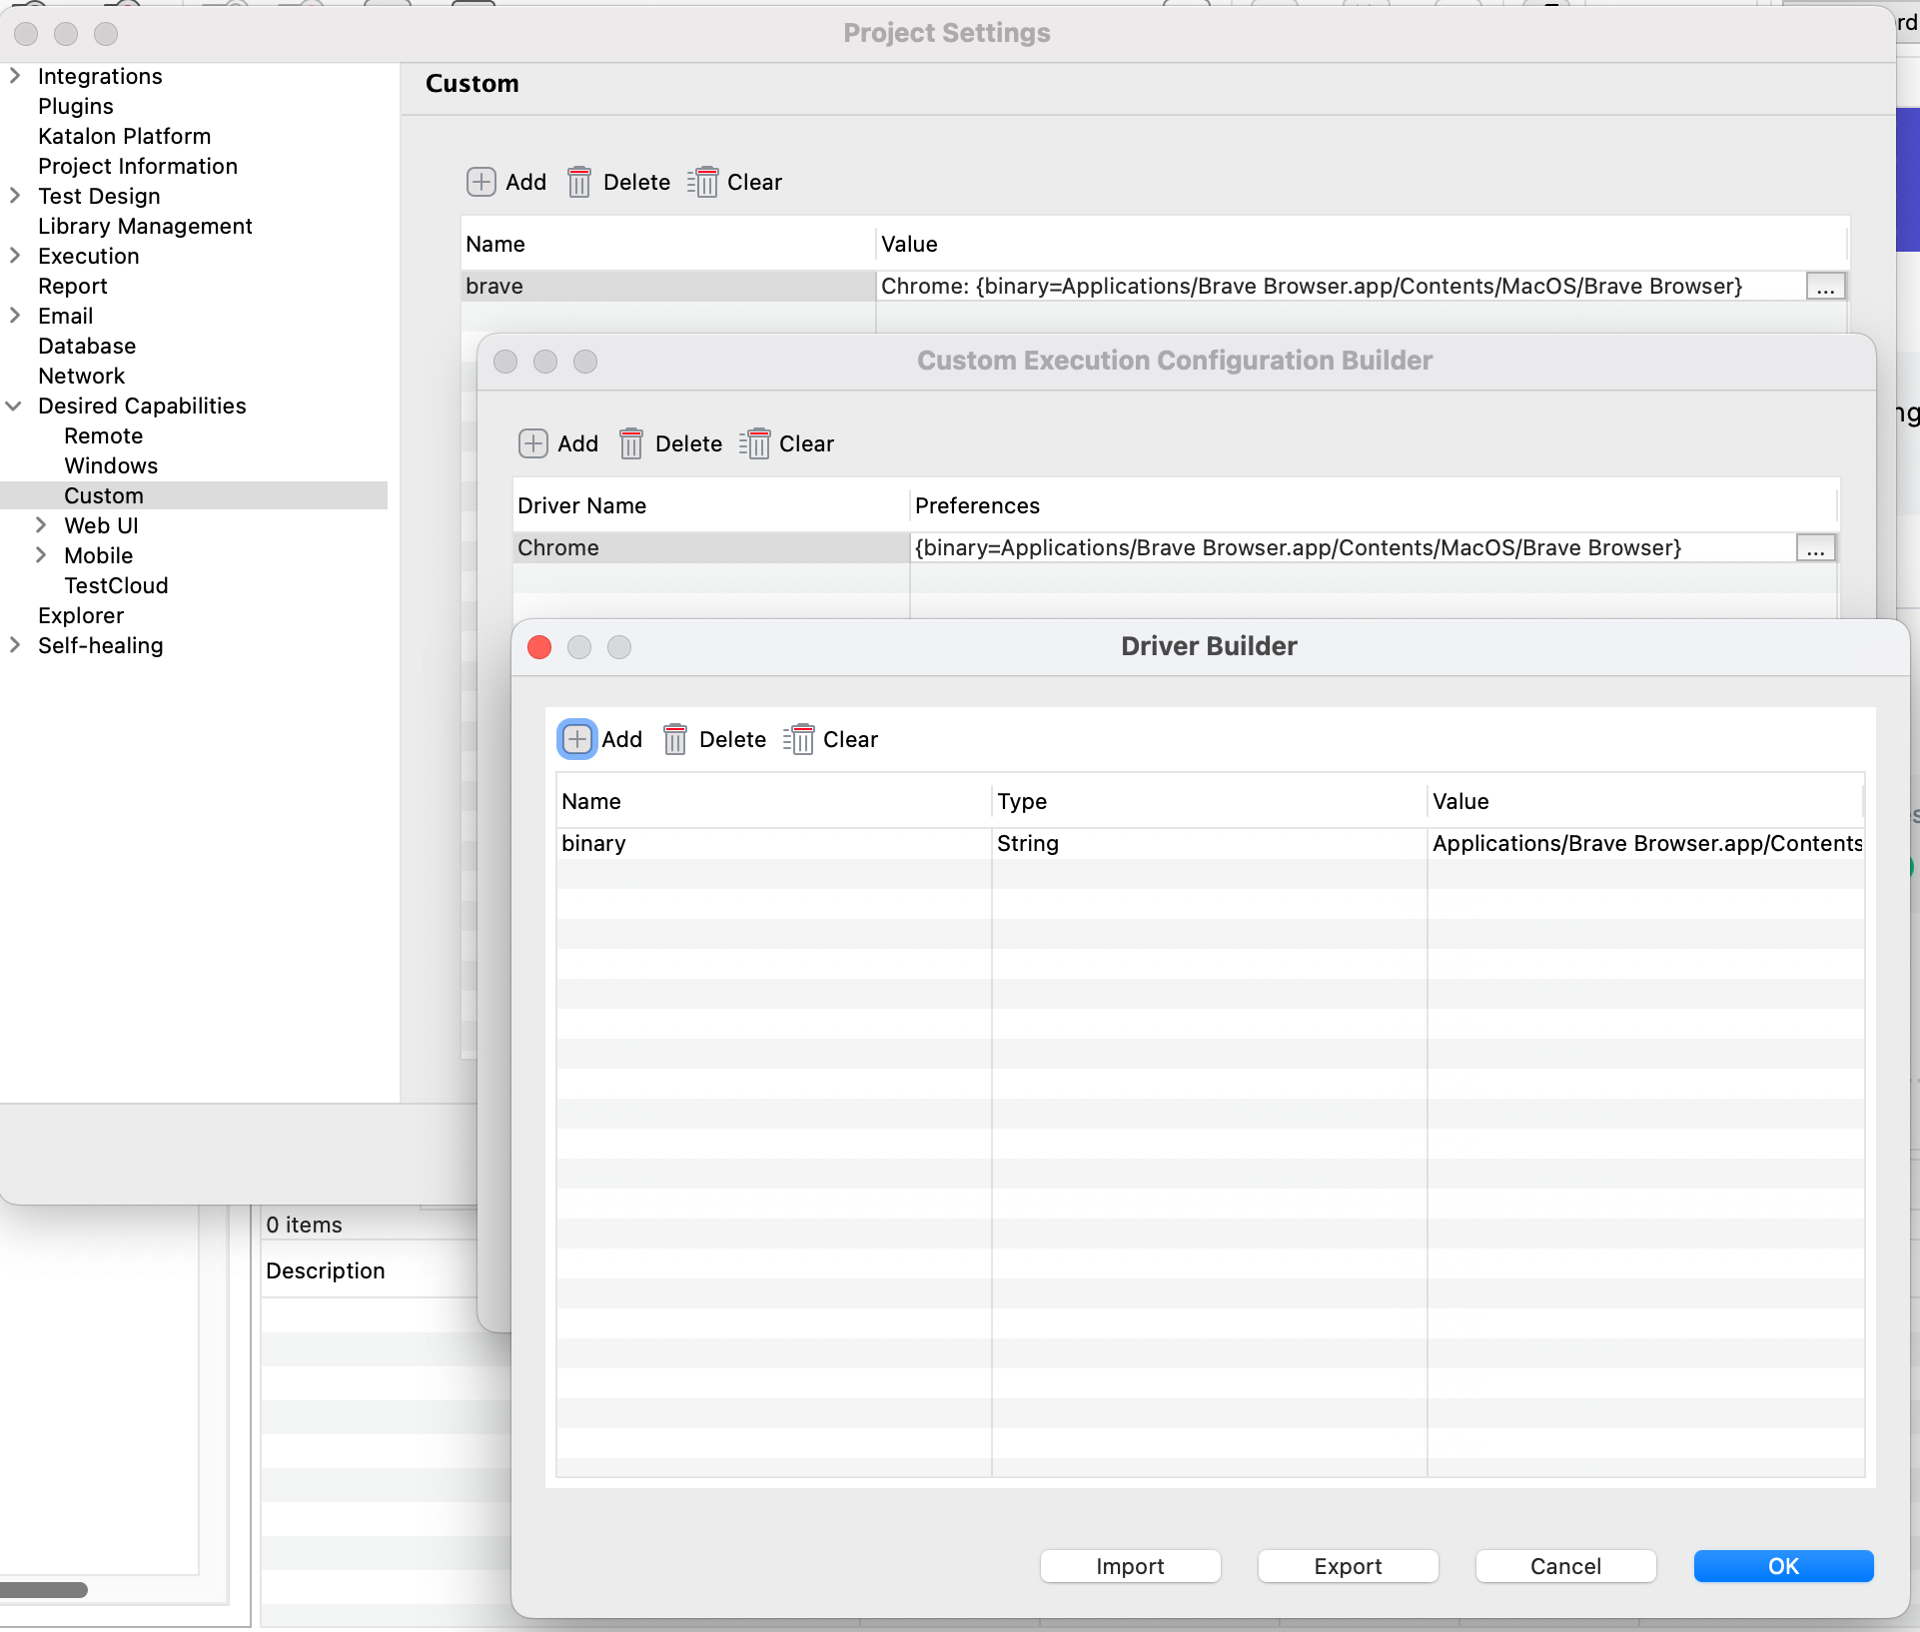
The binary value on macOS should be set to: /Applications/Brave Browser.app/Contents/MacOS/Brave Browser
After configuring the binary path, update the Chrome WebDriver if needed and execute your test using the custom browser's configuration.
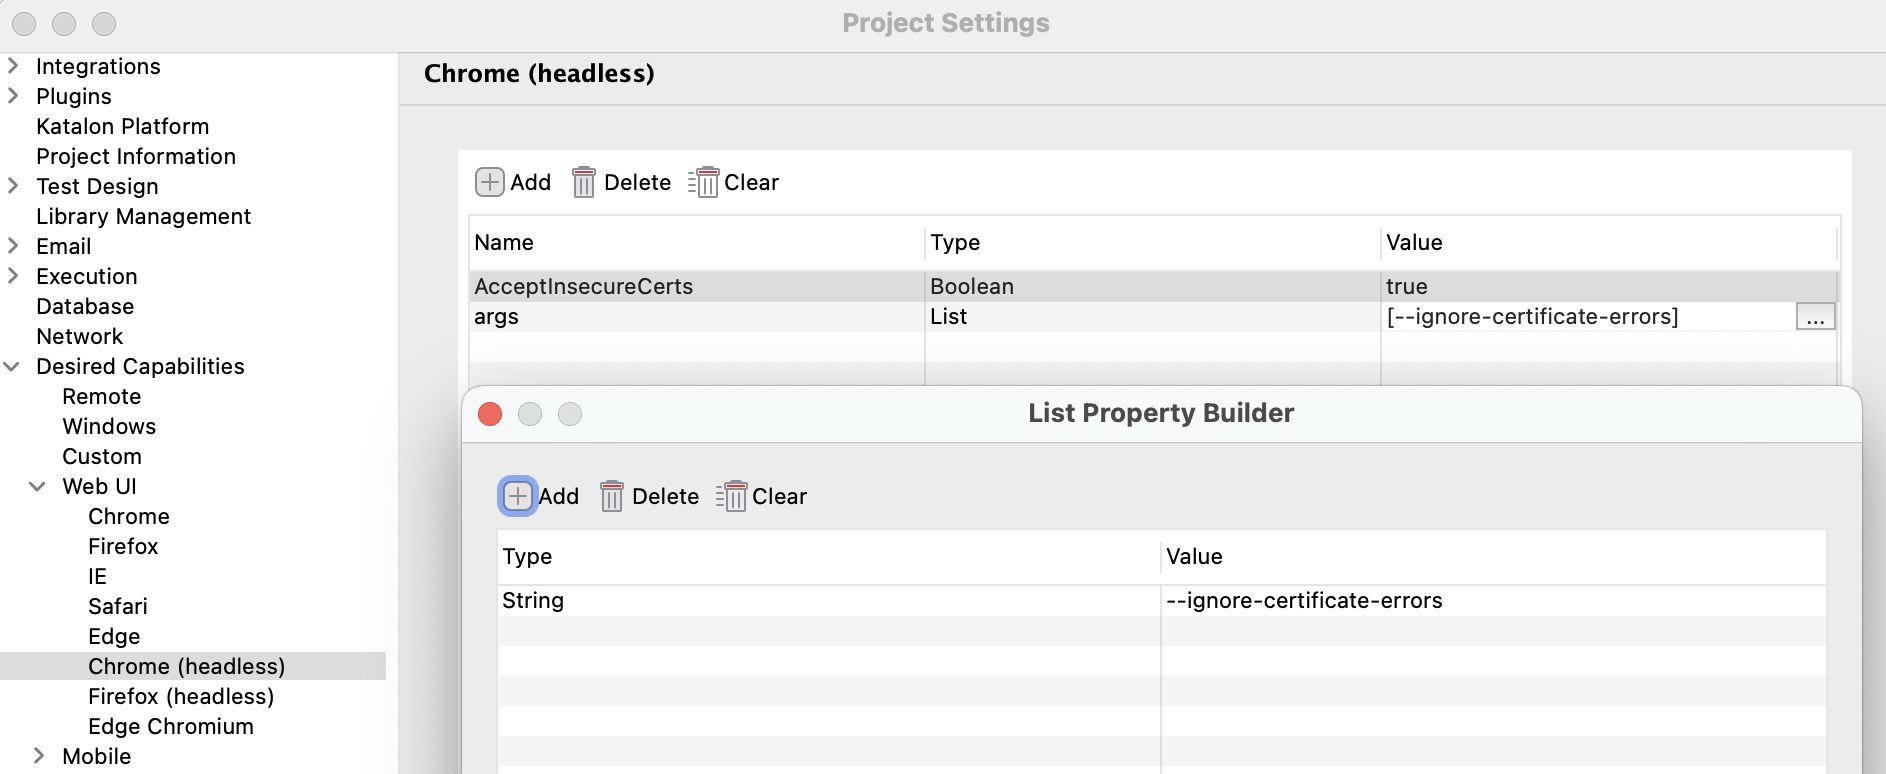
Troubleshoot "Cannot locate elements" issue
If your test (Chrome headless) failed with the error Cannot locate elements:

Simply add these to the Chrome's desired capabilities to Chrome:
| Name | Type | Value |
|---|---|---|
| AcceptInsecureCerts | Boolean | true |
| args | List | [--ignore-certificate-errors] |