Create test cases with Record and Playback in Katalon Studio
Test recording is the easiest way for new automation testers to start learning test automation. Identifying objects on applications is time-consuming. The Web Recorder Utility function captures your actions being performed on the application and converts them into executable code in the back-end.
You can quickly automate a few functionalities of your app and save time by recording actions that have to be performed many times in iterative builds. This function supports recording and running the same tests on multiple browsers. This document shows you how to:
Record Test with the Record Web function
This issue affects Katalon Studio versions 8.x and 9.x.
Chrome 142 has stopped supporting unpacked extension loading during runtime, preventing users from recording test cases when launching new browser instances in Katalon Studio.
Workarounds:
- Use Edge Chromium, Firefox, or other supported browsers.
- Or record with Active Browser mode.
We’ll notify you immediately when the fix is available.
Scenario: To make an appointment
- Launch the application under test (Example: http://demoaut.katalon.com/)
- Click the Make Appointment button
- Enter a valid username, password, and click Login
- Make an appointment
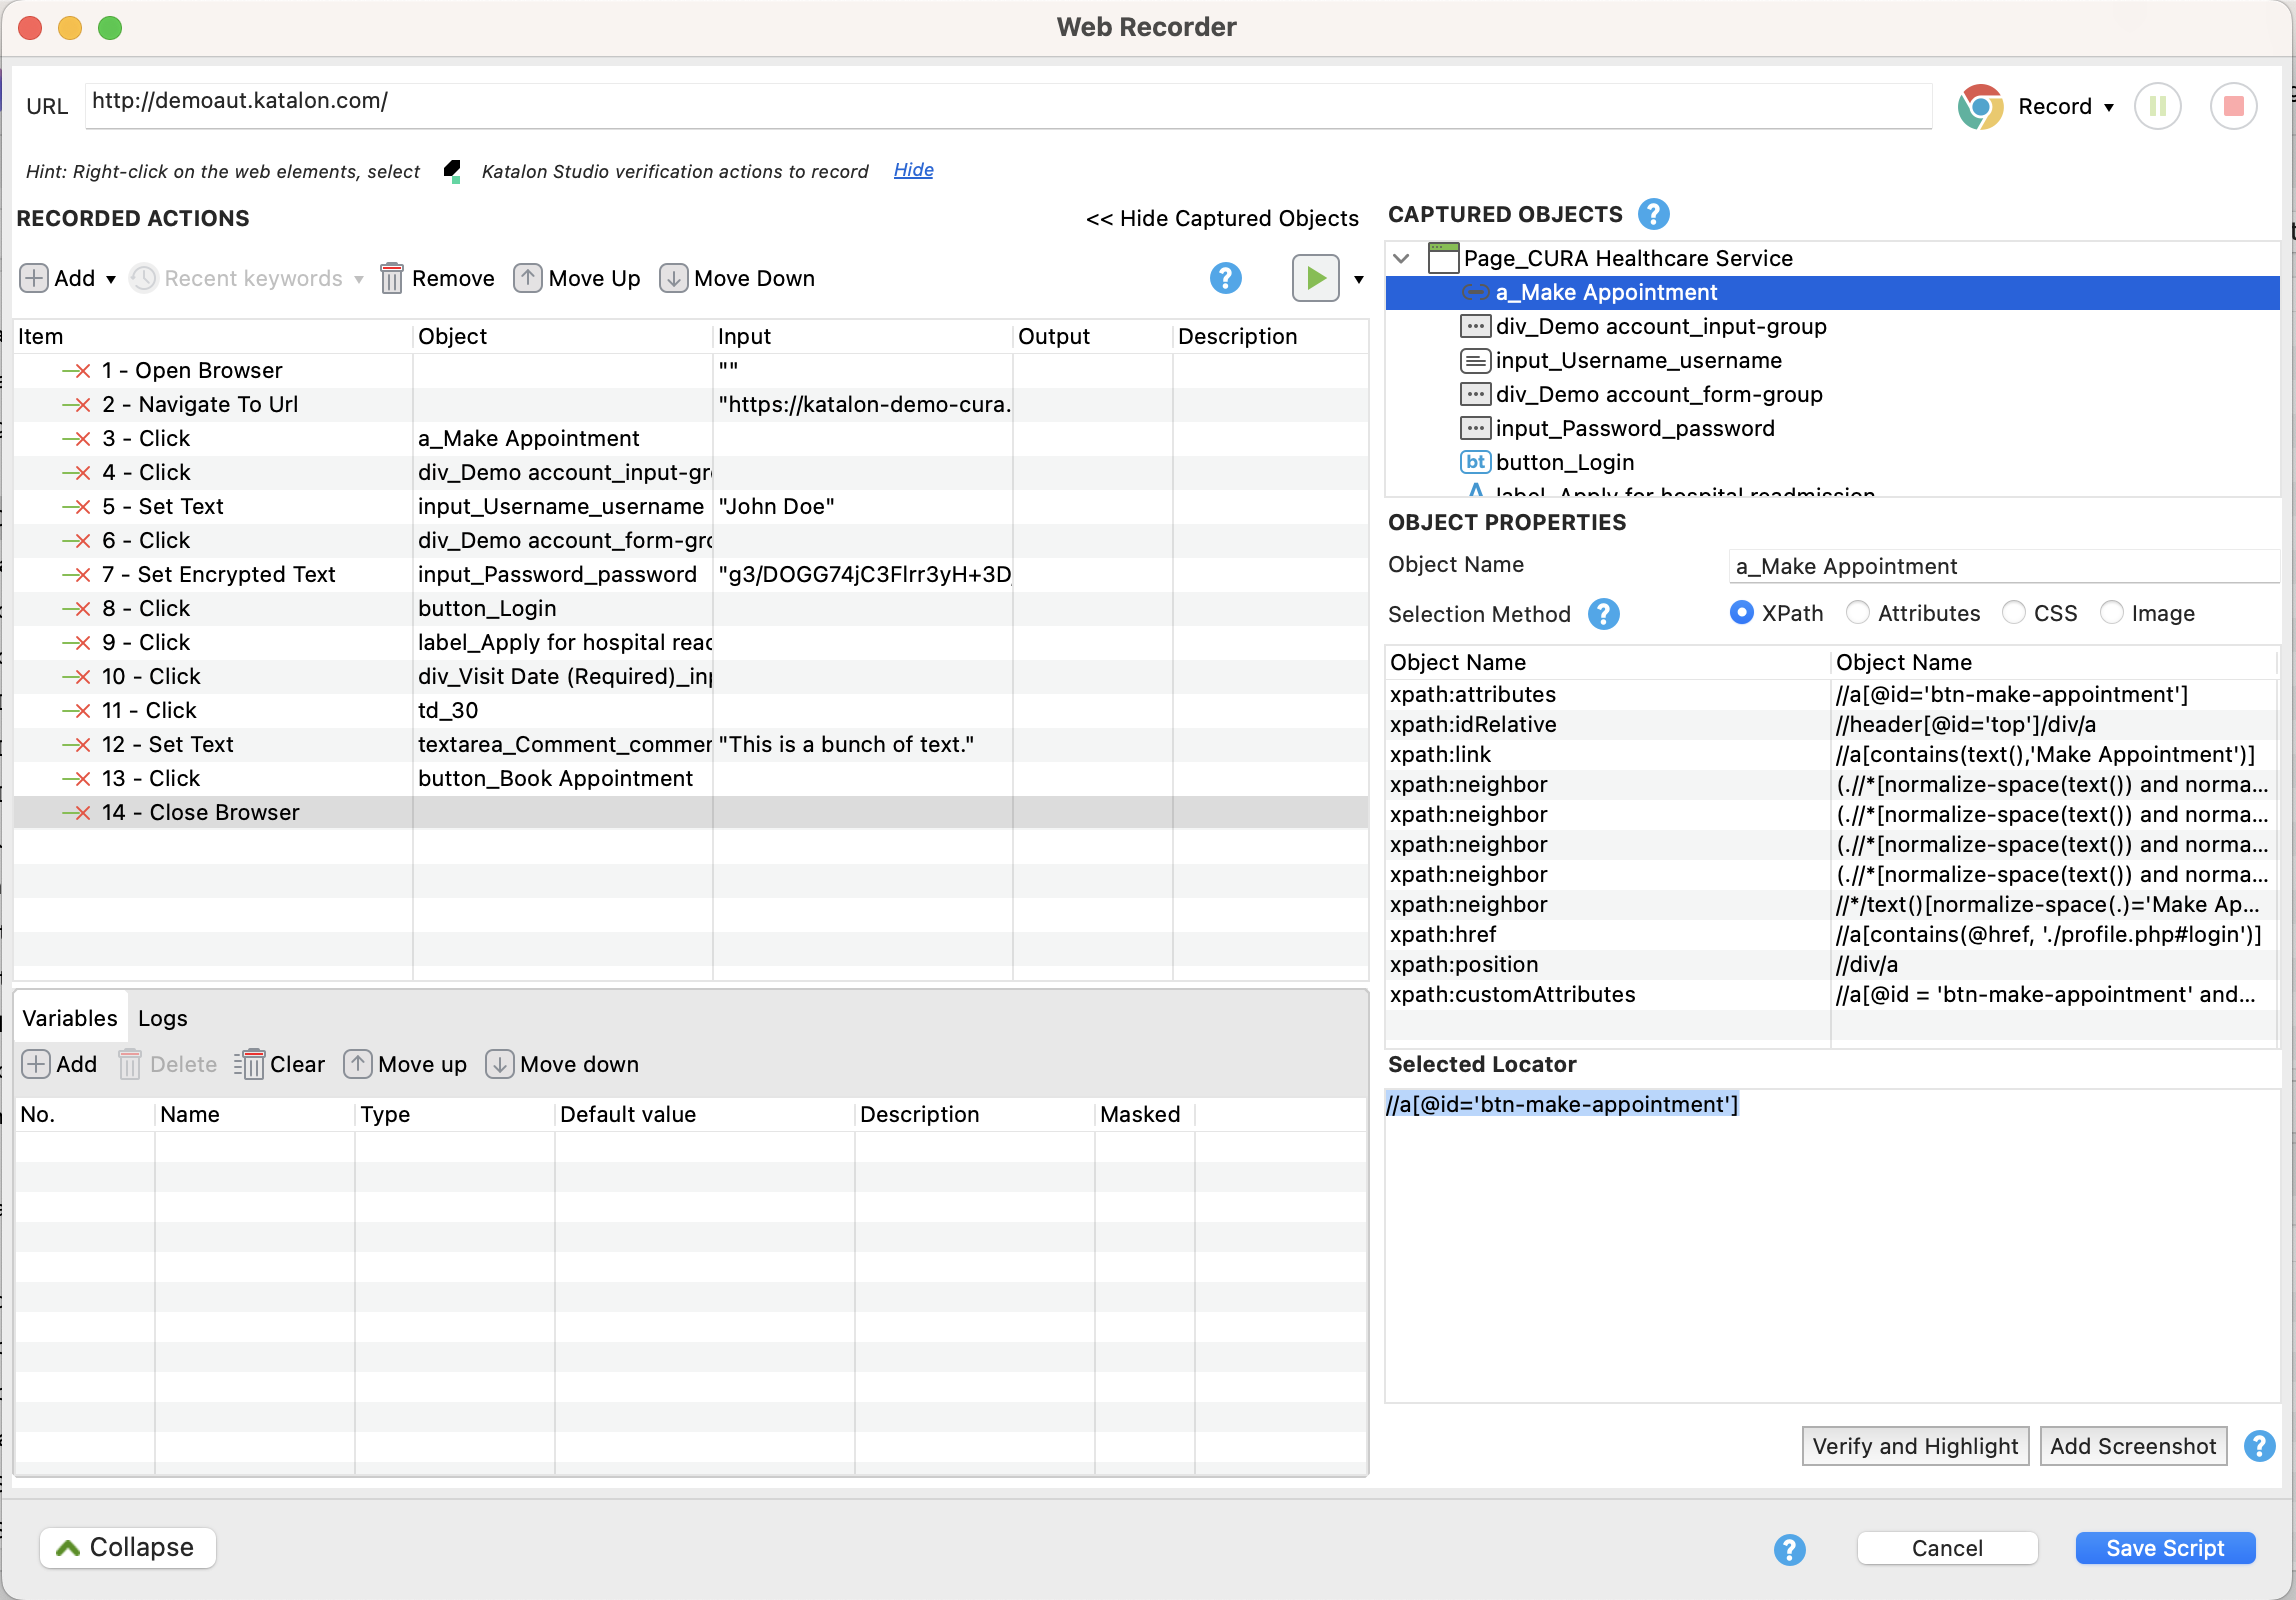
Follow the below steps to get familiar with the Record & Playback feature for Web UI tests
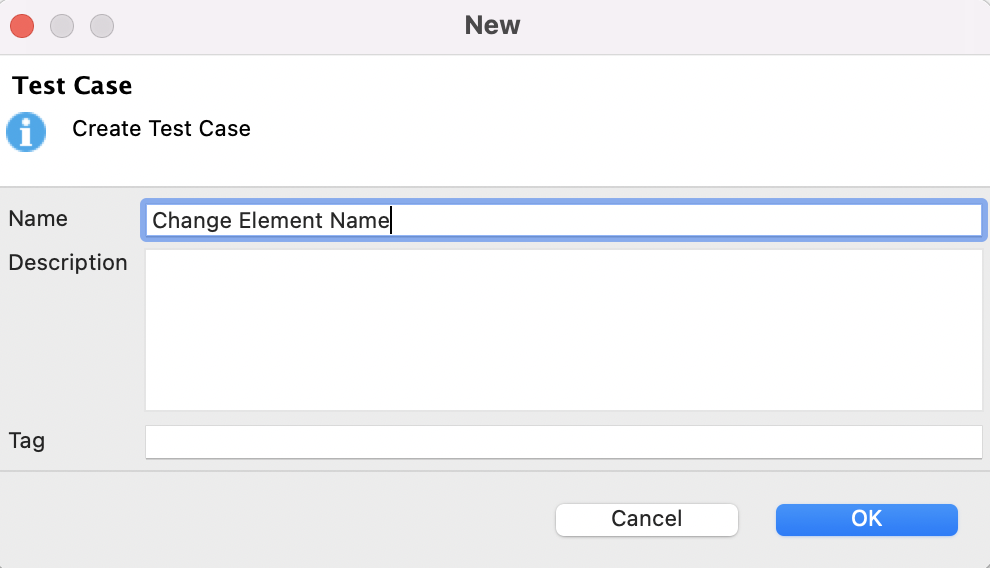
Step 1: Launch Katalon Studio and click New > Test Case on the main toolbar. Provide a name for your test case and click OK. An empty test case is created.

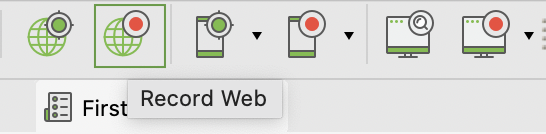
Step 2: Click Record Web from the main toolbar.
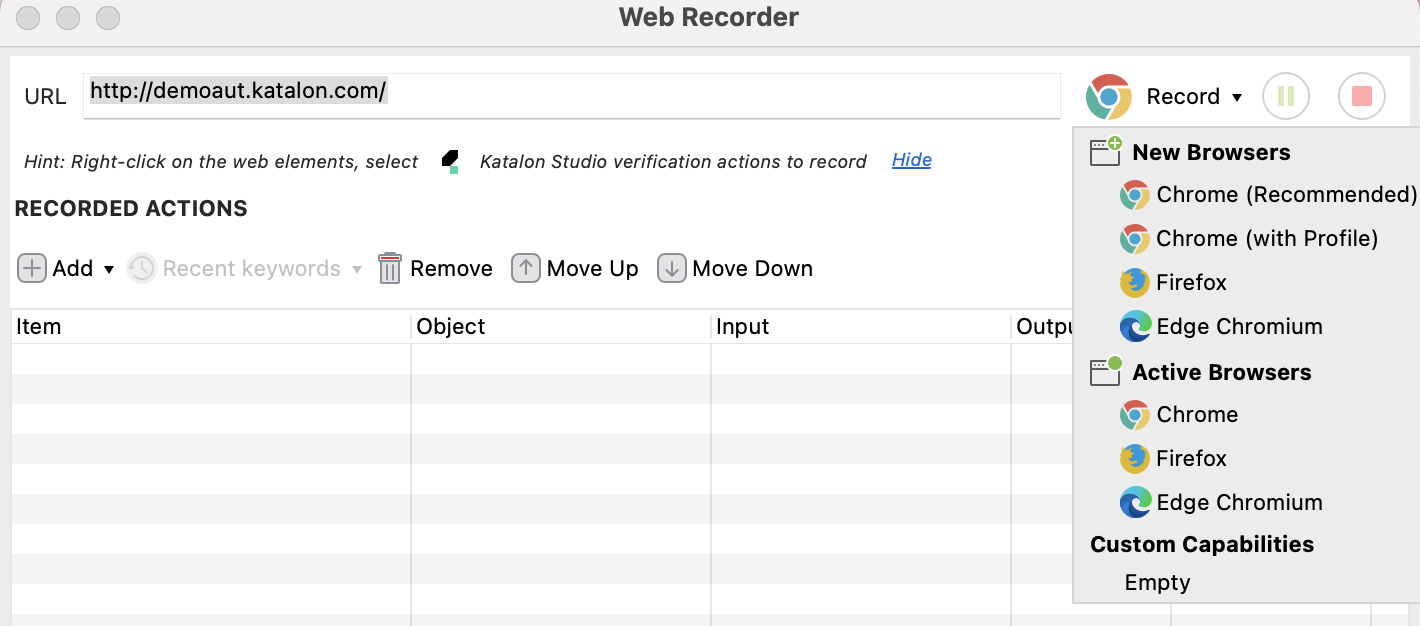
Step 3: The Record dialog displays.

Step 4: Select a browser, then click Record to start recording the test case.
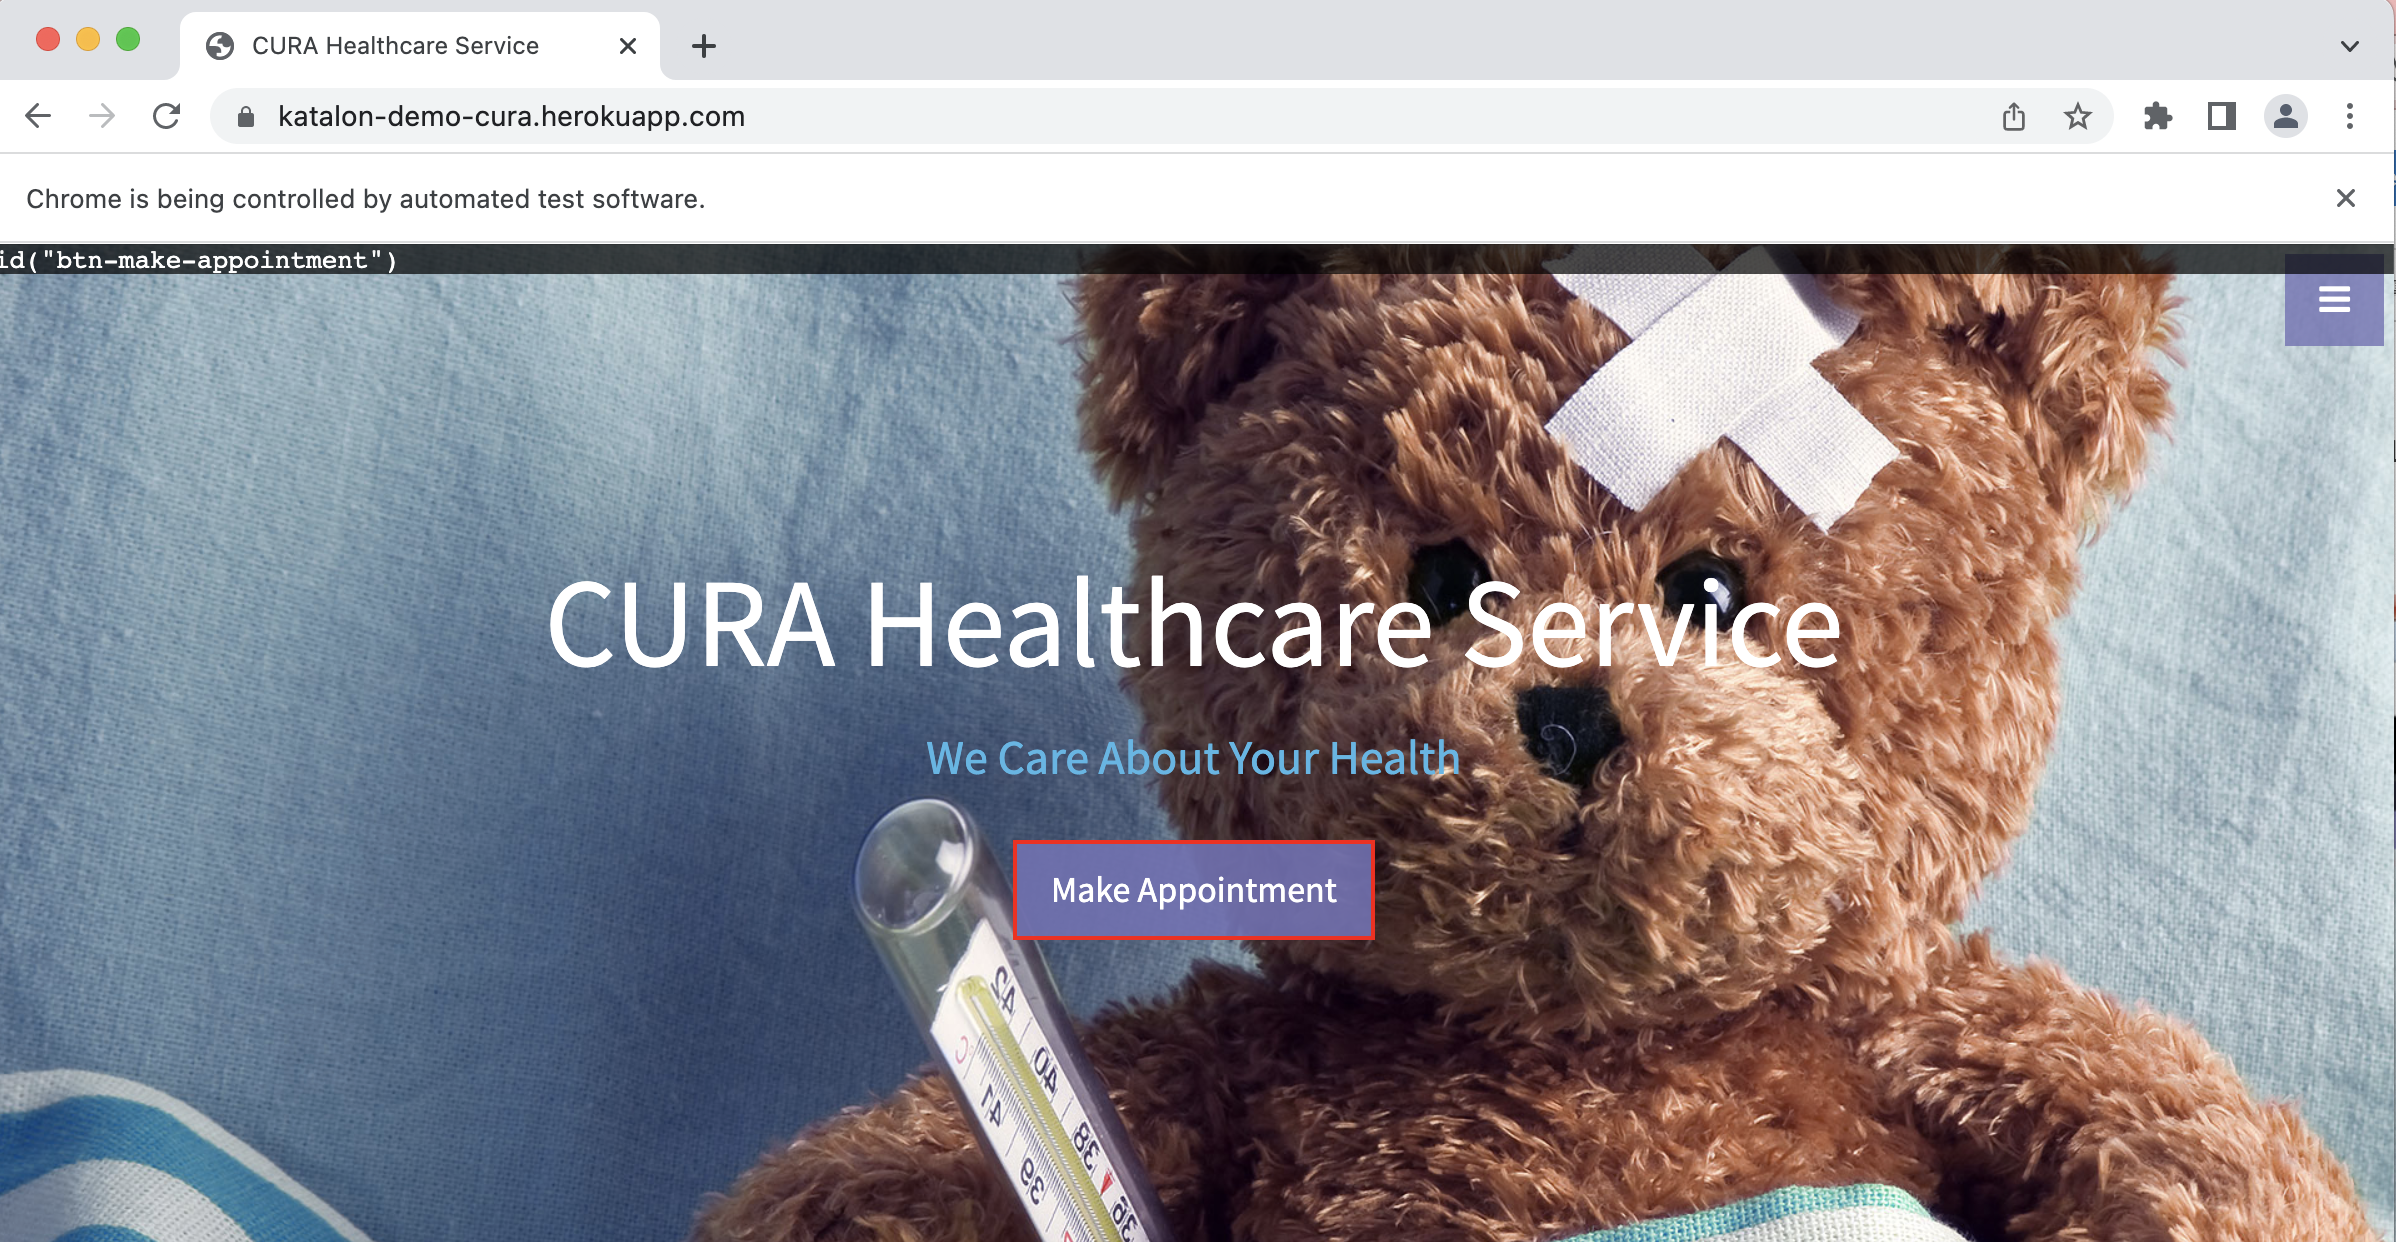
Step 5: Once your application has been launched, click on the Make Appointment button. You are directed to the Login page.
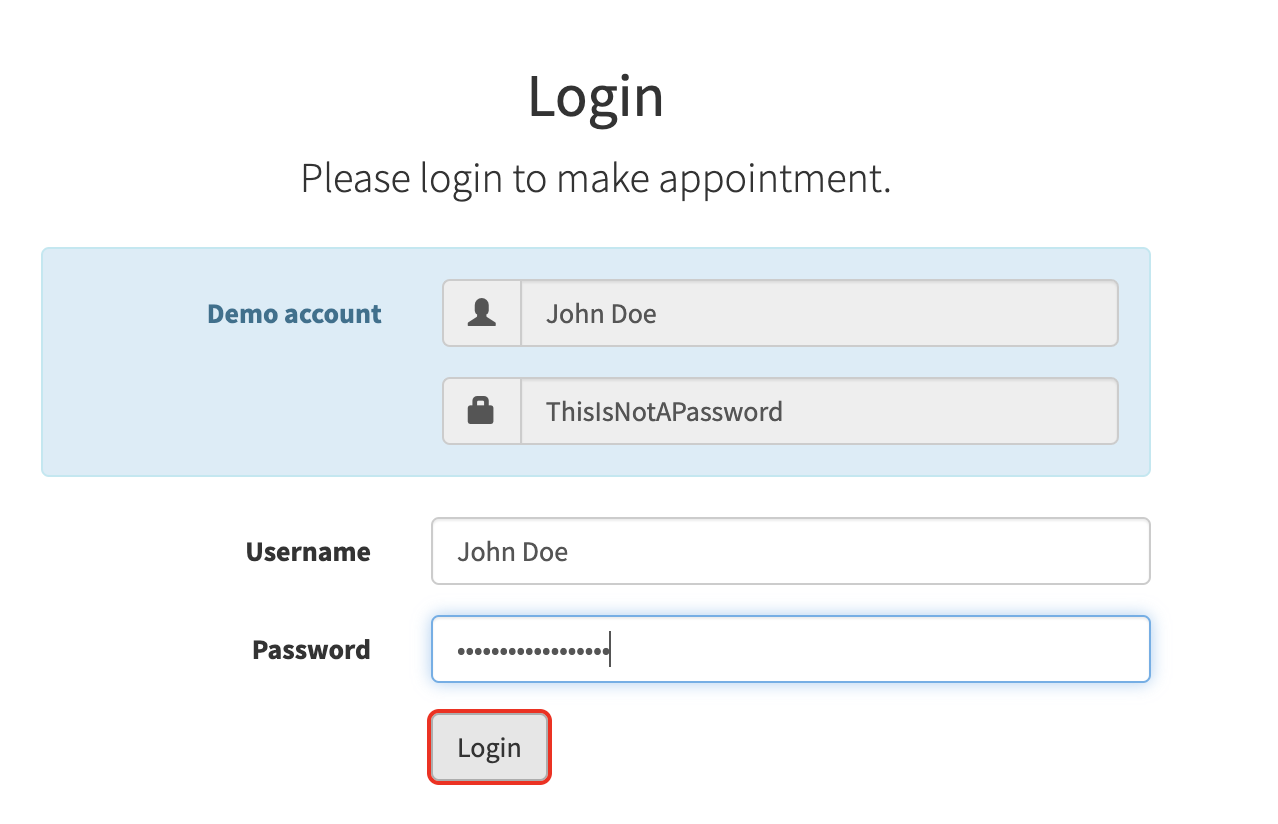
Step 6: Enter valid username and password (John Doe and ThisIsNotAPassword), then click Login.
Step 7: Once the Make Appointment page has been loaded, select the value Hongkong CURA Healthcare Center from the Facility dropdown menu.
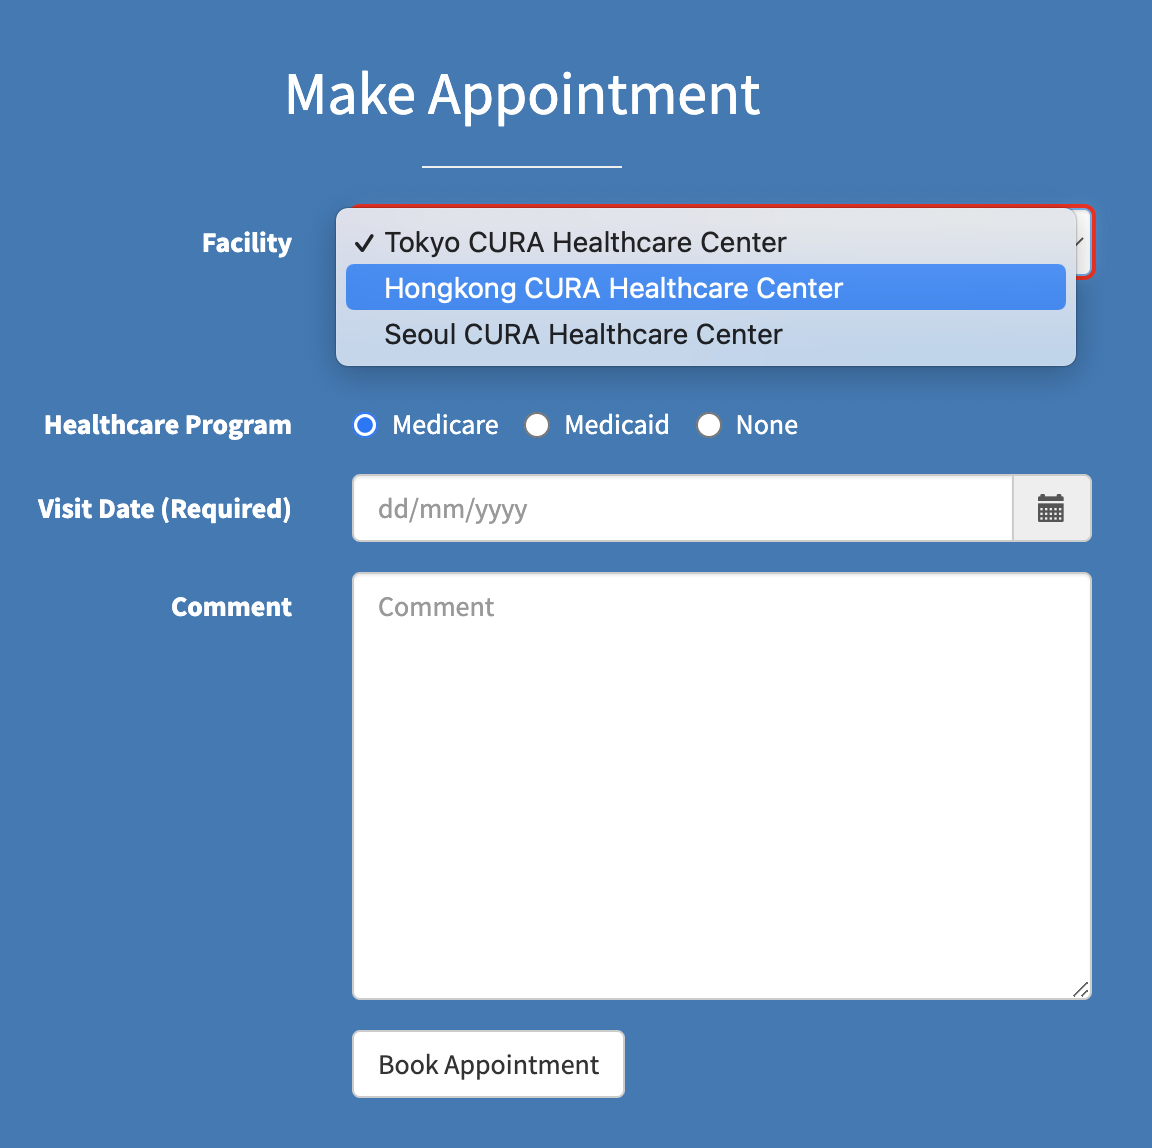
Step 8: Select the Apply for hospital readmission checkbox.
Step 9: Then move the cursor to click on the Medicaid checkbox.
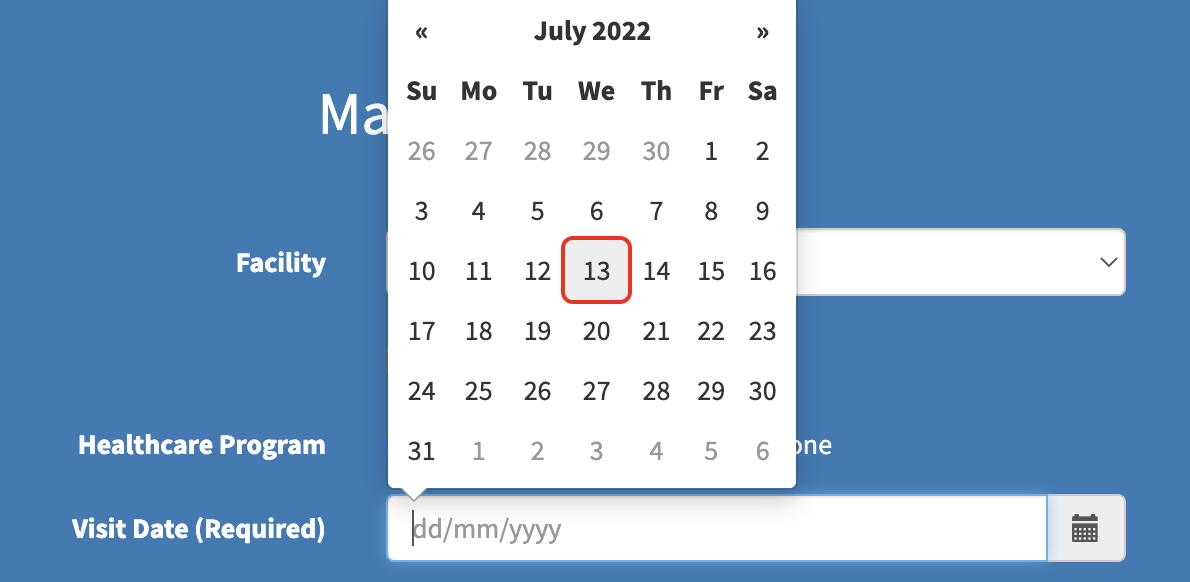
Step 10: Click the calendar icon next to Visit Date (Required). Select a date.
Step 11: Enter text in the Comment field.
Step 12: Click Book Appointment.
Step 13: You can stop the recording anytime by clicking Stop. You can select the Selection Method for the captured objects. The Basic mode is recommended to manual testers who have just started automated testing. With basic mode, Katalon Studio automatically generates robust and unique selectors for captured objects.
Advanced testers who want to manually input the selectors have the option to choose between CSS and XPath modes. For more details about Selection Method, refer to Manage Web Test Objects.
Step 14: When you are done recording, click OK to save the recorded actions into Katalon Studio.
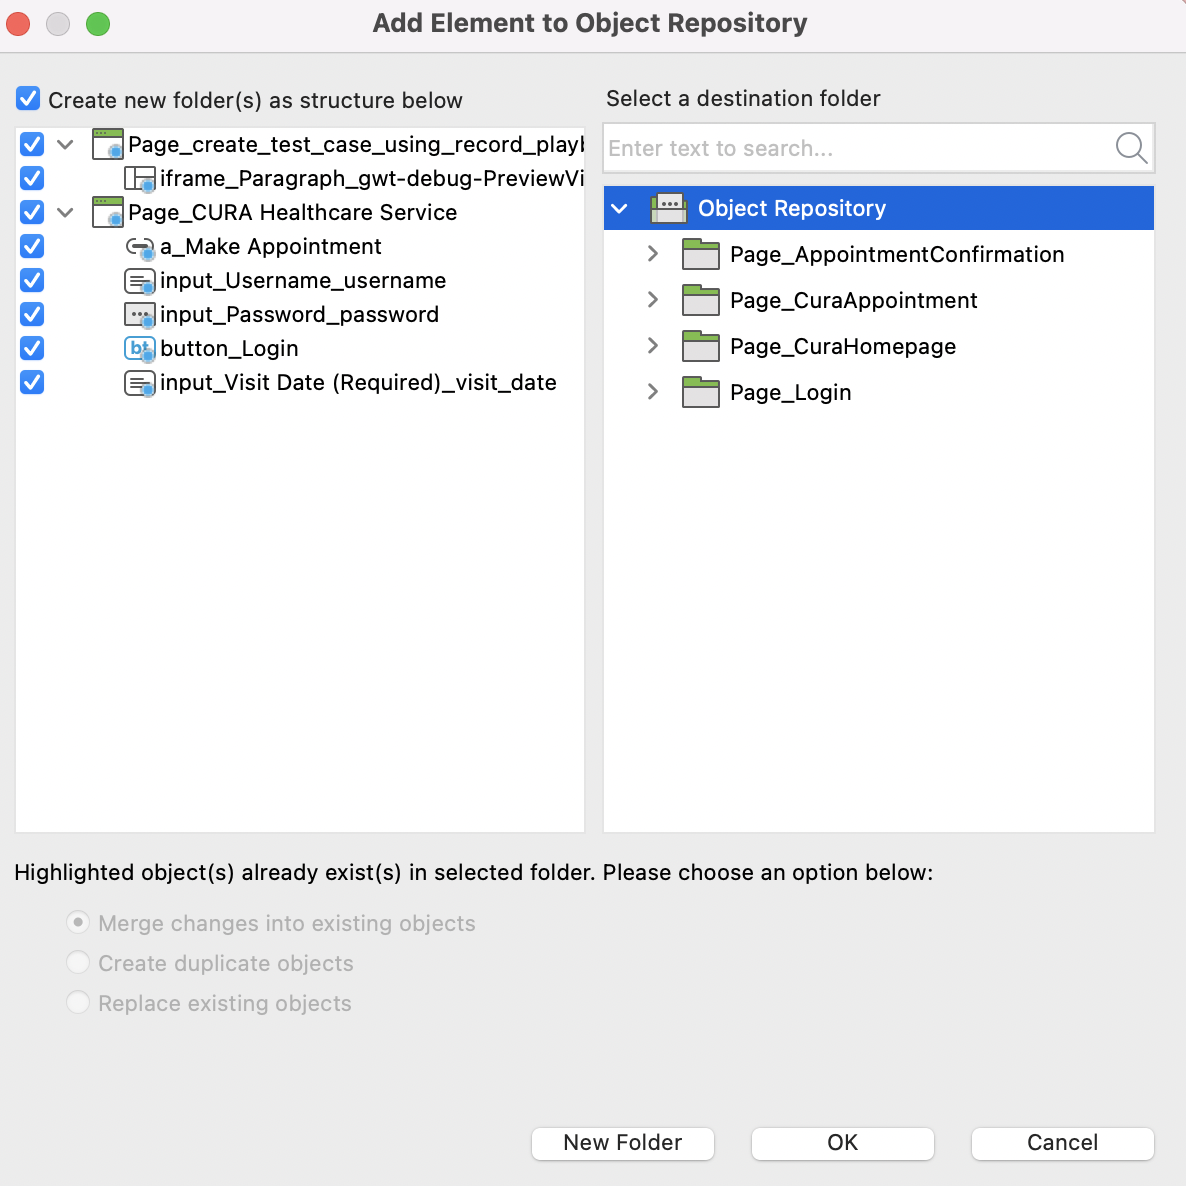
You are prompted to save captured objects to the Object Repository, which can be reused whenever needed. You can also create a folder to maintain page objects in desired structure. Click OK to continue.
Step 15: Recorded objects and actions are saved in the test case as shown below.
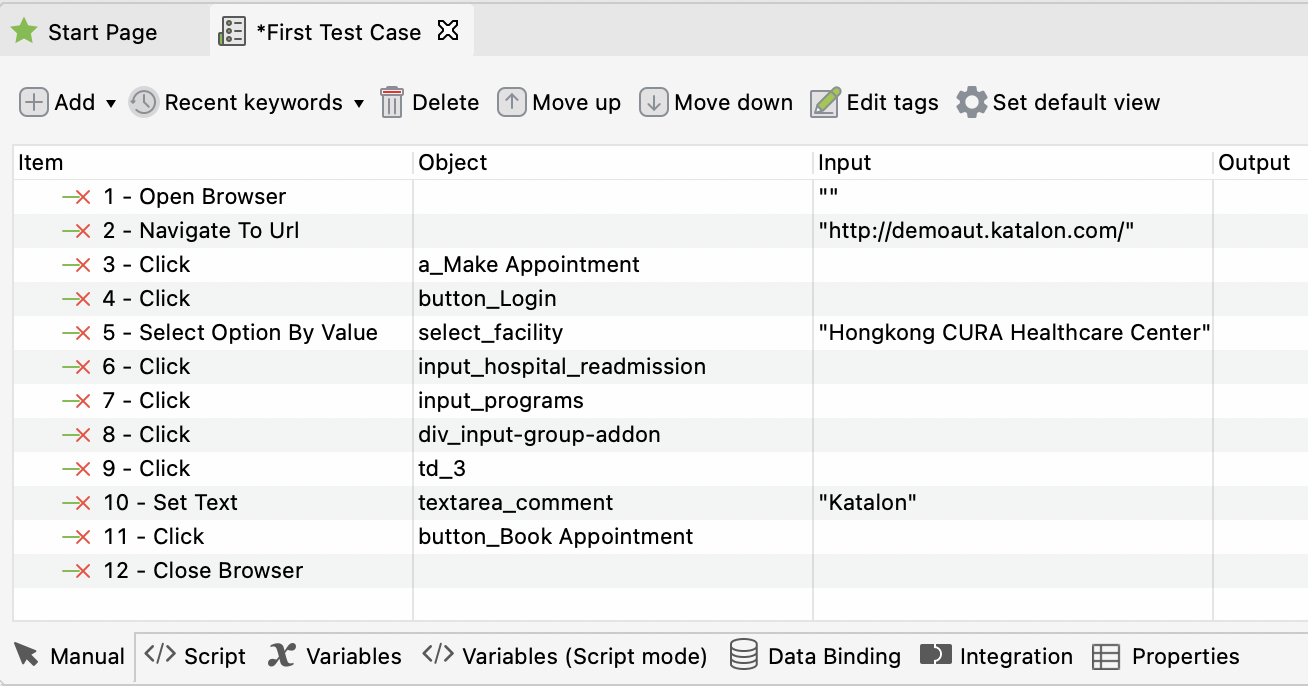
Click Run to execute recorded test cases in your desired browser.
Script Code for Record and Playback
import static com.kms.katalon.core.testobject.ObjectRepository.findTestObject
import com.kms.katalon.core.webui.keyword.WebUiBuiltInKeywords as WebUI

WebUI.openBrowser('')

WebUI.navigateToUrl('http://demoaut.katalon.com/')
WebUI.click(findTestObject('Page_Home Page/button_Make Appointment'))

WebUI.click(findTestObject('Page_Login/button_Login'))

WebUI.closeBrowser()
Rename Page Folders and Elements while Recording
To organize your test scripts in page object pattern, you need to add test objects in the folder corresponding to the page. This action helps you reuse and maintain the objects.
Scenario: Login with valid data
- Launch the application under test (Example: http://demoaut.katalon.com/)
- Click the Make Appointment button
- Enter a valid username, password, and click Login
Step 1: Launch Katalon Studio and go to File > New > Test Case on the main toolbar. Provide a name for your test case and click OK. An empty test case is created.
Step 2: Click Record Web on the main toolbar.
Step 3: The Record dialog displays. Select a browser and click the Record button to start recording the test case.
Step 4: Once your application has been launched, click on the Make Appointment button. You are directed to the Login page.
Step 5: Navigate back to the Web Recorder window. Click expand.
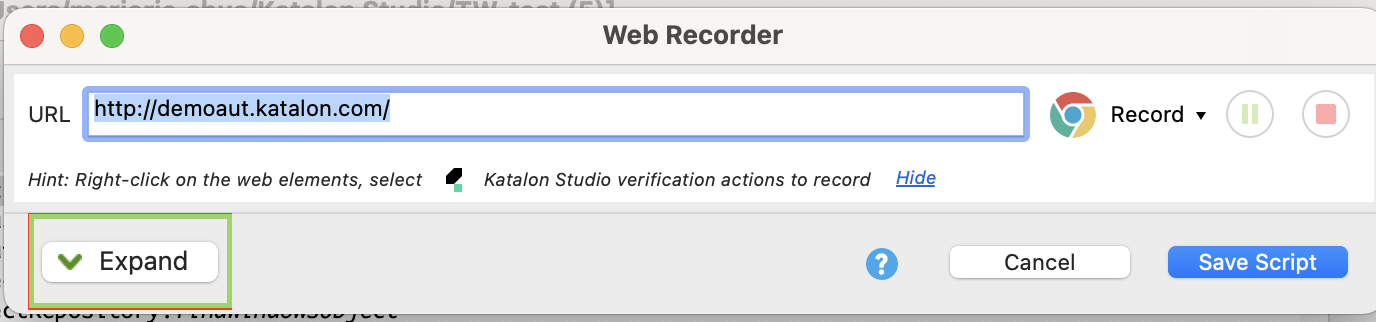
By default, this will expand the menu downwards and show all recorded actions.
Step 6: Click on Show Captured Objects. This will expand the Web Recorder window again, this time to the right.
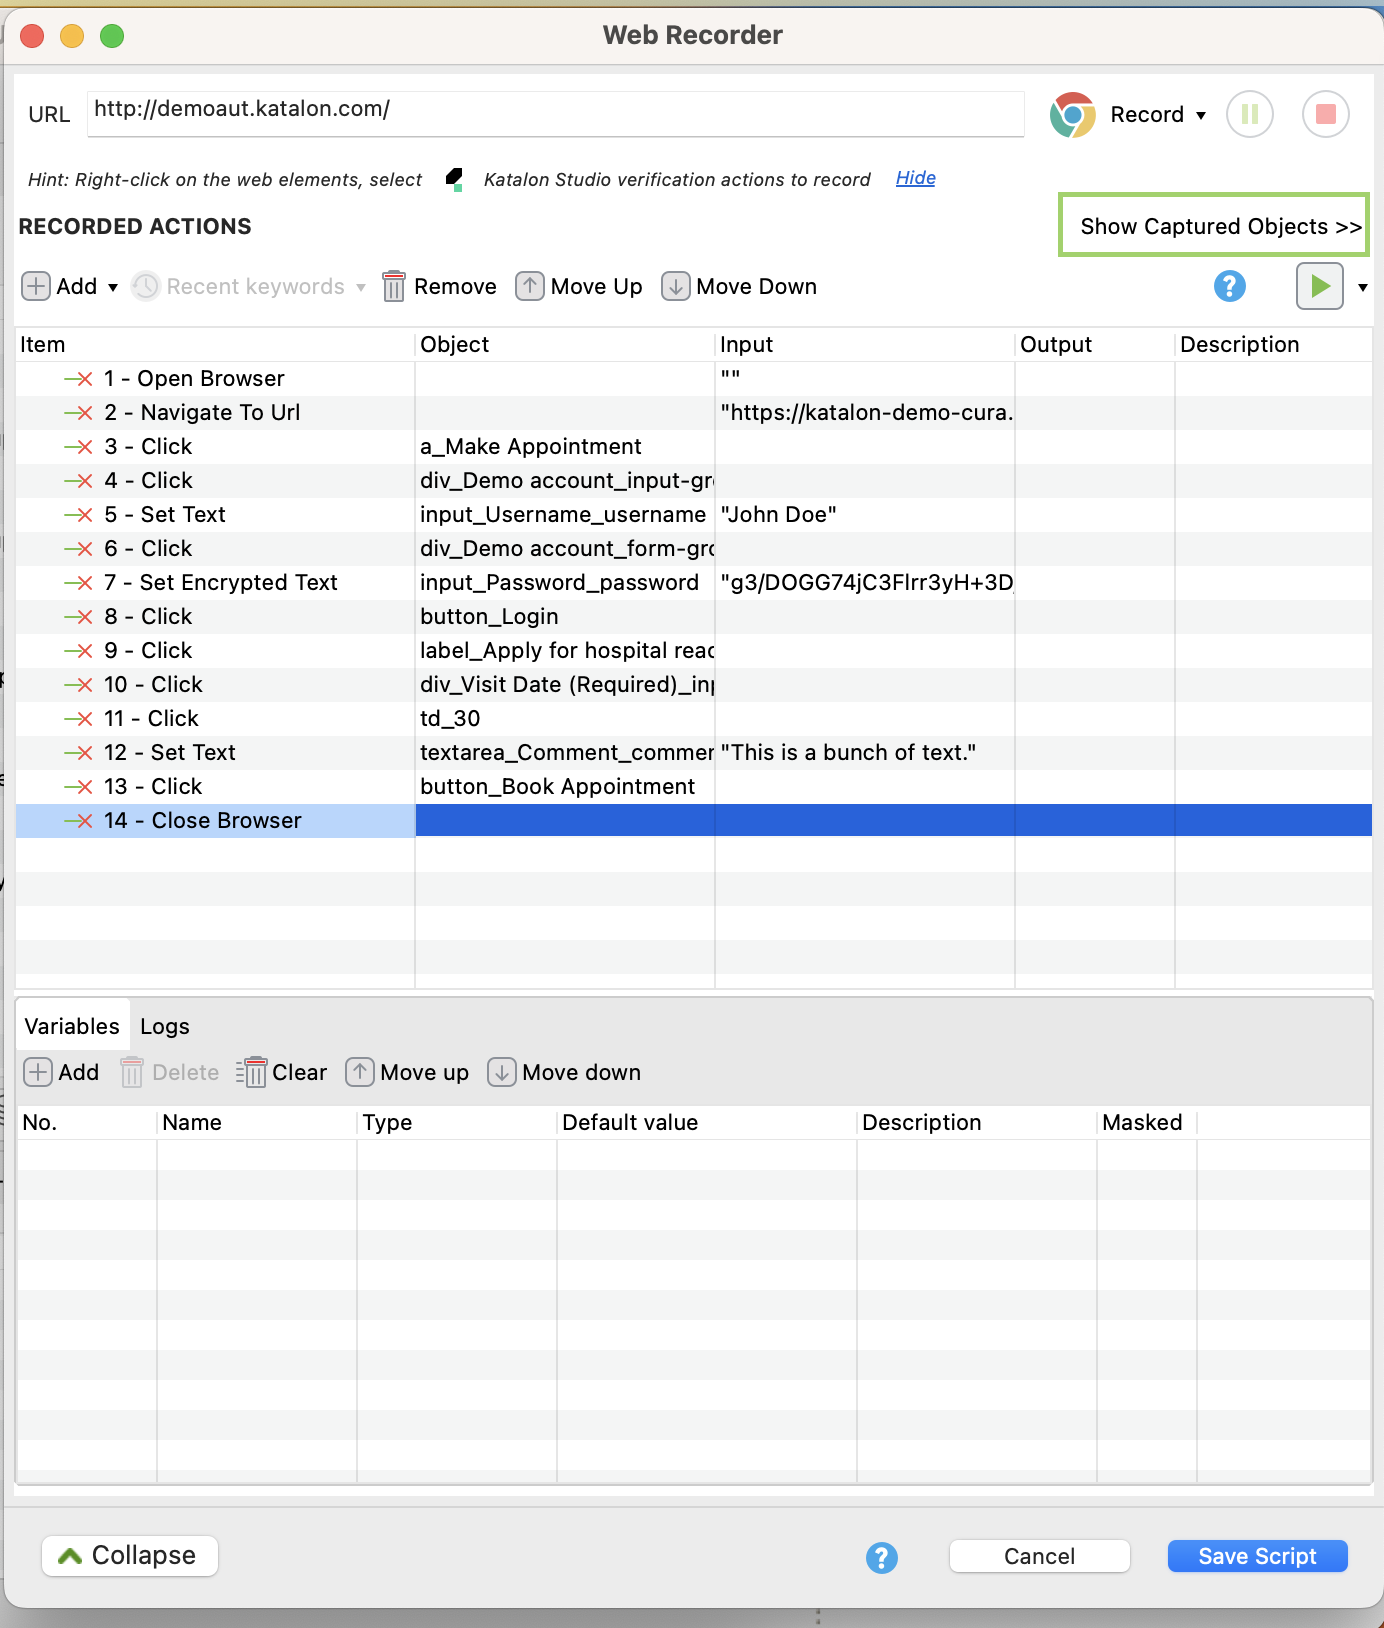
If you cannot see the expanded window, drag the Web Recorder window to the left until all elements are visible. It should look as below:
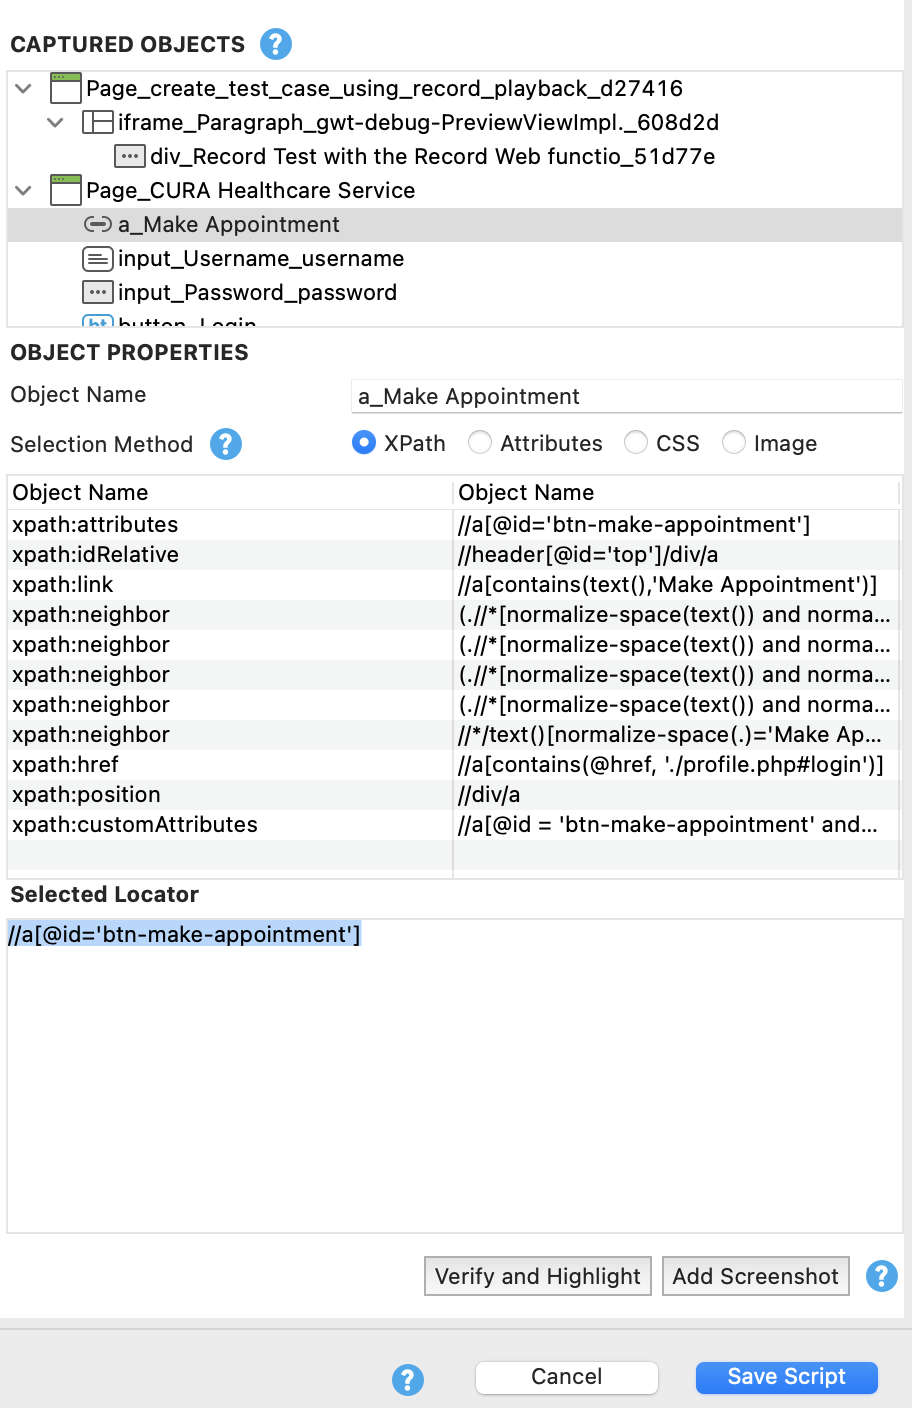
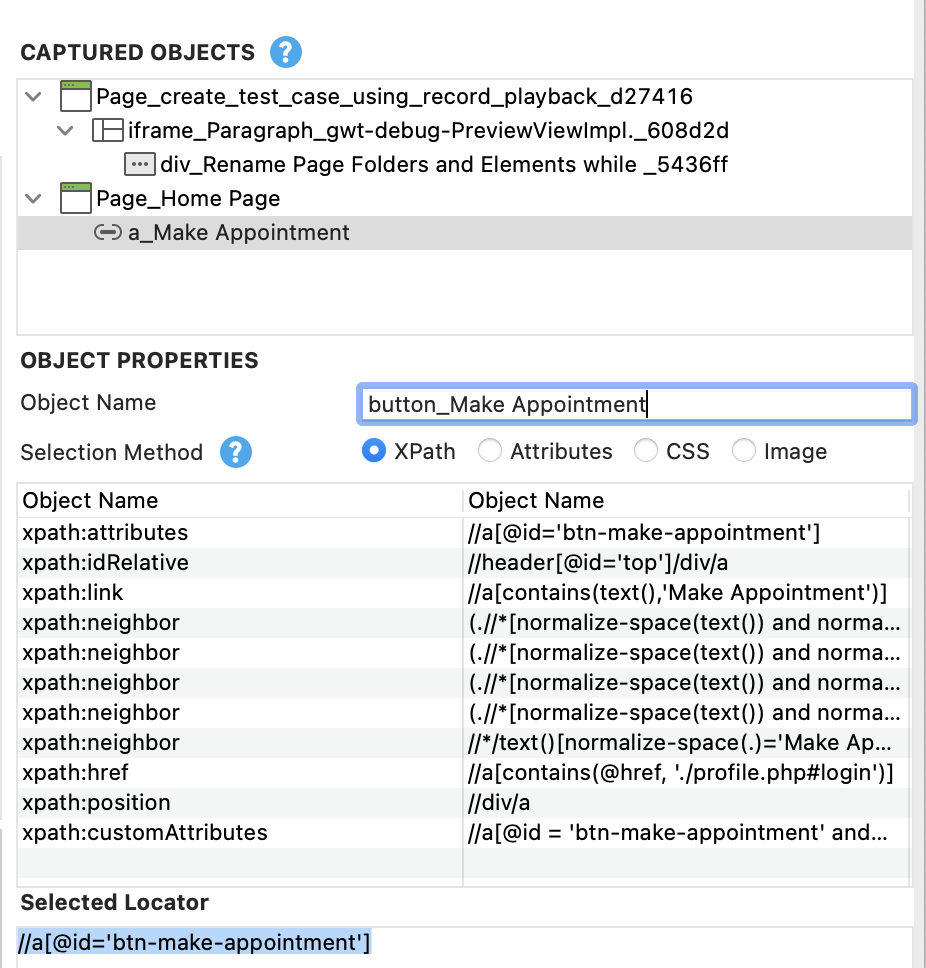
Step 7: Go to the Captured Objects window and click on "Page_CURA Healthcare Service". This will unfurl the toggle menu. It will go to "a_Make Appointment" by default.
Step 8: Rename the page name from "Page_CURA Healthcare Service" to "Page_Home Page."
Step 9: In the Captured Objects frame, select the a_Make Appointment element.
Step 10: Rename the element name from "a_Make Appointment" to "button_Make Appointment."
Step 11: Go back to the recording browser and continue to record. Click Login.
Step 12: Repeat the same steps above to change the name of the object Login and its folder.
Step 13: You can stop recording by clicking Stop. Click OK to save recorded actions into Katalon Studio.
Step 14: You are prompted to save the captured objects to Object Repository, which can be reused whenever needed. You can also create a folder to maintain page objects in your desired structure. Click OK to continue.
Step 15: Recorded objects and actions are saved in the test case as shown below.
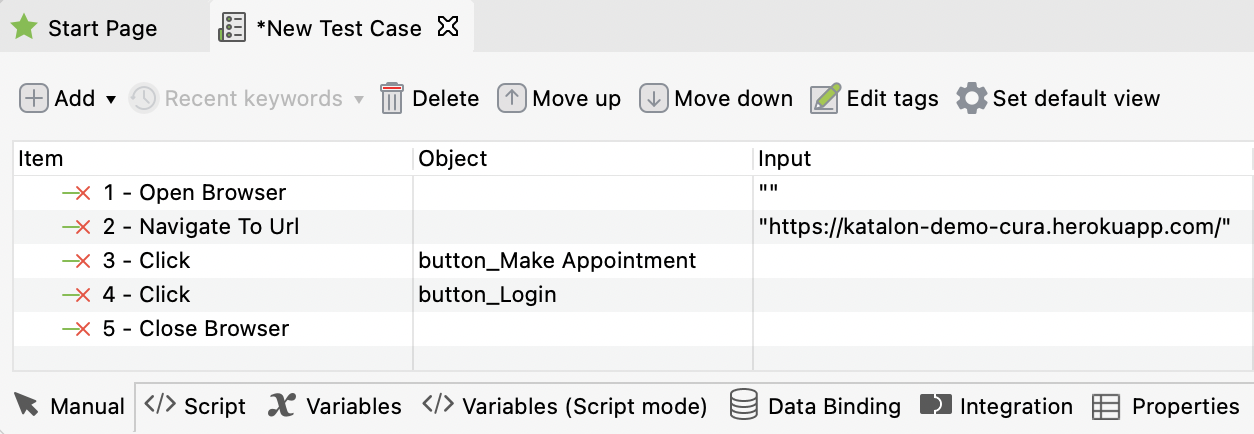
Click Run to execute the recorded test cases in your desired browser.
Source Code:
import static com.kms.katalon.core.testobject.ObjectRepository.findTestObject
import com.kms.katalon.core.webui.keyword.WebUiBuiltInKeywords as WebUI

WebUI.openBrowser('')

WebUI.navigateToUrl('http://demoaut.katalon.com/')
WebUI.click(findTestObject('Page_Home Page/button_Make Appointment'))

WebUI.click(findTestObject('Page_Login/button_Login'))

WebUI.closeBrowser()
Thus we can record the actions being performed using Katalon Studio. However, there are a few actions which cannot be recorded.
What cannot be recorded?
Though recording your tests saves time, we cannot validate some scenarios such as Web Table handling, switching to multiple frames, switching to windows, handling captcha, image recognition, and video playbacks.
You can download the source code here.
For further instructions and help, you can refer to Recording WebUI Test tutorial.