Mobile Recorder utility
The Mobile Recorder utility in Katalon Studio allows you to create automated test cases for mobile applications. You perform actions on the application under test (AUT) as a user, and the recorder captures these actions to generate test cases.
Device types
Katalon Studio provides three recording options for mobile test automation. Each option has distinct advantages, disadvantages, and prerequisites.
| Device types | Pros | Cons | Prerequisites |
|---|---|---|---|
| Local devices | Direct control, no subscription needed. | Complex mobile device setup process with occasional bugs. | For Android: For iOS: |
| Remote devices | Access to a wide range of real devices for thorough testing, useful for cross-platform compatibility. | Requirements of remote servers and management of network connections, potential latency issues | See: |
| Test Execution - Cloud devices | Access to multiple devices and configurations, no hardware needed, simple setup for users with minimal to no coding experience. | Slower interaction and execution times compared to local devices. | Subscription to Test Execution - Cloud Mobile Native App testing. See Test Execution - Cloud overview. |
Record a mobile application
Follow these steps to configure and execute your recording session effectively:
-
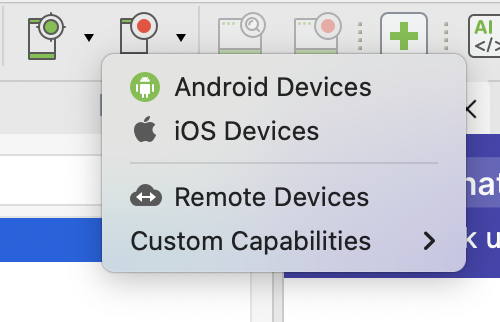
Click the Record Mobile icon on the main toolbar, and select your device type.
-
In the displayed Mobile Recorder dialog, specify the device information in the Configurations section.

- Device Name: A mobile device where Katalon launches the application. All of your connected devices should be displayed in this list.
- Start with: In the drop-down list, select either Application File or Application ID.
- Application File: Browse your tested application (
.apkfile for Android;.ipafile for iOS). - Application ID: Specify the application ID of your tested application, which is either the package name of an Android app or the bundle identifier of an iOS app.
- Application File: Browse your tested application (
For example, here we use the Android emulator for configuration setup.
-
Click Start on the action bar to begin recording.
After starting the application, you can see the application display in Device View and the objects in All Objects:
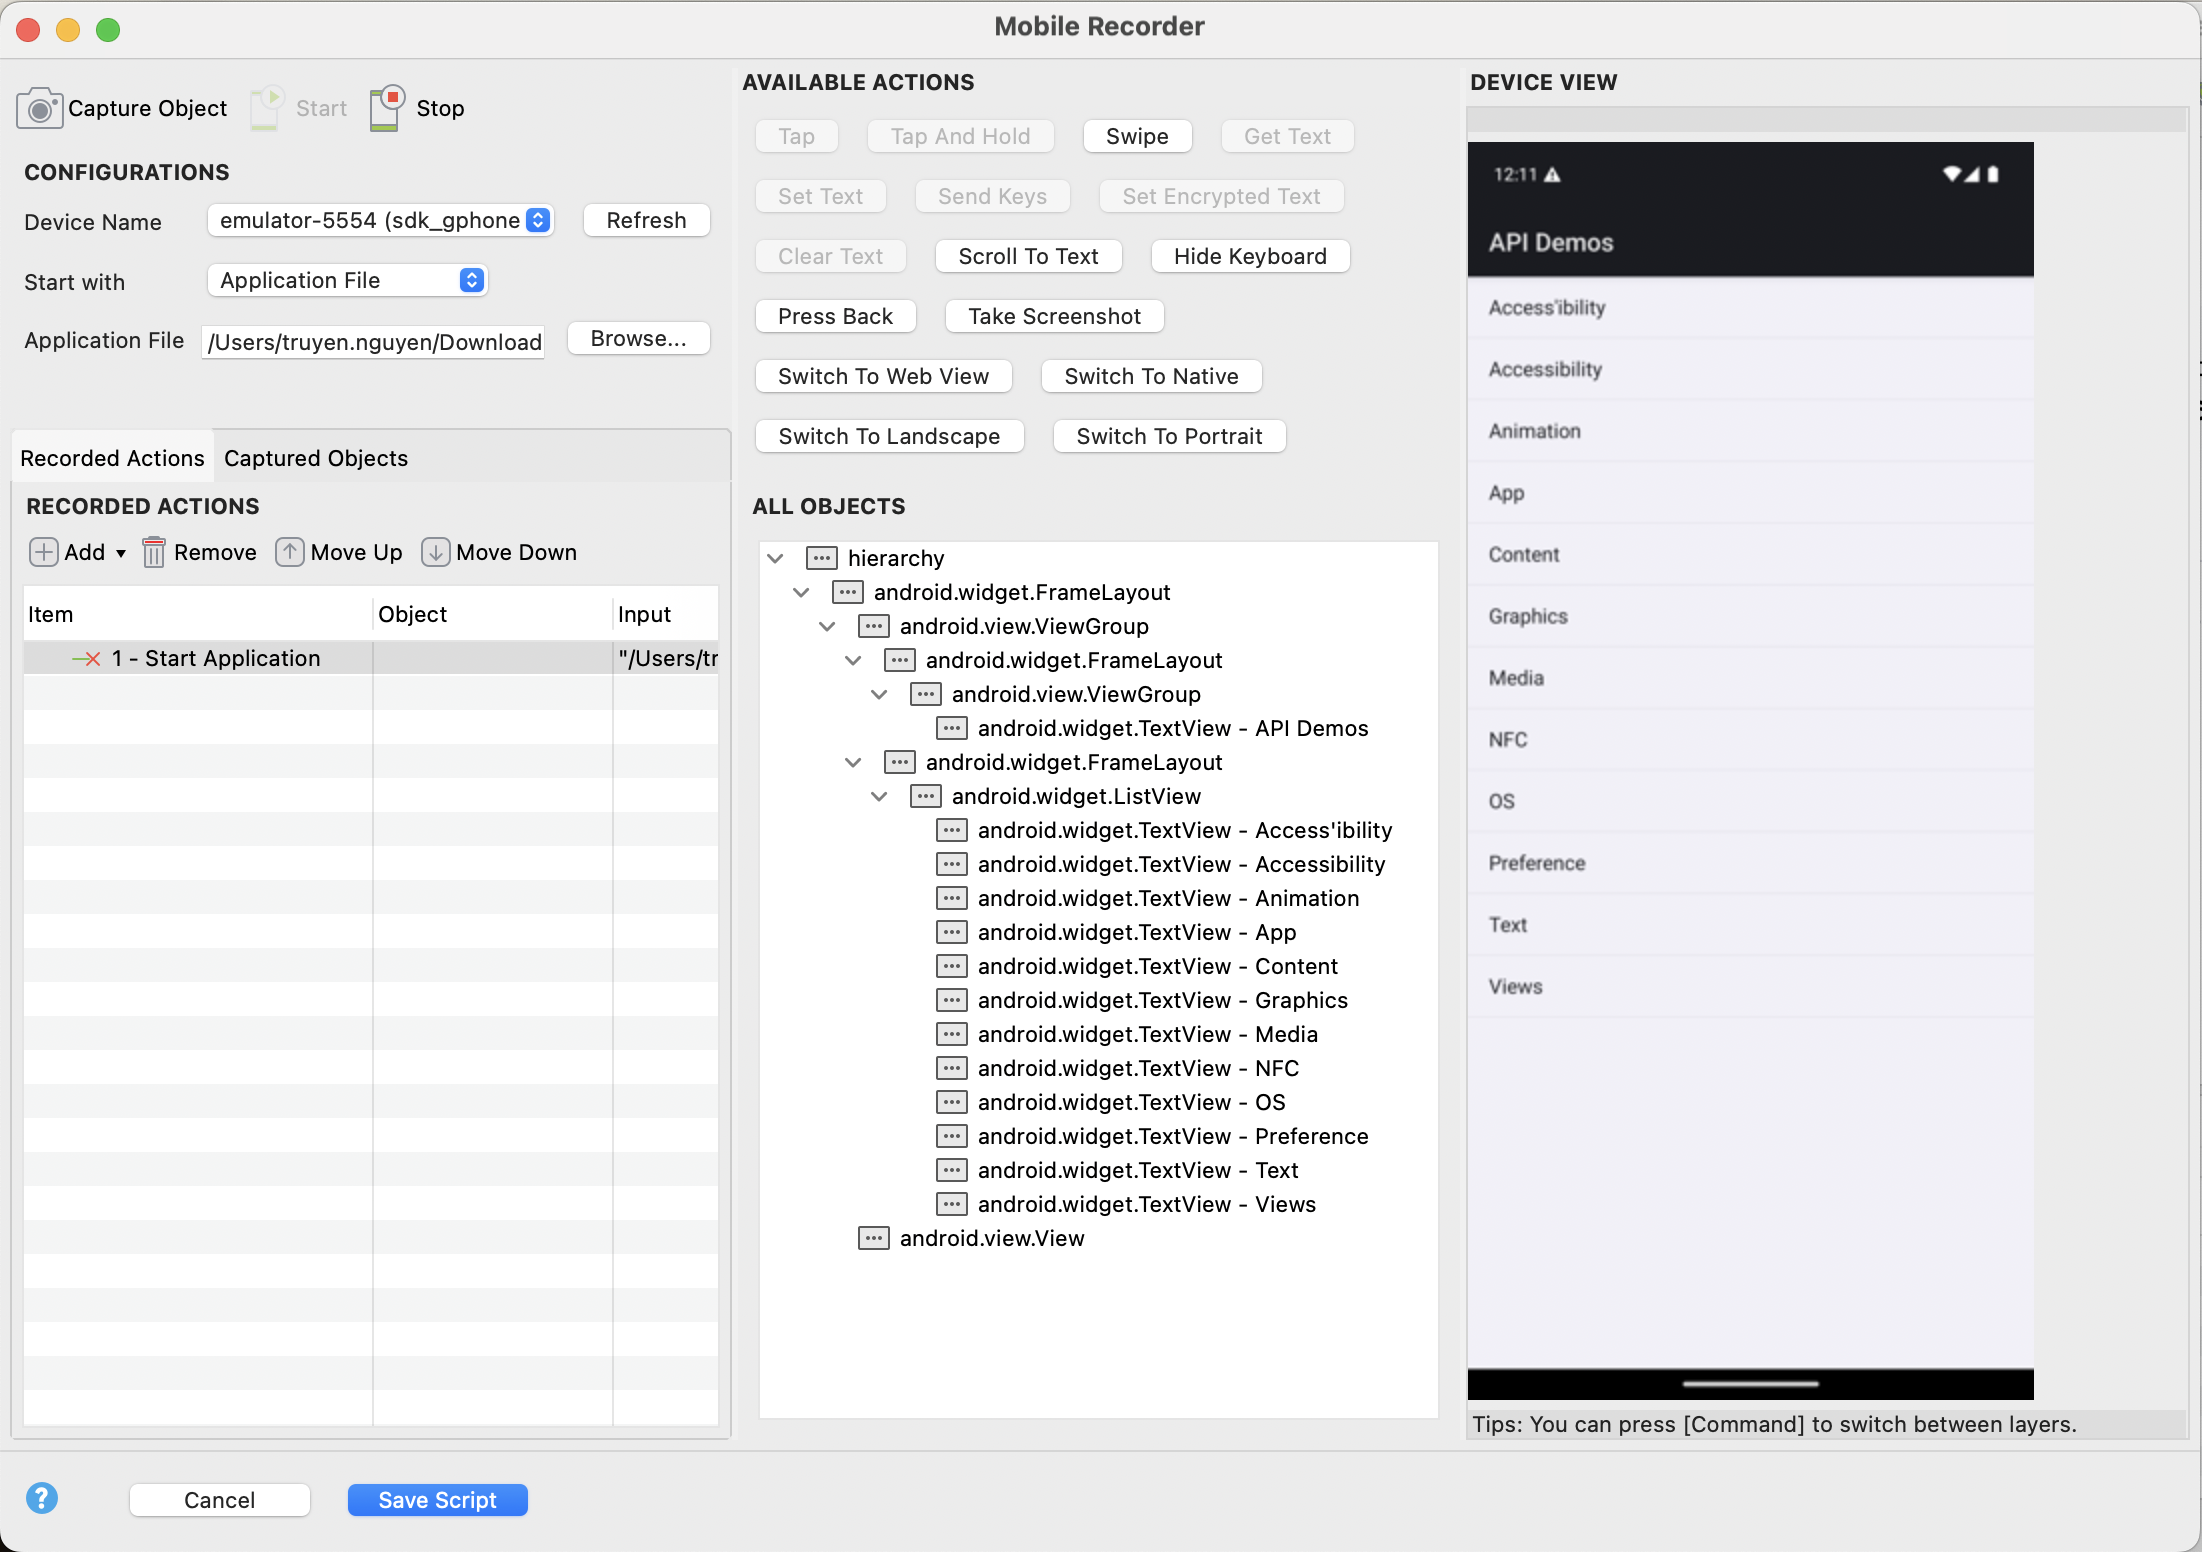
- Device View is a simulator of the device screen. You can interact with the AUT in this view.
- All Objects captures and organizes all the displayed mobile objects of Device View in a tree.
To make sure the Device View displays the current screen of the AUT on the device, click the Capture Object button on the action bar to reload Device View and refresh All Objects.
-
Perform actions on the AUT:
- Select any object either in the tree of All Objects or in Device View. Katalon highlights their counterpart accordingly for verification.
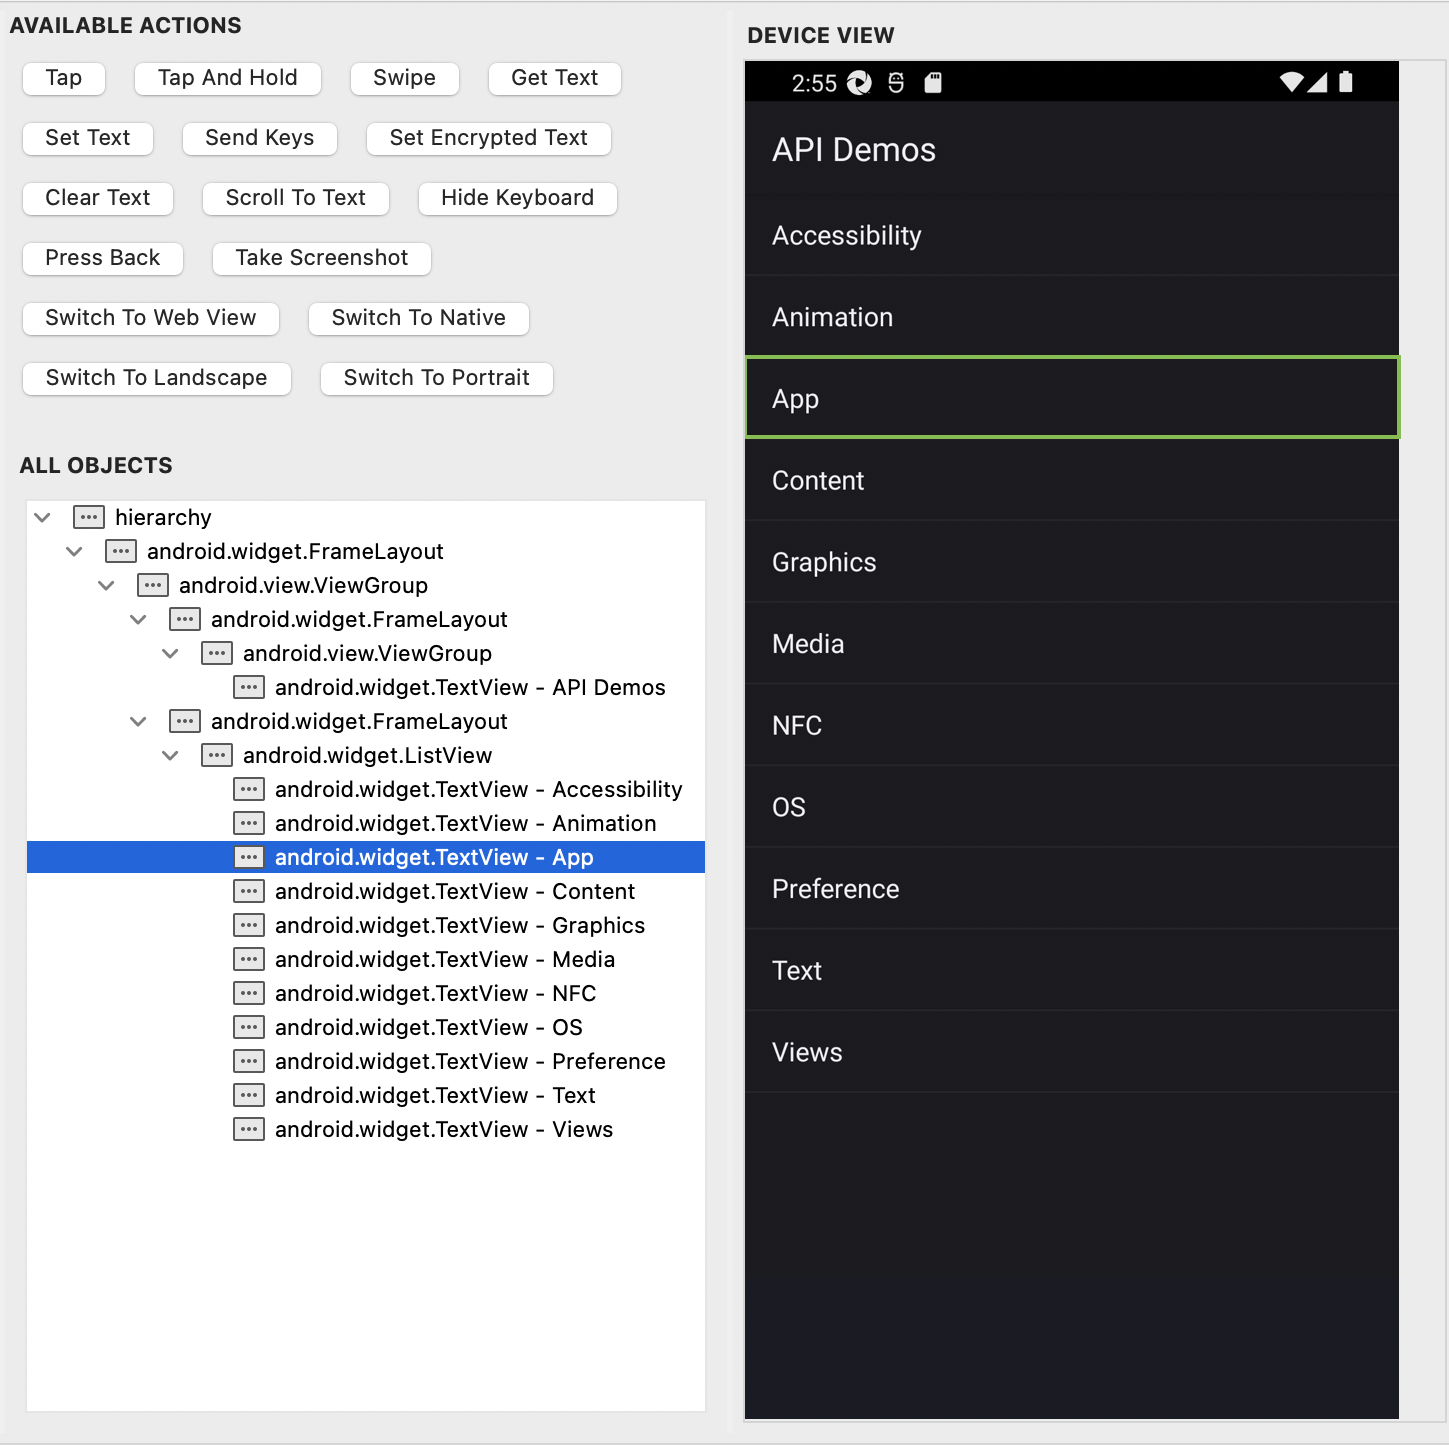
- Choose a button in Available Actions to act on the selected object.
To learn about available actions and UI elements, see Available Actions and Validate UI elements.
- Repeat these two steps until all the actions you need to perform are completed.
-
Review the recorded actions.
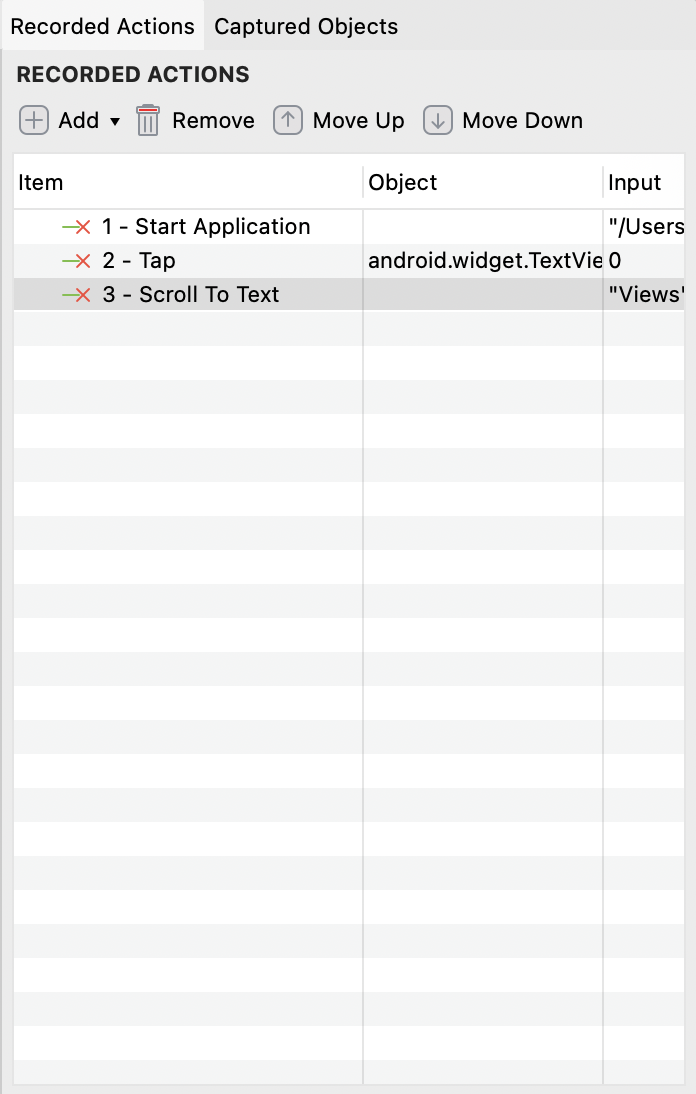
The Recorded Actions table shows all the recorded actions and related input/output you performed on the AUT. These items later become test steps in your test case.
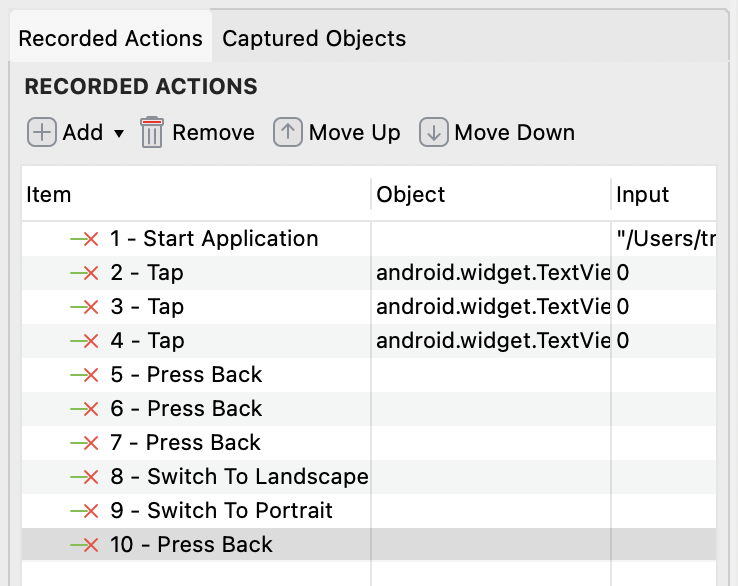
You can manually add new actions using keywords by clicking on Add, delete unwanted actions by clicking on Remove, or rearrange recorded actions by clicking on Move Up or Move Down.
-
Review properties of captured objects.
Captured Objects displays all interacted objects during the recording session. For each object captured, you can find its detailed properties shown in the Object Properties table by clicking on it.
The most important property of an object is its Locator Strategy and value. The default locator is a unique value in detecting that object.
If you prefer another locator strategy, choose among the provided options and generate a new locator. Then click Highlight to confirm your newly updated locator can detect the target object correctly.

For more information about locator strategies, see Locator strategies for Mobile objects.
-
When you finish a recording session, click Stop, then click Save Script.
The Add Element to Object Repository dialog pops up asking you where to store recently captured objects. You can decide whether to merge, create duplicates or replace the existing objects:

- Merge changes into existing objects: Add unique changes of the newly recorded object to the existing object, but still keep the existing object ID.
- Create duplicate objects: Save the newly recorded object separately from the existing object.
- Replace existing objects: The newly recorded object overrides the ID and attributes of the existing object.
-
After clicking OK, there are three (3) options to export the recorded actions to a test case:
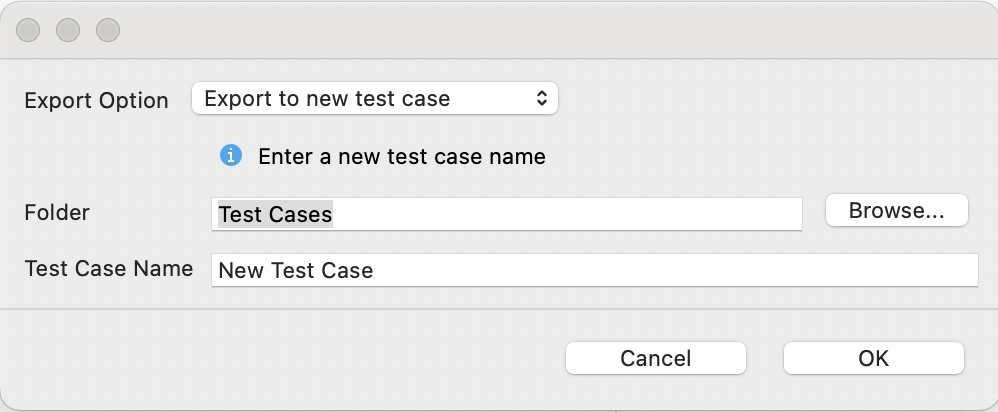
- Export to new test case: Creates a new test case with the recorded actions.
- Append to test case: Adds the recorded actions to the end of an existing test case.
- Overwrite test case: Replaces the existing actions in a test case with the recorded actions.
After choosing your Export Option, click OK.
You have successfully set up and used the Mobile Recorder utility in Katalon Studio to create a mobile test case.
Use Mobile Recorder on cloud devices
Choose to record on cloud devices to removes the need for complex local setups and makes it easier for users with minimal coding experience to conduct mobile testing.
You need to upload your application file to True Platform and directly record objects on a cloud device.
- You have purchased a Test Execution Cloud Mobile Native App subscription.
- Test Execution - Cloud integration enabled in your project. See Integrate Test Execution - Cloud with Katalon Studio.
Upload a mobile app
Follow this dedicated guide to upload your app to True Platform: Upload a mobile app to True Platform.
Record objects on a Cloud device
To begin capturing objects on a Cloud device, follow these steps:
-
From the main Toolbar, click the Record Mobile icon and select Katalon True Platform Devices.
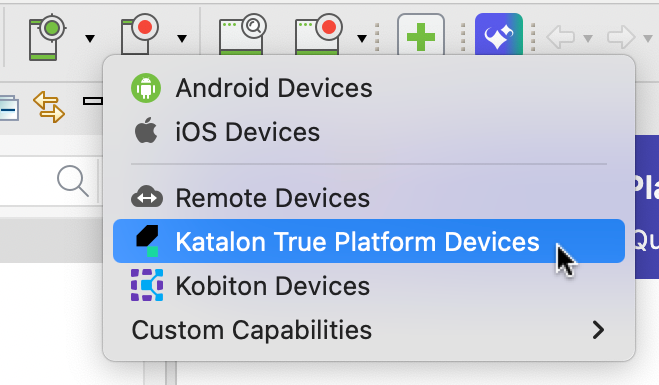
The Mobile Recorder dialog appears.
-
In the Test Execution Cloud Configurations section:
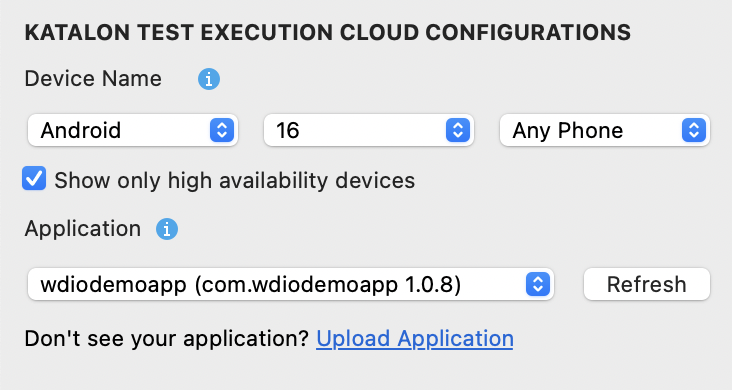
- Device Name: Select the mobile operating system (OS), the version of the OS, and Studio will list out the available devices accordingly.
You can also select Any Phone or Any Tablet from the top of the list to let the system choose a suitable device that meets your requirements.
- Show only high availability devices: This option, enabled by default, filters the list to show devices with high availability status. You can then choose a device for testing without delays.
- When enabled: Only devices with high availability status are shown.
- When disabled: All devices are shown.
- Application: Select the application file you want to test from your TestOps uploads.
-
Click Start on the action bar to launch the AUT.
-
Follow from Step 4 of Record a mobile application.
Available Actions
Available Actions contains multiple mobile action buttons that can be performed on the AUT.
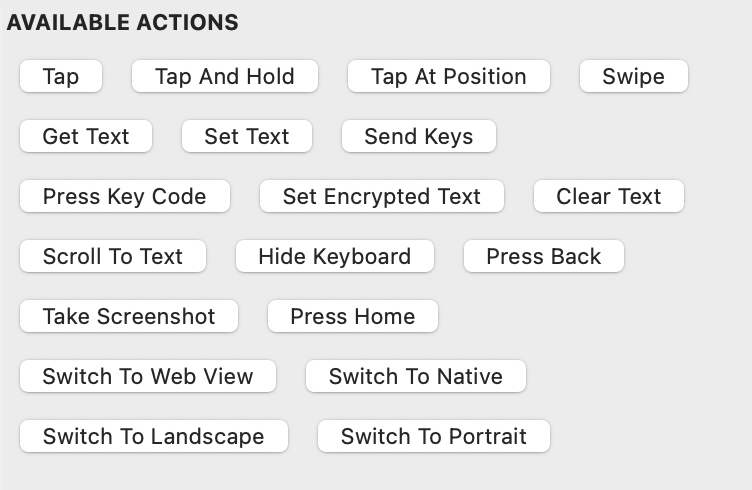
There are two types of actions:
- Object action: Require selecting an object in Device View or All Objects. After selecting, you can see which actions are enabled for that object.
- Application action: Do not require selecting an object to perform.
| Available Actions | Description |
|---|---|
| Tap | Tap on a mobile element. |
| Tap And Hold | Tap and hold on a mobile element for a duration. |
| Swipe | Simulate swiping fingers on the mobile device. |
| Get Text | Get the text of a mobile element. |
| Set Text | Set the text on a mobile element. It also clears the previous value of the mobile element. |
| Send Keys | Simulates keystroke events on the specified element, as though you typed the value key-by-key. |
| Set Encrypted Text | Enter an encrypted text in an input field and clear the existing value of the input field. To encrypt a raw text, from the main menu, Help > Encrypt Text. |
| Clear Text | Clear text of a mobile element. |
| Scroll To Text | Scroll to an element which contains the given text. |
| Hide Keyboard | Hide the keyboard if it is showing. |
| Press Back (Available on Android only) | Simulate pressing back button on a mobile device. |
| Press Home | Simulate pressing the home button on a mobile device. |
| Take Screenshot | Take a screenshot of the current device screen. |
| Switch To Web View | Switch the current device to web view context. |
| Switch To Native | Switch the current device driver to native context. |
| Switch To Landscape | Switch the current mode of the device to landscape mode. |
| Switch To Portrait | Switch the current mode of the device to portrait mode. |
Validate UI elements
Besides the available actions, you can right-click on any element in Device View or All Objects to access the context menu. Then, you can capture the selected object or add Verify and Wait keywords as test steps.
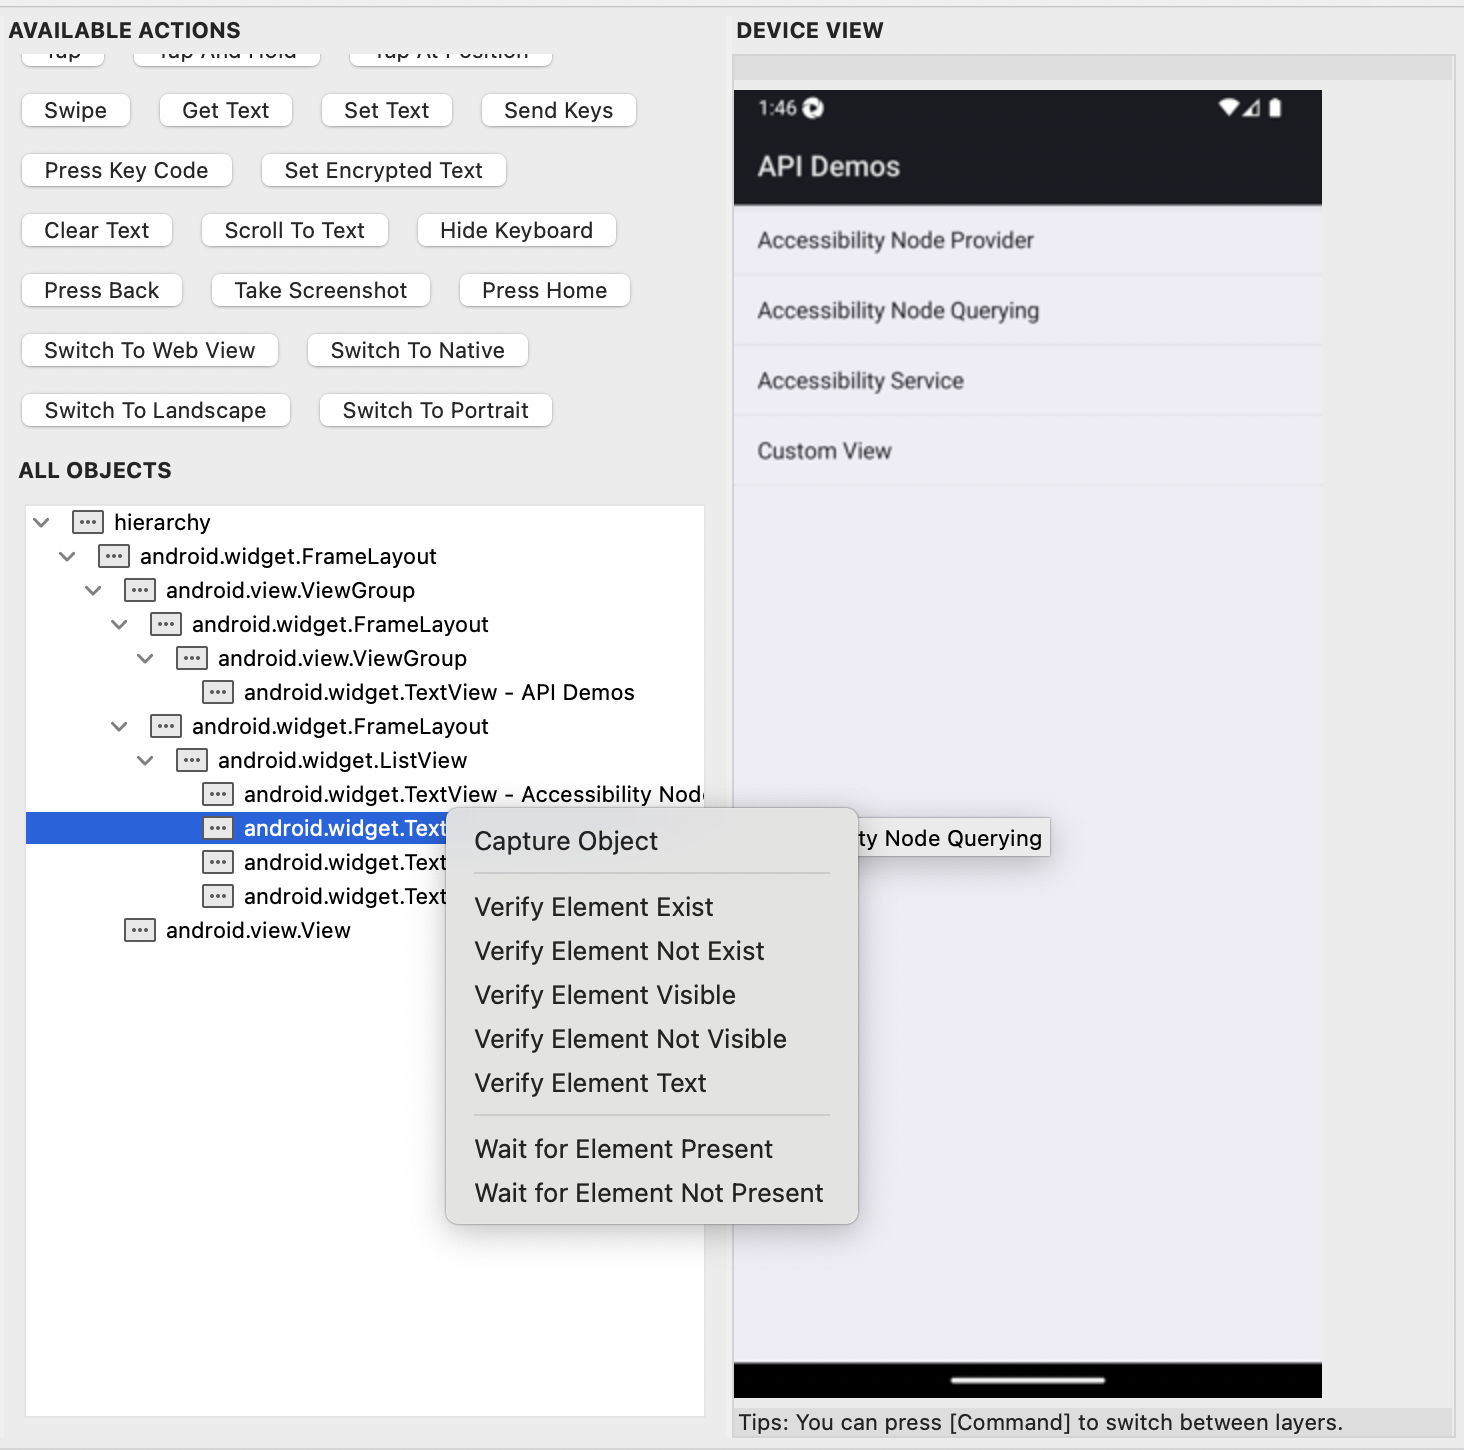
The selected verification action is recorded in Recorded Actions table. Double-click on the Input field to add necessary values to some keywords.
| Available Actions | Description |
|---|---|
| Capture Object | Used for capturing an object. |
| Verify Element Exist | Verify if a mobile element is present. |
| Verify Element Not Exist | Verify if a mobile element is NOT present. |
| Verify Element Visible | Verify if a mobile element is visible |
| Verify Element Not Visible | Verify if a mobile element is not visible. |
| Verify Element Checked | Verify if a mobile element is checked. Applicable to:
|
| Verify Element Not Checked | Verify if a mobile element is not checked. Applicable to:
|
| Verify Element Text | Verify the text of an element. After adding this keyword, you need to get text and parse it in the Input. |
| Wait for Element Present | Wait for the given mobile element to present within the given time (in seconds). |
| Wait for Element Not Present | Wait for the given element to NOT be present within the given time (in seconds). |
Use Mobile Recorder with custom desired capabilities for remote Appium devices
Katalon Studio now supports the use of custom desired capabilities with remote Appium type when using the Record Mobile and Spy Mobile features. This enhancement is especially useful when working with multiple remote device types.
Previously, users had to manually add custom desired capabilities under the Remote option each time, which added unnecessary setup time. With this enhancement, users can define their desired configurations under Project > Settings > Desired Capabilities, and simply select the appropriate device setup when initiating a recording or spying session. This eliminates the need to reconfigure the Remote settings each time, streamlining the workflow and saving time in mobile automation projects.
- You have added your custom mobile desired capabilities with remote Appium type in Project > Settings > Desired Capabilities > Custom. See Add custom capabilities for mobile testing in Katalon Studio.
Record mobile objects using custom desired capabilities
To begin mobile objects using custom capabilities, follow these steps:
-
From the main Toolbar, click the Record Mobile icon and select Custom Capabilities.

-
Select the custom desired capability.
noteThe new Custom option in the Record/Spy menu displays custom desired capabilities that are relevant to mobile devices only. Since desired capabilities are defined as key-value string pairs, Katalon Studio determines their relevance based on mobile-specific keys such as
automationNameandplatformName. If these keys are not present in a desired capability object, it will not appear in the Custom menu — even if it is intended for a mobile device.
Configure object tree display
You can configure the display of the object tree for iOS device in Project Settings > Test Design > Mobile.
| Option | Description |
|---|---|
| Minimal | Default option. Uses the Driver.execute("mobile: source") method and displays minimal elements in the object tree. Better performance, but some elements might be missing. |
| Full | Uses the Driver.getPageSource() method and displays all elements in the object tree. Might cause performance issues. |