[Mobile] Set up iOS real devices
This article shows you how to set up a real device on a macOS machine. After setting up the device, you can test iOS applications with Katalon Studio.
- From version 11.0.0 onwards, Katalon Studio supports Appium 3.0.0 or later for mobile testing.
- iOS mobile testing is not supported in Windows or Linux.
1. Install Xcode
Install Xcode version 10.2 or newer. You can download Xcode from the Apple Developer website: Download Xcode.
Xcode must support the current version of your macOS and iOS device. Check that your macOS and iOS device are compatible with Xcode in this document supported iOS environments in Katalon Studio and Apple Developer document System requirements.
2. Install Appium, Xcode command-line tools, and other iOS dependencies
Install with built-in tools
You can install Appium, Xcode command-line tools (Xcode CLT), Homebrew, NodeJS, and other iOS dependencies with Katalon Studio built-in tools.
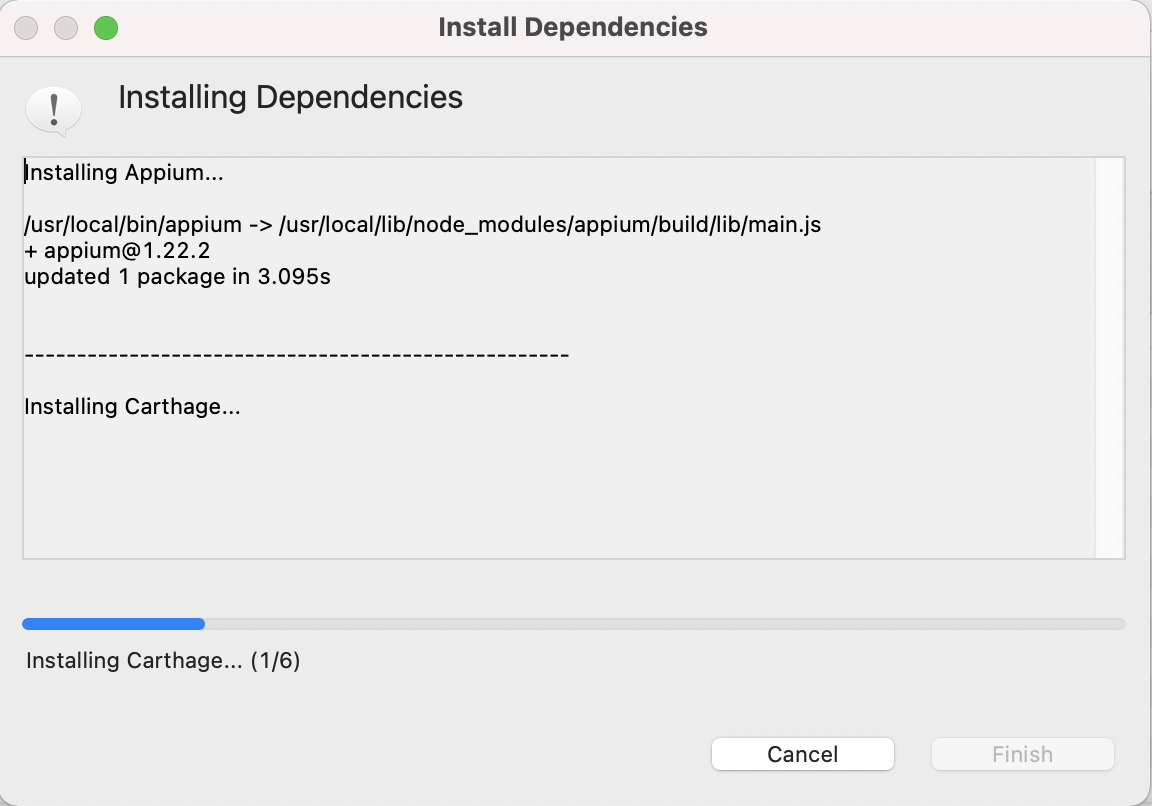
- Go to Tools > Set up iOS environment and select Install Dependencies.
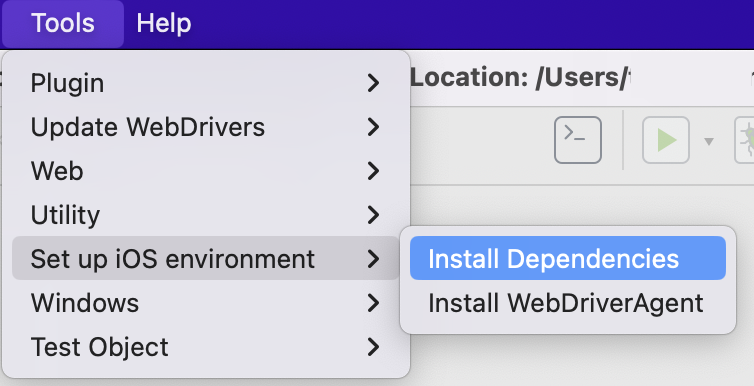
- Katalon Studio will automatically install the latest version of Xcode CLT, Appium, Homebrew, NodeJS, and other iOS dependencies.
Install manually
-
Install Xcode command-line tools. You can download the command-line tools compatible with your Xcode version from the Apple Developer website here: Download.
Alternatively, run the following commands in this order in Terminal:
xcode-select --installsudo xcode-select -s /Applications/Xcode.app/Contents/Developer -
Download and install Node.js from the Node.js website: Node.js Downloads.
Make sure you install Node.js into a location where you have full Read/Write permissions.
-
Install Appium 3 and the Appium XCUITest Driver with the following commands in Terminal:
npm i --location=global appium@3.0.0
appium driver install xcuitest@7.21.1noteIf you are using emulators other than Xcode simulators, some emulators come with Appium installed. If you want to run an application on an emulator, check your emulator settings before installing Appium.
-
Install Homebrew. Homebrew is a package manager that makes it easy to install extra dependencies. To install Homebrew, follow the instructions on the Homebrew website: Homebrew.
-
After installing Homebrew, you can now install the following dependencies in Terminal:
-
Install
libimobiledevicewith the following command:brew install libimobiledevice
For more details on the supported Appium and driver versions, refer to Execute mobile tests with Appium.
-
3. Set up the real iOS device
You have enrolled in the Apple Developer Program. To learn more about Apple Developer Program enrollment, refer to this Apple document: Enrollment.
-
Register your device for development with Xcode in Apple Developer. To learn about registering your device in Apple Developer, refer to this Apple document: Register a single device in Apple Developer.
-
In Xcode > Preferences > Account, click Add (+) to enter your Apple Developer Account ID and password.
-
Connect your iOS devices to your computer via a USB cable. Confirm to accept or trust the phone.
-
To enable UI Automation on the iOS device, navigate to Settings > Developer. In the UI Automation section, turn on Enable UI Automation.
-
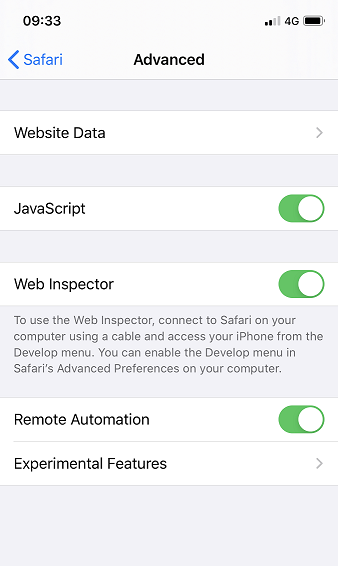
If you want to execute mobile browser tests (Safari on iOS), enable the following settings in Settings > Safari > Advanced:
- JavaScript
- Web Inspector
- Remote Automation
4. Install the WebDriverAgent
The WebDriverAgent is a WebDriver server used to control iOS devices remotely. For detailed instruction on WebDriverAgent installation, refer to Install WebDriverAgent for iOS devices.
5. Distribute your app to registered devices
To distribute your app for testing to registered devices, you need to archive and export an .ipa file. Do as follows:
Prepare your app for distribution
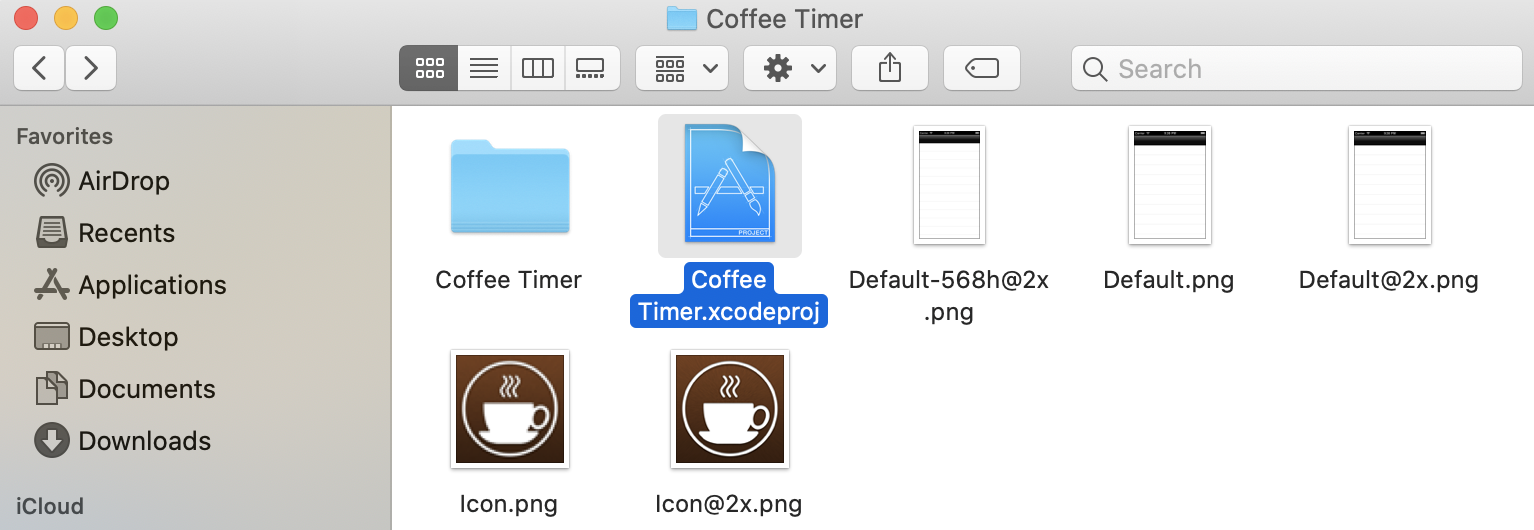
- Open the project file with Xcode. For example, to open
Coffee Timer.xcodeproj, go to your project folder > App > Your-First-iOS-App > Coffee Timer. Double-click theCoffee Timer.xcodeprojfile.
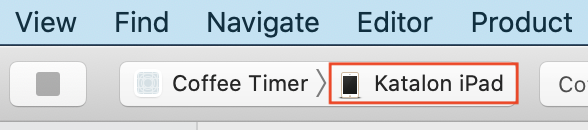
- After opening the project in Xcode, select a registered iOS device to launch the apps.
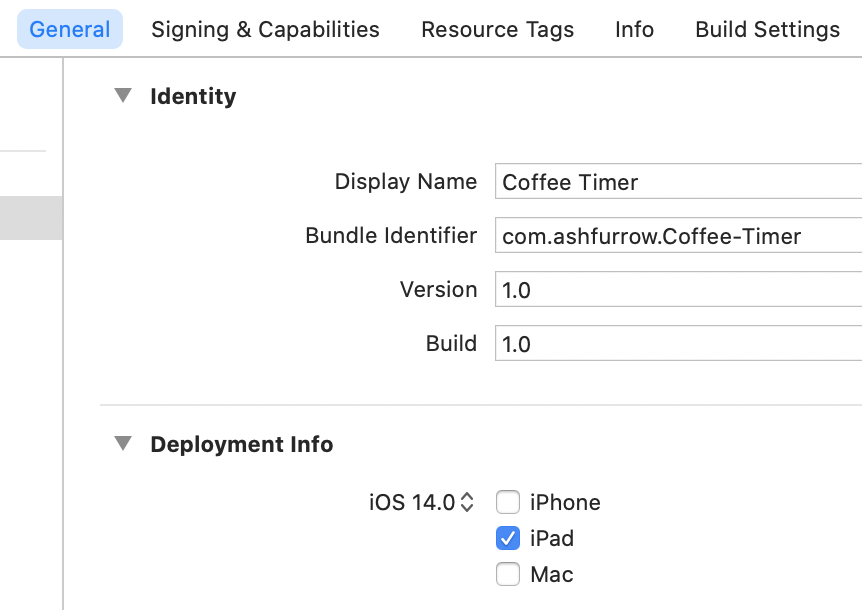
- In the General tab, set deployment iOS version and select device type in the Deployment Info section.
-
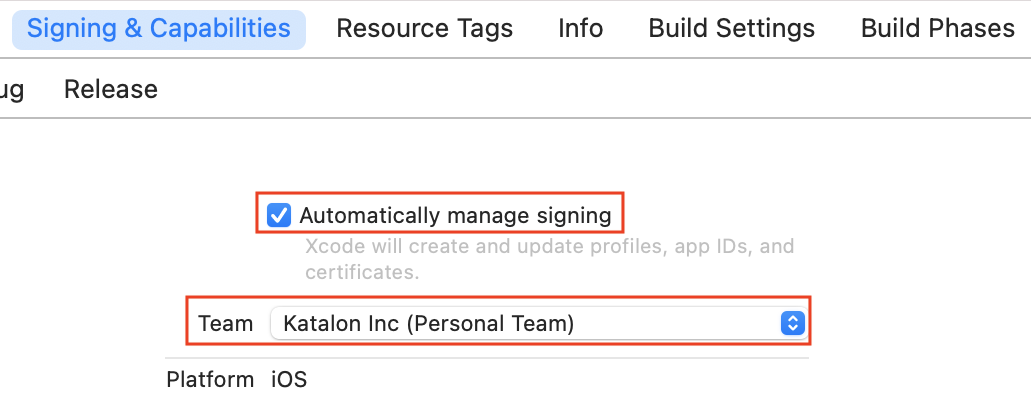
Switch to the Signing & Capabilities tab, check the Automatically manage signing box, then choose the team that has your device registered in the Apple Developer Portal.
By choosing the Automatically manage signing box, Xcode manages code signing assets for you. To learn more about automatic signing, refer to this Apple document: Automatic signing.
- To build the
.ipafile, click Product > Build.
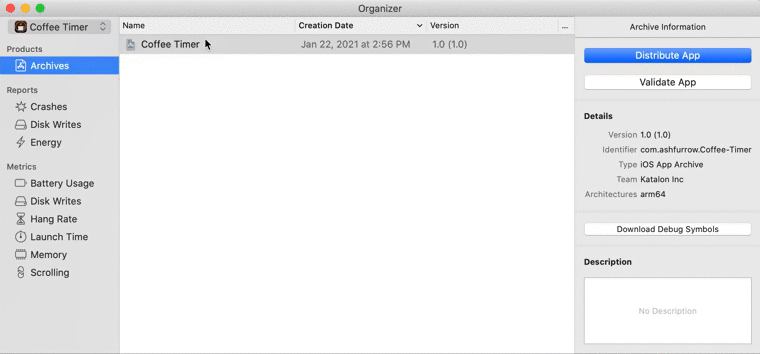
Create an archive of your app
To archive the .ipa file, click Product > Archive. If the archive builds successfully, it appears in the Archives organizer.
You can't create an archive if you set the run destination to a simulator.
Export your app using an ad hoc or development provisioning profile
When you export the app, Xcode re-signs the app using the code signing assets that you choose. To learn more about the distribution method, refer to this Apple document: Distribution method.
-
To open the Archives organizer, choose Window > Organizer and click Archives.
-
Select the archive you want to export, then click Distribute App and follow the instructions to get the
.ipafile. Here, we choose a development provisioning profile to export theCoffee Timer.ipafile.
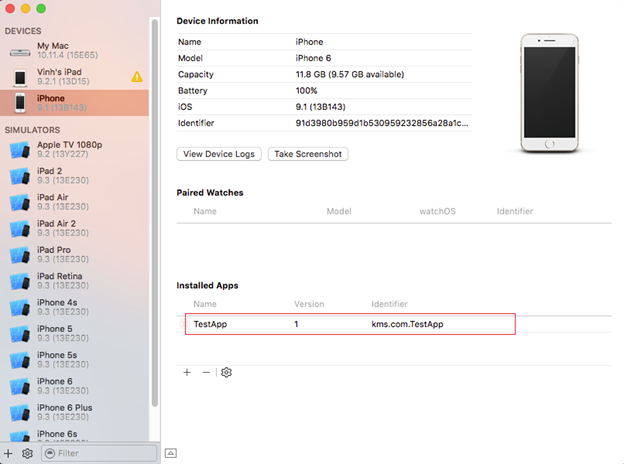
Install the app on user devices
-
Open Xcode, then navigate to Window > Devices and Simulators.
-
Choose your device from the Devices list.
-
Click Add (+) to browse the
.ipafile.
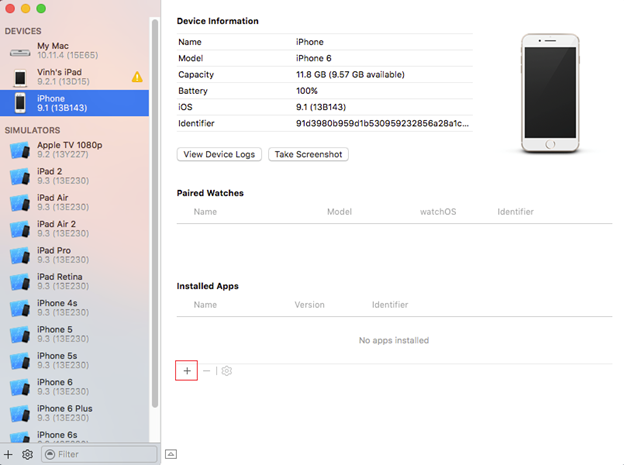
- Once installed successfully, the application appears in the Installed Apps section.