Execute mobile tests with Appium 2.x
Since January 1, 2022, the Appium core team no longer maintains Appium 1.x. As such, all latest versions of the officially supported platform drivers are no longer compatible to Appium 1.x, and requires Appium 2 to run.
- Katalon Studio added support for Appium 2 from version 9.1.0 and later versions. If your team is migrating from Appium 1.x to Appium 2.x, refer to the following documentation:
In Appium 2.x, one major change is the independence of drivers. This change separates tools and processes of building and using drivers for different platforms. With the ability to install and work with decoupled web drivers based on your application platform (iOS, Android, etc.), you can reduce your setup time and improve mobile testing performance in Katalon Studio.
The following documentation provides guidance on how to configure and execute mobile tests with Appium 2.x, and more.
Requirements
- Katalon Studio version 9.1.0 and later versions.
- Node.js 14+.
- Node Package Manager 8+ (NPM). This is usually bundled with Node.js, but you can upgrade independently.
We recommend downloading and installing Node.js from the official website instead of using package manager (e.g., brew or apk) to avoid issues.
Install Appium 2.x and execute mobile tests
- Install Appium 2.x via NPM using the following command:
npm i --location=global appium - Installing Appium 2.0 only installs the Appium server, but not the drivers since all drivers have been isolated from the Appium server app. As such, install the Appium XCUITest Driver for iOS and Appium UiAutomator2 Driver for Android.
For iOS: The Appium XCUITest Driver, which is based on the Apple XCTest framework, is used for iOS native and web apps (via hybrid mode), and can only be used on macOS. To learn more about Appium XCUITest Driver, refer to the Appium repository on GitHub: appium-xcuitest-driver.
Run the following command to install the latest version of Appium XCUITest driver (version 7.21.1):
appium driver install xcuitest@7.21.1Note:If you are using Appium 2.0 and Xcode 14 to test with physical iOS devices, you need to manually install WebDriverAgent. See the following article for more information: Build WebDriverAgent for real iOS devices with Appium 2.0 and Xcode 14.
For Android: The Appium UiAutomator2 Driver for Android native and web apps (via hybrid mode) is based on the Google UiAutomator framework. To learn more about Appium UiAutomator2 Driver, refer to the Appium repository on GitHub: appium-uiautomator2-driver.
Run the following command to install the recommended version of the Appium UiAutomator2 driver (version 3.7.0):
appium driver install uiautomator2@3.7.0
- If you have both Appium 1 and Appium 2 on your machine, make sure to specify the Appium version to execute your test with. To do so, go to Preferences > Katalon > Mobile > Appium Directory .
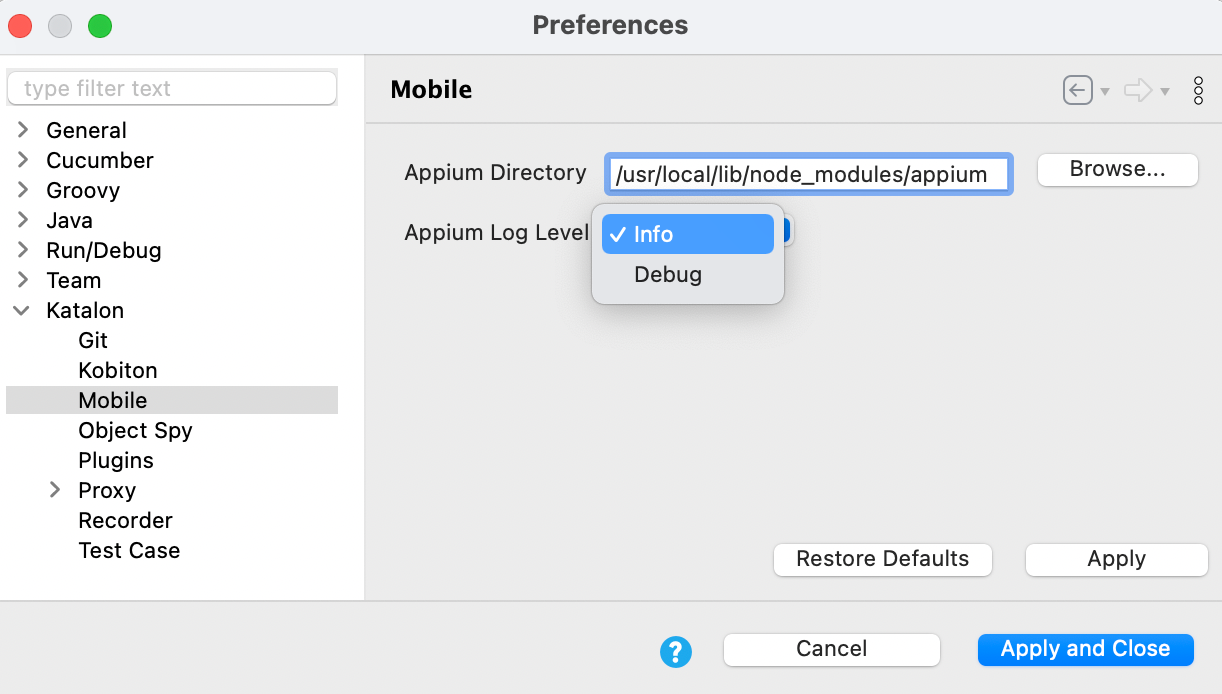 Click Apply and Close.
 - Execute your mobile test.
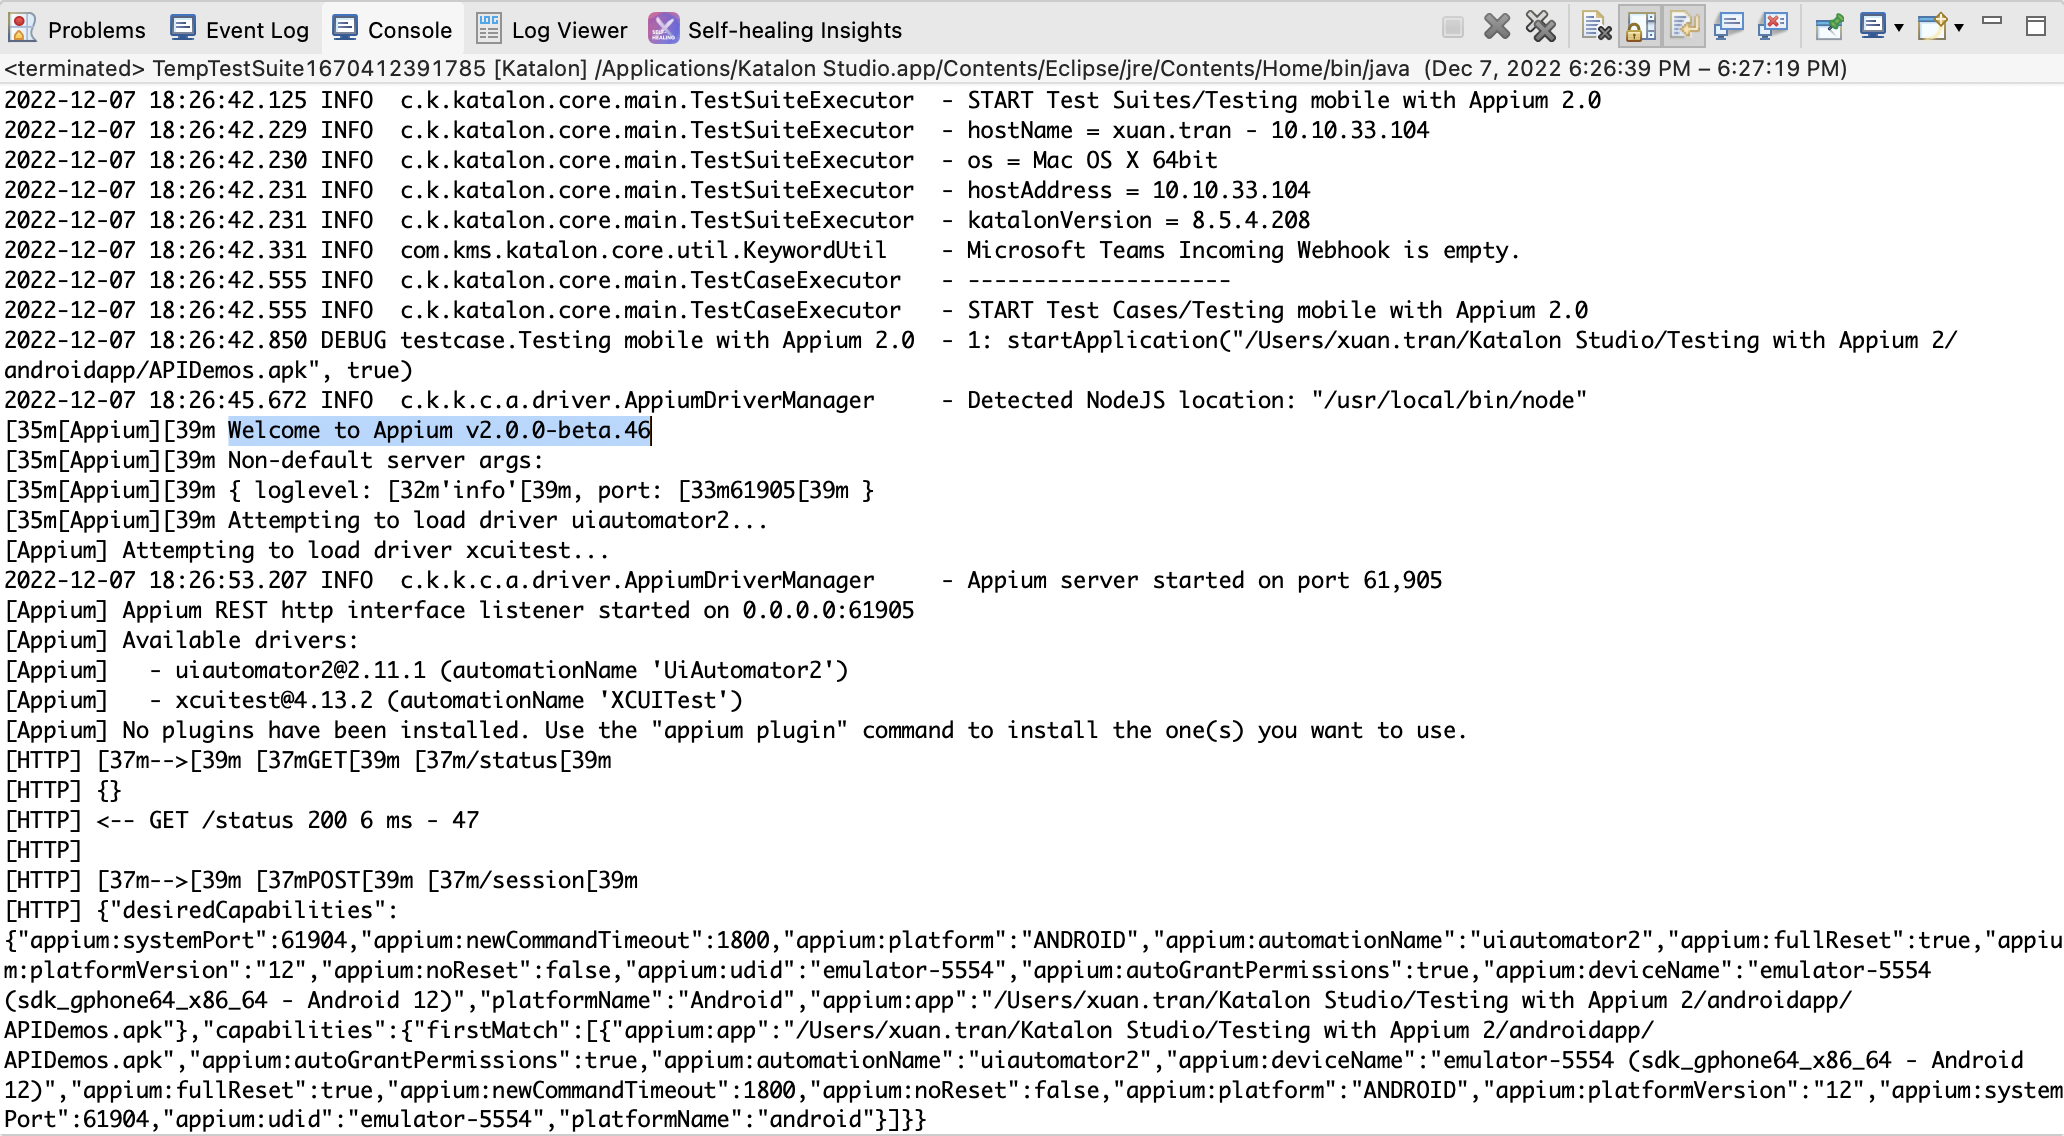
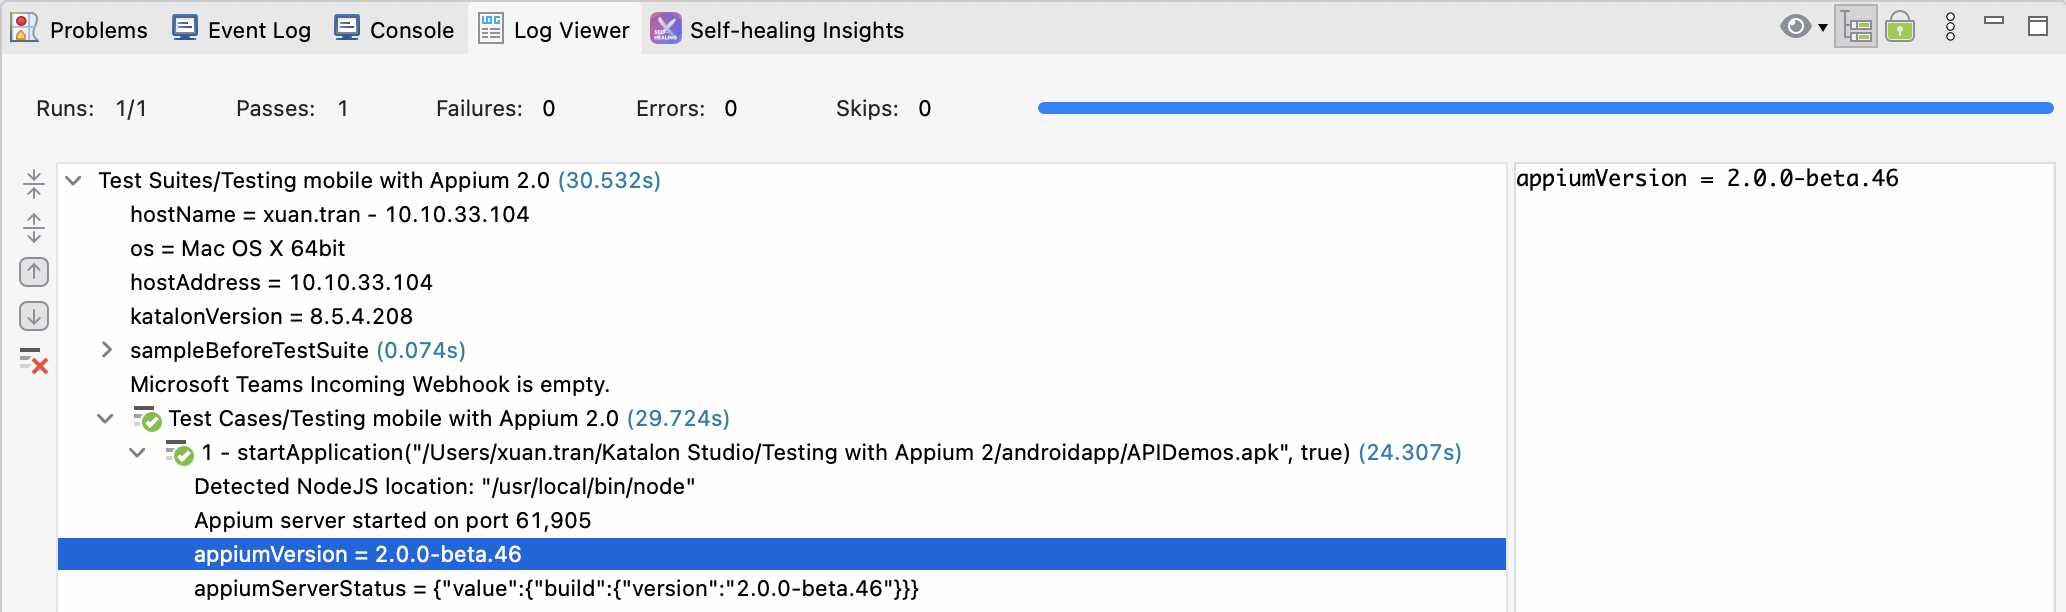
To learn more about execution logs in Katalon Studio, refer to the following document: View and customize execution log in Katalon Studio.
For troubleshooting, refer to the following document: Unable to Start Application on this device: Appium directory is invalid.
Build WebDriverAgent for real iOS devices with Appium 2.0 and Xcode 14
You have installed the latest version of the Appium XCUITest Driver. See Install Appium 2.x and execute mobile tests.
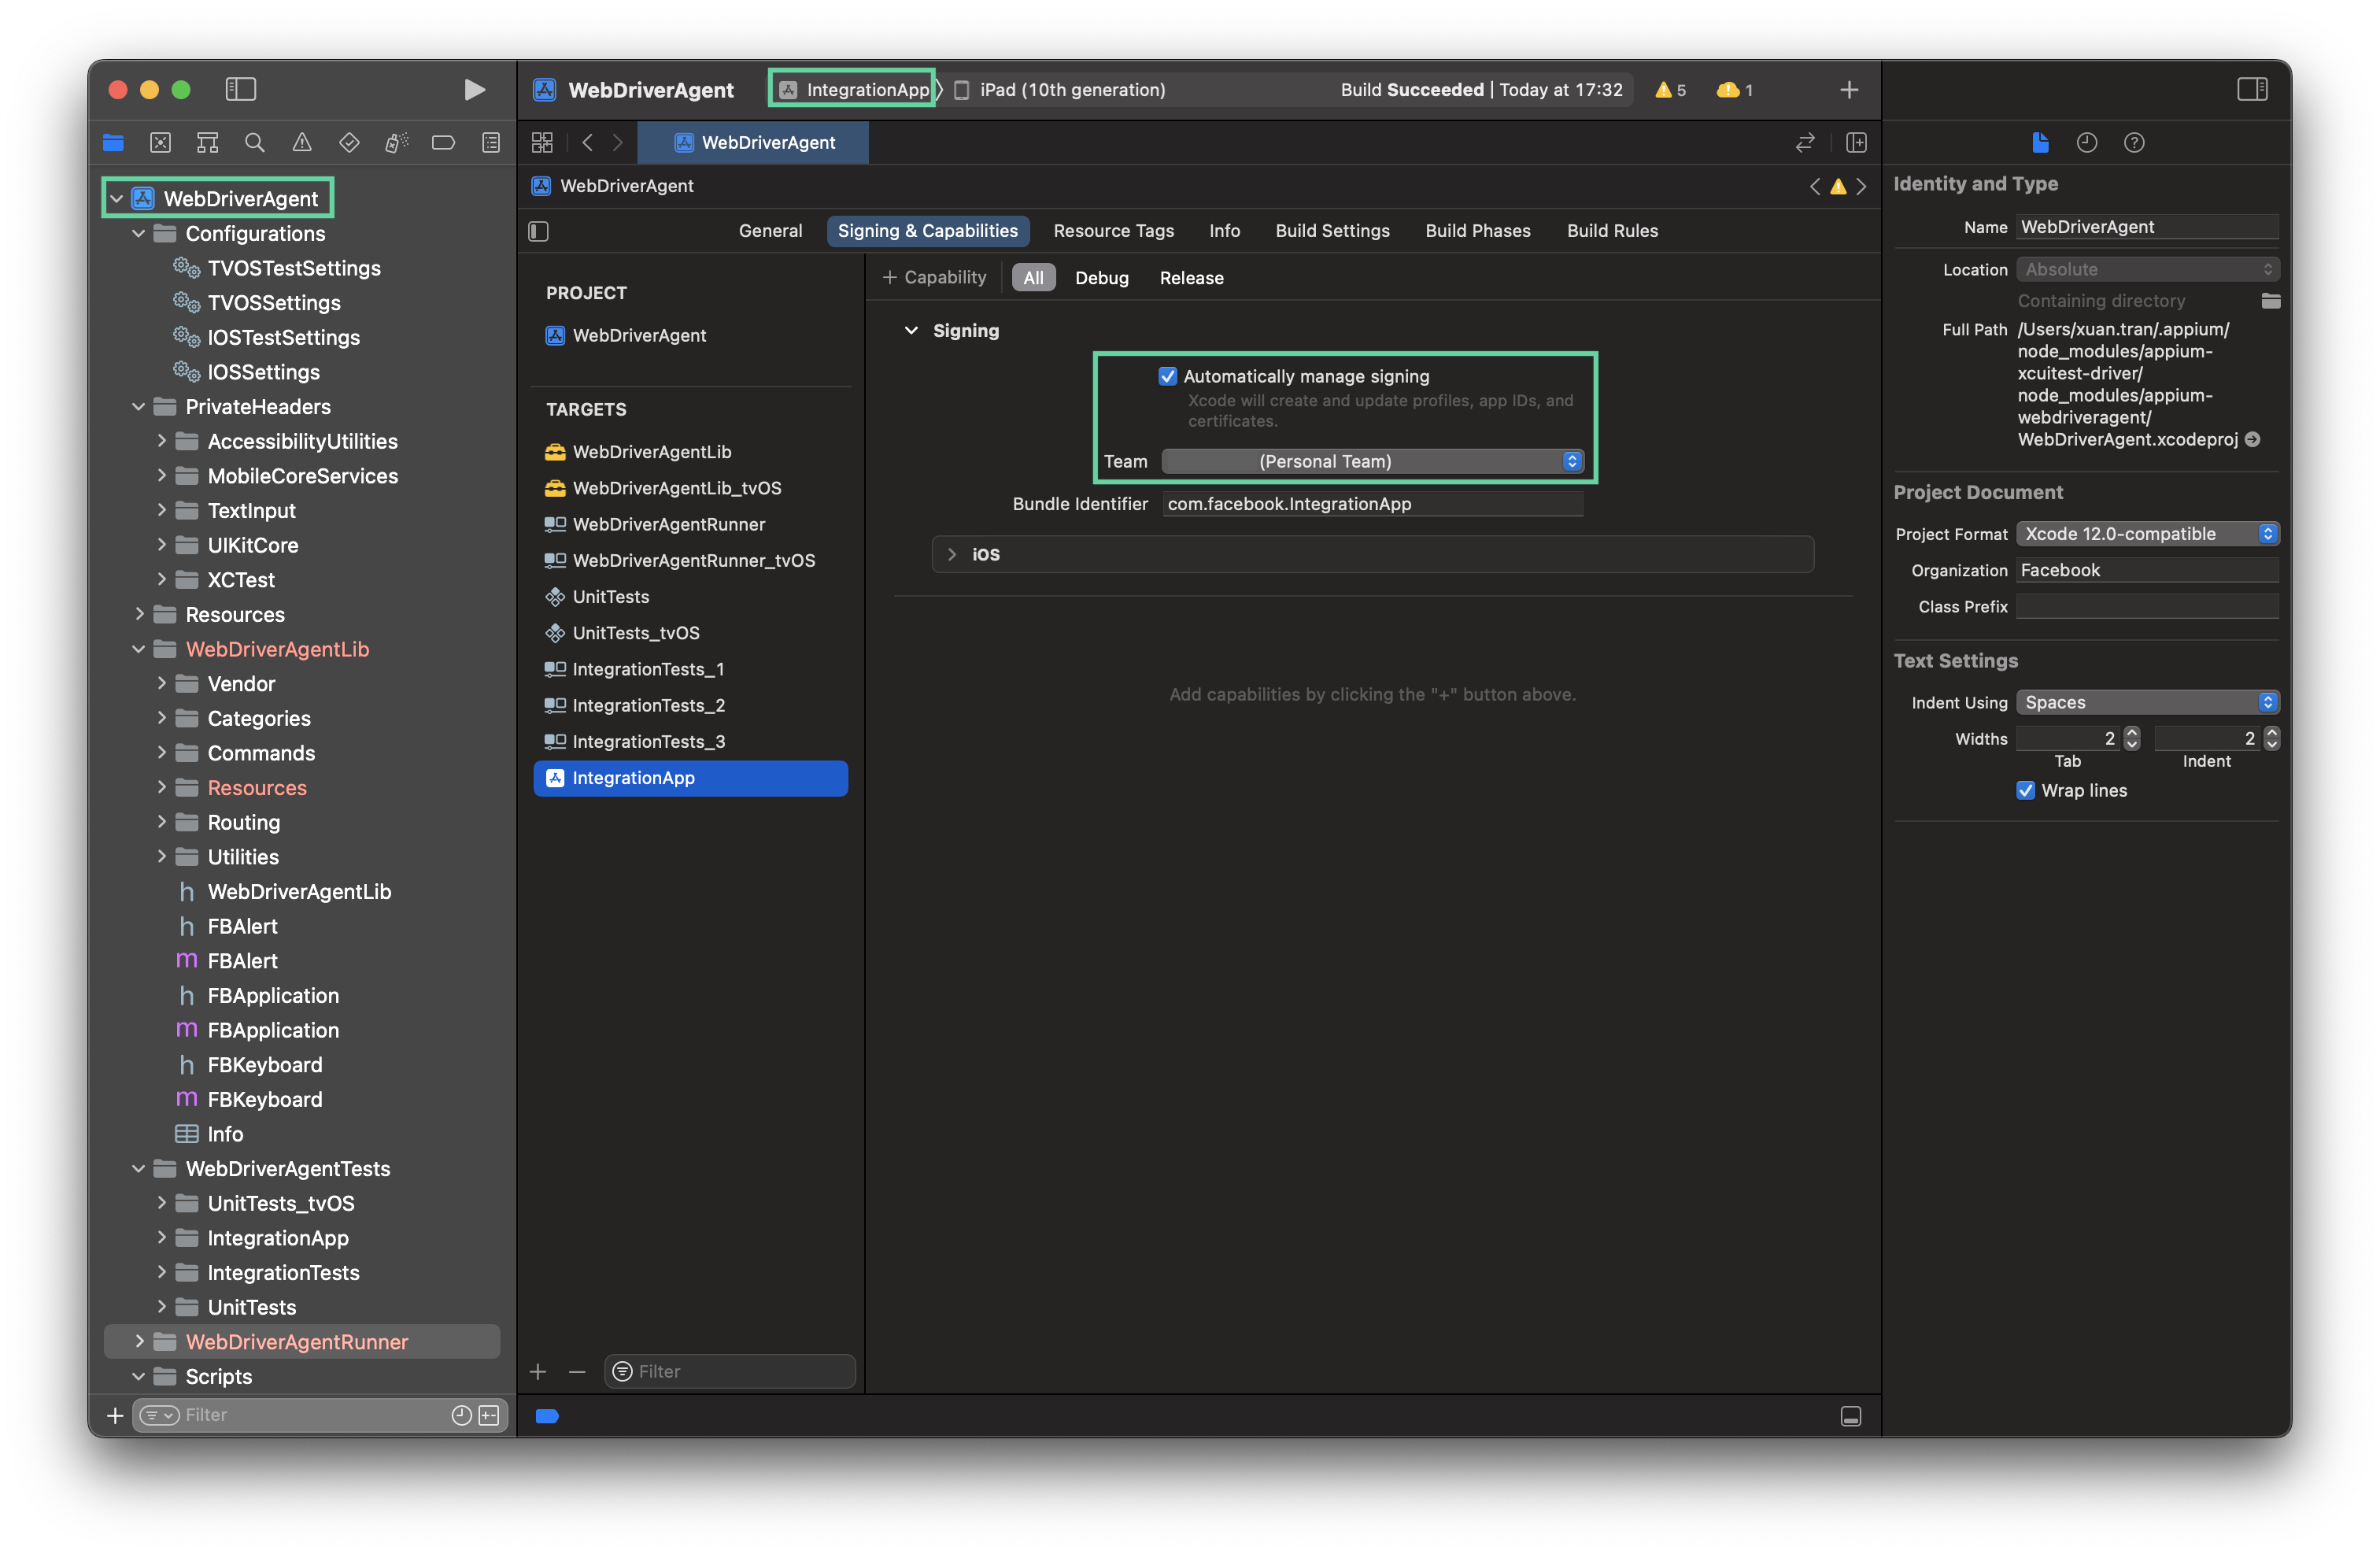
- Build the IntegrationApp target with the following steps:
- Select the IntegrationApp target. In the Signing & Capabilities section, check the Automatically manage signing box, then choose a team added in Step 1.
- Select the IntegrationApp target. In the Signing & Capabilities section, check the Automatically manage signing box, then choose a team added in Step 1.
- Build the WebDriverAgentLib target with the following steps:
- Select the WebDriverAgentLib target. In the Signing & Capabilities section, check the Automatically manage signing box, then choose a team added in Step 1.
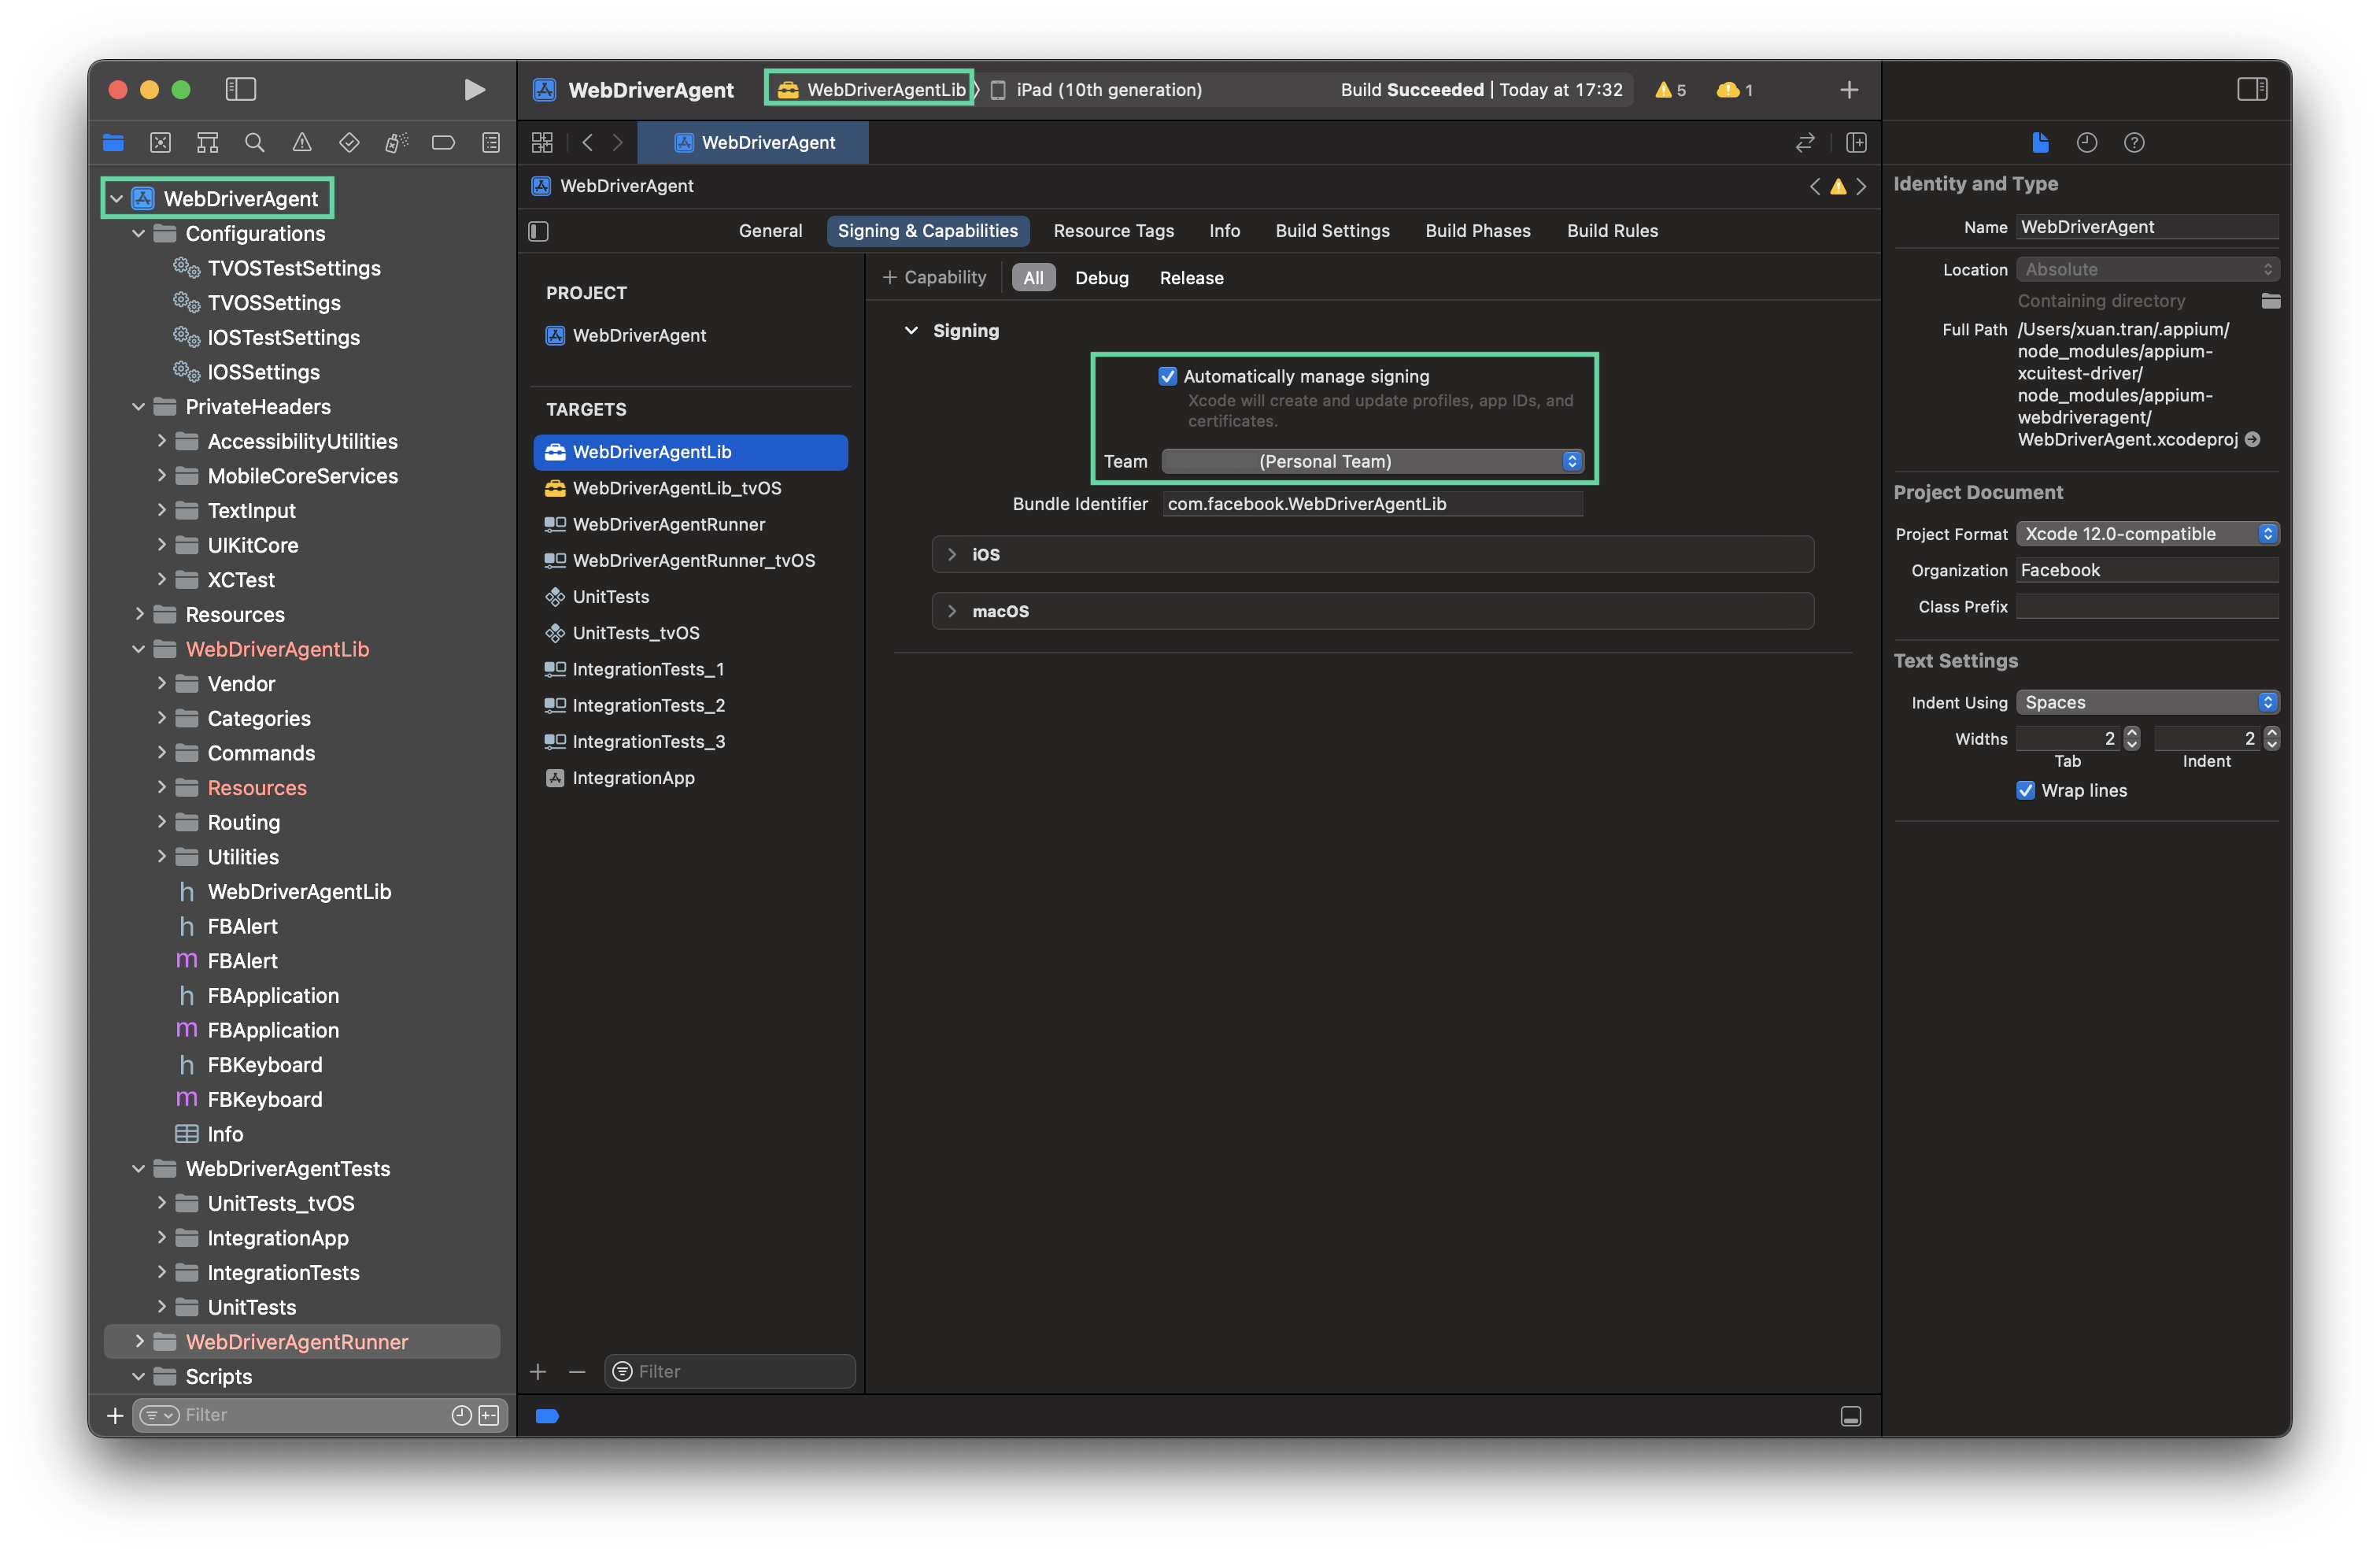
- Select the WebDriverAgentLib target. In the Signing & Capabilities section, check the Automatically manage signing box, then choose a team added in Step 1.
- Build the WebDriverAgentRunner target with the following steps:
- Select the WebDriverAgentRunner target. In the Signing & Capabilities section, check the Automatically manage signing box, then choose a team added in Step 1.
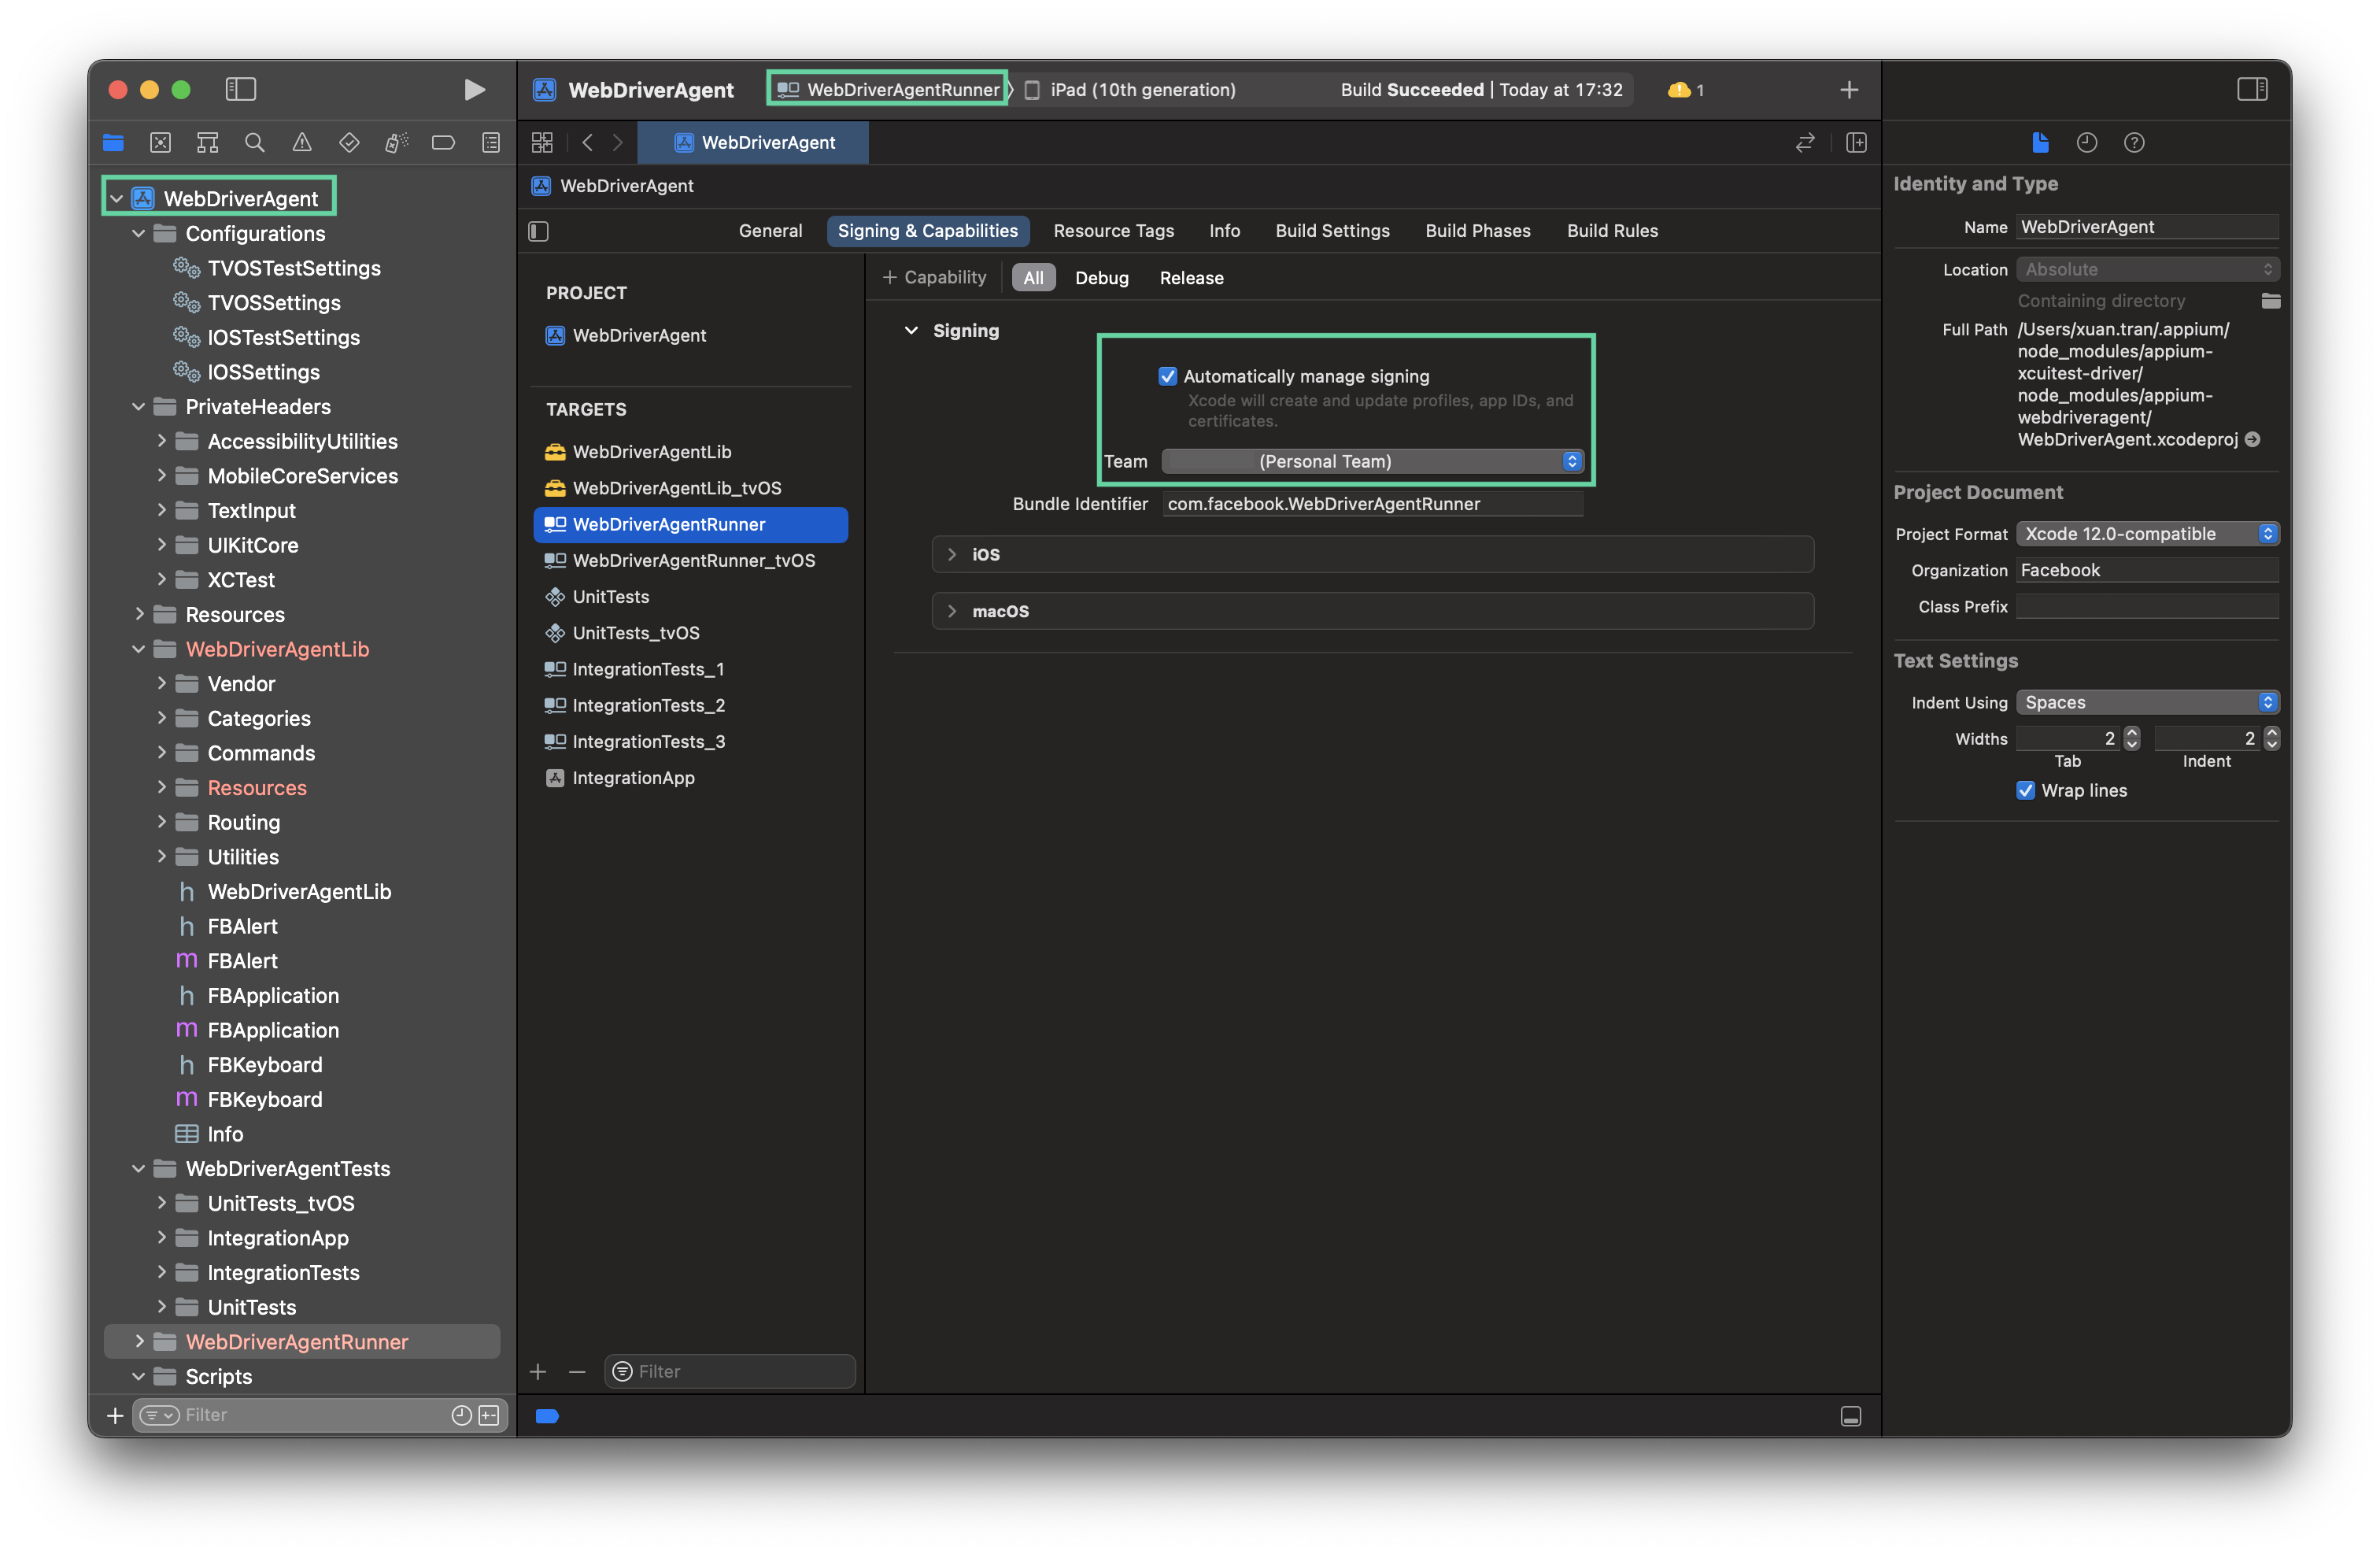
- Select the WebDriverAgentRunner target. In the Signing & Capabilities section, check the Automatically manage signing box, then choose a team added in Step 1.