GitLab Integration
This document explains how to set up and manage a GitLab integration in Katalon True Platform.
Connect GitLab to Katalon True Platform to sync test cases and test suites between the two systems.
Find your starting point:
- Setting up GitLab for the first time? → Start at Step 1
- Your org is already connected and you just need to link a repo? → Skip to Step 2
- You just need to push your edits back to GitLab? → Skip to Step 3
Step 1: Authorize the GitLab Connection (Account-level)
This step establishes the connection between Katalon True Platform and GitLab. No data is synced yet.
- You must have the Account Admin or System Admin role in Katalon True Platform to perform this action.
- The Personal Access Token (PAT) must be created by a user with full access to all repositories in the GitLab organization. If using a PAT with limited permissions may cause errors when integrating repositories at the project level.
-
Go to Account Settings > Integrations and click
+ Create Integration. -
In the Available Integration list, select GitLab.
-
Fill in the required fields:
- Integration Name: a custom label (max 50 characters).
- Organization Account URL: your GitLab org URL, e.g.
https://gitlab.com/your-org-name. - GitLab Personal Access Token: To generate a PAT, refer to this GitLab documentation on creating a personal access token.
- Description (Optional): Max 255 characters.
-
If connecting to GitLab Enterprise Server or a self-managed instance, fill in the same fields above.
Supported version: Gitlab Server 18.0.1-ee and above. You can optionally configure a Cloud Tunnel for local testing. See Local testing with Test Execution - Cloud in Katalon True Platform for steps to install the agent, generate tunnel, and manage tunnel availability.
- Click Test Connection to validate, then Save.
Result
To verify if the connection is active, navigate to Account Settings > Integrations. Your GitLab integration will be listed under the Integration list.
- If the status initially shows as Inactive, reload the page to update the status to Active.
- If the status shows Error, verify all required configuration fields, especially the Personal Access Token (PAT), and confirm it is valid and configured correctly in the account-level integration.
Step 2: Link Repository to Project (Project-level)
This step shows how to connect a specific GitLab repository/branch to your Katalon True Platform project and sync test data.
- Only Project Admins can perform this step. Even Account Admins and System Admins need the Project Admin role in the specific project to configure this
- A GitLab account must already be connected at the Account-level (Step 1)
-
Navigate to your specific project's UI > Settings > Integrations.
-
On your linked GitLab connection, click the right edge and select New configuration (Settings icon).

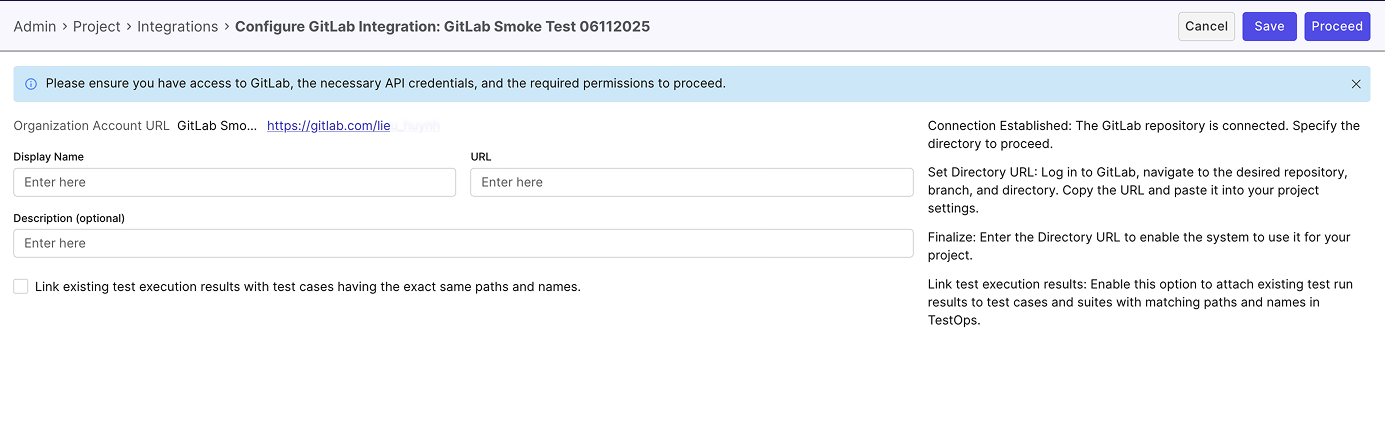
- Fill in the required fields:
- Display Name: A custom name for the linked project (max 50 characters).
- URL: The URL to the desired repository, branch, or directory from the linked GitLab account. Copy and paste the URL into this field.
- For example: If you linked a connection under
https://gitlab.com/your-group-name, then the URL should look like:
https://gitlab.com/katalon-test/katalon-project/tree/test/Test%20Casesn
- For example: If you linked a connection under
- Link existing test execution results with test cases having the exact same paths and names (Optional): Enable this if you want Katalon True Platform to automatically attach existing test results to test cases and test suites whose paths and names match your GitLab structure.
- Description (Optional): A brief description of this linked project (max 255 characters).
-
Click Proceed to sync data and finalize the connection. Katalon True Platform automatically syncs your project with the GitLab repository.
- A GitLab webhook is created automatically, enabling real-time updates such as test results and GitLab action triggers.
- If webhook creation succeeds → The integration status updates to Active.
- If webhook creation fails → The status shows Inactive, with an error message: "Failed to create GitLab webhook. Please try again." You can retry by clicking Proceed again once the issue is resolved.
Additional behavior:
- If the status initially shows as Inactive, reload the page to update the status to Active.
- If you modify the connection details and click Save, the changes are saved, but the status may remain Inactive. To sync data and finalize the connection, you must click Proceed.
-
[Optional] To edit an existing linked GitLab integration, click the Edit (pen) icon, make the necessary changes, and click Proceed. After editing, reload the page to ensure data is refreshed.
Step 3: Enable Updates to GitLab
This step is only required if you edit test cases in Katalon True Platform and want those changes to sync to GitLab.
- GitLab is connected at the account level (Step 1)
- A repository is linked at the project level (Step 2)
- You have write permissions for the repository in GitLab
By default, changes you make in Katalon True Platform (such as priority, assignee, or structure) remain local. To push these changes back to GitLab, you need to provide your own Personal Access Token (PAT). Katalon True Platform uses this token to sync changes on your behalf.
Each user must complete this setup individually.
- Go to User Settings > Personal Integration.
- Click the settings icon next to the integration you want to configure.
- Enter your User Email and GitLab Personal Access Token (PAT).
- Click Save.
Once saved, any edits you make to artifacts in linked repositories within Katalon True Platform will automatically sync back to GitLab.
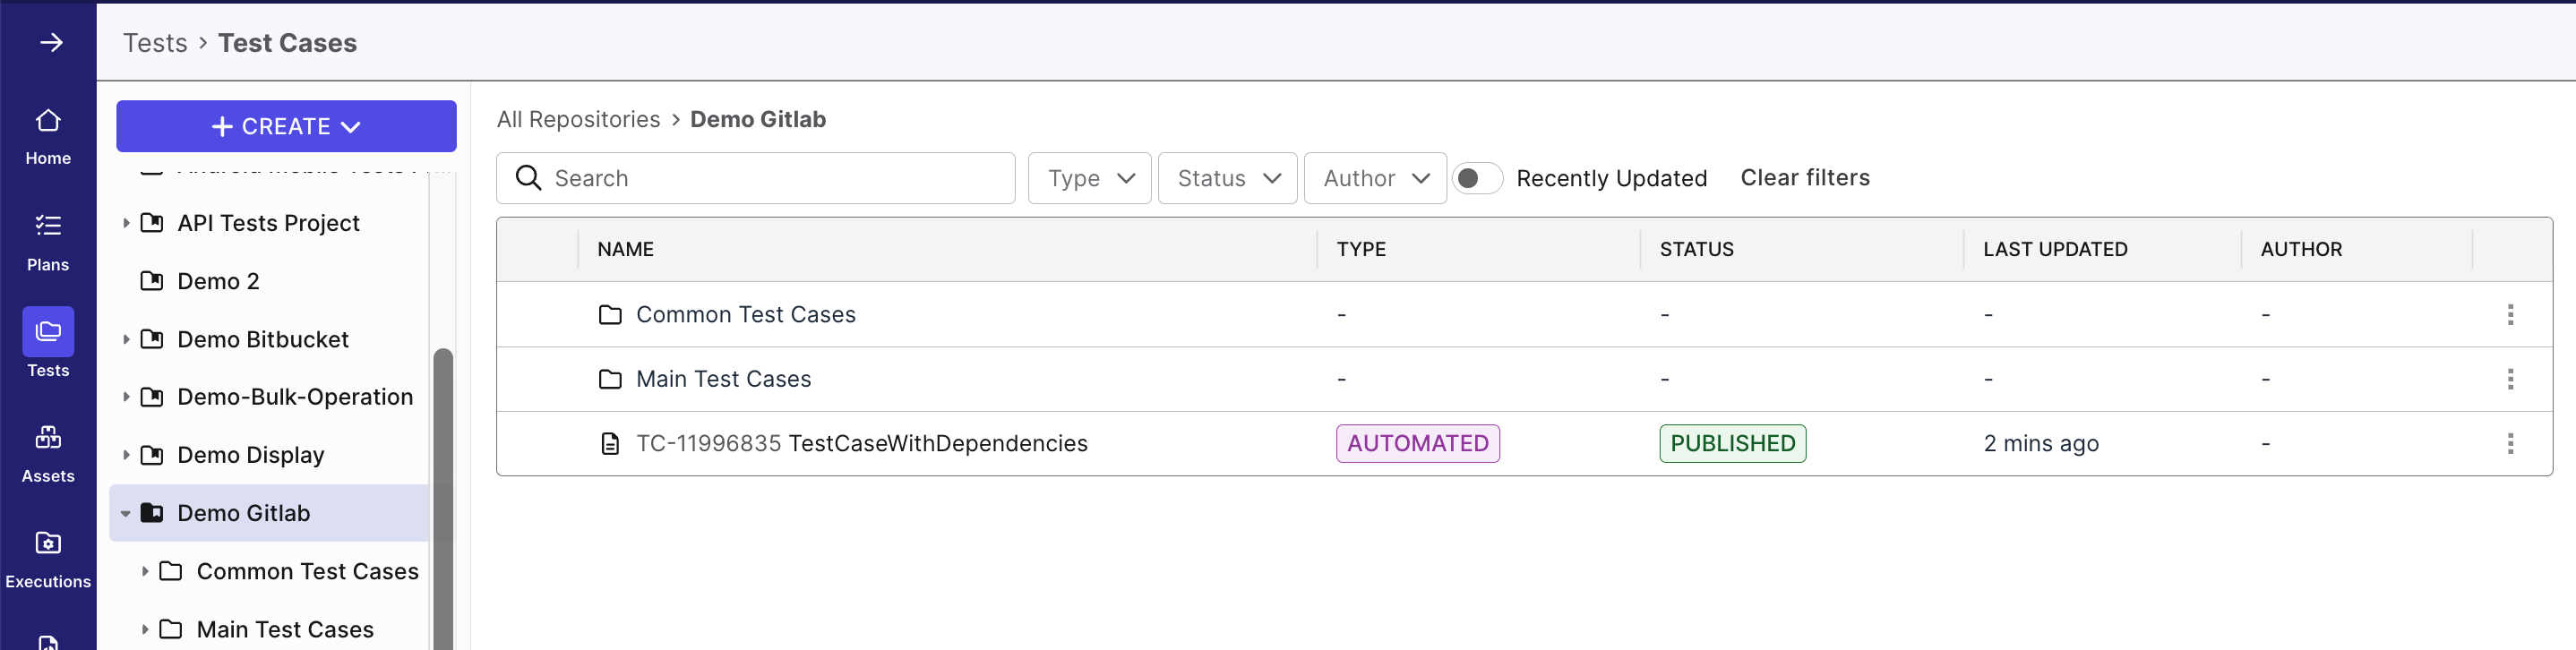
View Test Cases or Test Suites Synced from GitLab
To view test cases or test suites synced from the linked GitLab integration, navigate to Tests > Test Cases/Test Suites.
Managing Your GitLab Integration
Katalon True Platform provides multiple ways to manage GitLab integrations without losing historical data. This section covers how to disconnect, archive, and restore an integration when needed.
- Use Disconnect to disable Gitlab integration across all projects (Account-level).
- Use Archive to disable Gitlab connection for a single project (Project-level).
Katalon does not support permanently deleting integrations. This ensures audit history is preserved and enhances security and traceability.
Disconnect a GitLab Connection
Required role: Account Admin or System Admin.
Disconnecting makes the integration inactive across all projects. Katalon True Platform does not support fully deleting integrations, in order to preserve audit history.
-
Go to Account Settings > Integrations.
-
Click the Disconnect icon next to the connection.
-
Confirm by clicking Disconnect in the dialog.
=> The status changes to Inactive. All projects using this integration lose the ability to sync with GitLab.
-
To reconnect, click the Reconnect icon next to the integration and confirm. All projects will resume syncing once reconnected.
Archive a Linked Repo
Required role: Account Admin or System Admin.
Archiving disables the connection for that project only — other projects using the same GitLab integration are unaffected. Archived configurations no longer appear in Project Settings, and any scheduled test runs will be canceled at runtime.
- Go to Project Settings > Integrations.
- Click the right edge of your linked connection and select Archive.
- Confirm by clicking Archive in the dialog.
Result: The integration no longer appears in the Test Cases/Test Suites module. Any scheduled test runs in the Execution module will be automatically canceled at runtime.
Restore an Archived Integration
- Go to Project Settings > Integrations.
- Click New configuration (settings icon) on the GitLab connection.
- Enter the same repository URL as the archived configuration and click Proceed.
Katalon True Platform will restore the archived configuration rather than creating a duplicate.