Connect to Katalon Studio MCP Server
This document guides you through configuring the Katalon Studio MCP server and connecting it to your own AI assistant, such as Claude, Codex, Copilot, or Cursor. By doing so, you can work with your Katalon Studio project using your preferred AI model and tools without losing context.
Starting from version 11.1.0, you can customize the server configuration and host the Katalon Studio MCP server from either the Katalon Studio app or a command-line interface (CLI). Both options keep the same MCP server in the Running status. Choose the desktop option if you can keep the Katalon Studio GUI open, or use the standalone option to host the server from a CLI without keeping the GUI open.
If you also have a Katalon Platform subscription, you can add Katalon True MCP server as well, for a complete end-to-end testing workflow.
Choose how to host the MCP server
The following options are alternatives. Choose one based on your preference.
Option 1: Host from Katalon Studio
When you open Katalon Studio, an MCP server is automatically hosted with default settings:
- Port
33699 - No authentication
- All tools enabled
You must keep the Katalon Studio GUI open while using the desktop MCP server. Closing Katalon Studio stops the server. If you prefer not to keep the GUI open, host the server from a CLI instead.
You can configure the above settings by following these steps:
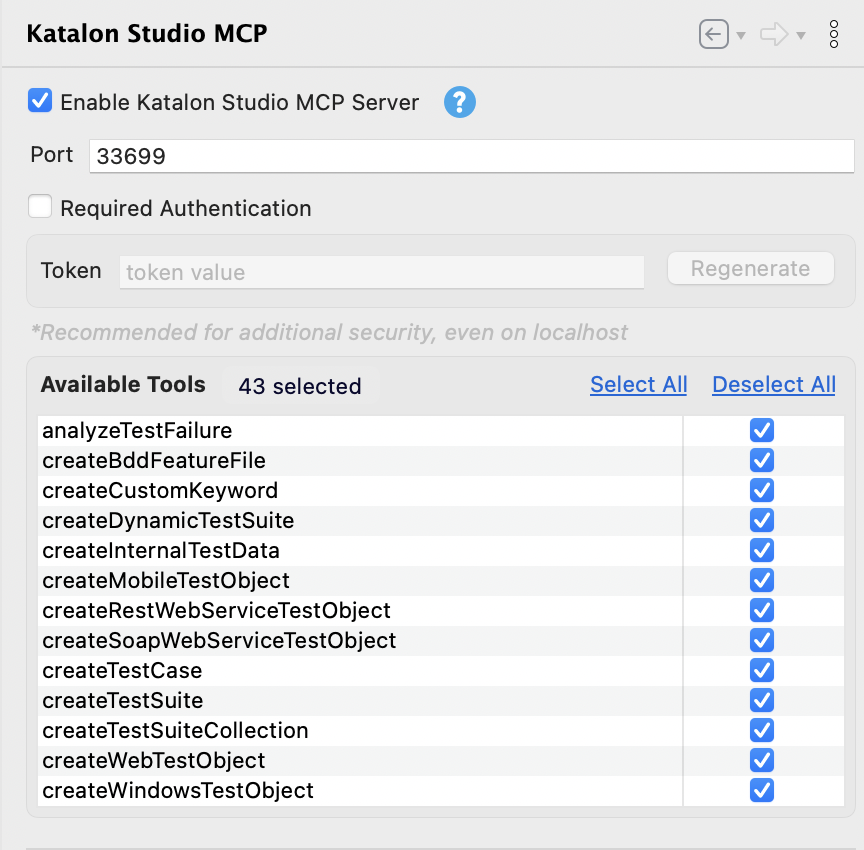
- Go to Preferences > Katalon > AI Configuration > ... > Katalon Studio MCP.
- Configure:
- Port: choose an available port.
- Authentication: enable to generate a secure token.
- Tools: select only what should be exposed.
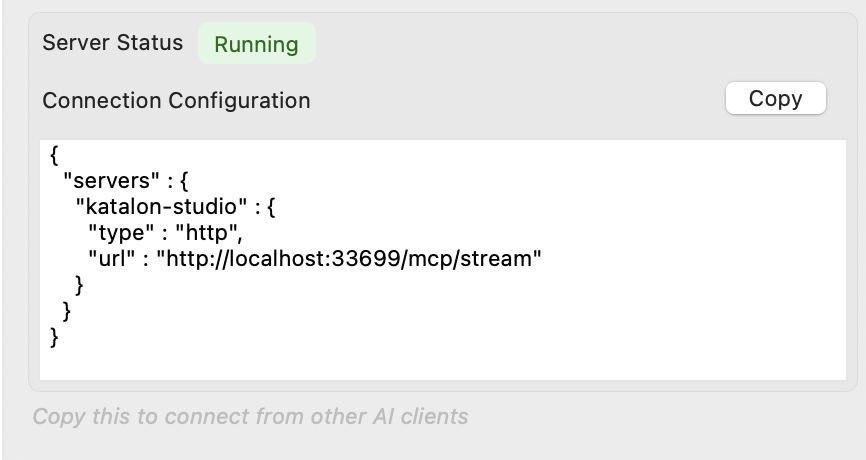
- Ensure the server status is Running.
- Click Copy to quickly get the connection configuration details.
This helps restrict access and control what external systems can use.
Option 2: Host from a CLI
The standalone option hosts the same MCP server from a CLI. Use Katalon Studio to generate a Katalon Runtime Engine (KRE) command, then run that command in your CLI. After starting the server from the CLI, you do not need to keep the Katalon Studio GUI open.
A Katalon Studio package cannot run in both GUI mode and standalone MCP mode simultaneously. If the MCP server is started via terminal, the GUI running on the same KS package must be terminated, and vice versa.
- Windows
- MacOS
- Go to Preferences > Katalon > AI Configuration > Katalon AI Assistant > Katalon Studio MCP.
- Double-check configuration (port, authentication, available tools).
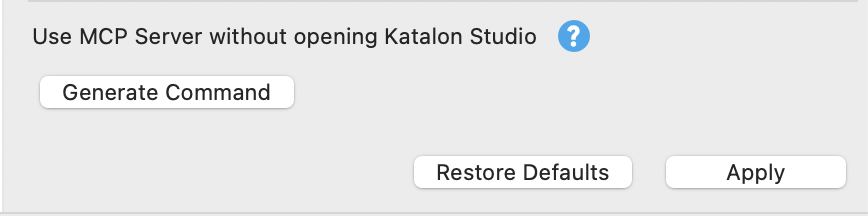
- Click Generate Command and copy the Katalon Runtime Engine command.
- Close Katalon Studio.
- Open Command Prompt (CMD) at the folder that contains the
katalon.exefile. - Execute the copied command.
- Go to Preferences > Katalon > AI Configuration > Katalon AI Assistant > Katalon Studio MCP.
- Double-check configuration (port, authentication, available tools).
- Click Generate Command and copy the Katalon Runtime Engine command.
- Close Katalon Studio.
- Right-click Katalon Studio app and select "Show Package Contents". You will see the Contents folder.
- Right-click the Contents folder and select "New Terminal at Folder".
- Execute the copied command.
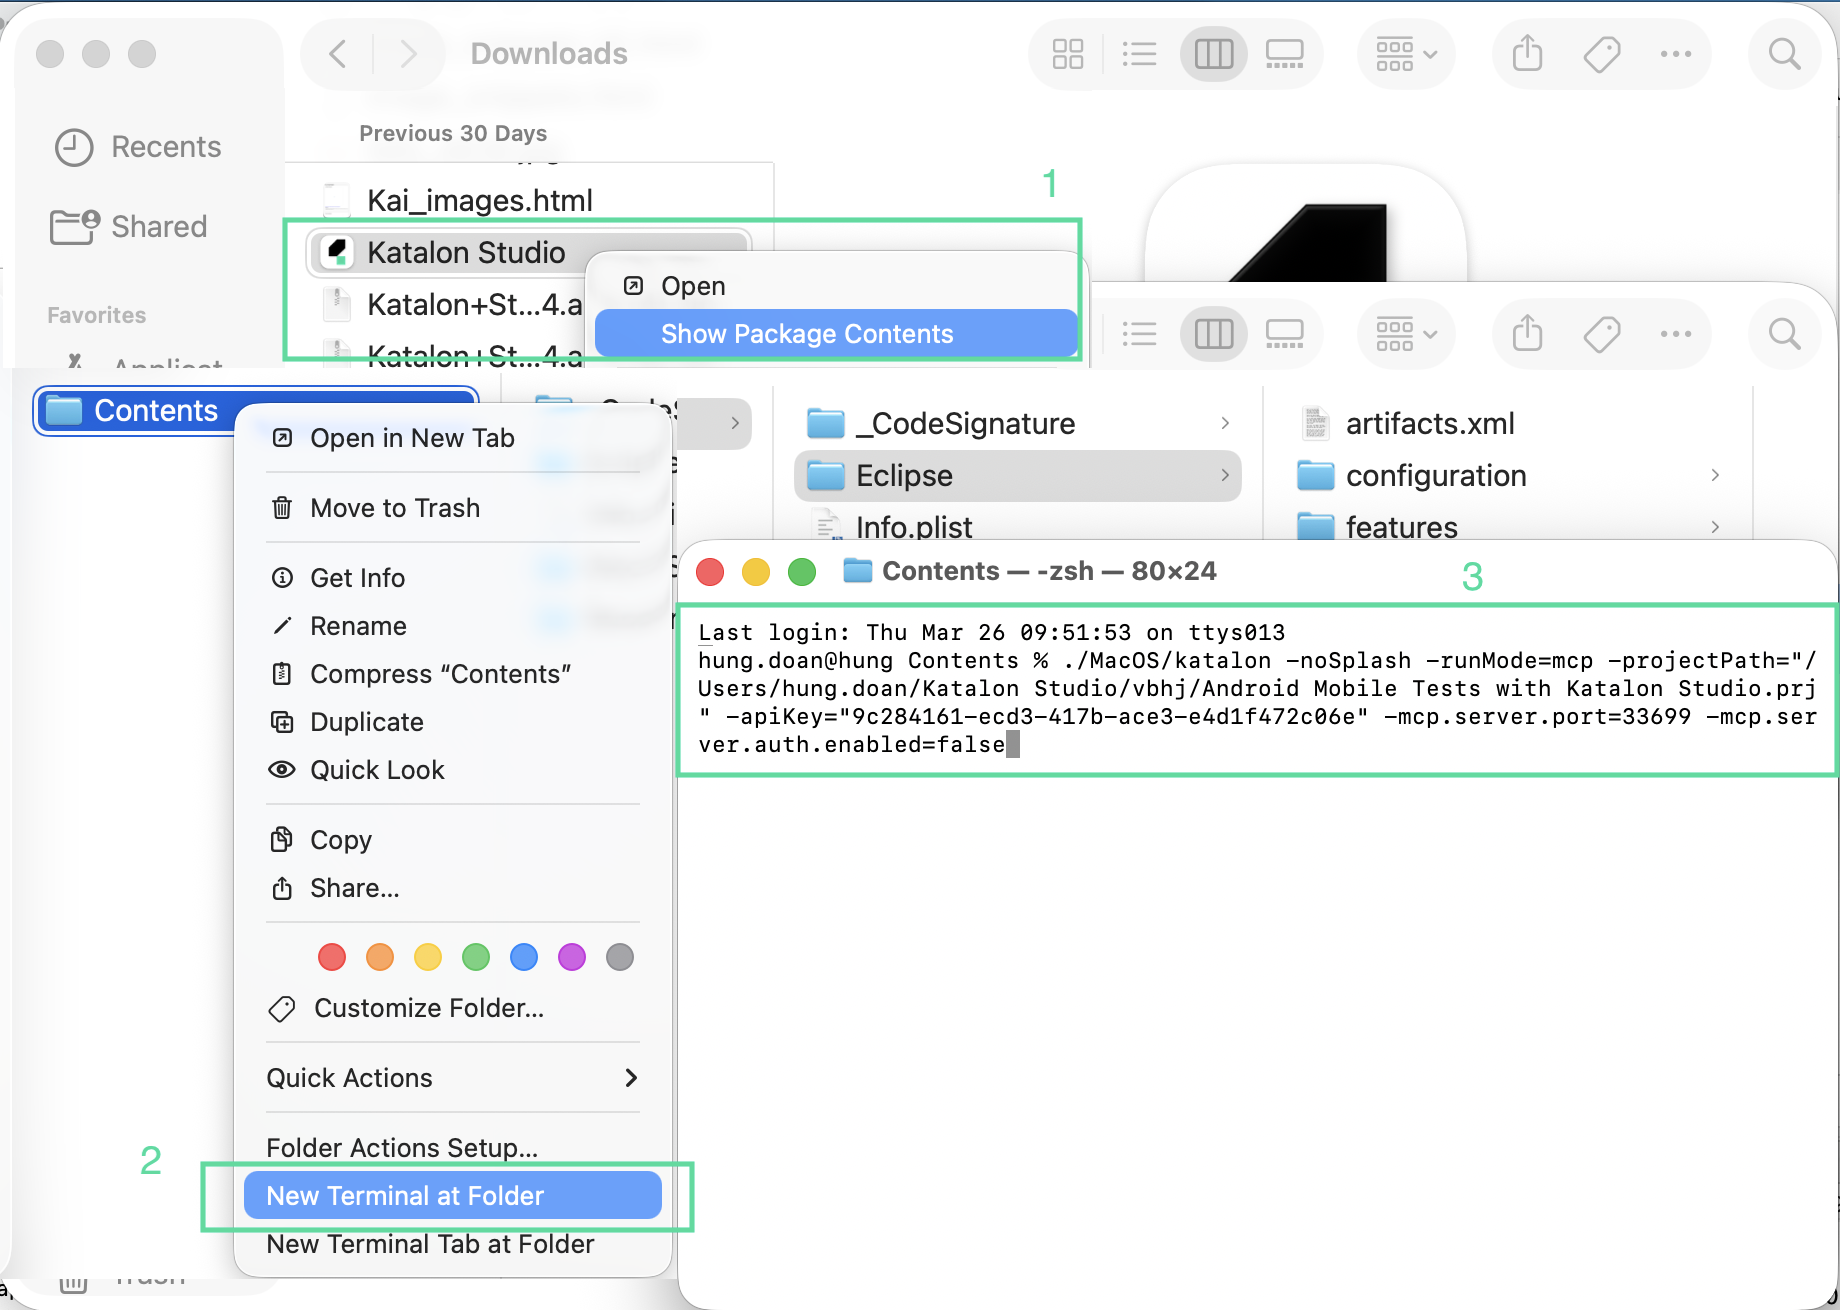
The MCP server will run independently and can be connected to external AI tools.
- Each MCP server instance is tied to a single project. To switch projects, stop the current server and restart it with the new project path.
Parameters for hosting the server from a CLI
You can customize the hosting command with these parameters:
Parameters | Description | Example |
|---|---|---|
| Run Katalon without launching the UI splash screen |
|
| Start Katalon in MCP server mode |
|
| Path to the Katalon project to load |
|
| API key used to authenticate Katalon license |
|
| Port used to host the MCP server |
|
| Enable or disable authentication for the MCP server |
|
| Token used for authenticating MCP requests |
|
| Comma-separated list of MCP tools to exclude from exposure (no spaces between commas). |
|
Connect the MCP server to your editor
Once the MCP server is running, you can connect it to supported AI editors. This setup enables hybrid workflows, allowing you to apply fixes with other tools without disrupting your Katalon AI Assistant chat flow.
Cursor
Follow these steps:
- Copy the connection configuration from KS.
- Paste it into Cursor's MCP configuration.
- Use Katalon AI Assistant and the tool in parallel.
Claude
Follow these steps:
- Create a
.jsonfile in the Claude folder:- For Windows:
%APPDATA%\Claude\ - For MacOS/Linux:
~/Library/Application Support/Claude/
- For Windows:
- Paste the following into the JSON file. Adjust to match your configuration:
{
  "mcpServers": {
    "my-server": {
      "command": "npx",
      "args": ["mcp-remote", "http://localhost:33699/mcp/stream"]
    }
  }
}
Codex
- The Katalon Studio MCP server is Running (default port
33699).
- Add through the UI
- Edit config.toml directly
- Open Settings, and under Integrations, click Plugins.
- Select the MCPs tab, then click + Add server.
- Fill in the dialog:
- Name:
katalon-studio - Transport / Type:
Streamable HTTP - URL:
http://localhost:33699/mcp/stream
- Name:
- Click Save. The
katalon-studioserver appears in the list — make sure its toggle is on.
- Open Settings > Configuration.
- In Custom config.toml settings, keep the scope on User config (or choose a project scope), then click Open config.toml.
- Add the server and save:
[mcp_servers.katalon-studio]
url = "http://localhost:33699/mcp/stream"
- Restart Codex. This is the same
~/.codex/config.tomlshared by the app/IDE and the CLI, so the server also shows up under Plugins > MCPs.
The header must be [mcp_servers...] (with an underscore). mcp-servers or mcpservers will be silently ignored.
For older Codex versions without HTTP support, use the mcp-remote bridge instead:
[mcp_servers.katalon-studio]
command = "npx"
args = ["mcp-remote", "http://localhost:33699/mcp/stream"]
VS Code
To connect Katalon Studio MCP server to VS Code, create a mcp.json file and add the connection configuration from KS:
{
  "servers" : {
  "katalon-studio" : {
  "type": "http",
  "url": "http://localhost:33699/mcp/stream"
    }
  }
}
For more details, see the VS Code Documentation.