Use Mobile Recorder on Cloud devices
The Mobile Recorder utility in Katalon Studio allows you to create automated test cases for mobile applications.
- Katalon Studio (KS) version 9.5.0 onwards.
- A Test Execution - Cloud Mobile Native App testing subscription.
Starting from Katalon Studio 9.5.0, you can use Cloud mobile devices for recording and playback. This feature eliminates the need for complex local setups and makes it easier for users with minimal coding experience to conduct mobile testing.
After you upload your app to TestOps, you can start recording objects on a Cloud mobile device.
Here's a demo video of using mobile recorder on Cloud devices:
Record objects on a Cloud device
-
From the main toolbar, click the Record Mobile dropdown and select Katalon True Platform Devices Devices.
-
In the Test Execution - Cloud Configurations section:
- Device Name: Specify the OS, OS version and select an available device accordingly. For example, here we select Android 14 and the Galaxy S24 device.
- Application: Select the application file to test from your TestOps uploads.
-
Click Start on the action bar to begin recording. You can see the application display in Device View and the objects in All Objects.
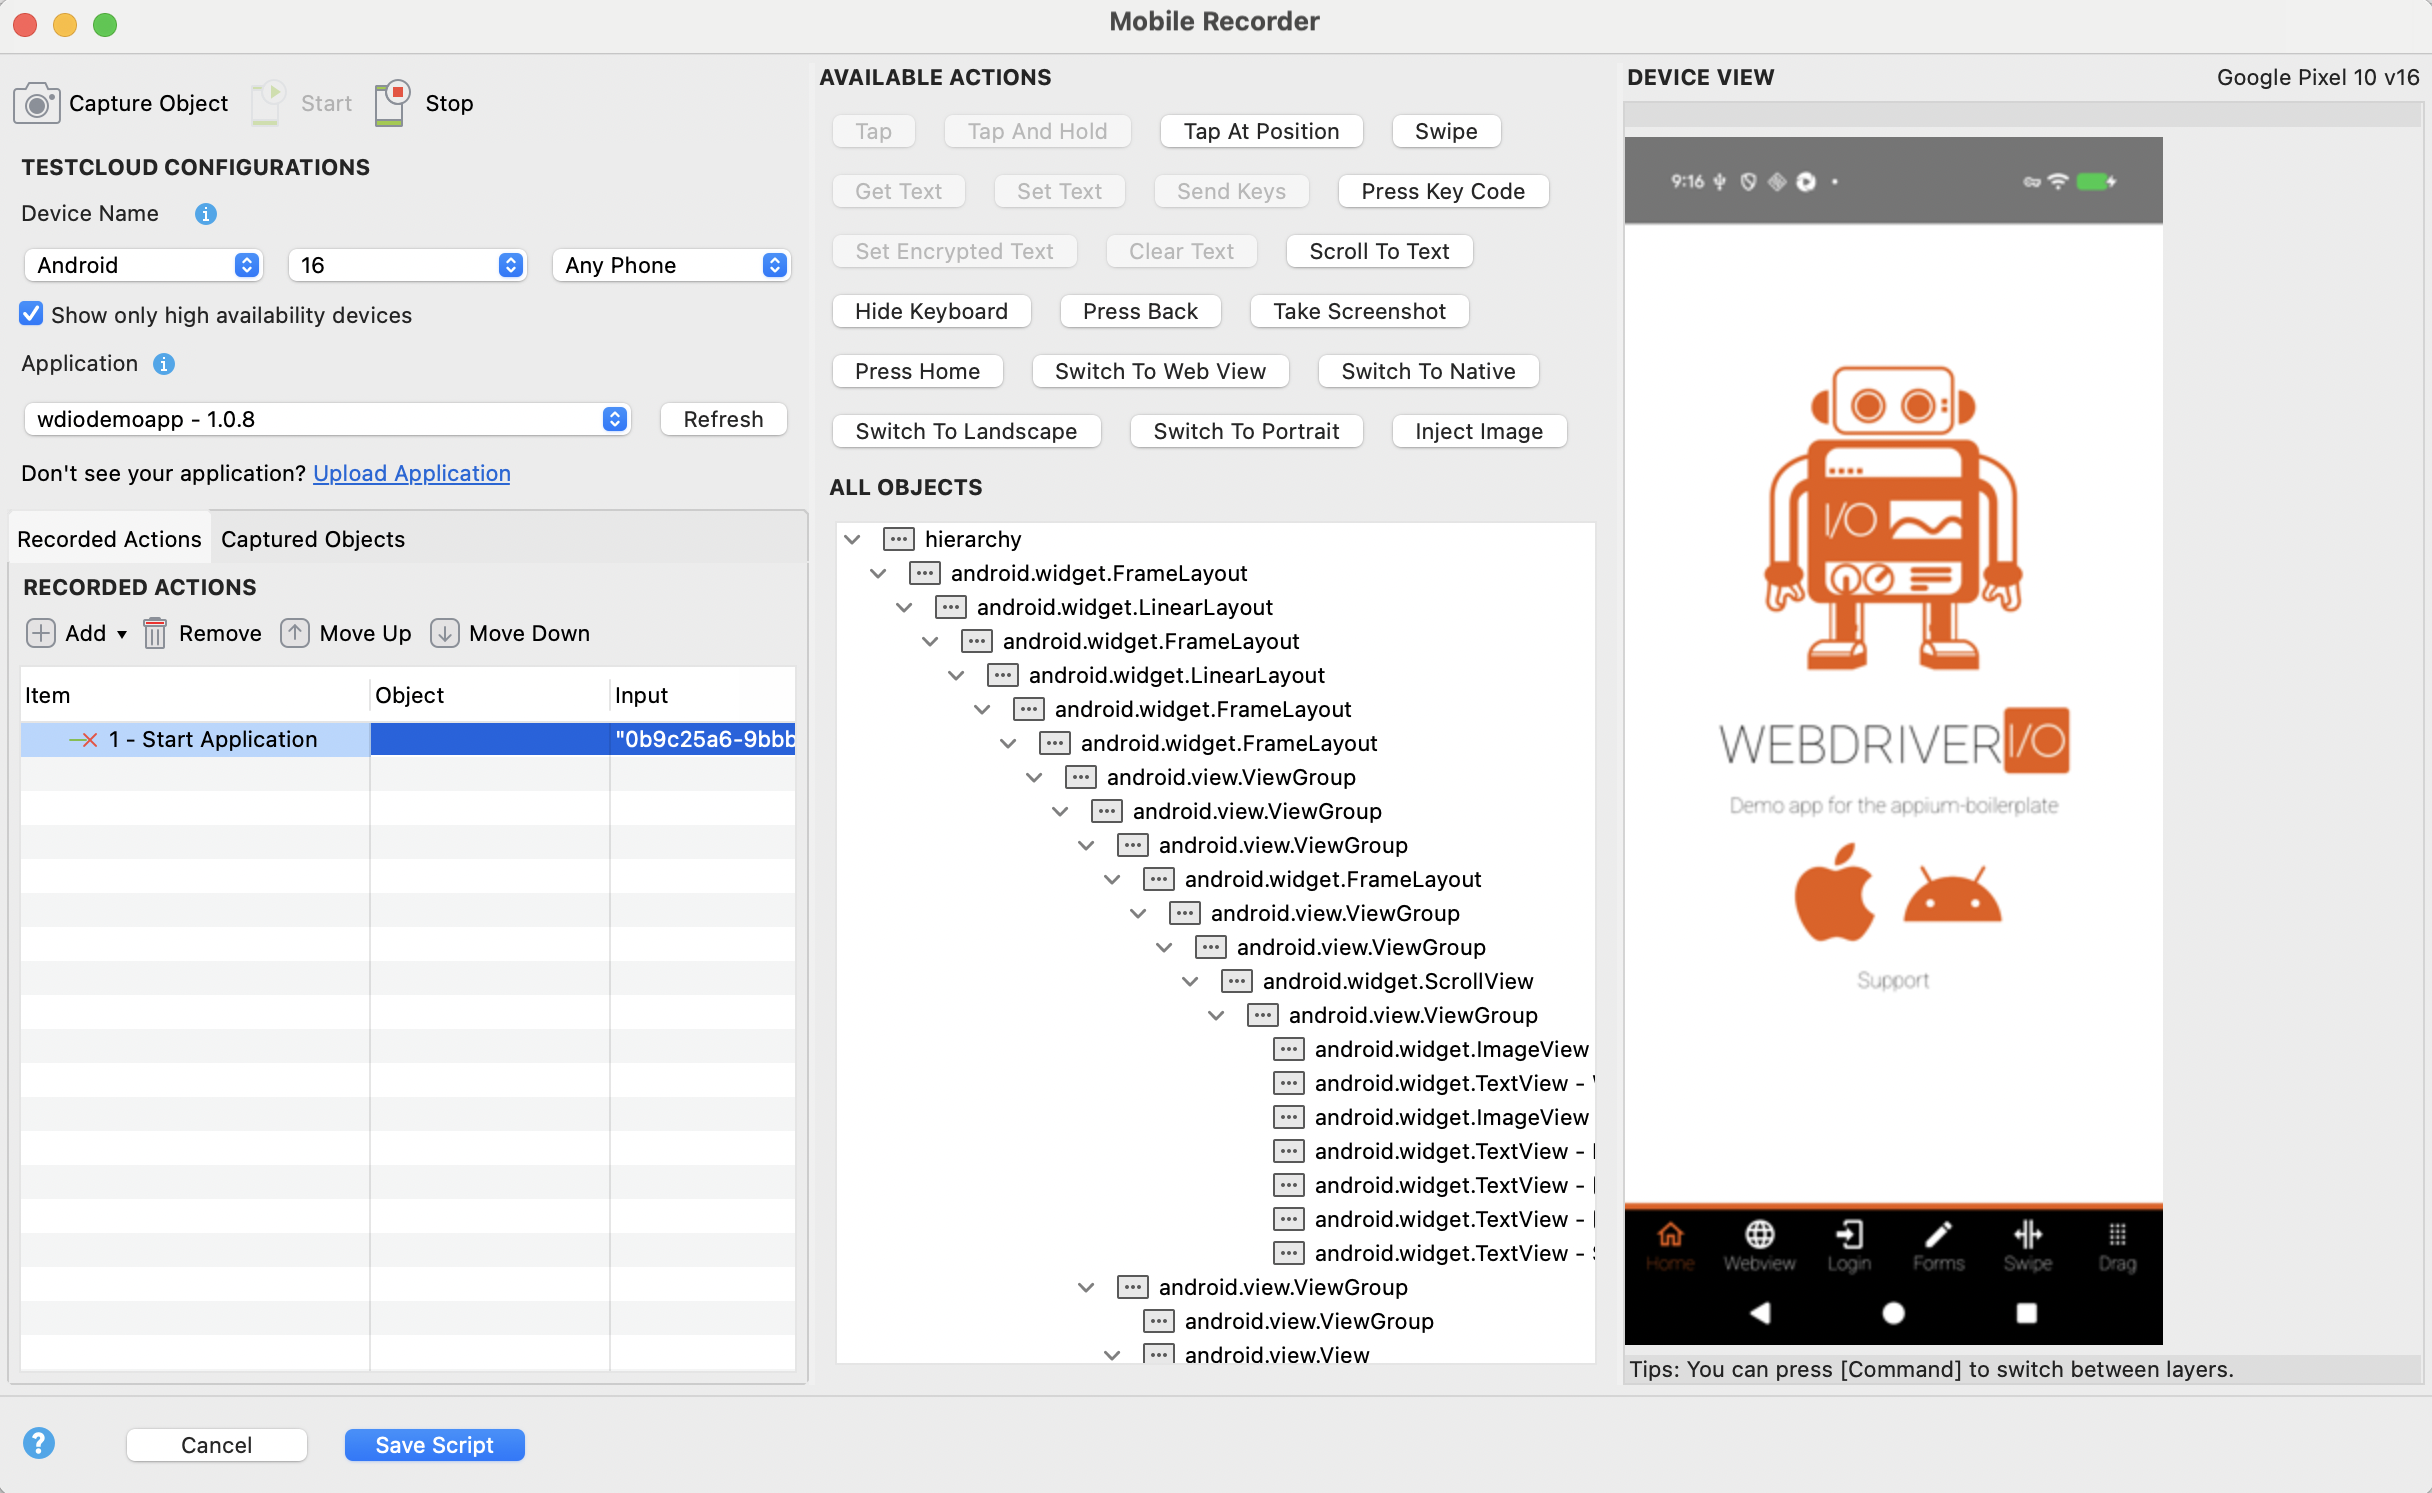
- Device View is a simulator of the device screen. You can interact with the AUT in this view.
- All Objects captures and organizes all the displayed mobile objects of Device View in a tree. To make sure the Device View displays the current screen of the AUT on the device, click the Capture Object button on the action bar to reload Device View and refresh All Objects.
-
Perform actions on the AUT:
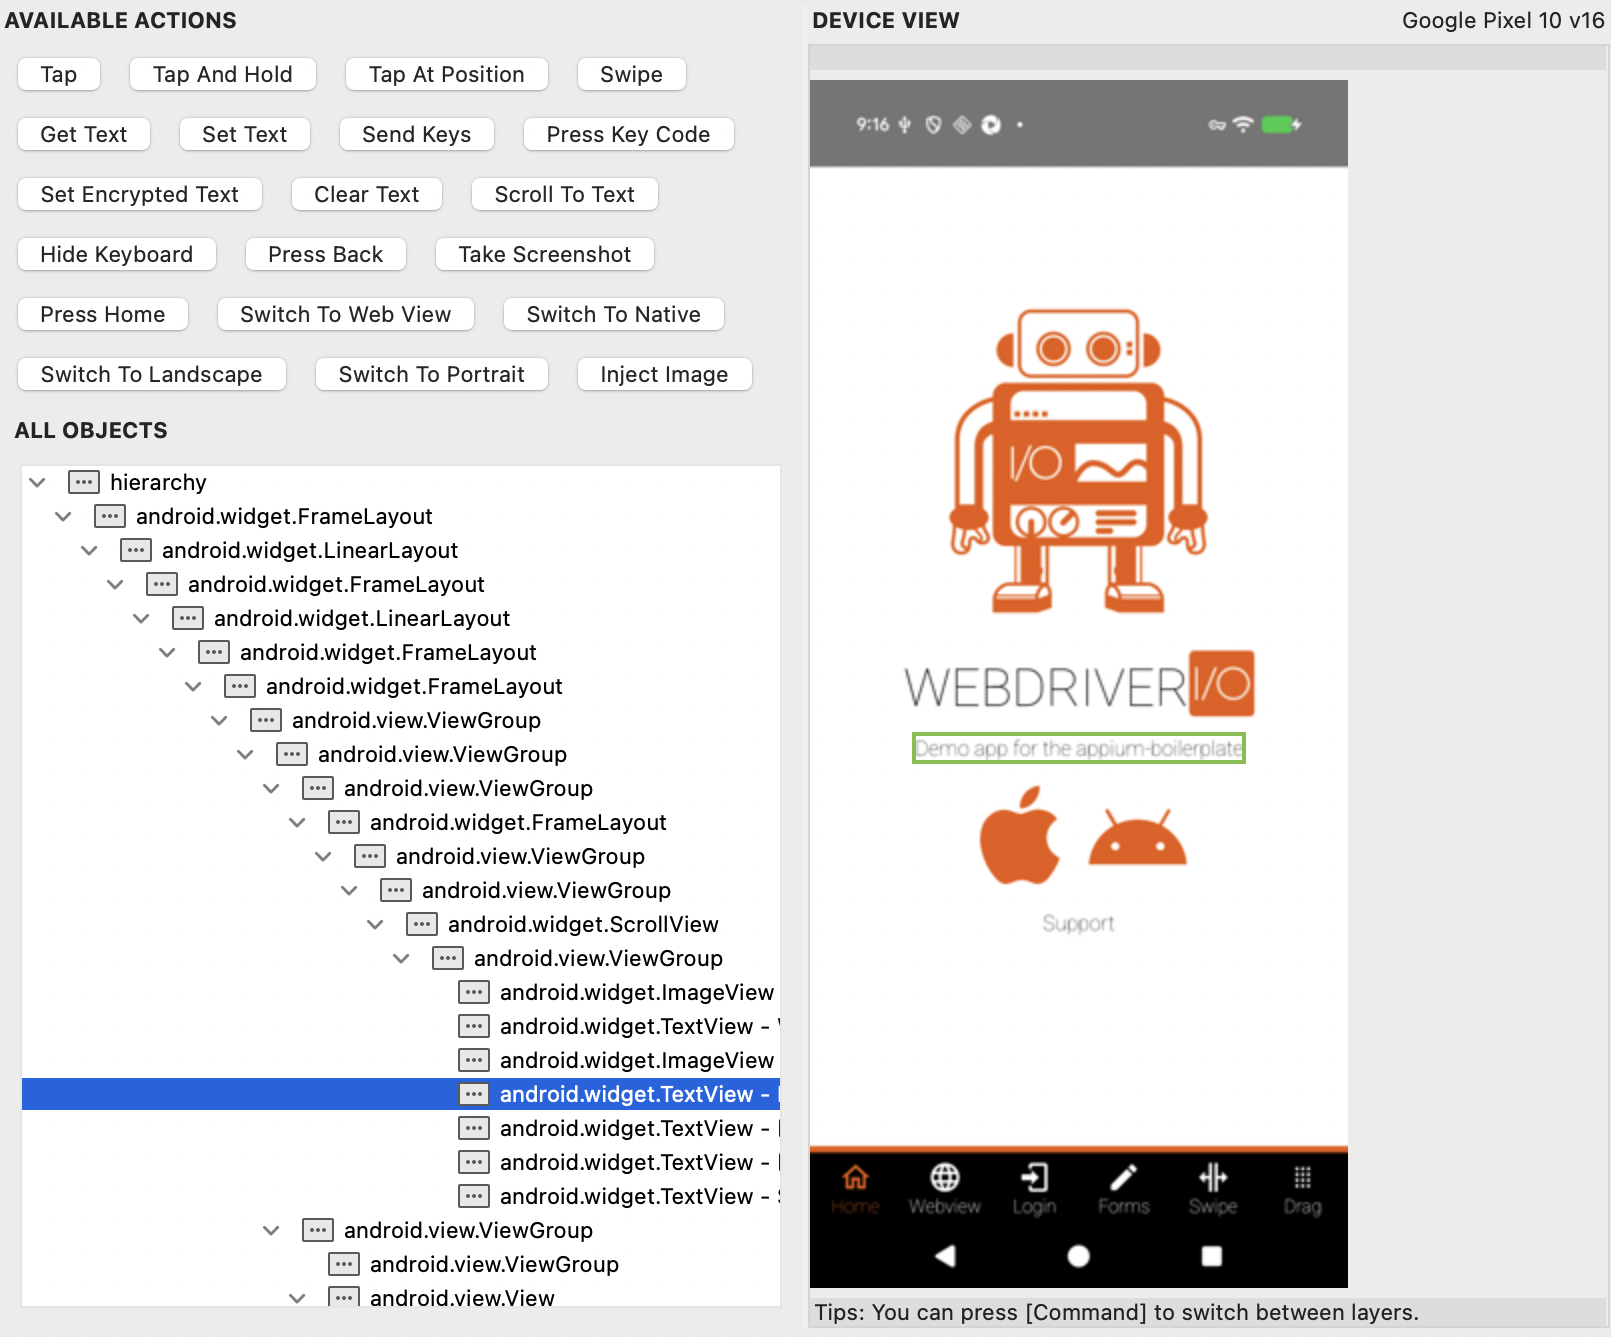
- Select any object either in All Objects or in Device View. Katalon highlights their counterpart accordingly for verification.
- Click the buttons in Available Actions to perform actions with the selected object.
- Repeat these two steps until all the actions you need to perform are completed.
-
Review the recorded actions. The Recorded Actions table shows all of the recorded actions and related input/output that you have performed on the AUT. These items later become test steps of your test case.
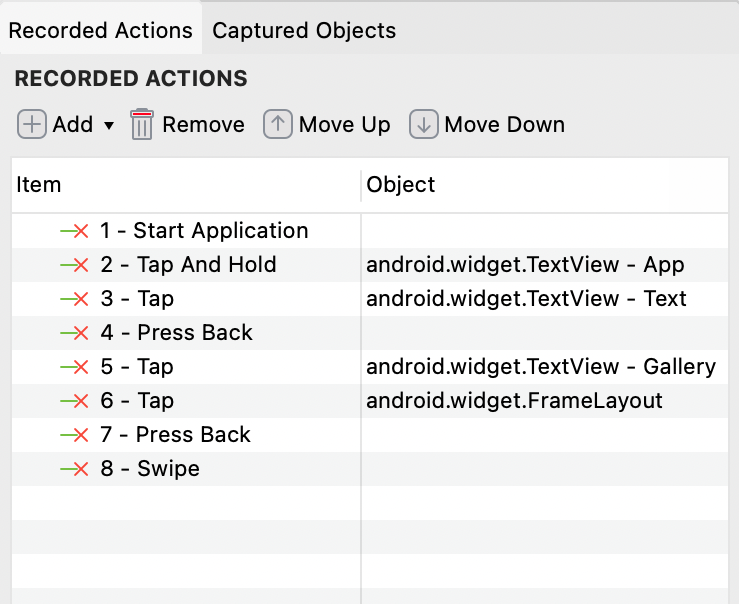
Click + Add to add new action keywords, select actions and click Remove to delete. Use Move Up and Move Down to rearrange the test steps.
-
Review properties of captured objects.
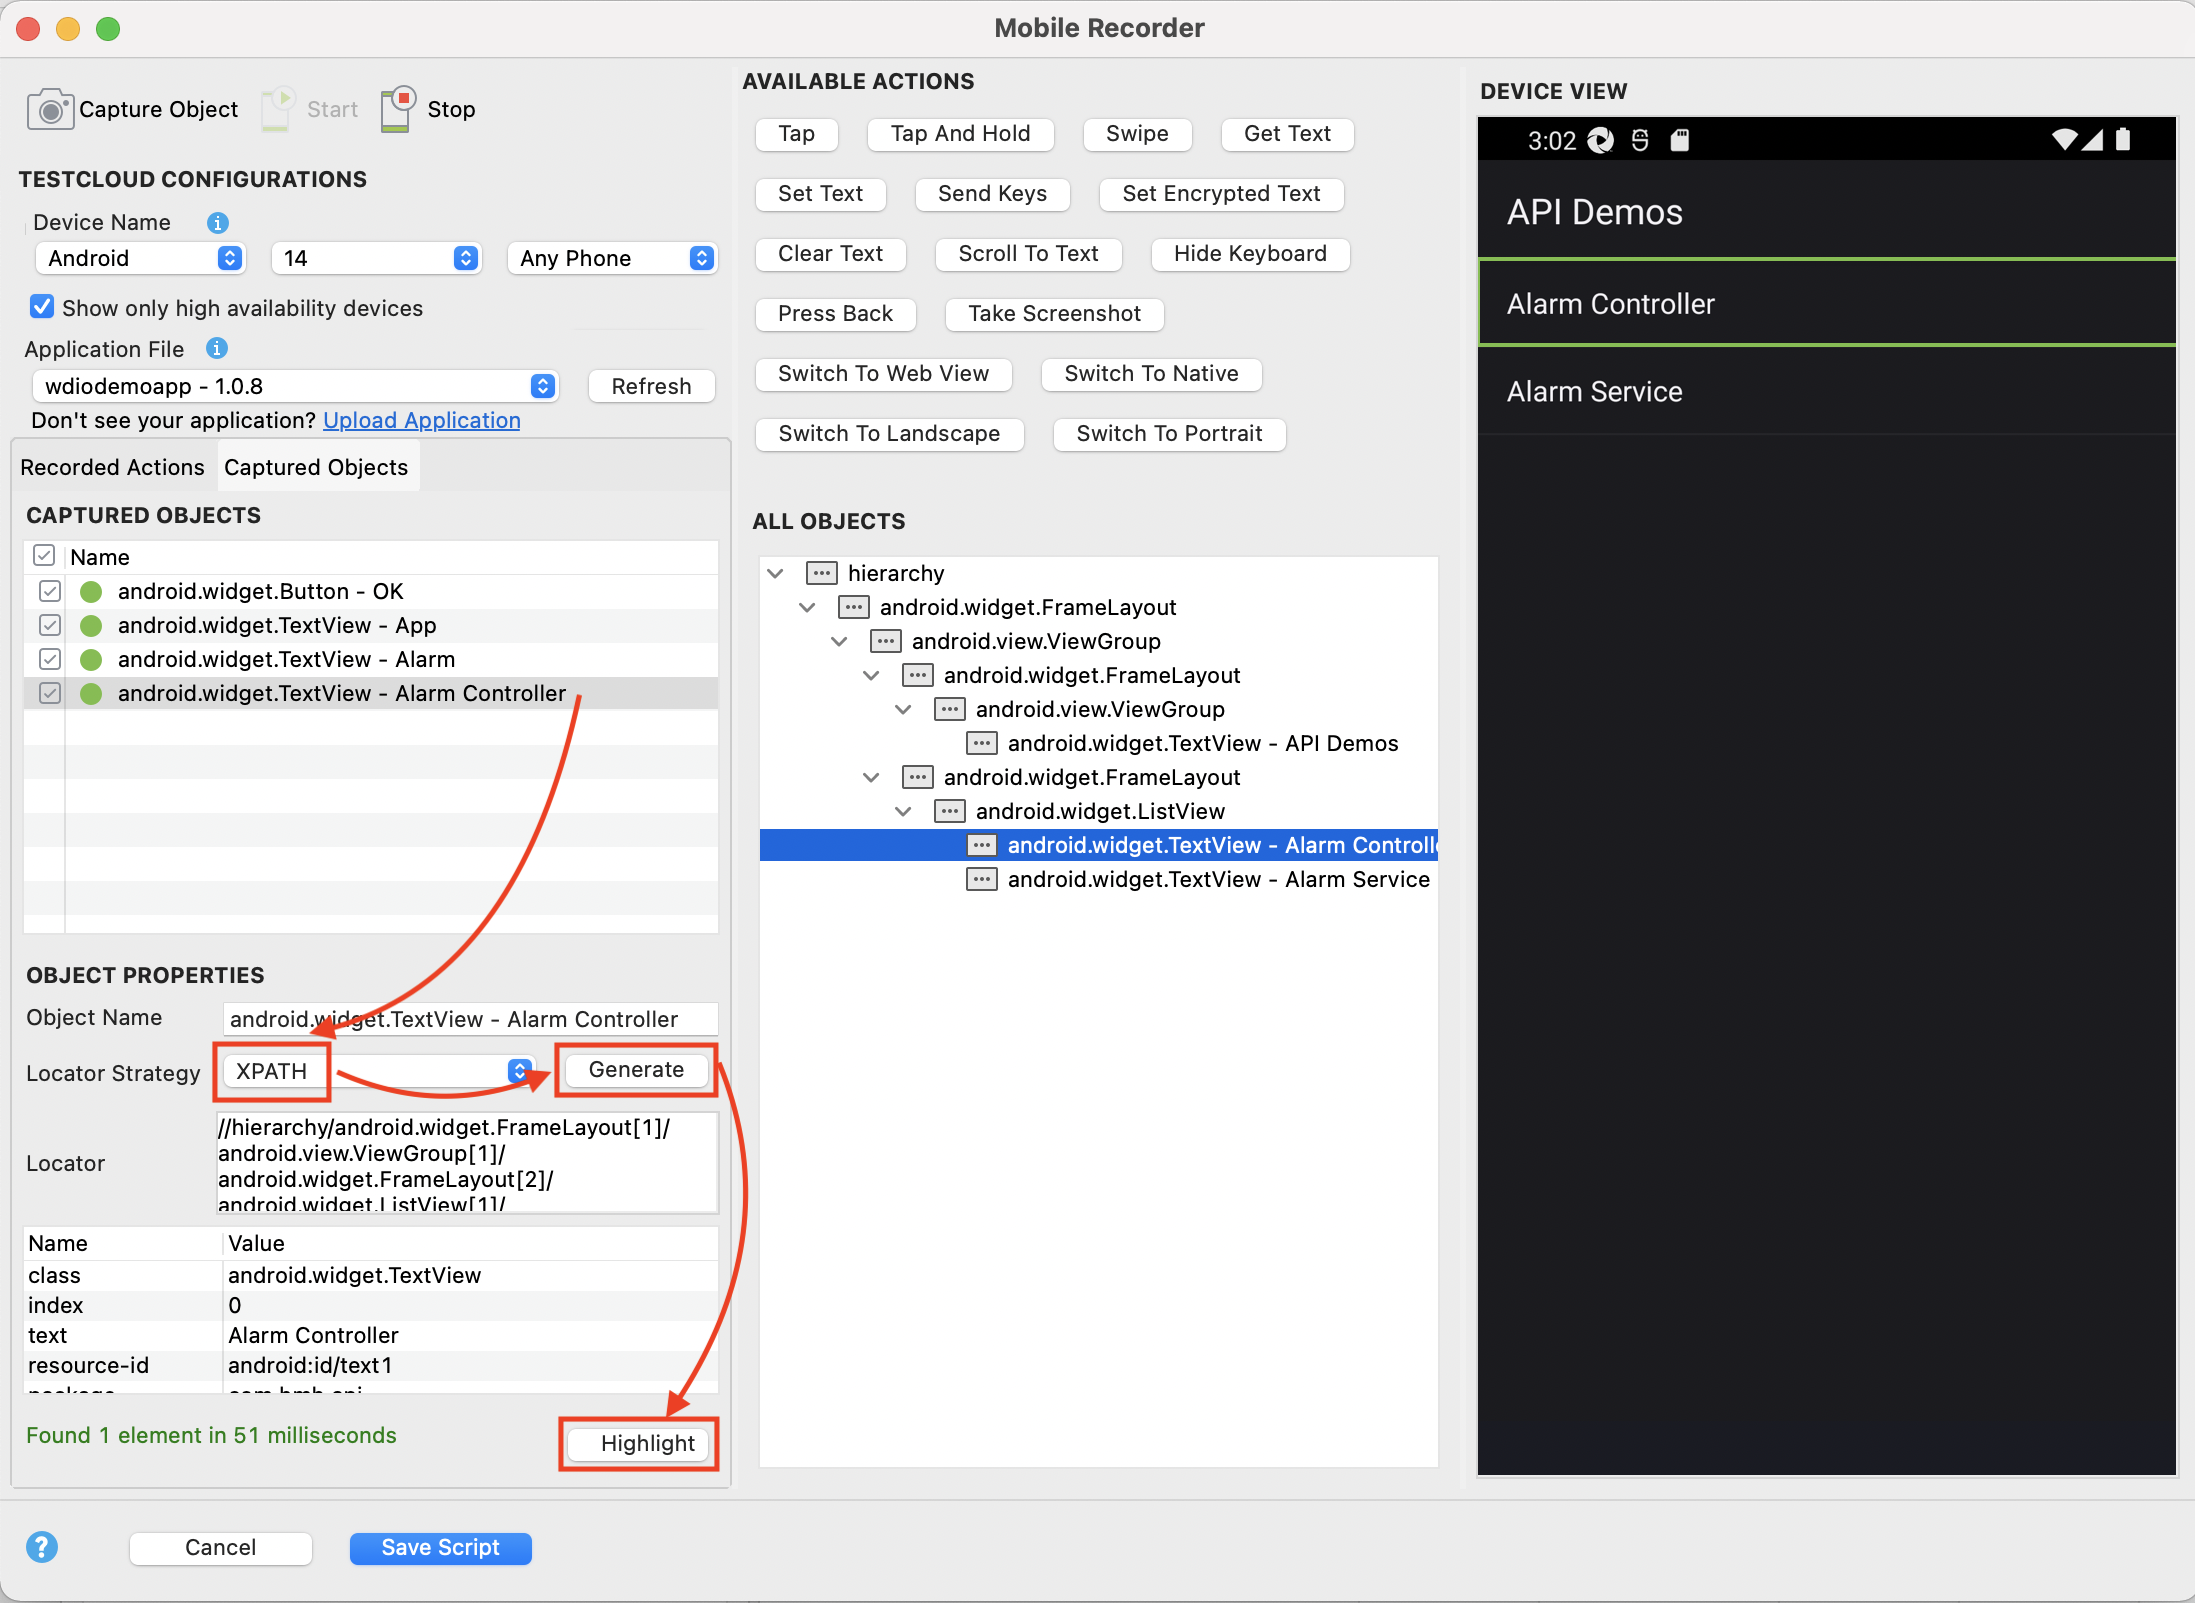
- Captured Objects displays all interacted objects during the recording session. Select a captured object to its detailed properties shown in the Object Properties table.
- If you prefer another locator strategy, choose among the provided options and generate a new locator. Then, click Highlight to confirm your newly updated locator can detect the target object correctly.
-
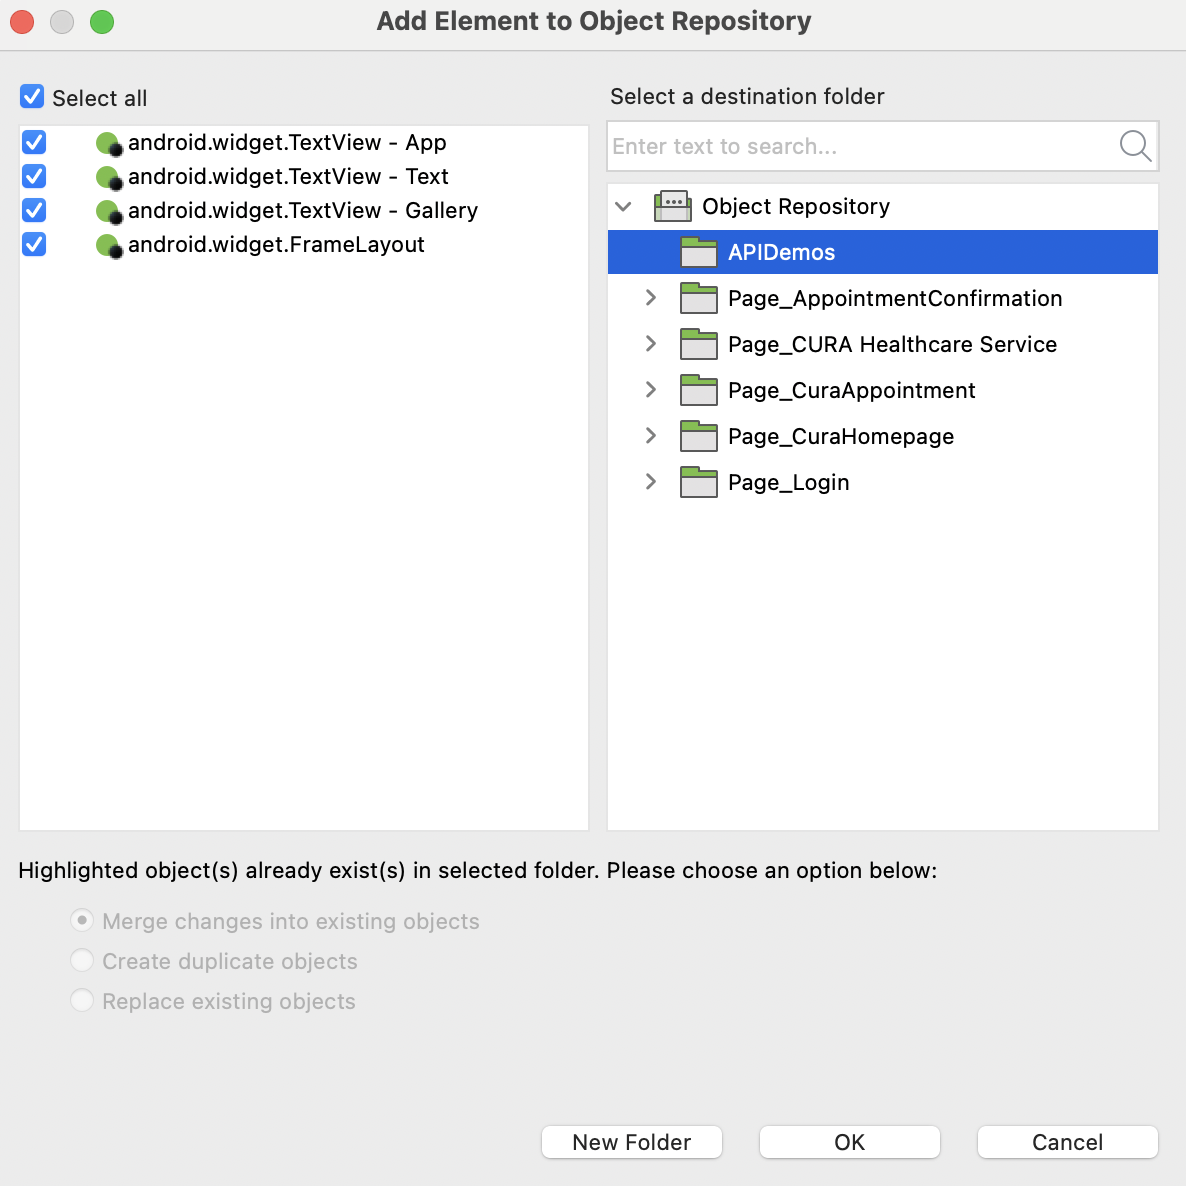
When you finish a recording session, click Stop, then click Save Script.
-
In the displayed Add Element to Object Repository dialog, select or create the folder you want to store the newly captured objects. Then, click OK.
-
Provide a name for the test case, select the Export Option:
- Export to new test case: Creates a new test case with the recorded actions.
- Append to test case: Adds the recorded actions to the end of an existing test case.
- Overwrite test case: Replaces the existing actions in a test case with the recorded actions.

- Click OK.
Result
You have successfully created a test case with Test Execution - Cloud device using the Mobile Recorder.