Robot Framework integration with Visual Testing
This document covers TestOps Legacy version only.
Robot Framework integration with Visual Testing
The Robot Framework package testops-robot allows you to apply Katalon Visual Testing directly in a Robot Framework test case. The package provides you with a simple interface to upload checkpoint images and retrieve comparison results. Status of each Robot Framework test case can be promptly driven by each comparison result returned from Katalon Visual Testing
You can find the sample project for testops-robot our GitHub repository: katalon-testops-robot-sample.
This guide shows you how to configure the testops-robot package and perform visual testing with the sample project.
Prerequisites
- A trial or paid account in Katalon TestOps.
- Python version 3.6 or above.
Configure the Robot Framework integration
To use the testops-robot package, you need to set up the configuration file testops-config.json for your Robot Framework tests. This configuration file includes the following properties:
apiKey: The API key to authenticate with Katalon TestOps. See: Katalon API Key in Katalon TestOps.projectId: The ID of your Katalon project.reportFolder: The local folder to store your test results.baselineCollectionId: The ID of the baseline collection to store baseline images. See: Baseline collection.
Follow these steps:
Sign in to Katalon TestOps and go to your project.
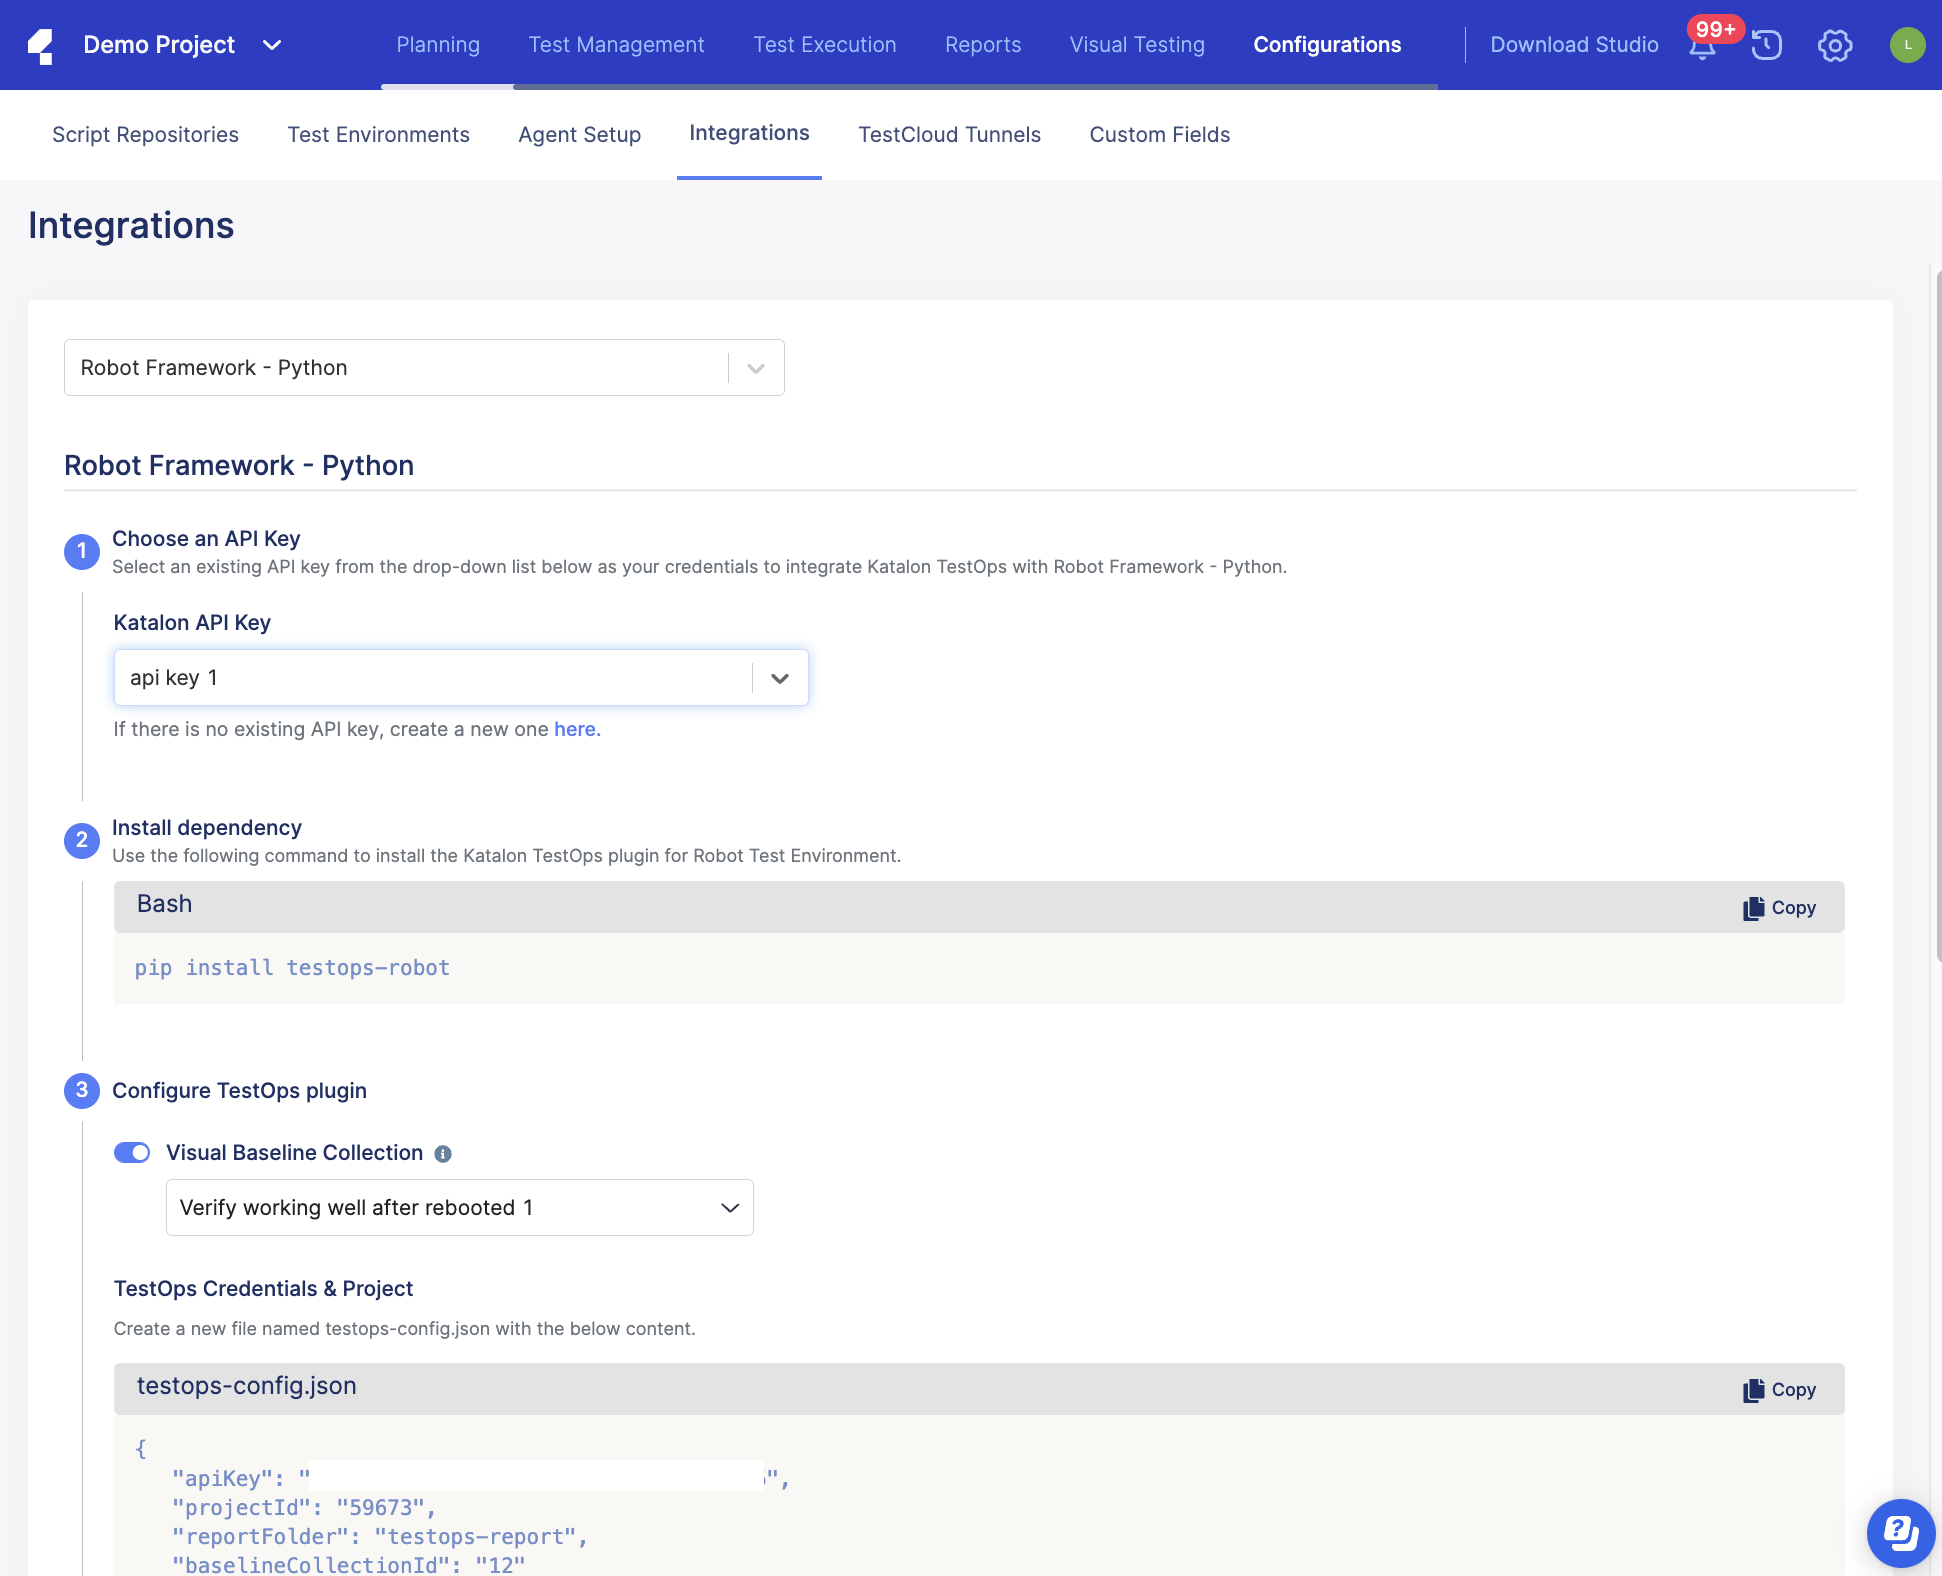
Go to Configurations > Integrations.
In the Integrations tab, select Robot Framework - Python and follow the on-screen instructions.
Note: When the Visual Baseline Collection toggle is on and there is no baseline collection in TestOps, the system will automatically generate a default baseline collection.
Result
Once you've finished the instructions, TestOps produces two files that you can use in your Robot Framework project:
testops-config.json: The file that stores configuration information fortestops-robot.katalon_visual_testing.py: The Python library file that contains the image verification functionverify_checkpoint. This function uploads and verifies checkpoint images.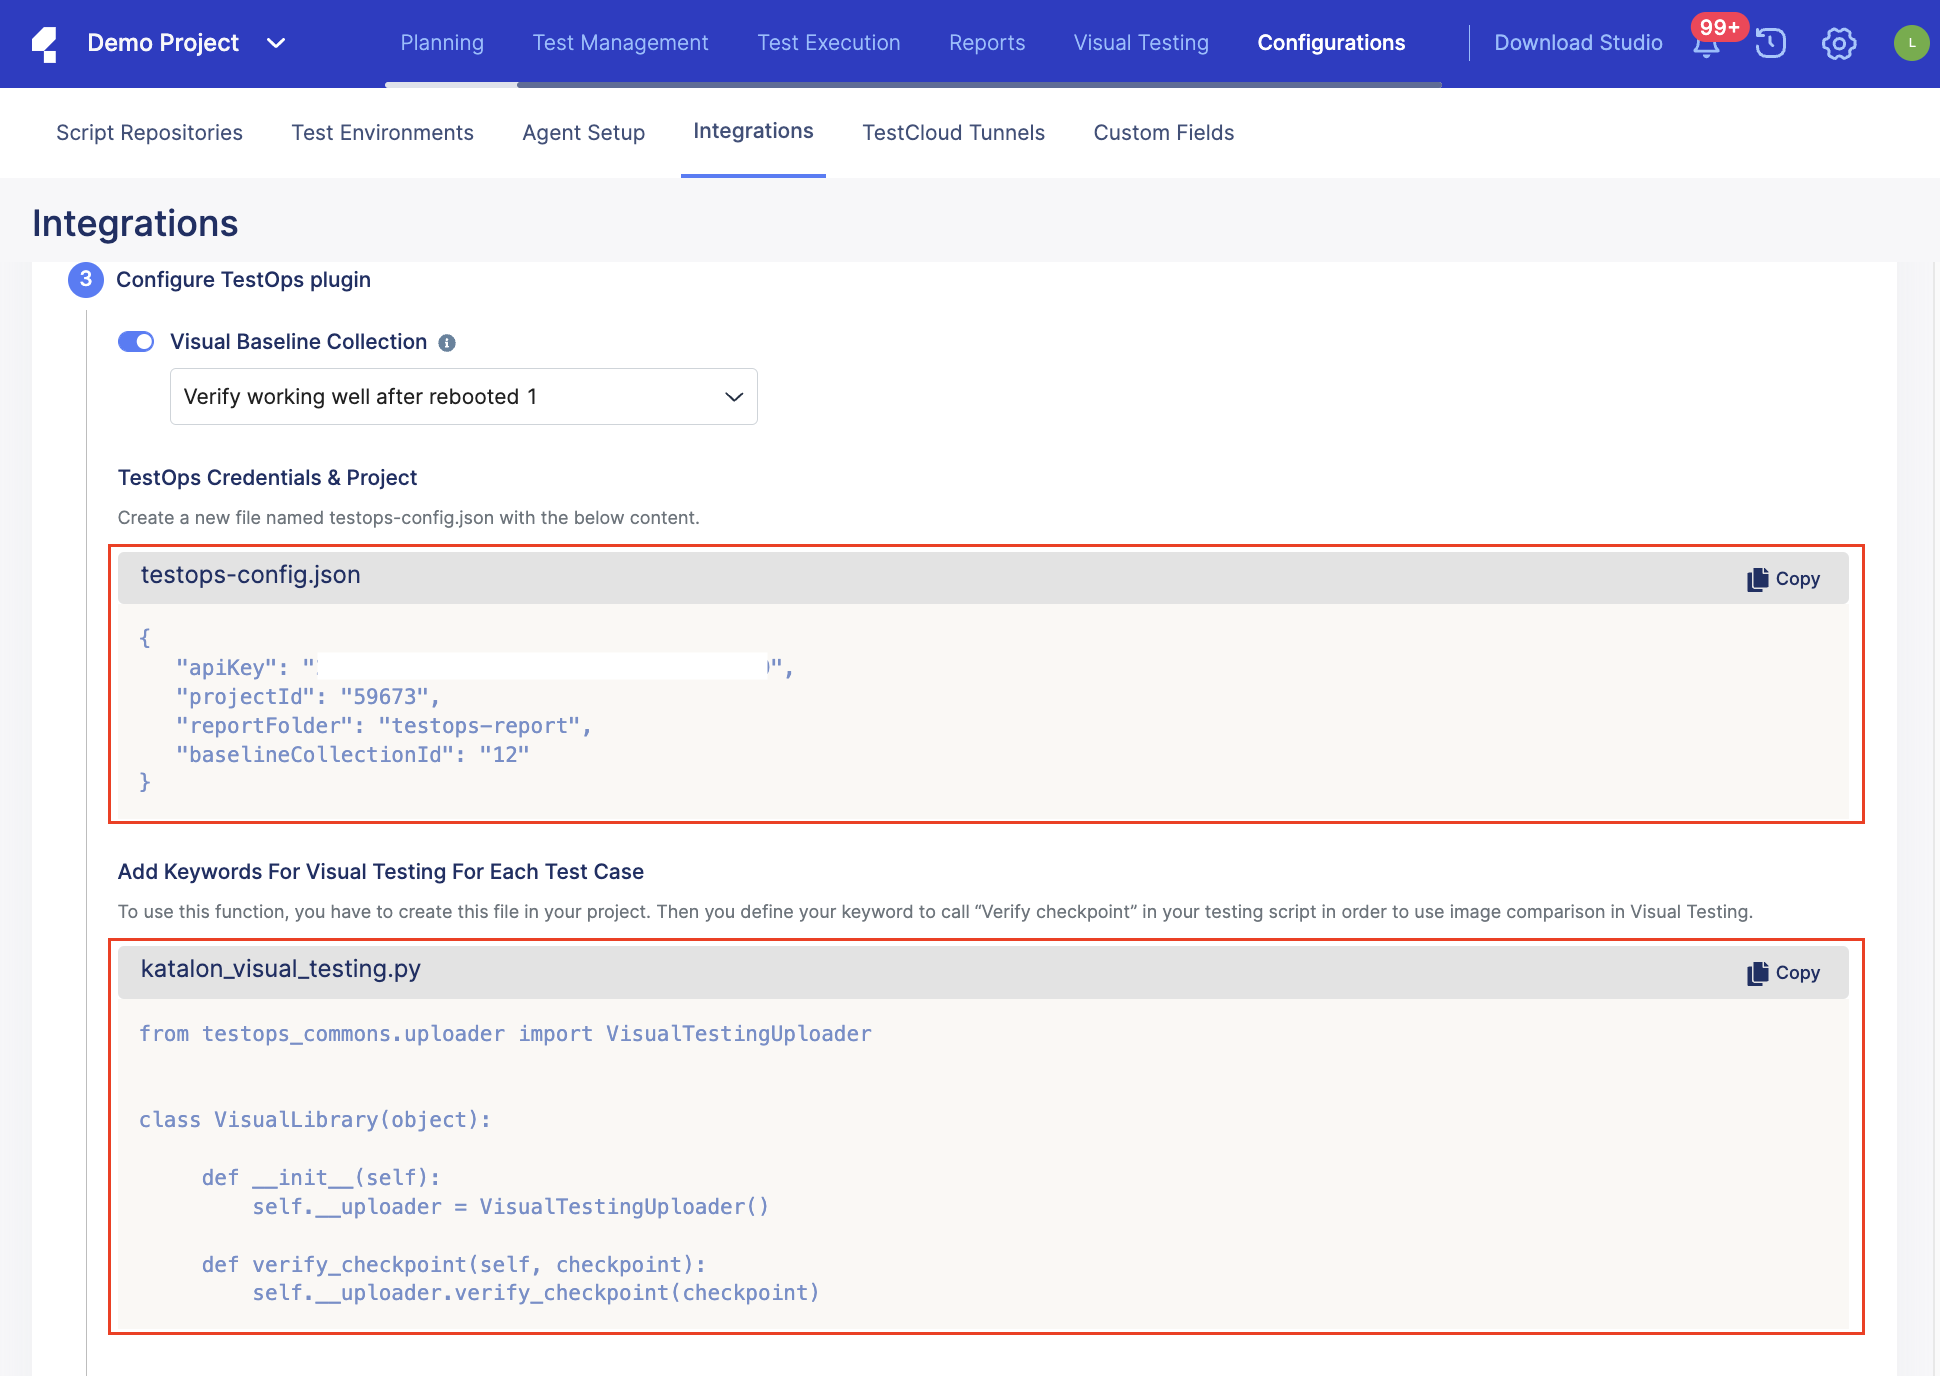
When you call the verify_checkpoint function in a Robot Framework test case, testops-robot will look for configuration information (API key, baseline collection ID, ...) in testops-config.json and make requests to TestOps server.
Sample Robot Framework project
To quickly get started with testops-robot, you can clone our sample project and run a sample test case: katalon-testops-robot-sample.
In the resource.robot file of the project, you can find all the sample keywords and the use of the Verify checkpoint function defined in VisualLibrary class:
*** Settings ***
Documentation     A resource file with reusable keywords and variables.
...
...               The system specific keywords created here form our own
...               domain specific language. They utilize keywords provided
...               by the imported SeleniumLibrary.
| Library |       SeleniumLibrary
| Library |       ../library/VisualLibrary.py


*** Variables ***
${SERVER}         https://katalon-demo-cura.herokuapp.com
${BROWSER}        Chrome
${DELAY}          0
${VALID USER}     John Doe
${VALID PASSWORD}    ThisIsNotAPassword
${CHECKPOINT_LOCATION}    checkpoint
${BOOKING_URL}    ${SERVER}/#appointment
*** Keywords ***
Analyze checkpoint "${checkpoint}"
    Verify checkpoint    ${checkpoint}

Open Browser To Cura Shop
    Open Browser    ${SERVER}    ${BROWSER}
    Maximize Browser Window
    Set Selenium Speed    ${DELAY}

Input Username
    [Arguments]    ${username}
    Input Text    txt-username    ${username}

Enter Password
    [Arguments]    ${password}
    Input Text    txt-password    ${password}

Submit Credentials
    Click Button    btn-login

Welcome Page Should Be Open
    Location Should Be    ${BOOKING_URL}
    Title Should Be    CURA Healthcare Service

Login Should Have Failed
    Element Should Be Visible    //p[contains(text(), "Login failed! Please ensure the username and password are valid.")]
In the test case valid_login_with_AI.robot, we use the Analyze checkpoint keyword to verify images:
*** Settings ***
Documentation     A test suite with a single test for valid login.
...
...               This test has a workflow that is created using keywords in
...               the imported resource file.
Resource          resource.robot

*** Test Cases ***
Valid Login
    Open Browser To Cura Shop
    Capture Page Screenshot    ${CHECKPOINT_LOCATION}/Review-Appointment.png
    Analyze checkpoint "${CHECKPOINT_LOCATION}/Review-Appointment.png"
    Click Element       //a[contains(text(),'Make Appointment')]
    Capture Page Screenshot    ${CHECKPOINT_LOCATION}/Login-Dialog-Origin.png
    Analyze checkpoint "${CHECKPOINT_LOCATION}/Login-Dialog-Origin.png"
    Input Username    ${VALID USER}
    Enter Password    ${VALID PASSWORD}
    Capture Page Screenshot    ${CHECKPOINT_LOCATION}/Login-Dialog-With-Data.png
    Analyze checkpoint "${CHECKPOINT_LOCATION}/Login-Dialog-With-Data.png"
    Submit Credentials
    Element Should Be Visible  appointment
    [Teardown]    Close Browser
To execute the test case, follow these steps in your terminal:
Clone the sample project to your local machine.
git clone https://github.com/katalon-studio-samples/katalon-testops-robot-sample.gitNavigate into the project folder and install the Python dependencies.
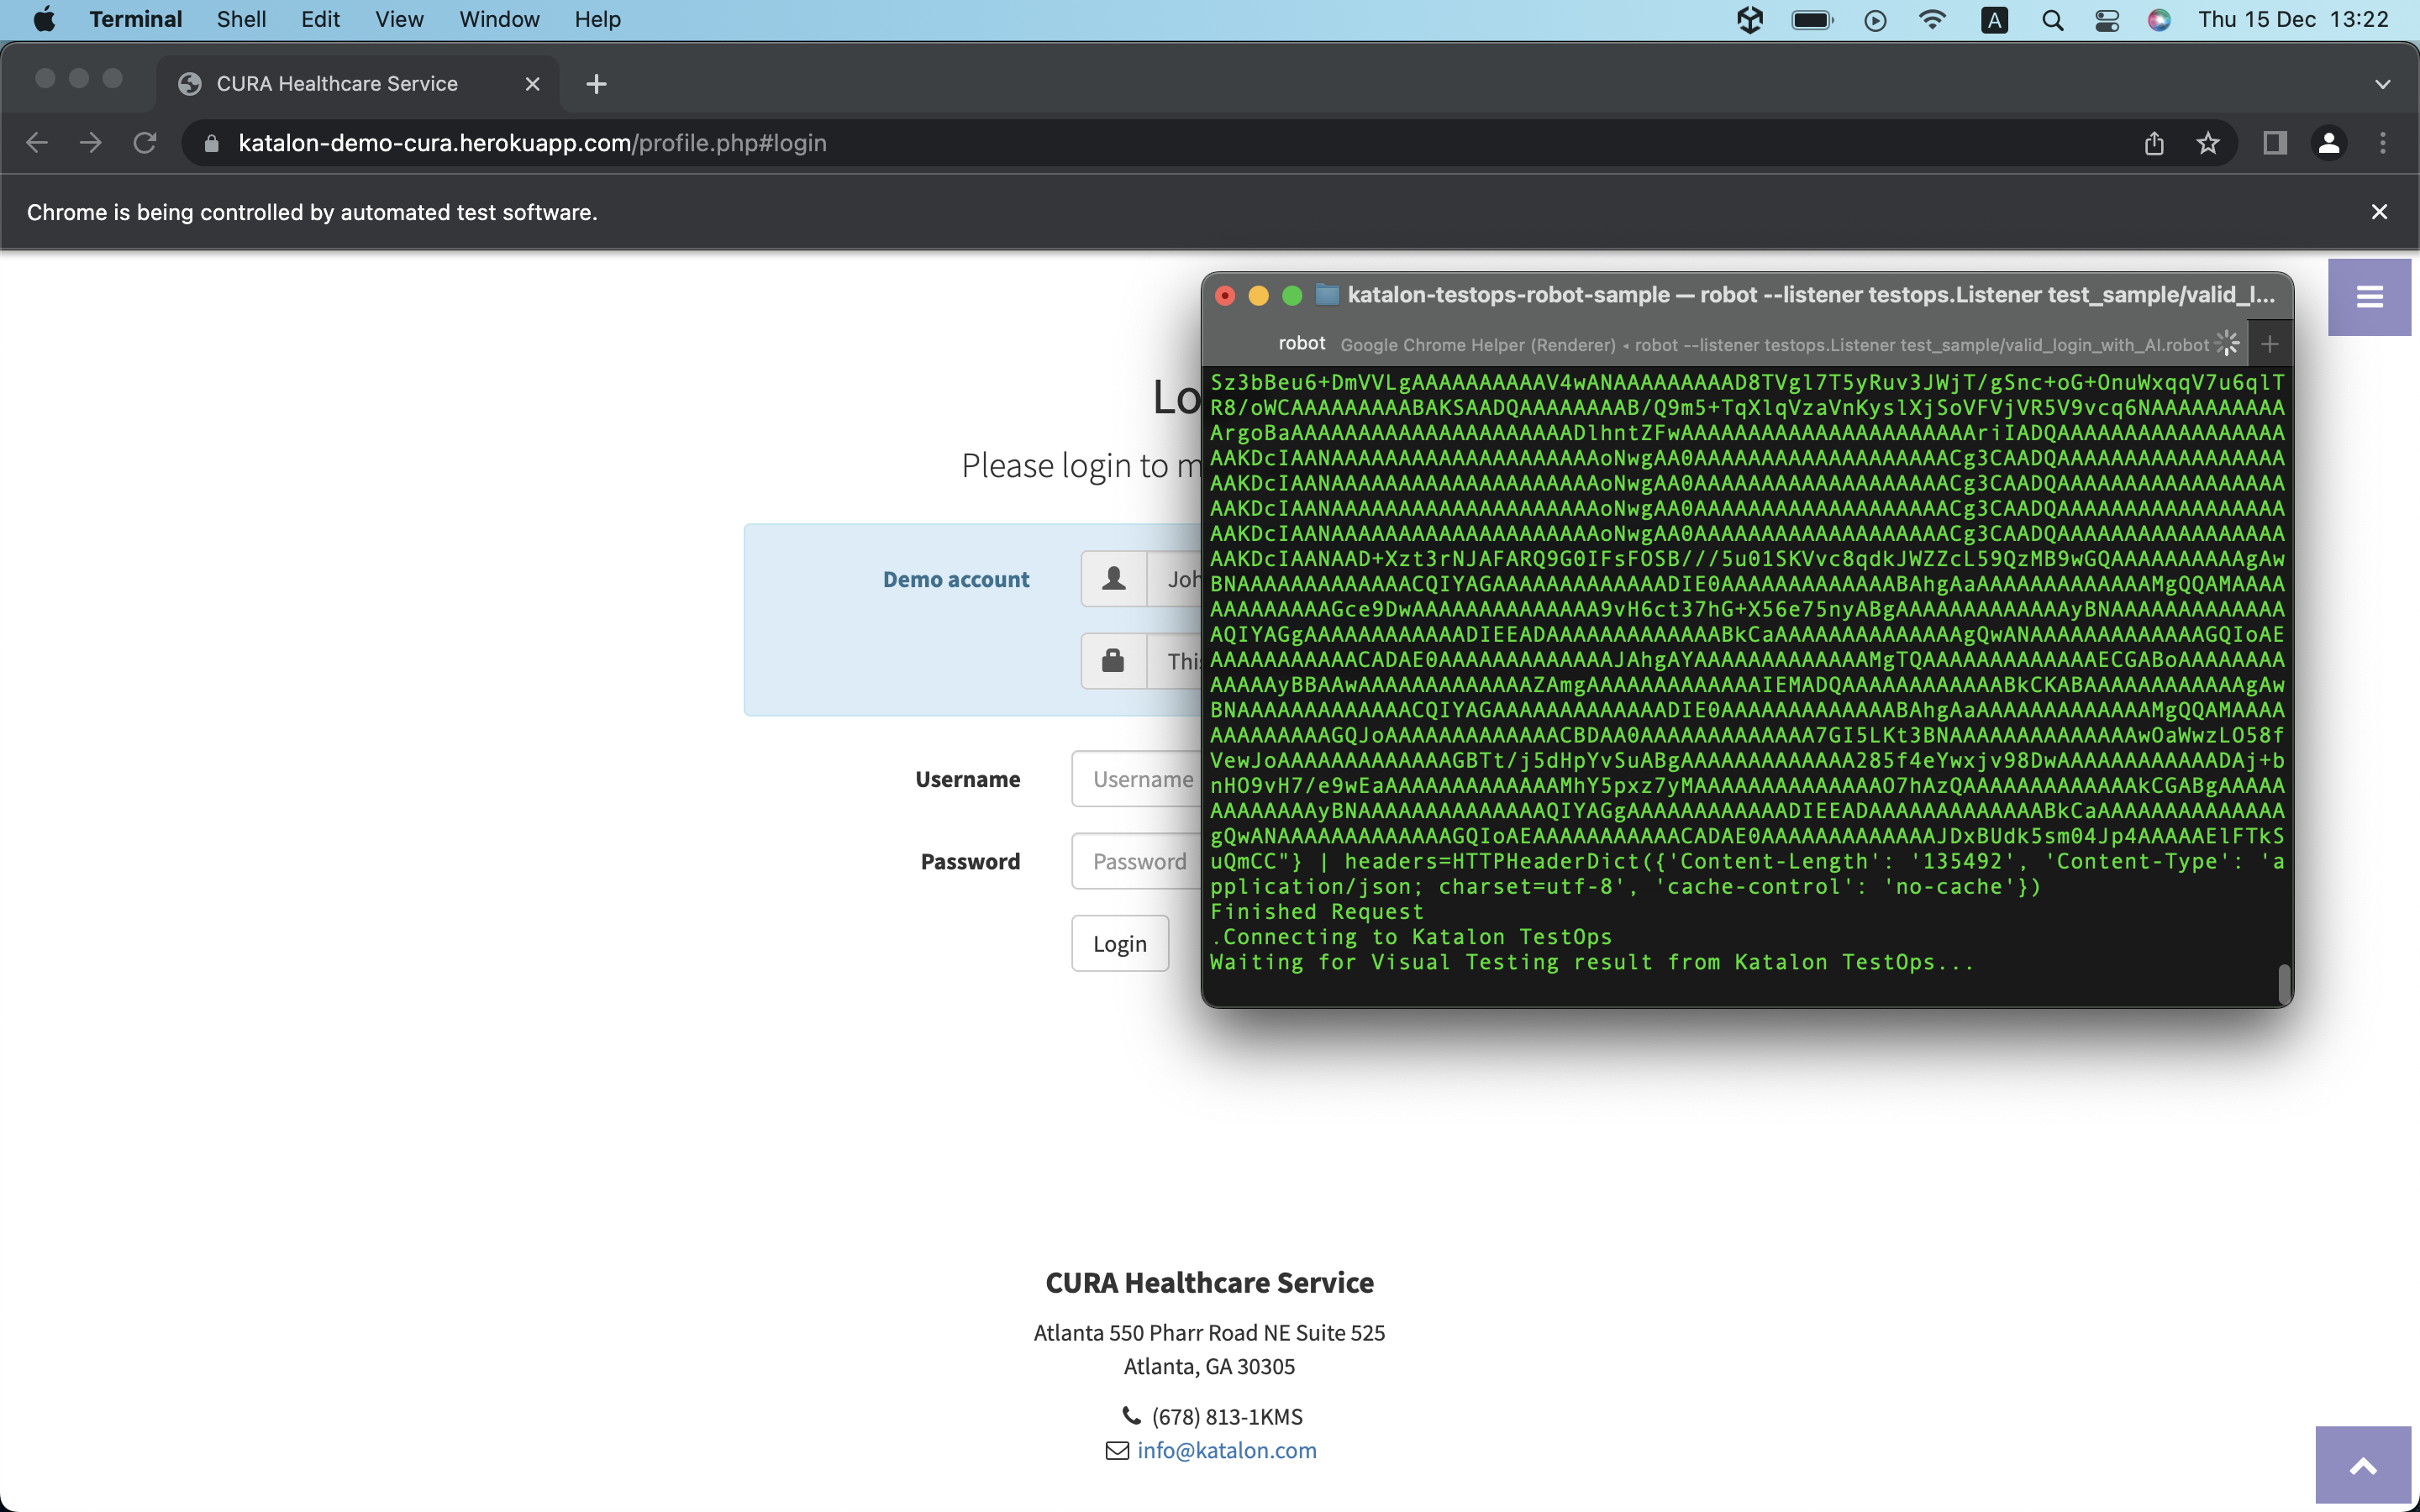
pip install -r requirements.txtRun a sample test case. Here we run a sample test case with a valid login
scenario valid_login_with_AI.robot.
robot --listener testops.Listener test_sample/valid_login_with_AI.robot
The test case is then executed with the Visual Testing steps.
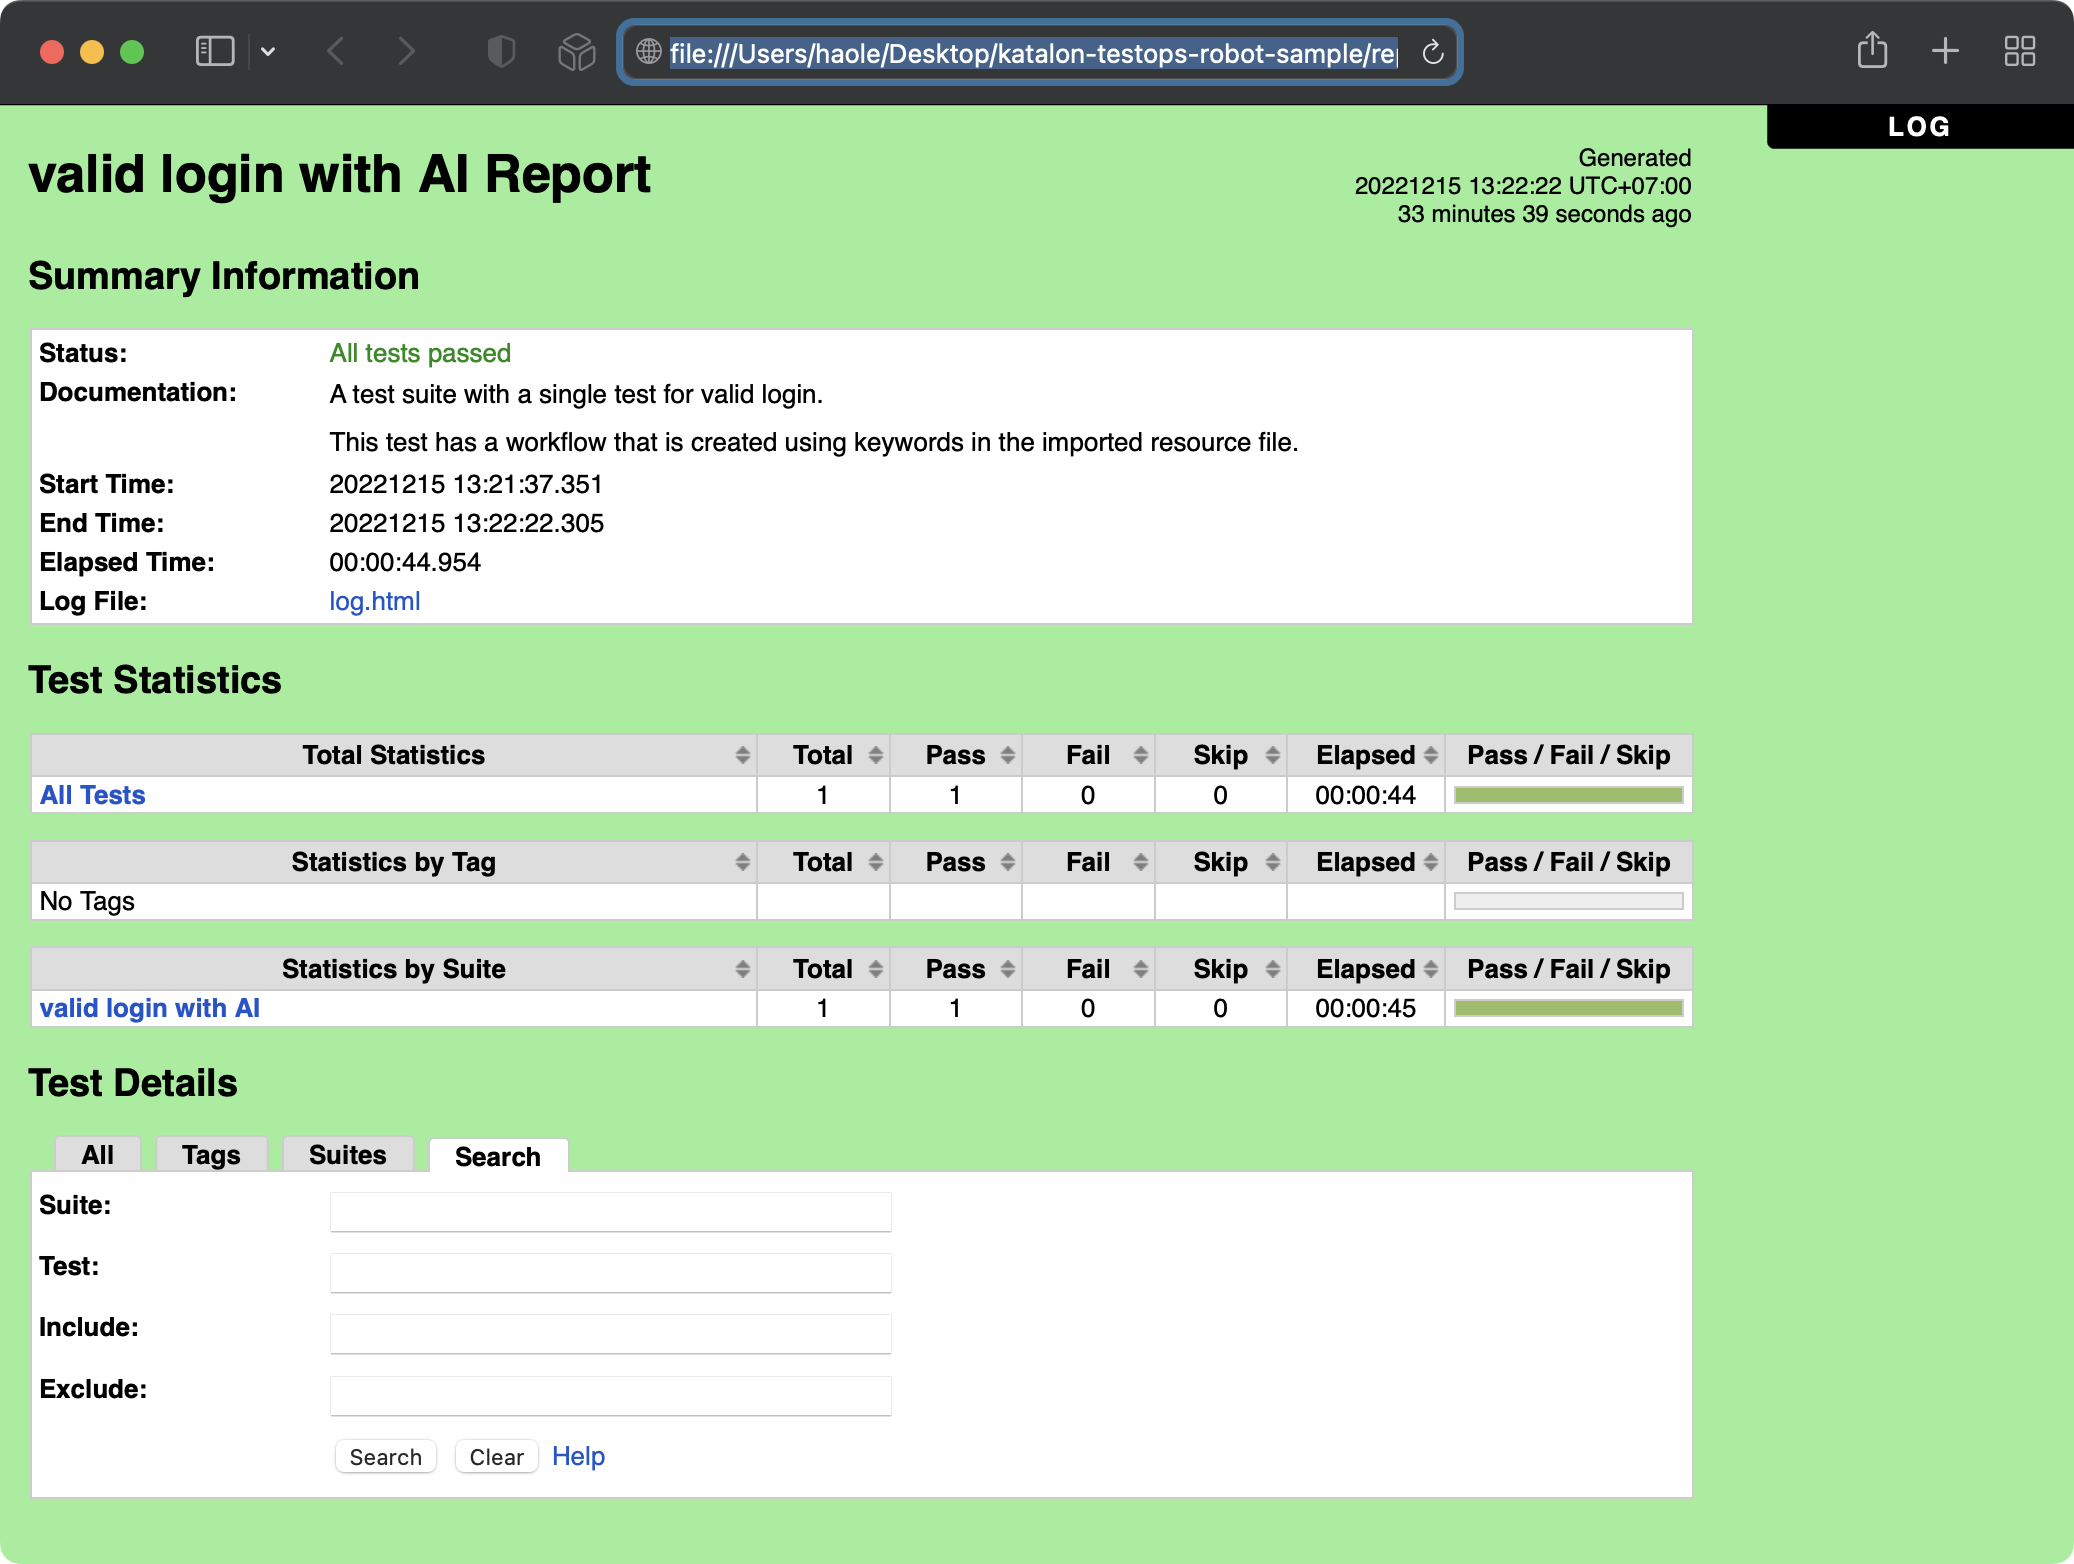
Result
Once the execution is done, you can view the test results stored in the testops-report folder (specified in testops-config.json) or with the report.html file.
Known issues
When running a Robot Framework with Katalon Visual Testing steps for the first time, you might encounter the following behaviors and issues:
- If the baseline collection is not specified in the configuration file, TestOps will generate a default baseline collection.

- When a Robot Framework test case is run, captured images are uploaded to TestOps one after another (as opposed to being uploaded altogether in a Katalon test suite). The first captured image will be labeled *New - Passed* and the rest will have *New - Unresolved* status. Therefore, to correctly compare images, you need to mark and add the Unresolved images to the default baseline manually.
We recommend creating a baseline collection and specifying it in the configuration file.