Data-driven testing with RESTful Web Service requests
Katalon Studio allows you to perform data-driven testing (DDT) with Web Service Objects.
This tutorial shows you how to create Web Service requests and test cases with variables, then bind data files to the associated request objects and test cases.
You can download the sample project here: Web Service Tests.
In our example, we want to send the user information with dynamic data, including username, password, age, gender, and avatar to the server to create an account, then receive a user ID as the response. After creating the new user, we will find that user by the user ID.
Create Web Service request objects with variables
Here we need to create two RESTful requests with variables:
- A POST request with variables to register a new user.
- A GET request with variables to get a user by ID.
Create a POST request with variables
We use the POST request to send the user information, including username, password, age, gender, and avatar to the server to create an account, then expect a user ID as the response.
Follow these steps to create and configure the POST request:
Create a Web Service request. From the main menu, select File > New > Web Service Request. In the displayed New dialog, name the request and specify the request type as RESTful request.

Specify the API endpoint. In our example, the API endpoint is
https://sample-web-service-aut.herokuapp.com/api/users/json.
To learn more about API endpoint management, refer to this document: API testing best practices.
In the Variables tab, input
username,password,gender,age, andavatarvariables.
To call a variable in a Web Service object, use the
${<variable_name>}syntax as a placeholder in any of the supported locations.Here we use the syntax to specify the variables in the HTTP Body tab.

Create a GET request with variables
Next, we use the GET request to find a user by ID. We expect the server to return the user information, including username, password, gender, age, and avatar in the response.
Follow these steps to configure the GET request:
-
Create a Web Service request. From the main menu, select File > New > Web Service Request. In the displayed New dialog, name the request and specify the request type as RESTful request.

-
Specify the API endpoint. Our API endpoint for the GET request is
https://sample-web-service-aut.herokuapp.com/api/users/. -
To pass a variable to the GET API, add the
${<variable_name>}placeholder at the end of the API endpoint.Here we specify the
idvariable using the${id}syntax as follows:https://sample-web-service-aut.herokuapp.com/api/users/${'{'}id{'}'}. -
In the Variables tab, input the
idvariable.
Create a test case with associated Web Service requests
After creating two RESTful Web Service requests with variables, we create a test case to send the POST request to register a new user and extract the user ID from the response. With the returned user ID, we send the GET request to retrieve user information and verify it.
Follow these steps to set up the test case:
-
Open a new test case. In the Script tab, enter the following code snippet to set up the test case:
// Send a POST request to create a new user // The response contains the id of the newly created user post_response = WS.sendRequest(findTestObject('POST a new user', [('username') : username, ('password') : password, ('gender') : gender, ('age') : age])) // Extract the id value from the response user_id = WS.getElementPropertyValue(post_response, 'id') println("ID of user " + username + ": " + user_id.toString()) // Send a GET request to retrieve user information by id get_response = WS.sendRequest(findTestObject('GET user by id', ['id' : user_id])) println("The response is: " + get_response.getResponseText()) // Verify that the returned values match the user information WS.verifyElementPropertyValue(get_response, 'username', username) WS.verifyElementPropertyValue(get_response, 'password', password) -
To input variables into the test case, switch to the Variables tab and pass the variables defined in the POST request object.
Here, we specify the
username,password,gender,age, andavatarvariables.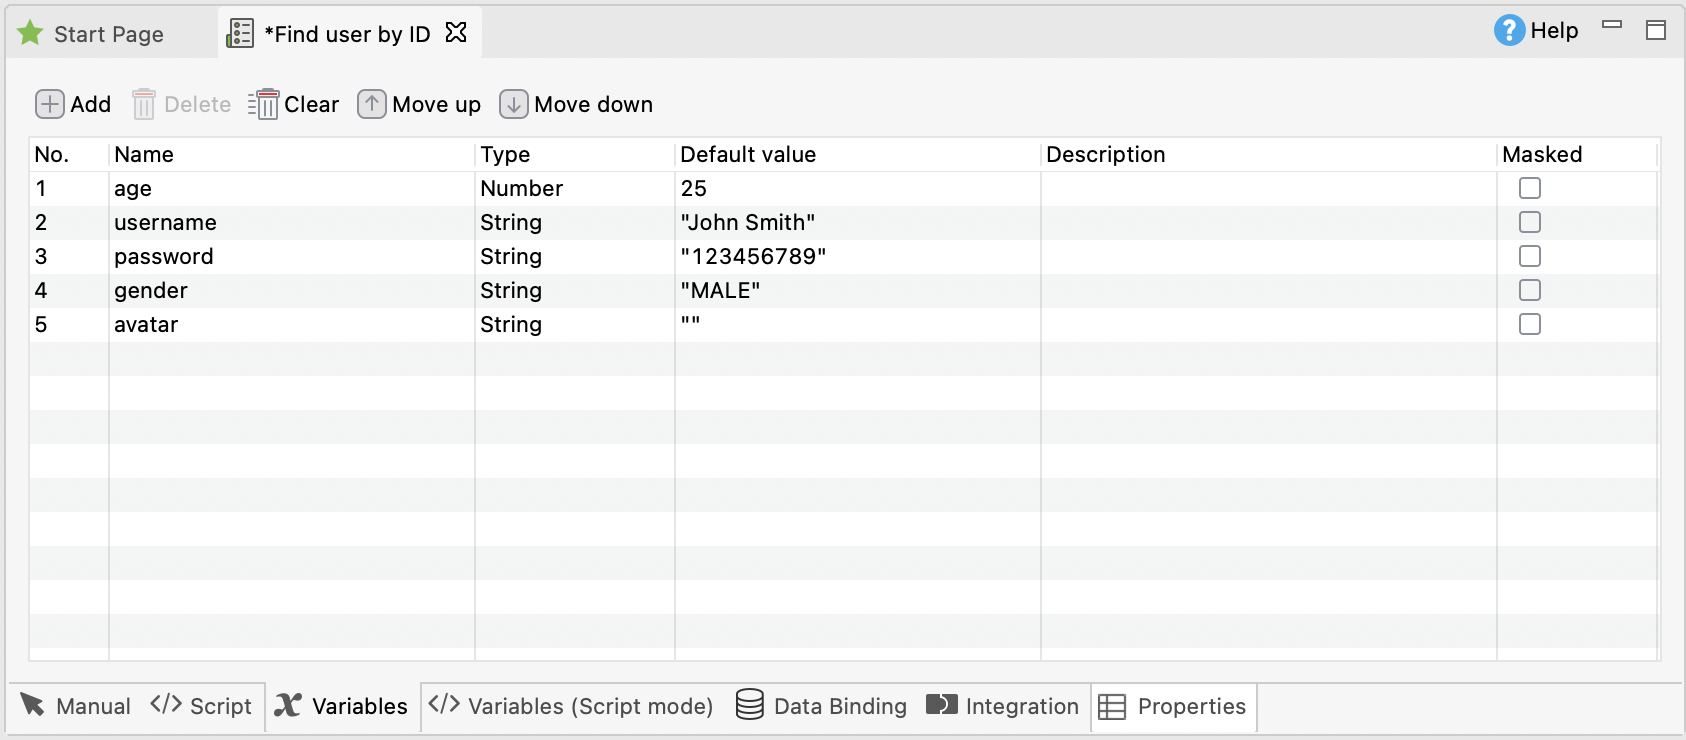
-
Run the test case and verify the test message in the Console log:

Bind data in the test suite
After configuring the test case with associated Web Service requests, we bind the test case to the test data in a test suite.
Follow these steps:
To create a test data file, from the main menu, select New > File > Test Data. In the displayed dialog, name the test data file and specify the data type.

In our example, we use an Excel file that contains user information.

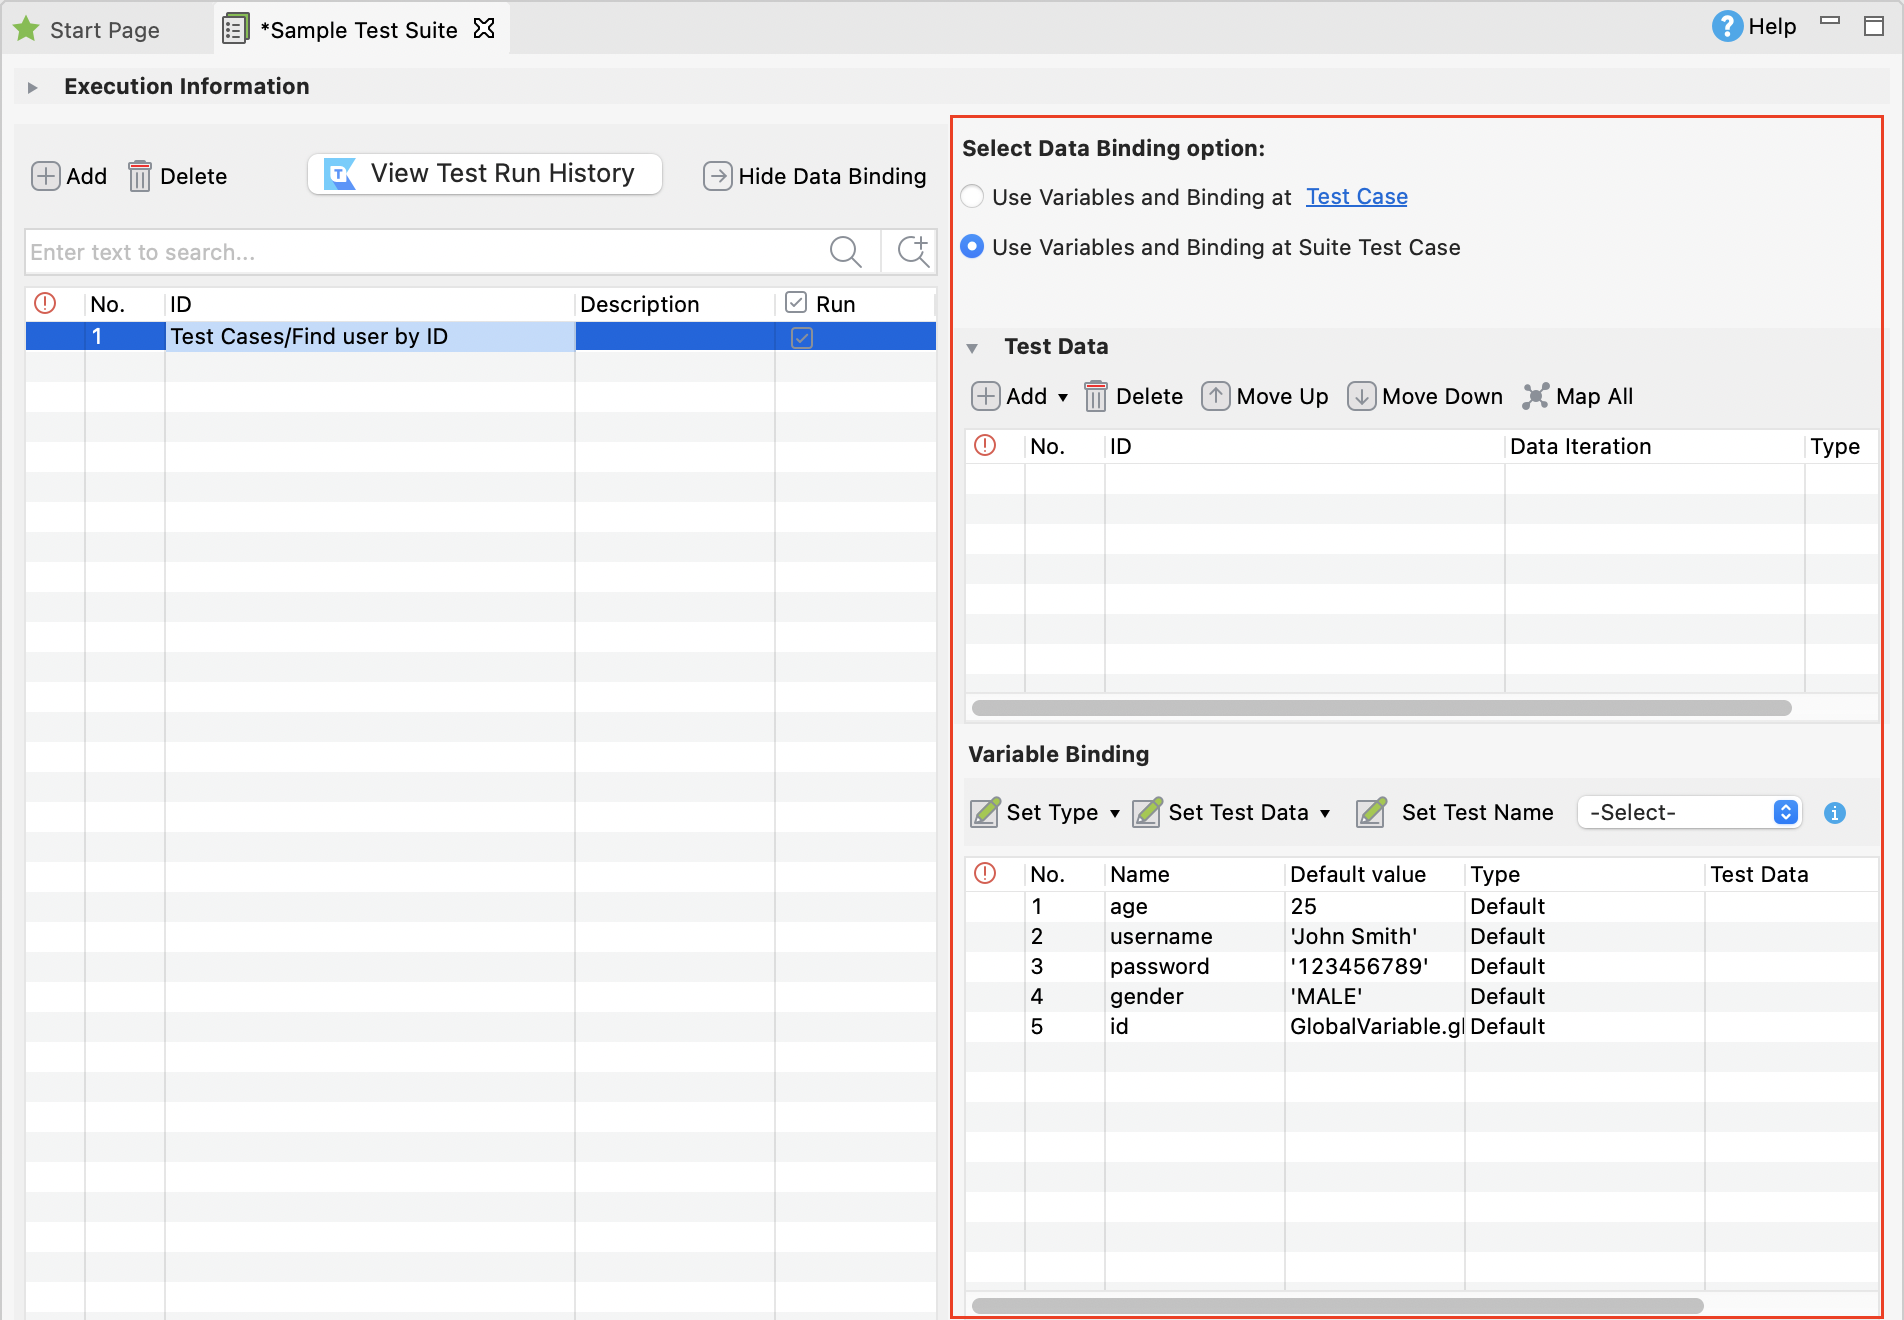
Open a new test suite, click on the Add button and include the associated test case.

To open the Data Binding section, click on the Show Data Binding button.

You need to specify the test data file and configure the variable binding. Follow the steps in this guide to configure the binding: Manage Data Binding.
Once configured, run the test suite and verify the result in the Log Viewer.

See also: