Generate browser-based videos in Katalon Studio reports
- You need an active Katalon Studio license.
- You need to install the FFmpeg library. See: Install FFmpeg library.
Record video of browser window only (even if it is hidden behind another window).
Record video of Headless browser. To learn more about Headless Browser Execution, see: Headless Browsers Execution.
Record videos of multiple browsers simultaneously (for instance, parallel execution of Test Suite Collection).
- You can only record and watch videos for Web UI testing.
- This feature supports test suite and test suite collection execution.
- This feature is available for Chrome, Microsoft Edge (Chromium-based), and Headless Chrome. To learn more about Headless Chrome, refer to the Google Developer website here: Getting Started with Headless Chrome.
- For screen-based recorder, see Generate screen-based videos in Katalon Studio reports.
Enable browser-based recorder
To enable browser-based recorder in Katalon Studio, follow the steps below:
-
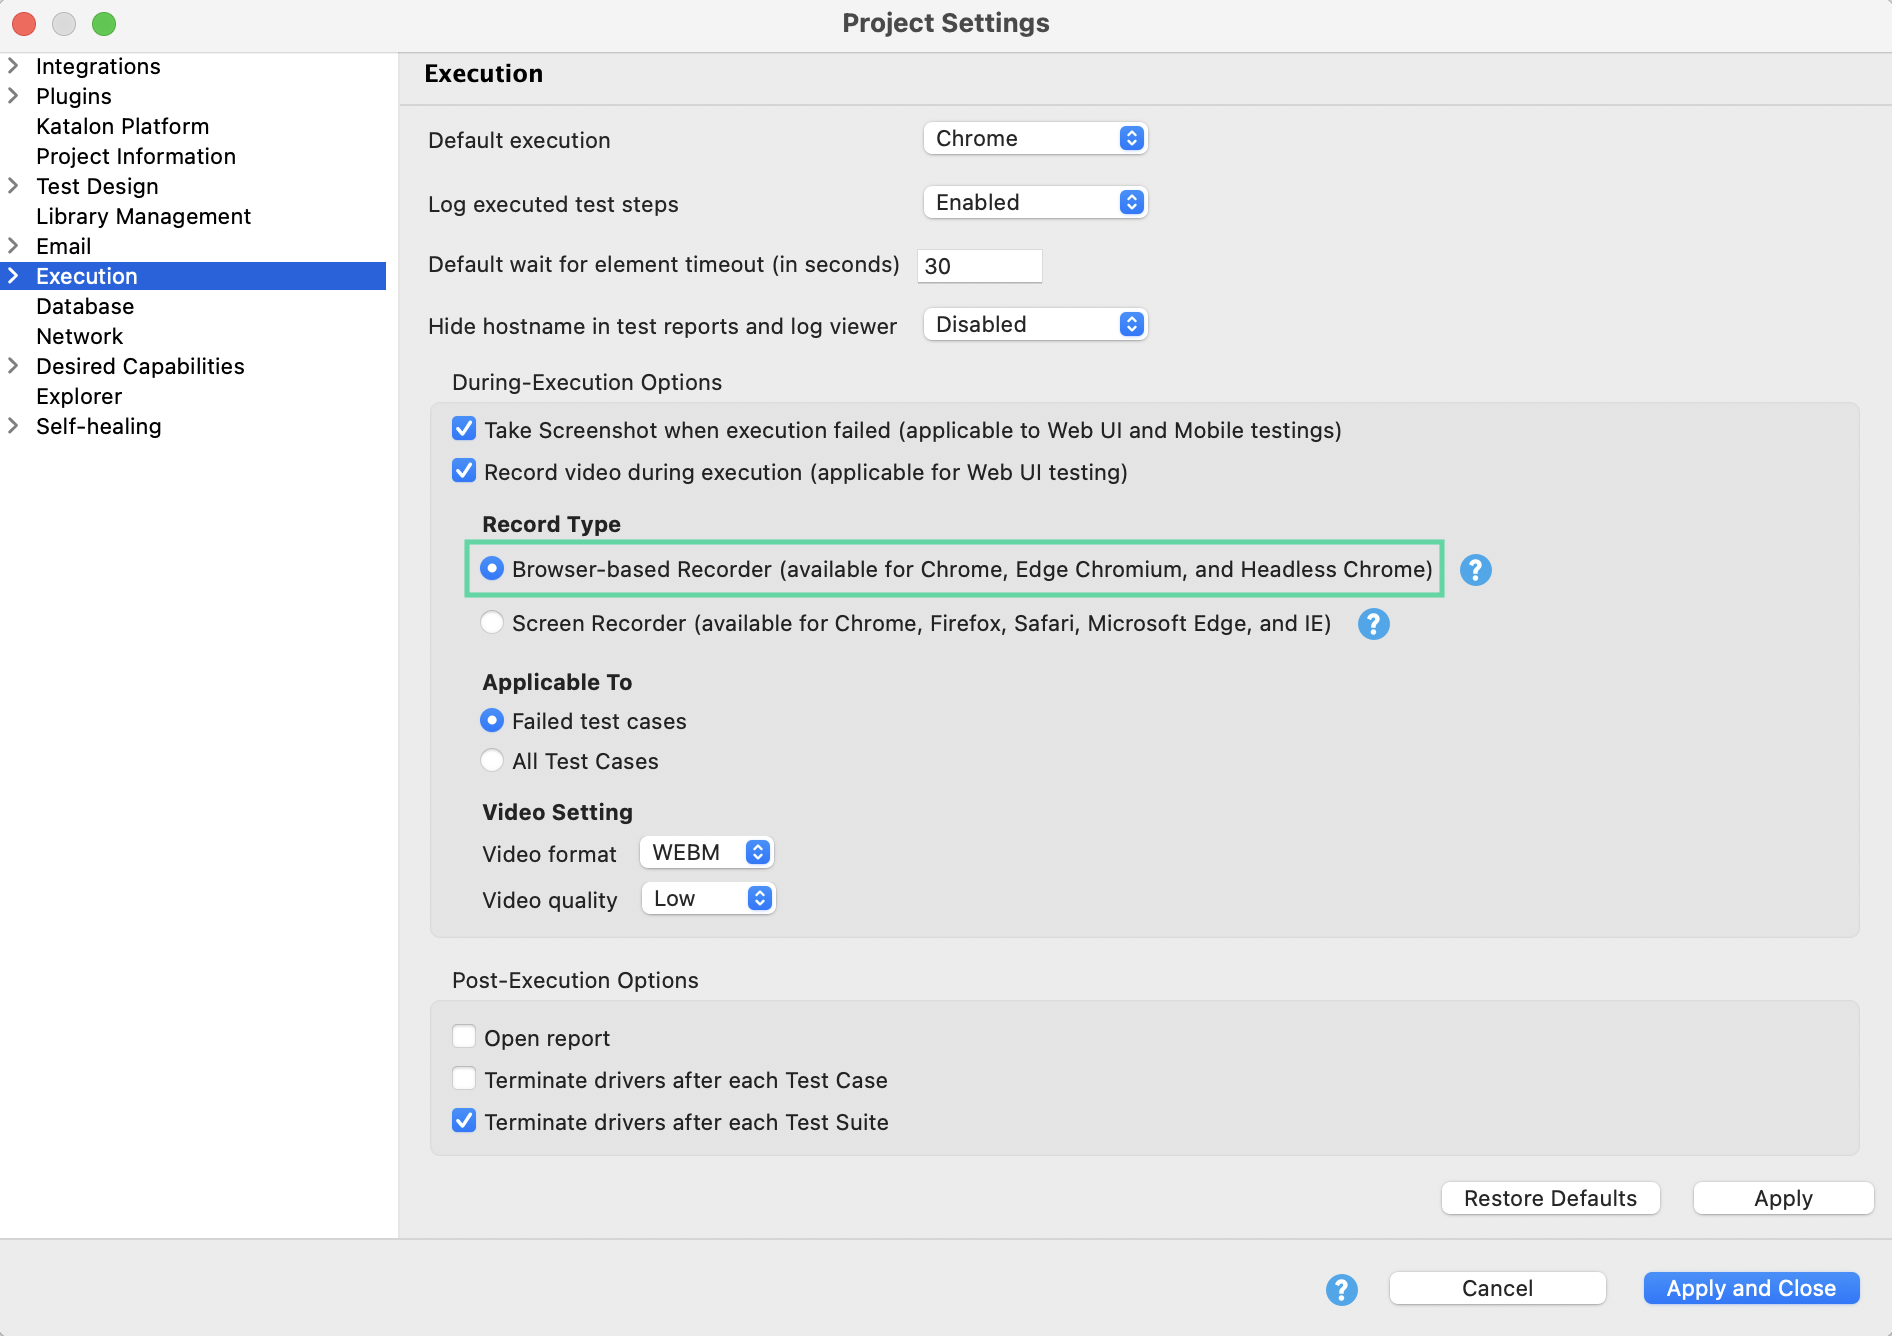
Go to Project > Settings > Execution.
-
In the During-Execution Options panel:
-
Enable Video Recorder by checking Record video during execution.
-
Select Record Type as Browser-based Recorder.
-
Specify the applicable test cases by choosing either Failed test cases or All Test Cases.
-
Specify video format and quality based on your preferences:
- Video format: WEBM (
.webm), AVI (.avi), MOV (.mov), or MP4 (.mp4). - Video quality: Low; Medium or High.
- Video format: WEBM (
-
Go to Desired Capabilities > Web UI, then select Chrome, Chrome Headless, or Edge Chromium.
-
Click the Add button, then type in the following value to set a window size of 1500x1000 for the browser to record and allow all remote origins, as shown in the sample screenshot below.
Name Type Value args List --window-size=1500,1000
--remote-allow-origins=*
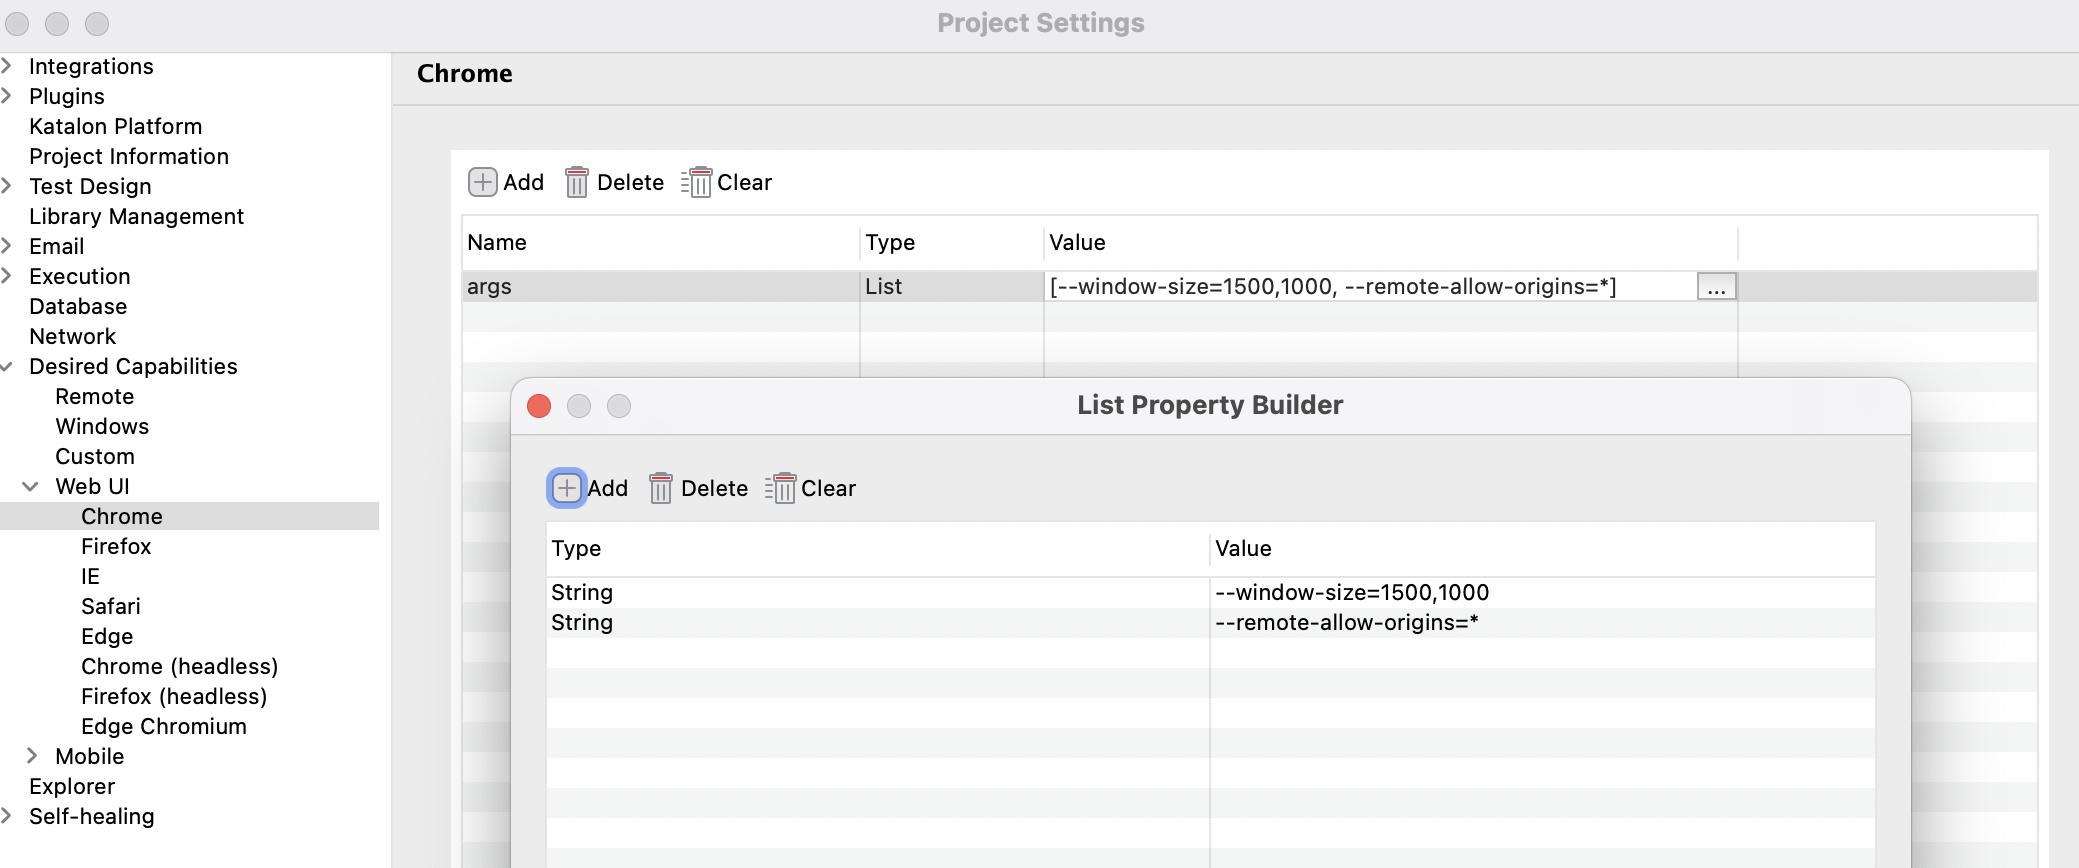
To learn more about setting desired capabilities for WebUI testing, see: Set up desired capabilities for WebUI testing.
- Click Apply & Close.
Install FFmpeg library
- For macOS, use the following command with Homebrew:
brew install ffmpeg - For Linux, use the following command:
sudo apt-get install ffmpeg - For Windows users:
Go to the FFmpeg download web page.
Download the package for Windows.
Add the path to the FFmpeg executable file to your PATH environment variable. See Add FFmpeg to PATH on Windows.
Reactivate Katalon Studio for this installation to take effect.
Attention:
FFmpeg v7 has an issue with the VP9 codec. The output file cannot be played on Chrome or Microsoft Edge browsers but works fine on Safari and Firefox. To resolve this issue, you should downgrade FFmpeg to v6.
Commands to install FFmpeg v6 on macOS:
Uninstall FFmpeg v7: brew uninstall ffmpeg
Install FFmpeg v6: brew install ffmpeg@6
Link FFmpeg v6: brew link ffmpeg@6
Verify the version: ffmpeg -version
Add FFmpeg to PATH on Windows
On Windows, to use FFmpeg with Katalon Studio, you need to add it to the system PATH. Follow these steps to configure the PATH variable:
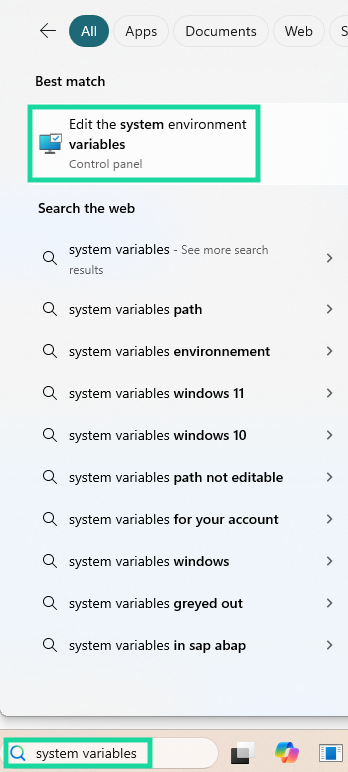
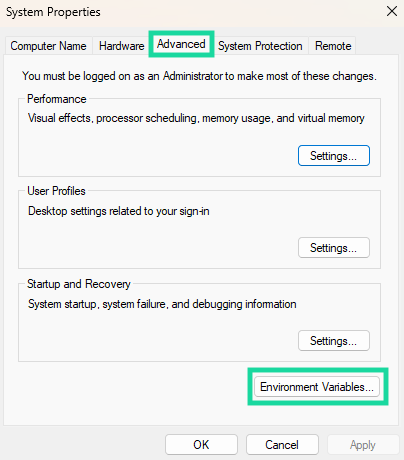
To add FFmpeg to the PATH, type system variables into the search bar, and select Edit the system environment variables.
In the System Properties window, go to the Advanced tab and select Environment Variables….
Under the User variables for [Your Username] section, locate the
Pathvariable and select Edit….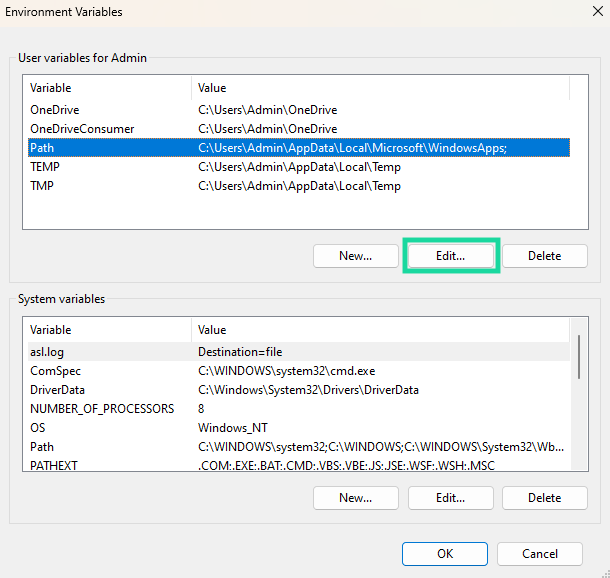
In the Edit environment variable window, click New and enter the path to the FFmpeg binary folder (for example,
C:\ffmpeg\bin).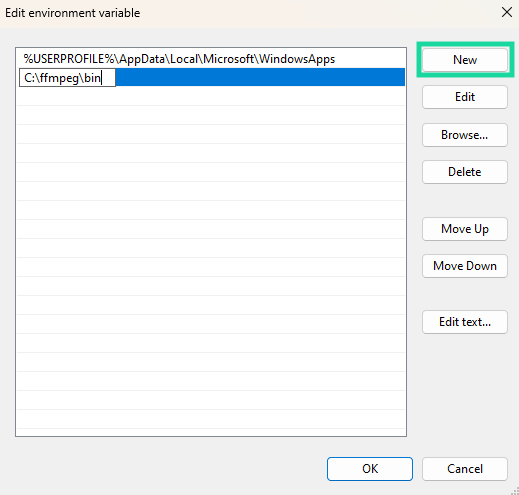
To verify that FFmpeg has been correctly added to the PATH, open the Command Prompt and run the following command:
ffmpeg -versionThe output should display FFmpeg version details, confirming the installation.

Attention:
If you have already installed FFmpeg, but typing
ffmpegin the command prompt returns nothing, make sure your user account has full permission OR run CMD window as Administrator mode.
Build and commit a Docker image with FFmpeg installed
Katalon Docker image may be used as a container to execute Katalon Studio tests and write reports to the host's file system. However, the default Katalon Docker image does not include the FFmpeg library required for browser-based video recording.
This procedure assumes you are using the Docker image
katalon:9.7.2. To check for the latest images, visit the Katalon Docker Hub.Make sure the image tag matches the version of Katalon Studio installed on your system.
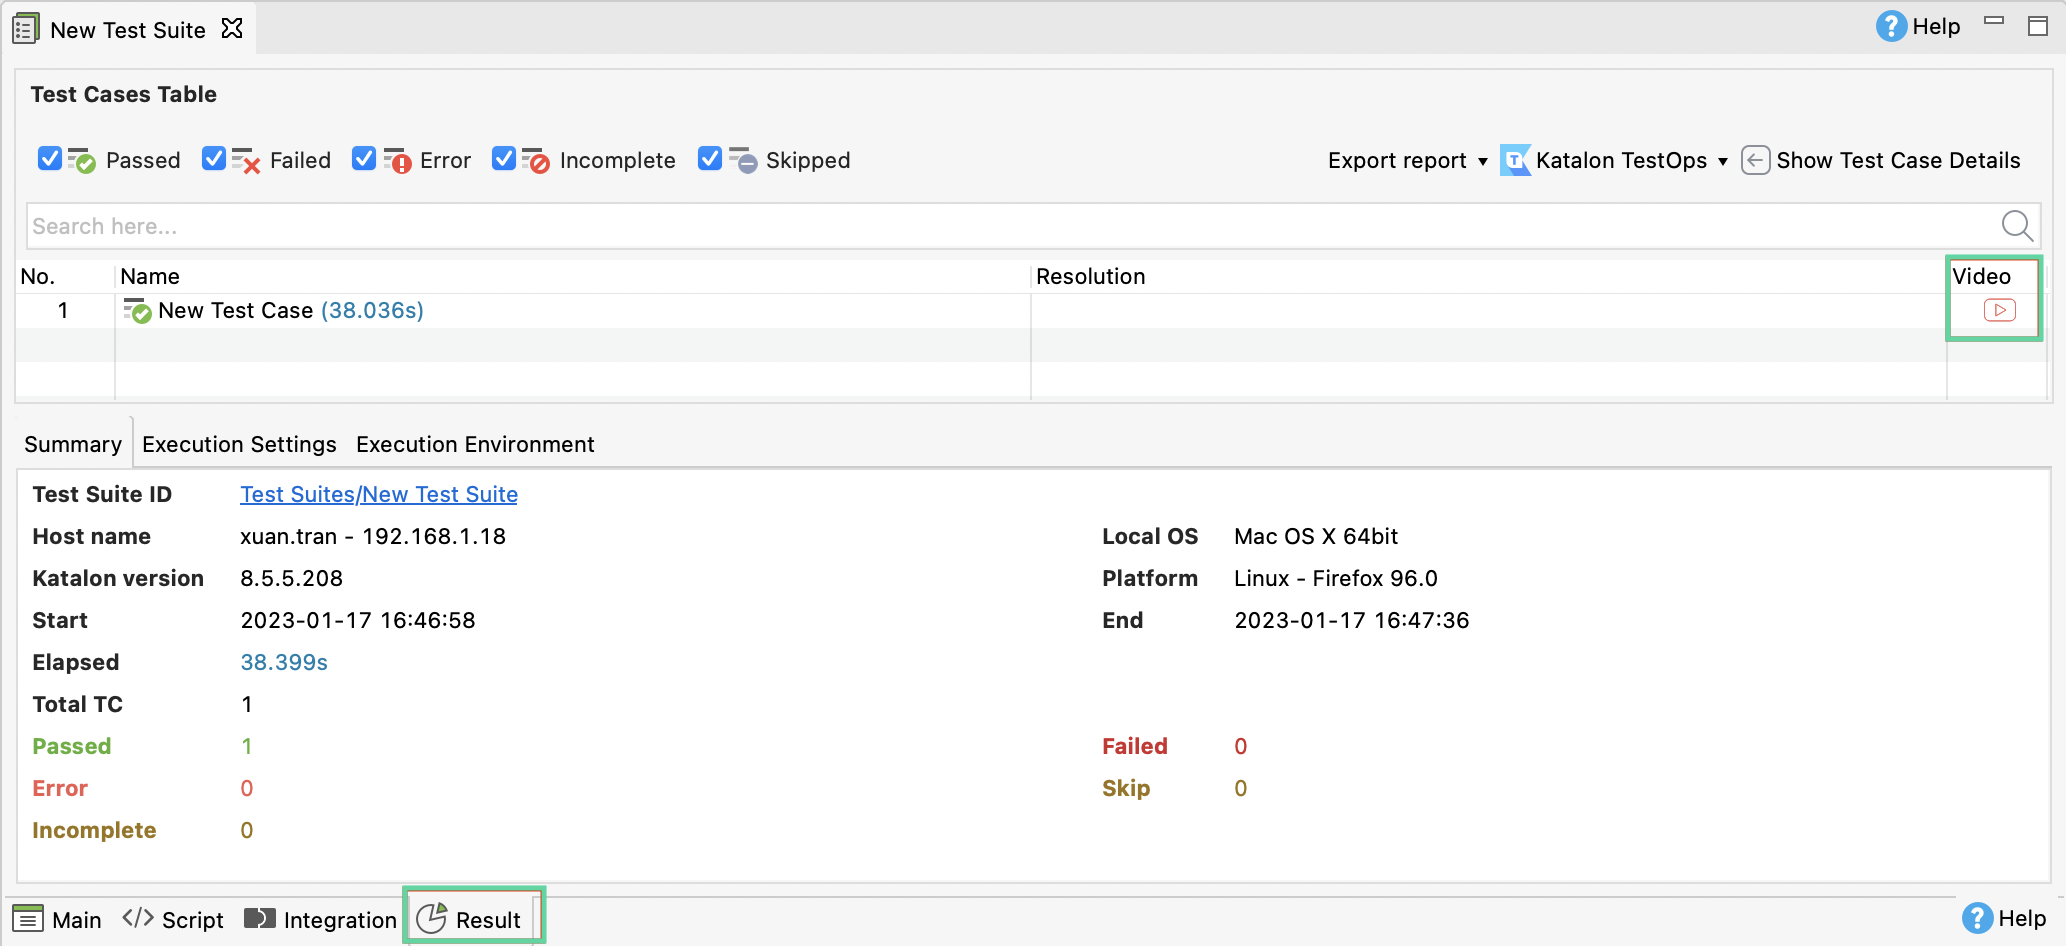
View recorded videos
Click the Play icon in the Video column to play the video as shown below. Each test step in the video has a description embedded like a subtitle.
After running the test suite, navigate to the Result tab. You can see a list of test cases. A recorded video is attached to each test case.