Set up Desired Capabilities for WebUI Testing in Katalon Studio
Katalon Studio allows you to define desired capabilities for local execution with Chrome, Firefox, Internet Explorer (IE), Safari, Edge or Edge (Chromium) in Project Settings.
This article shows you how to configure some common capabilities in WebUI testing and where they are saved.
You can find some common desired capabilities configurations in our GitHub sample project: Tips and tricks.
Chrome/Chrome (headless) desired capabilities
To set Chrome/Chrome (headless) desired capabilities, go to Project > Settings > Desired Capabilities > WebUI > Chrome/Chrome (headless). You can add, delete or clear (delete all) capabilities for Chrome/Chrome (headless) browser.
After clicking Add, provide Name, Type and Value of the property that you wish to configure.
- Desired capabilities is a JSON object (having keys and values pair). We need to set the capability Name as
keyand the capability Value asvalue. - The capabilities keys are case-sensitive.
- If the property requires an
integervalue, be sure to add the value without decimal. E.g.profile.default_content_setting_values.notificationstakes values0,1, and2- assigning1.0would not work.

Alternatively, go to <your test project location>\settings\internal, open the settings files for Chrome/Chrome (headless), and edit the capabilities in the Groovy script.
| Driver | Settings file |
|---|---|
| Chrome | com.kms.katalon.core.webui.chrome.properties |
| Chrome (Headless) | com.kms.katalon.core.webui.chrome (headless).properties |
To see all ChromeDriver supported capabilities, you can refer to the ChromeDriver document here: Capabilities & ChromeOptions.
Common use cases
Below are some common use cases of the desired capabilities for Chrome:
Use case 1: To start Chrome maximized by default. Click Add on the command toolbar, then type in the following value.
| Name | Type | Value |
|---|---|---|
| args | List | --start-maximized |

Alternatively, add the following script into the settings file for Chrome/Chrome (headless) in <your test project location>\settings\internal\.
{
  "CHROME_DRIVER": {
    "args": [
      "--start-maximized"
    ]
  }
}
Use case 2: To start Chrome in incognito (private) mode. Click Add on the command toolbar, then type in the following value.
| Name | Type | Value |
|---|---|---|
| args | List | --incognito |

Alternatively, add the following script into the settings file for Chrome/Chrome (headless) in <your test project location>\settings\internal\.
{
  "CHROME_DRIVER": {
    "args": [
      "--incognito"
    ]
  }
}
Use case 3: Configure Chrome to automatically download files to a specific directory.
| Name | Type | Value |
|---|---|---|
| prefs | Dictionary | Click More (...). In the pop-up Dictionary Property Builder dialog, input values from Table 2. |
| Name | Type | Value |
|---|---|---|
| download.default_directory | String | C:\Downloads |
| download.prompt_for_download | Boolean | false |
| download.directory_upgrade | Boolean | true |
Alternatively, add the following script into the settings file for Chrome/Chrome (headless) in <your test project location>\settings\internal\.
{
  "CHROME_DRIVER": {
      "prefs": {
        "download.default_directory": "C:\\Downloads",
        "download.prompt_for_download": false,
        "download.directory_upgrade": true
      }
    }
}
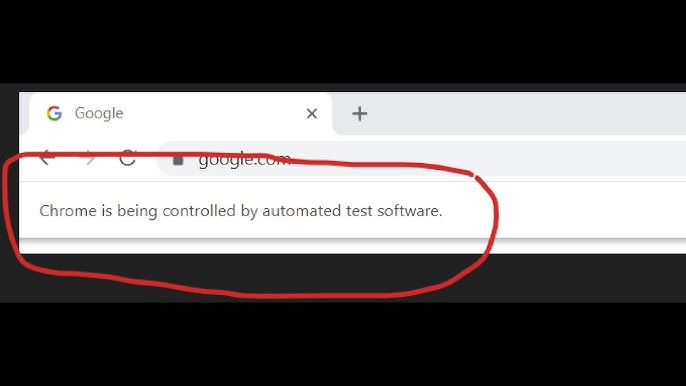
Use case 4: Hide Chrome is being controlled by automated test software message
When running automated web tests using Katalon Studio with Chrome, users may notice the Chrome is being controlled by automated test software message displayed at the top of the browser. It's harmless, but distracting and doesn't look good on client-facing demos.
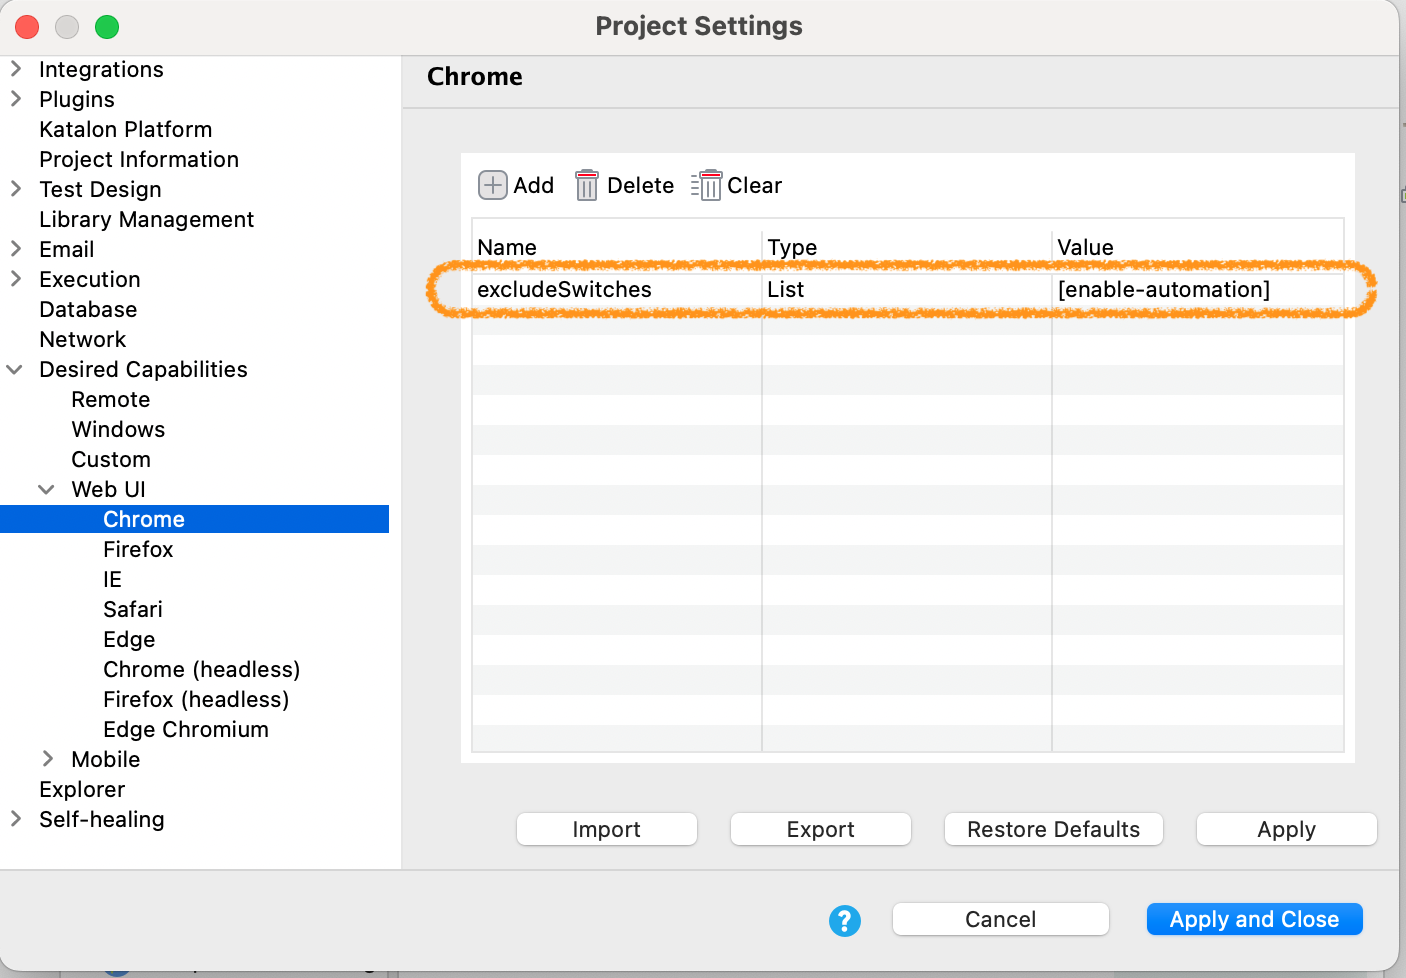
You can add the following argument in Desired Capabilities > Web UI > Chrome to hide it (the hiding is visual only, Chrome will still be running in automation mode):
| Name | Type | Value |
|---|---|---|
excludeSwitches | List | [enable-automation] |
This prevents ChromeDriver from applying the automation flag that triggers the banner.
Use case 5: Bypass the Local Network Access popup in Chrome
When running tests on Web applications that access local network resources, Chrome may display a Local Network Access permission popup, which can block execution and cause test failures.
Disabling web security should be used only in test environments. It is not recommended for production-like security testing, as it relaxes Chrome’s built-in security restrictions.
You can bypass this popup by adding the following value in Chrome Desired Capabilities:
| Name | Type | Value |
|---|---|---|
| args | List | --disable-web-security |
This argument disables Chrome’s web security checks, allowing access to local network resources without triggering the popup during automated execution.
Alternatively, add the following script into the settings file for Chrome/Chrome (headless) in <your test project location>\settings\internal\.
{
  "CHROME_DRIVER": {
    "args": [
      "--disable-web-security"
    ]
  }
}
Firefox/Firefox (headless) desired capabilities
To get access to some useful capabilities for Firefox, follow these steps:
- Open Firefox browser
- In the address bar, type
about:config - Search for the browser key

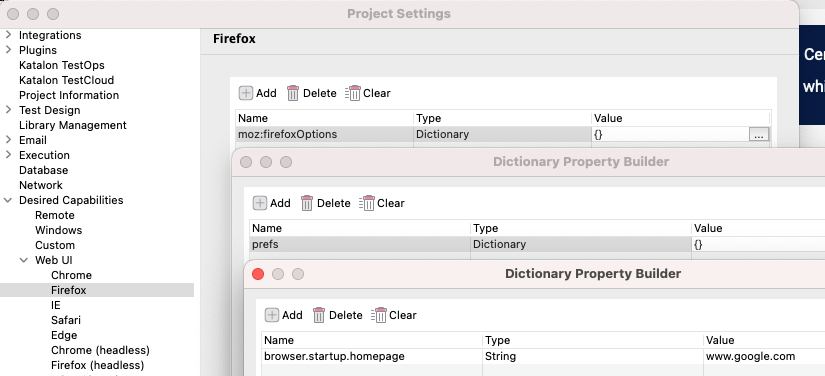
To define Firefox desired capabilities in Katalon Studio, follow these steps:
- Go to Project > Settings > Desired Capabilities > WebUI > Firefox/Firefox (headless).
- Click Add to create a key called
moz:firefoxOptions. - Add your capabilities inside the
moz:firefoxOptionskey.

To learn more about the use of the moz:firefoxOptions key, you can refer to the Mozilla developer document here: firefoxOptions.
Alternatively, go to <your test project location>\settings\internal, open the settings files for Firefox/Firefox (headless), and edit the capabilities in Groovy.
| Driver | Settings file |
|---|---|
| Firefox | com.kms.katalon.core.webui.firefox.properties |
| Firefox (Headless) | com.kms.katalon.core.webui.firefox (headless).properties |
Common use cases
Belows are some common use cases of the desired capabilities for Firefox:
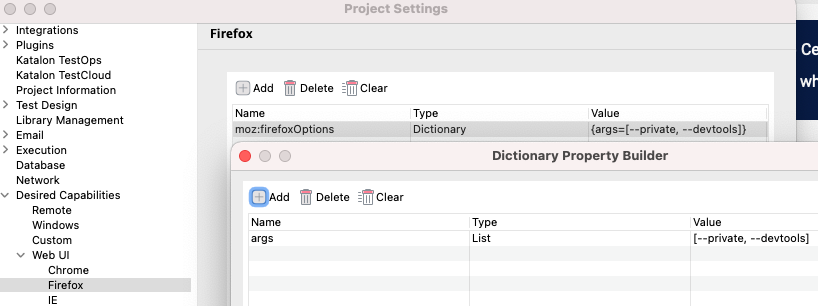
Use case 1: Start Firefox with devtools in private mode. To do so, click Add on the command toolbar, then input the following values:
| Name | Type | Value |
|---|---|---|
| moz:firefoxOptions | Dictionary | Click More (...). In the pop-up Dictionary Property Builder dialog, input values from Table 2. |
| Name | Type | Value |
|---|---|---|
| args | List | --devtools,--private |
Alternatively, go to <your test project location>\settings\internal, open the settings files for Firefox/Firefox (headless), and edit the capabilities in Groovy.
{
  "FIREFOX_DRIVER": {
    "moz:firefoxOptions": {
      "args": [
        "--private",
        "--devtools"
      ]
    }
  }
}
Use case 2: Start Firefox at a default page. To do so, click Add on the command toolbar, then input the following values:
| Name | Type | Value |
|---|---|---|
| moz:firefoxOptions | Dictionary | Click More (...). In the pop-up Dictionary Property Builder dialog, input values from Table 2. |
| Name | Type | Value |
|---|---|---|
| prefs | Dictionary | Click More (...). In the pop-up Dictionary Property Builder dialog, input values from Table 3. |
| Name | Type | Value |
|---|---|---|
| browser.startup.homepage | String | www.google.com |
Alternatively, go to <your test project location>\settings\internal, open the settings files for Firefox/Firefox (headless), and edit the capabilities in Groovy.
{
  "FIREFOX_DRIVER": {
    "moz:firefoxOptions": {
      "prefs": {
        "browser.startup.homepage": "https://www.google.com/"
      }
    }
  }
}
Use case 3: Download files to specified folders. Here, we want to download .html files to the C:\Downloads folder. To do so, click Add in the command toolbar, input the following values:
| Name | Type | Value |
|---|---|---|
| moz:firefoxOptions | Dictionary | Click More (...). In the pop-up Dictionary Property Builder dialog, input values from Table 2. |
| Name | Type | Value |
|---|---|---|
| prefs | Dictionary | Click More (...). In the pop-up Dictionary Property Builder dialog, input values from Table 3. |
| Name | Type | Value |
|---|---|---|
| browser.download.folderList | Number | 2.0 |
| browser.helperApps.alwaysAsk.force | Boolean | False |
| browser.download.manager.showWhenStarting | Boolean | False |
| browser.download.dir | String | C:\Downloads |
| browser.download.dir | String | C:\Downloads |
| browser.download.defaultFolder | String | C:\Downloads |
| browser.helperApps.neverAsk.saveToDisk | String | text/html |
Explanation of the settings:
browser.download.folderList: Setting this preference as2tells Firefox to use the directory specified inbrowser.download.diras the download folder instead. You can learn more about this preference in the MozillaZine document here: About:config entries.browser.download.manager.showWhenStarting: Setting this preference asFalseturns off the showing of download progress.browser.download.dir: This preference is to set path for the downloading folder, for example,C:\Downloads.browser.helperApps.neverAsk.saveToDisk: This preference tells Firefox to automatically download the files of the selected MIME types. The list of MIME types is comma-separated. To find the MIME types of the files you want to download, you can refer to the Mozilla developer document here: Check MIME types.
Alternatively, go to <your test project location>\settings\internal, open the settings files for Firefox/Firefox (headless), and edit the capabilities in Groovy.
{
  "FIREFOX_DRIVER": {
    "moz:firefoxOptions": {
      "prefs": {
        "browser.download.folderList": 2.0,
        "browser.helperApps.alwaysAsk.force": false,
        "browser.download.manager.showWhenStarting": false,
        "browser.download.dir": "C:\\Downloads",
        "browser.download.downloadDir": "C:\\Downloads",
        "browser.download.defaultFolder": "C:\\Downloads",
        "browser.helperApps.neverAsk.saveToDisk": "text/html"
      }
    }
  }
}

Internet Explorer (IE) desired capabilities
The Internet Explorer (IE) driver supports some essential capabilities which can be used for smooth test execution. These capabilities ease the way for automation testing using Selenium WebDriver on Internet Explorer. You can learn more about supported IE capabilities here: IE Specific.
To set desired capabilities for IE, go to Project > Settings > Desired Capabilities > WebUI > IE.
Alternatively, go to <your test project location>\settings\internal , open the settings files for Internet Explorer, and edit the capabilities in Groovy.
| Driver | Settings file |
|---|---|
| Internet Explorer | com.kms.katalon.core.webui.ie.properties |
Common use cases
The most common use of Internet Explorer desired capabilities is to configure Internet Explorer for automation testing. To do so, click Add on the common toolbar, input the following values:
If you want to configure Internet Explorer globally, you can refer to this document: Internet Explorer Configurations.
| Name | Type | Value |
|---|---|---|
| ignoreProtectedModeSettings | Boolean | True |
| ignoreZoomSetting | Boolean | True |
| enablePersistentHover | Boolean | false |
| requireWindowFocus | Boolean | false |

Alternatively, go to <your test project location>\settings\internal , open the settings files for Internet Explorer, and edit the capabilities in Groovy.
{
  "IE_DRIVER": "ignoreProtectedModeSettings\t",
  "ignoreZoomSetting": true,
  "enablePersistentHover": false,
  "requireWindowFocus": false
}
Explanation of the settings:
ignoreProtectedModeSettings: This capability determines whether to skip the protected mode check. Enable this capability for smooth test execution with IE.ignoreZoomSetting: This capability indicates whether to skip checking that the browser's zoom level is set to 100%. Value is set to false by default.enablePersistentHover: This capability determines whether persistent hovering is enabled (true by default). Persistent hovering is achieved by continuously firing the mouse over events at the last location where the mouse cursor has been moved to.requireWindowFocus: This capability determines whether to require the IE window to focus before performing any user interaction operations (mouse or keyboard events). This capability is false by default.
Edge Chromium desired capabilities
To set Edge Chromium desired capabilities, go to Project Settings > Desired Capabilities > WebUI > Edge Chromium.
Common use cases
Below are some common use cases of the desired capabilities for Edge Chromium:
Use case 1: Set Edge Chromium window size. To do so, click Add on the command toolbar, then input the following values:
| Name | Type | Value |
|---|---|---|
| ms:edgeOptions | Dictionary | Click More (...). In the pop-up Dictionary Property Builder dialog, input values from Table 2. |
| ms:edgeChromium | Boolean | true |
| Name | Type | Value |
|---|---|---|
| args | List | Click More (...). In the pop-up List Property Builder dialog, input values from Table 3. |
| Type | Value |
|---|---|
| String | window-size=100,100 |
Use case 2: Set high-dpi-support and force-device-scale-factor desired capabilities. Click Add on the command toolbar, then input the following values:
| Name | Type | Value |
|---|---|---|
| ms:edgeOptions | Dictionary | Click More (...). In the pop-up Dictionary Property Builder dialog, input values from Table 2. |
| ms:edgeChromium | Boolean | true |
| Name | Type | Value |
|---|---|---|
| args | List | Click More (...). In the pop-up List Property Builder dialog, input values from Table 3. |
| Type | Value |
|---|---|
| String | --start-maximized |
| String | force-device-scale-factor=0.75 |
| String | high-dpi-support=0.75 |
Use case 3: Run Edge Chromium in headless mode. This setup is commonly used in CI/CD pipelines, Docker containers, or non-GUI environments.
Add the following values:
| Name | Type | Value |
|---|---|---|
| ms:edgeOptions | Dictionary | Click More (...). In the pop-up Dictionary Property Builder dialog, input values from Table 2. |
| Name | Type | Value |
|---|---|---|
| args | List | Click More (...). In the pop-up List Property Builder dialog, input values from Table 3. |
| Type | Value |
|---|---|
| String | disable-gpu |
| String | headless |
Your final structure should look like this:
ms:edgeOptionsargsdisable-gpuheadless
Apply and run a test case using Edge Chromium. Edge Chromium will now run in headless mode.
Location of desired capabilities files
You can find the settings files for each environment in the <your test project location>\settings\internal folder.
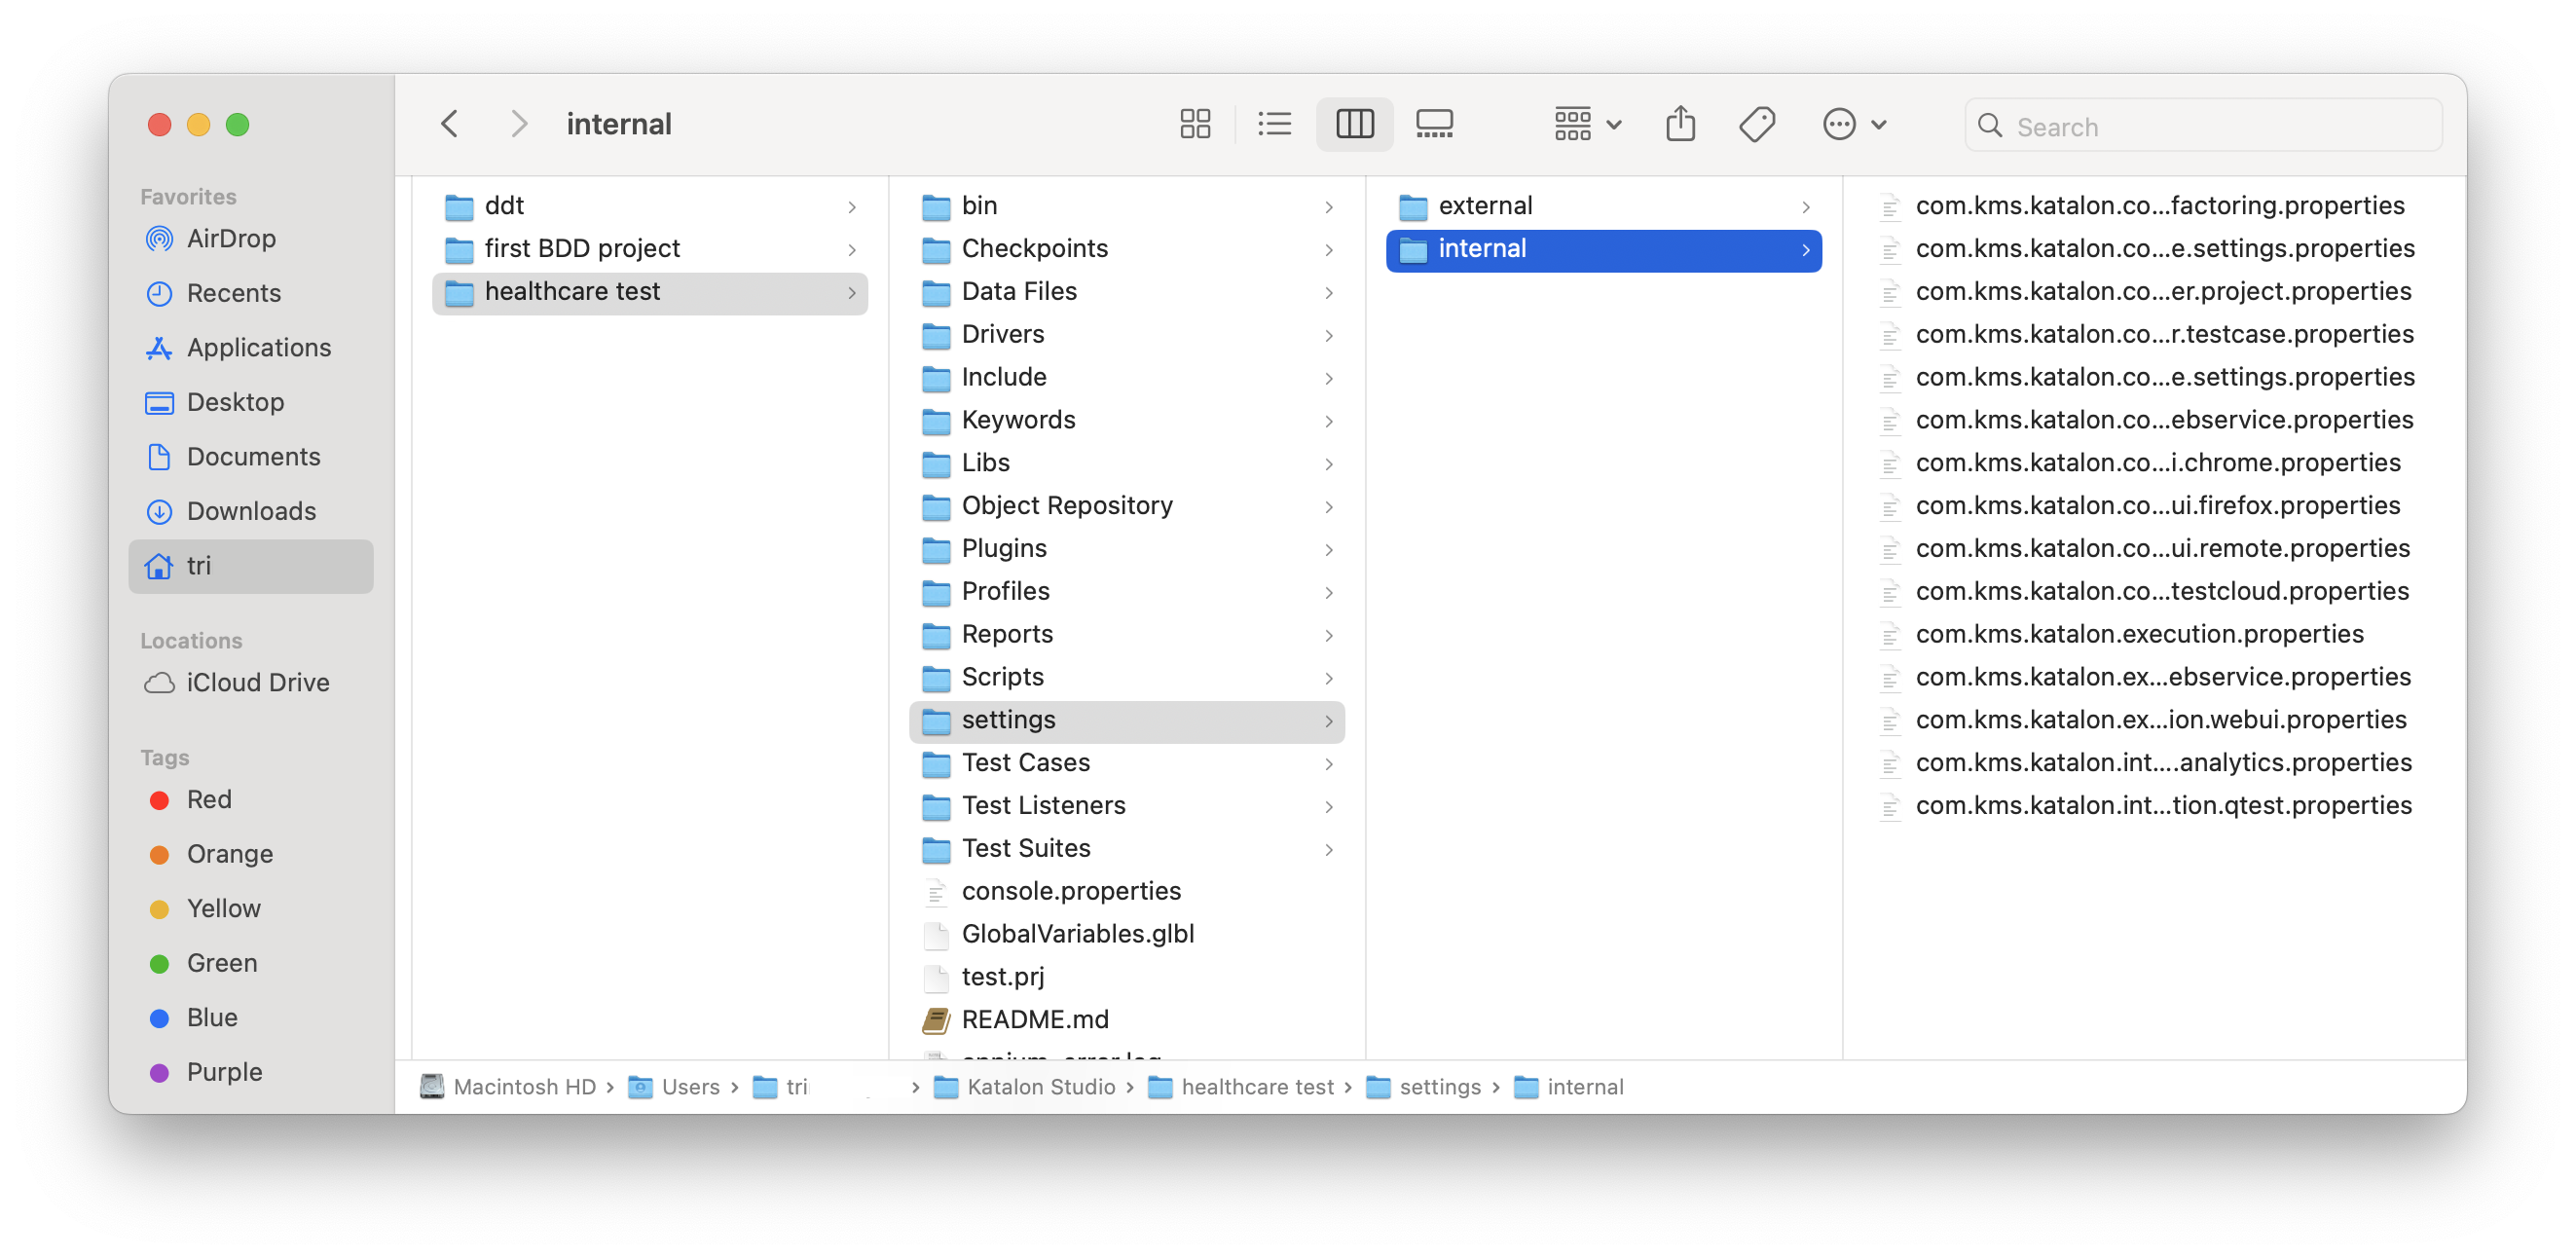
The files for each driver are named as follows:
| Driver | Settings file |
|---|---|
| Chrome | com.kms.katalon.core.webui.chrome.properties |
| Firefox | com.kms.katalon.core.webui.firefox.properties |
| Chrome (Headless) | com.kms.katalon.core.webui.chrome (headless).properties |
| Firefox (Headless) | com.kms.katalon.core.webui.firefox (headless).properties |
| IE | com.kms.katalon.core.webui.ie.properties |
| Safari | com.kms.katalon.core.webui.safari.properties |
| Edge | com.kms.katalon.core.webui.edge.properties |
| Edge (Chromium) | com.kms.katalon.core.webui.edge chromium.properties |
Advanced use cases
Zooming in browsers
When executing tests in a CI/CD environment, the website may be scaled beyond 100%, causing UI elements to appear misaligned.
To perform zooming, you can set a fixed browser size, then use JavascriptExecutor to perform zooming:
- Configure browser size in Desired Capabilities, for the browser env you want to execute in. This example sets window size to
1200x600:
| Name | Type | Value |
|---|---|---|
| args | List | [--window-size=1200,600] |
- Add
JavascriptExecutorscript to your test case
This script below should be added after the WebUI.openBrowser('') step, and before the use of WebUI.navigateToUrl:
import org.openqa.selenium.WebDriver
import com.kms.katalon.core.webui.driver.DriverFactory
import org.openqa.selenium.JavascriptExecutor

WebDriver driver = DriverFactory.getWebDriver()

// If you run with Edge Chromium, change this to edge://settings/
driver.get("chrome://settings/")

WebUI.delay(3)

// Set zoom to [zoom_level_in_decimal]. E.g. 0.75 for zoom level 75%
((JavascriptExecutor) driver).executeScript(
 "chrome.settingsPrivate.setDefaultZoom([zoom_level_in_decimal]);"
)
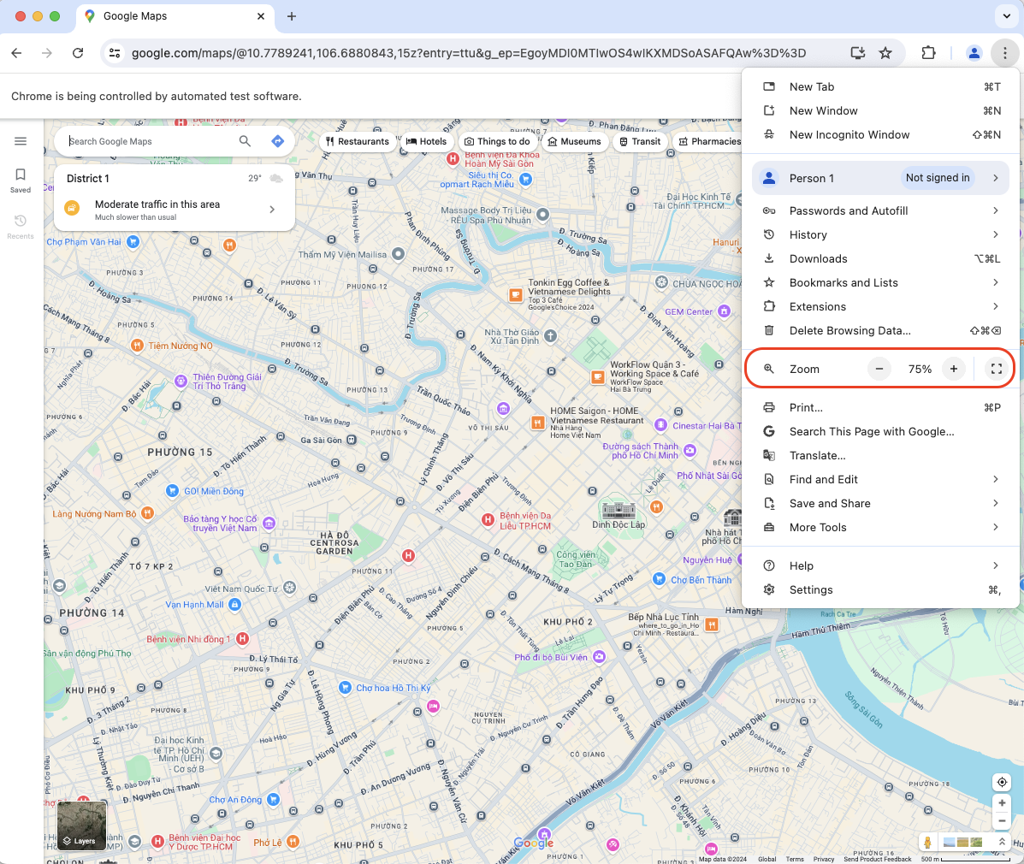
For example, in the below test case, the Google Map site is accessed, then zoomed out to 75%:
Click to expand
import org.openqa.selenium.JavascriptExecutor
import org.openqa.selenium.WebDriver
import com.kms.katalon.core.webui.driver.DriverFactory
import com.kms.katalon.core.webui.keyword.WebUiBuiltInKeywords as WebUI

WebUI.openBrowser('')

WebDriver driver = DriverFactory.getWebDriver()

// If you run with Edge Chromium, change this to edge://settings/
driver.get("chrome://settings/")

WebUI.delay(3)

// Set zoom to 75%, in decimal
((JavascriptExecutor) driver).executeScript(
 "chrome.settingsPrivate.setDefaultZoom(0.75);"
)

// Open Google Maps as an example
WebUI.navigateToUrl(
 'https://www.google.com/maps/@10.7789241,106.6880843,15z?entry=ttu'
)
Results: