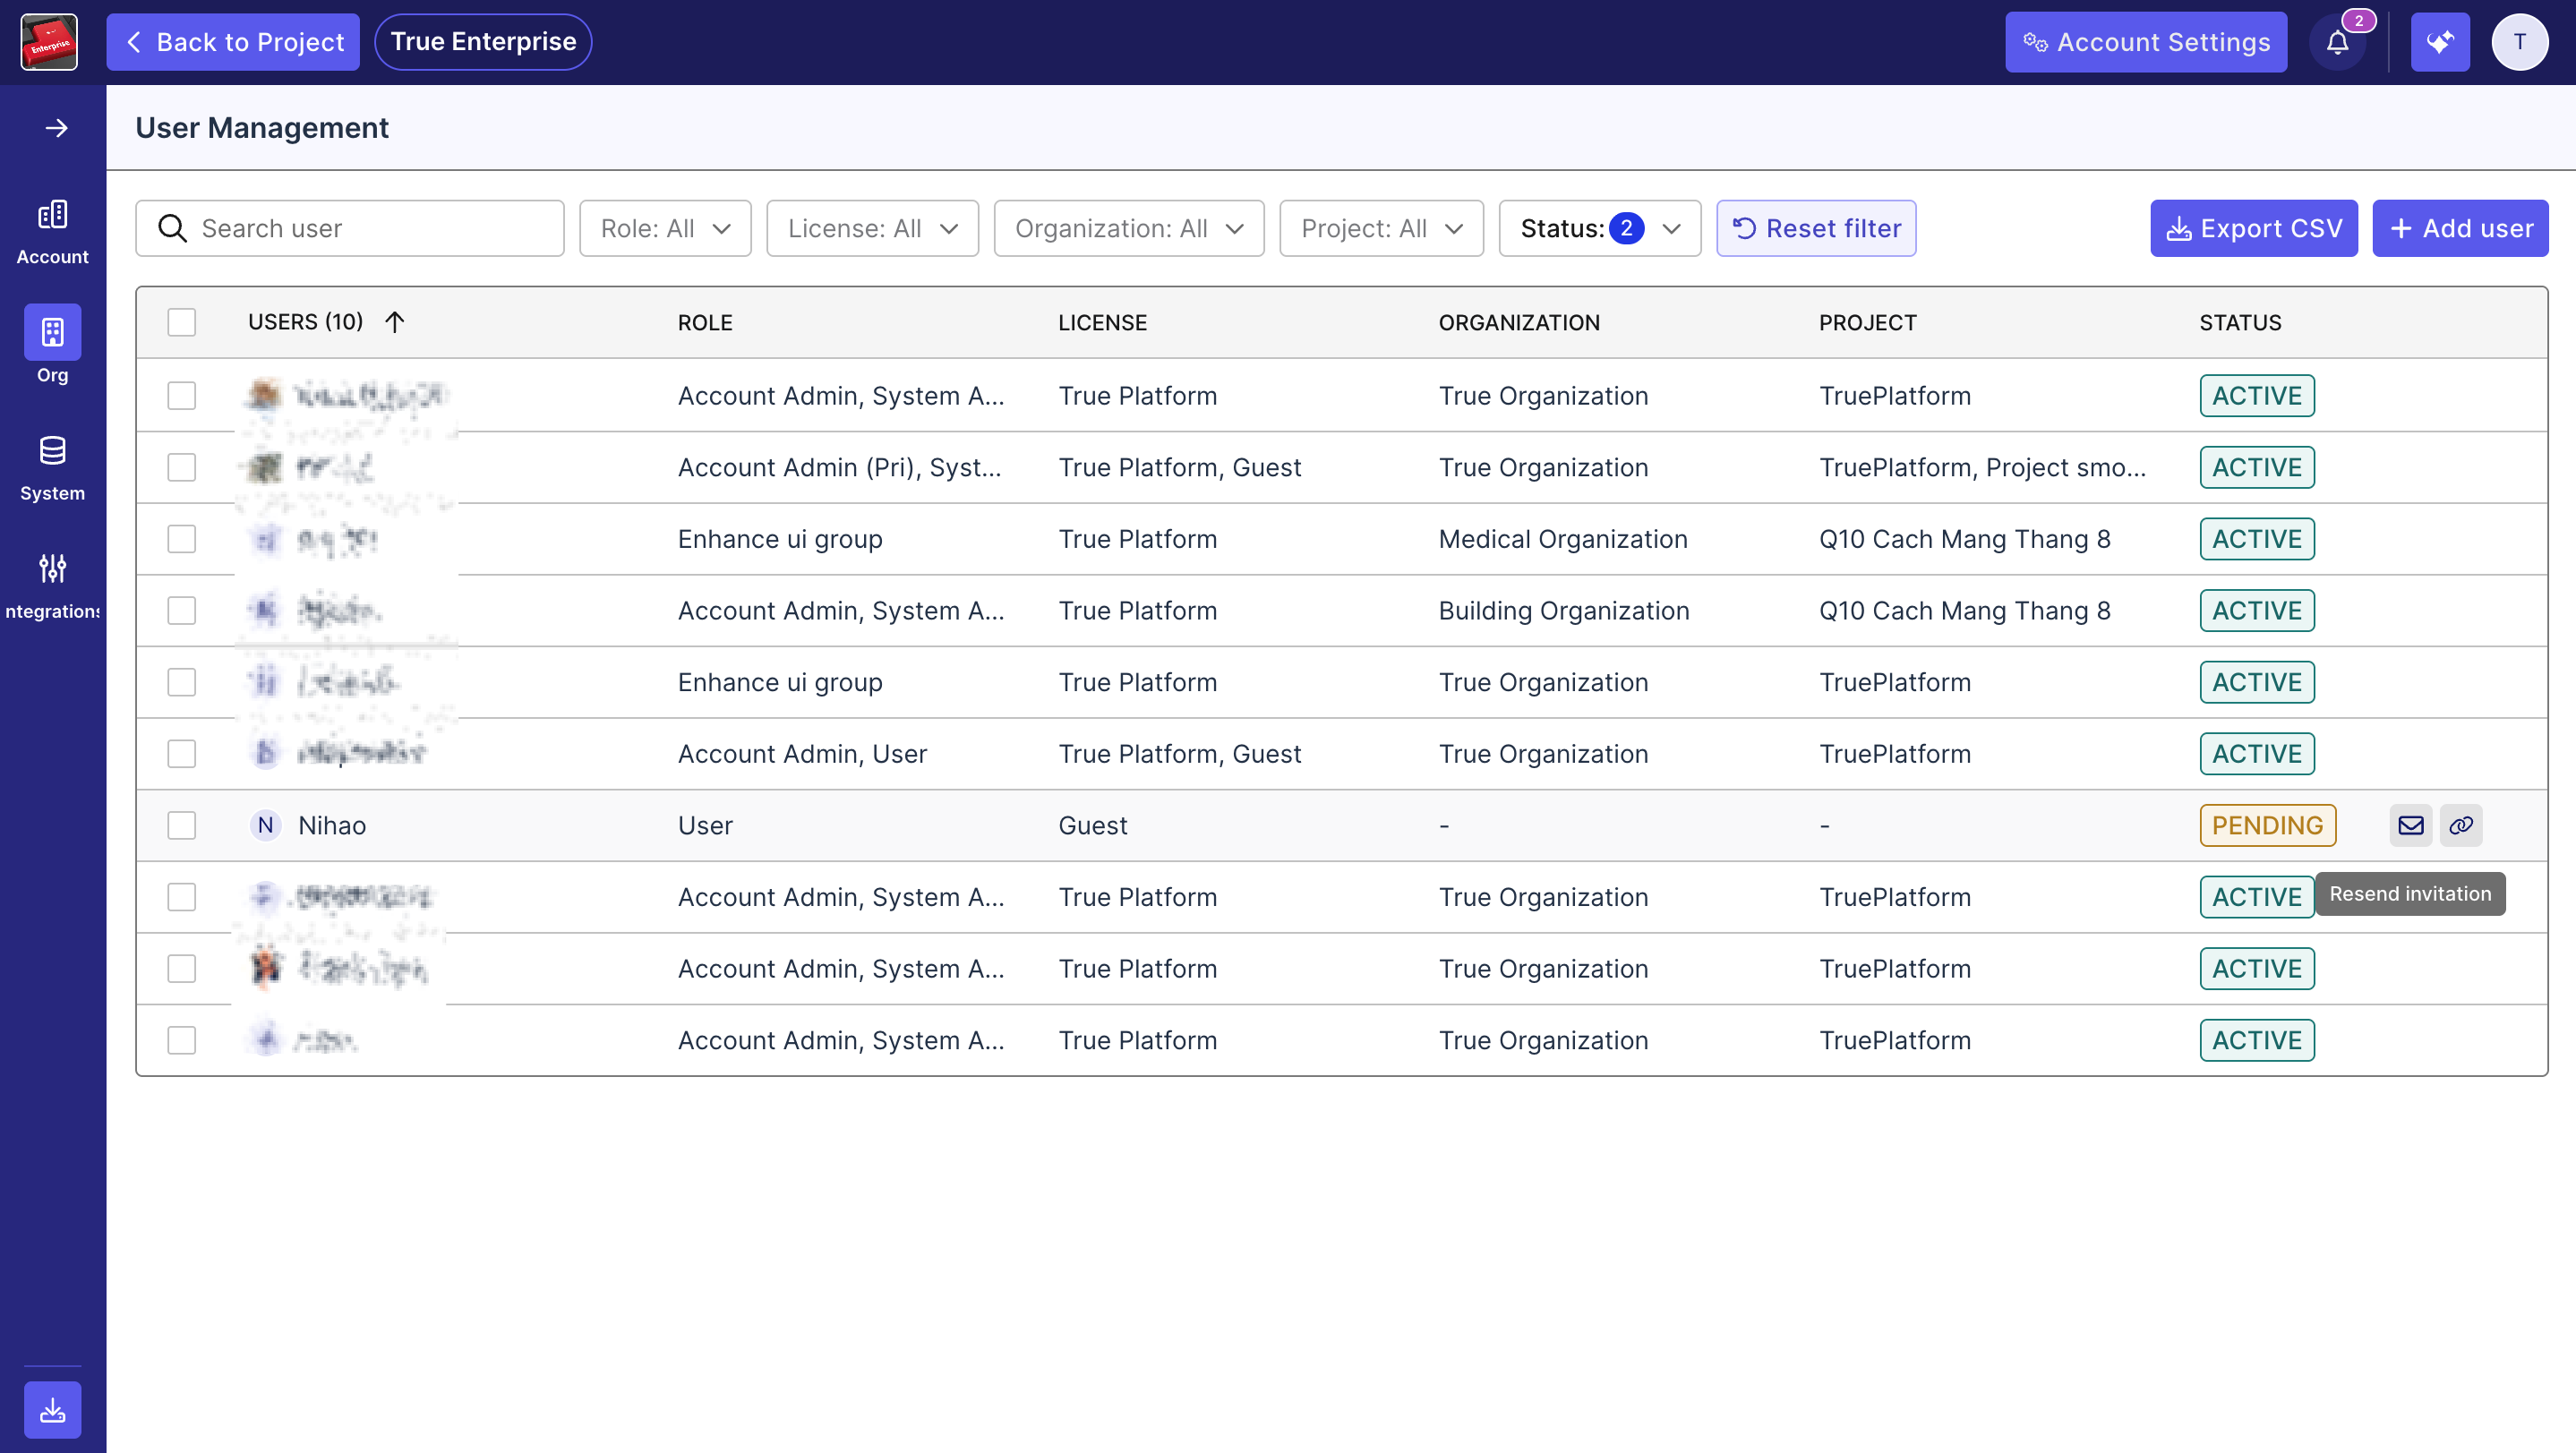
User Management
This guide shows how to view user details, manage roles, change organizations, resend invitations, and deactivate users from the User Management page.
You must have the Account Admin role to perform these actions.
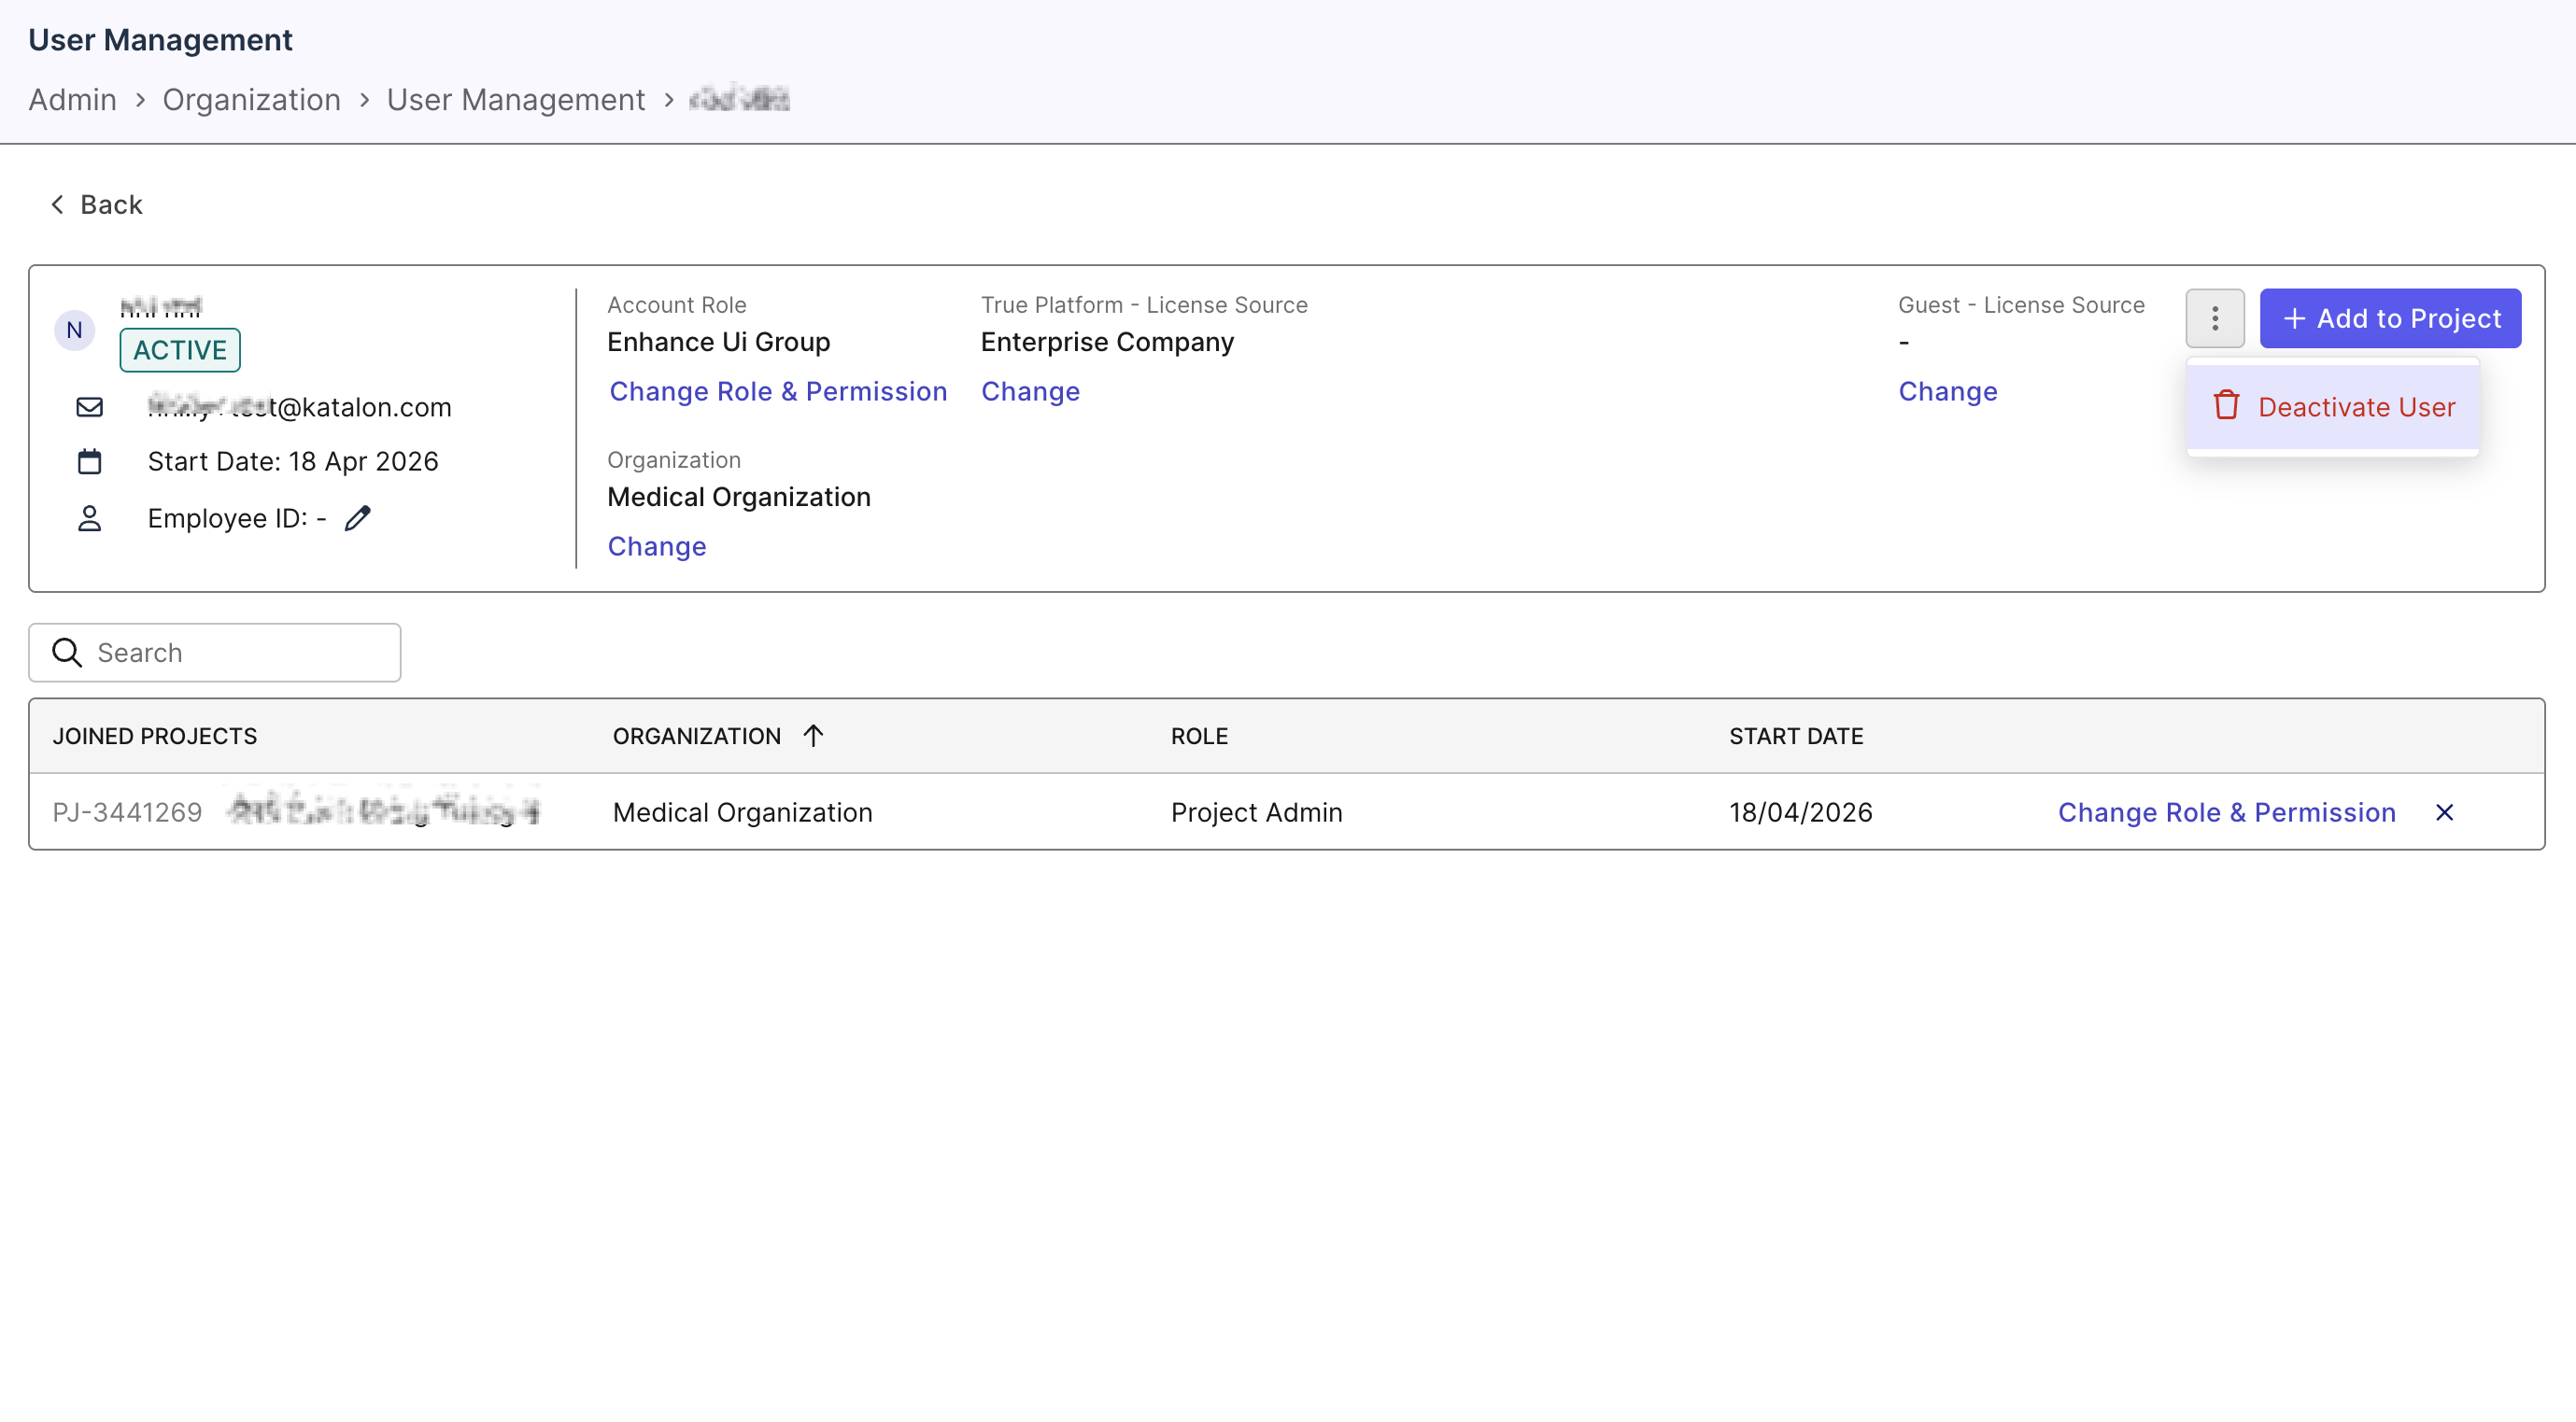
View User Details
- Go to Account Settings > Org > User Management.
- In the directory, click on the user’s name to open their User Detail page.
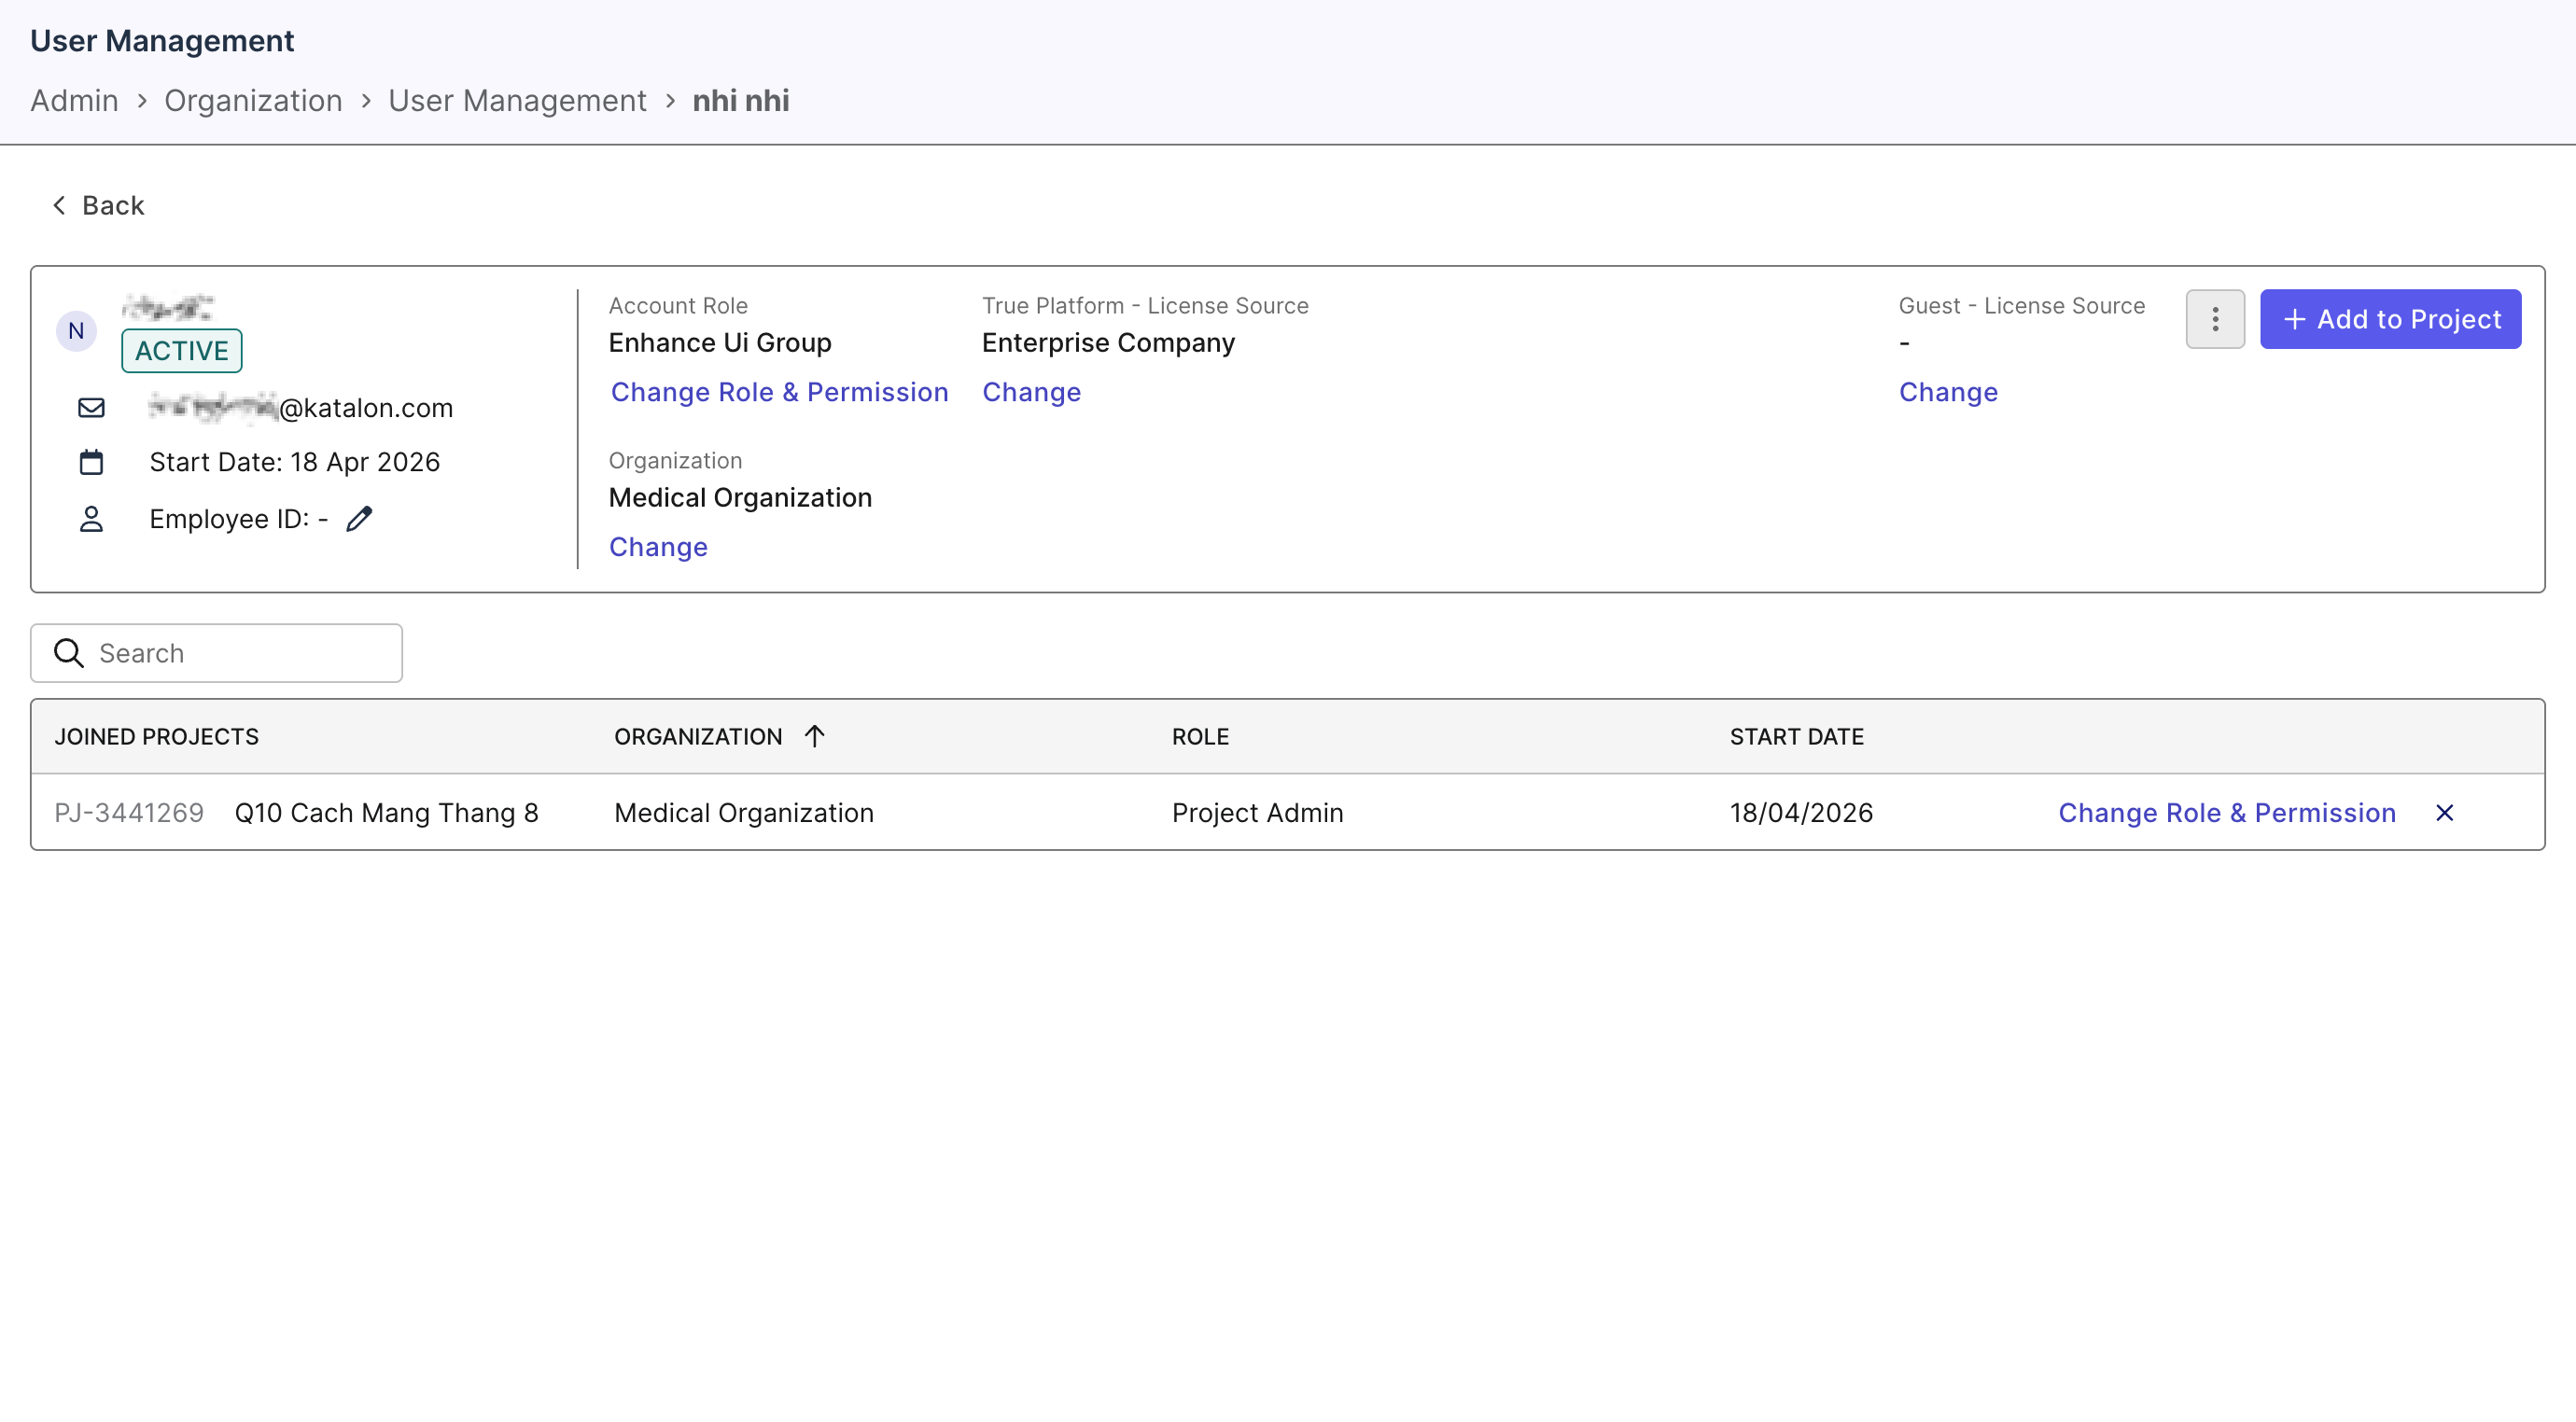
The User Detail page displays:
- Full name and profile picture
- Contact details and employment start date
- Account-level role – whether they are an account admin
- Affiliated organization
- Licenses (e.g., Katalon True Platform, KSE, Guest)
- Joined projects list
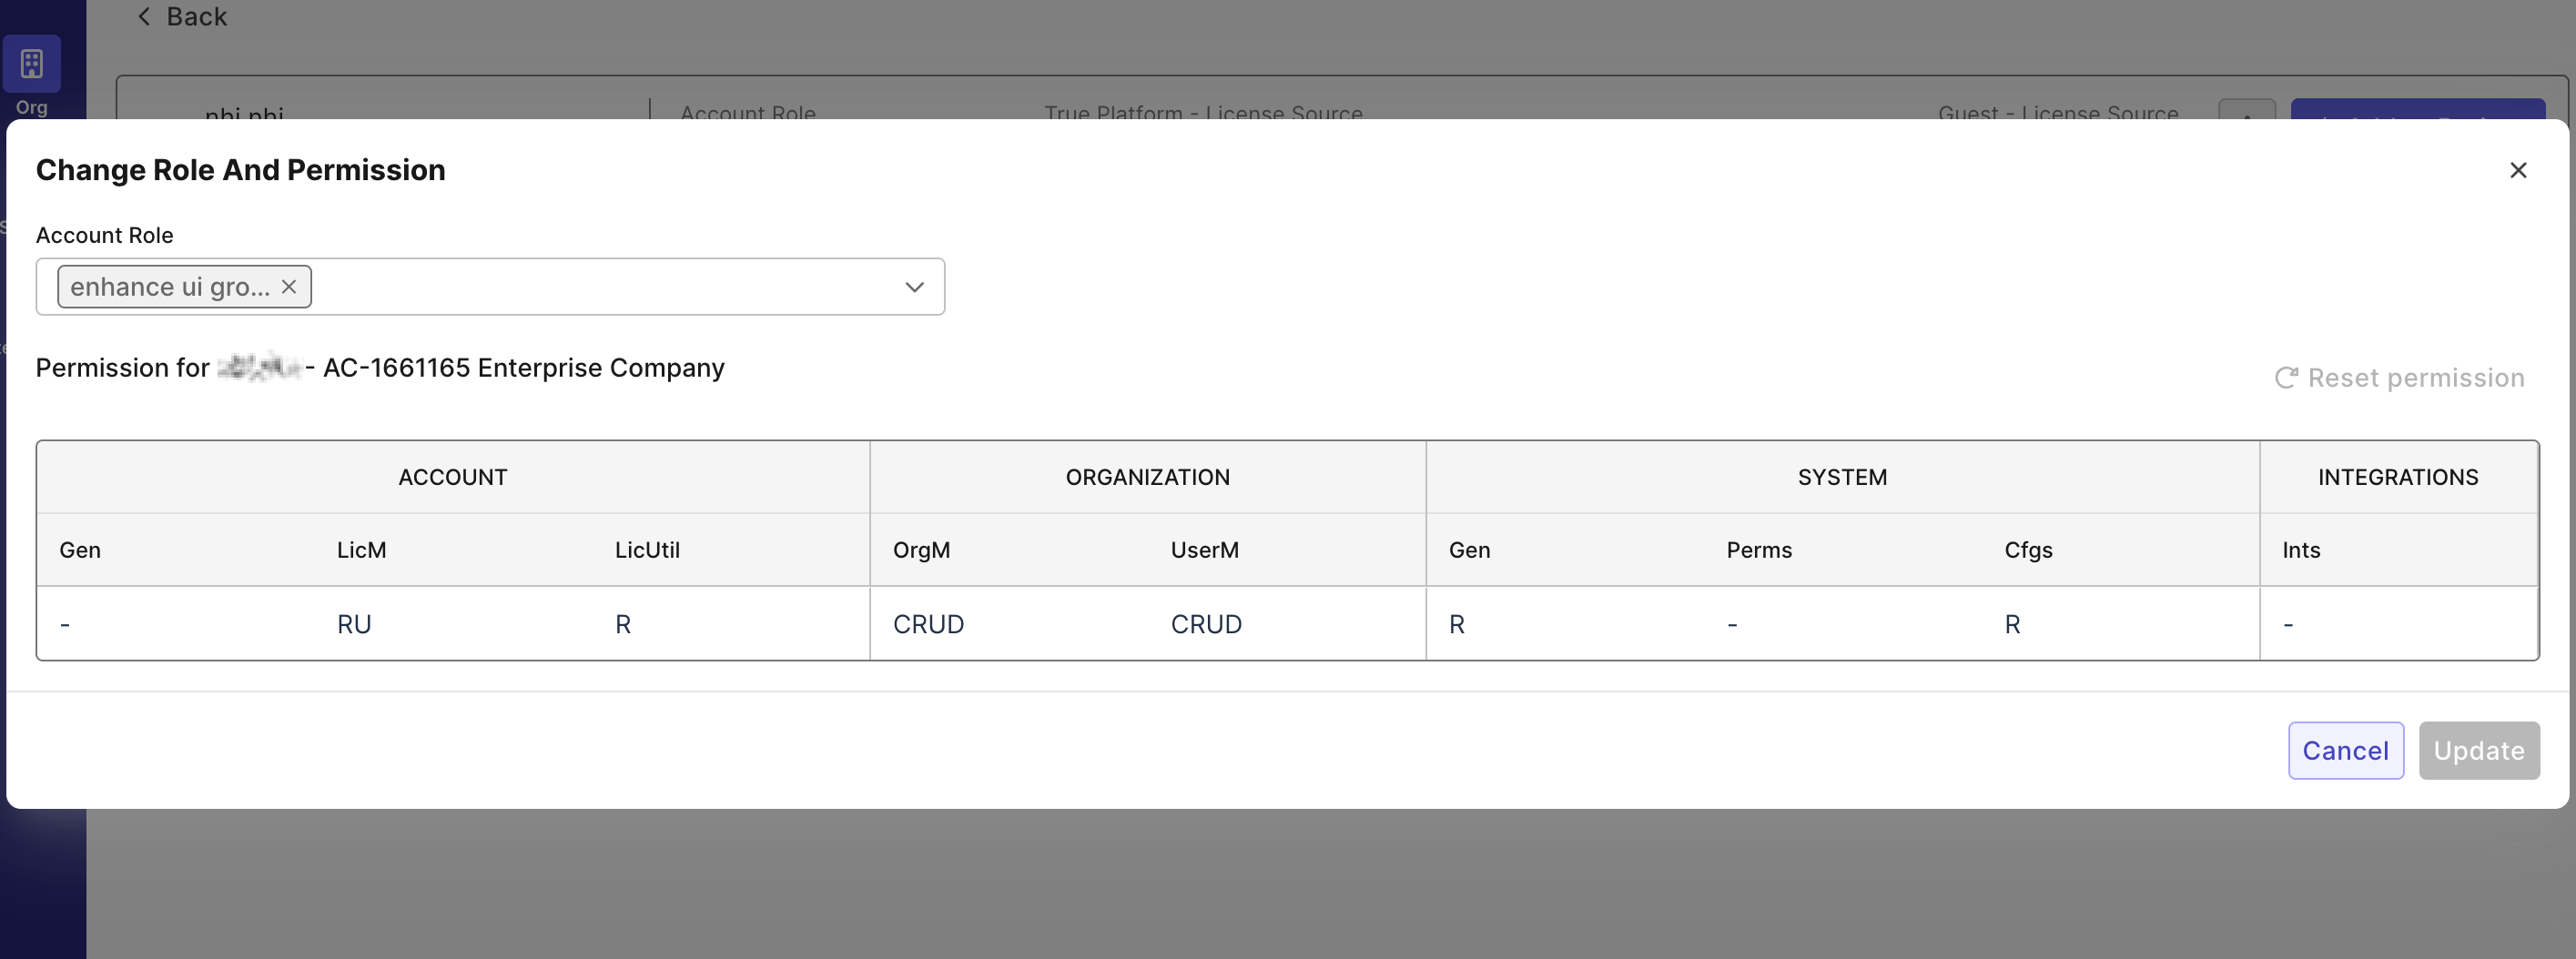
Change a User’s Account Roles
-
Go to Account Settings > Org > User Management.
-
Click the user’s name to open their User Detail page.
-
Under Account Role, click Change Role & Permission.
-
In the Change Role and Permission dialog, select a new role from the dropdown.
-
Click Update to apply the changes.
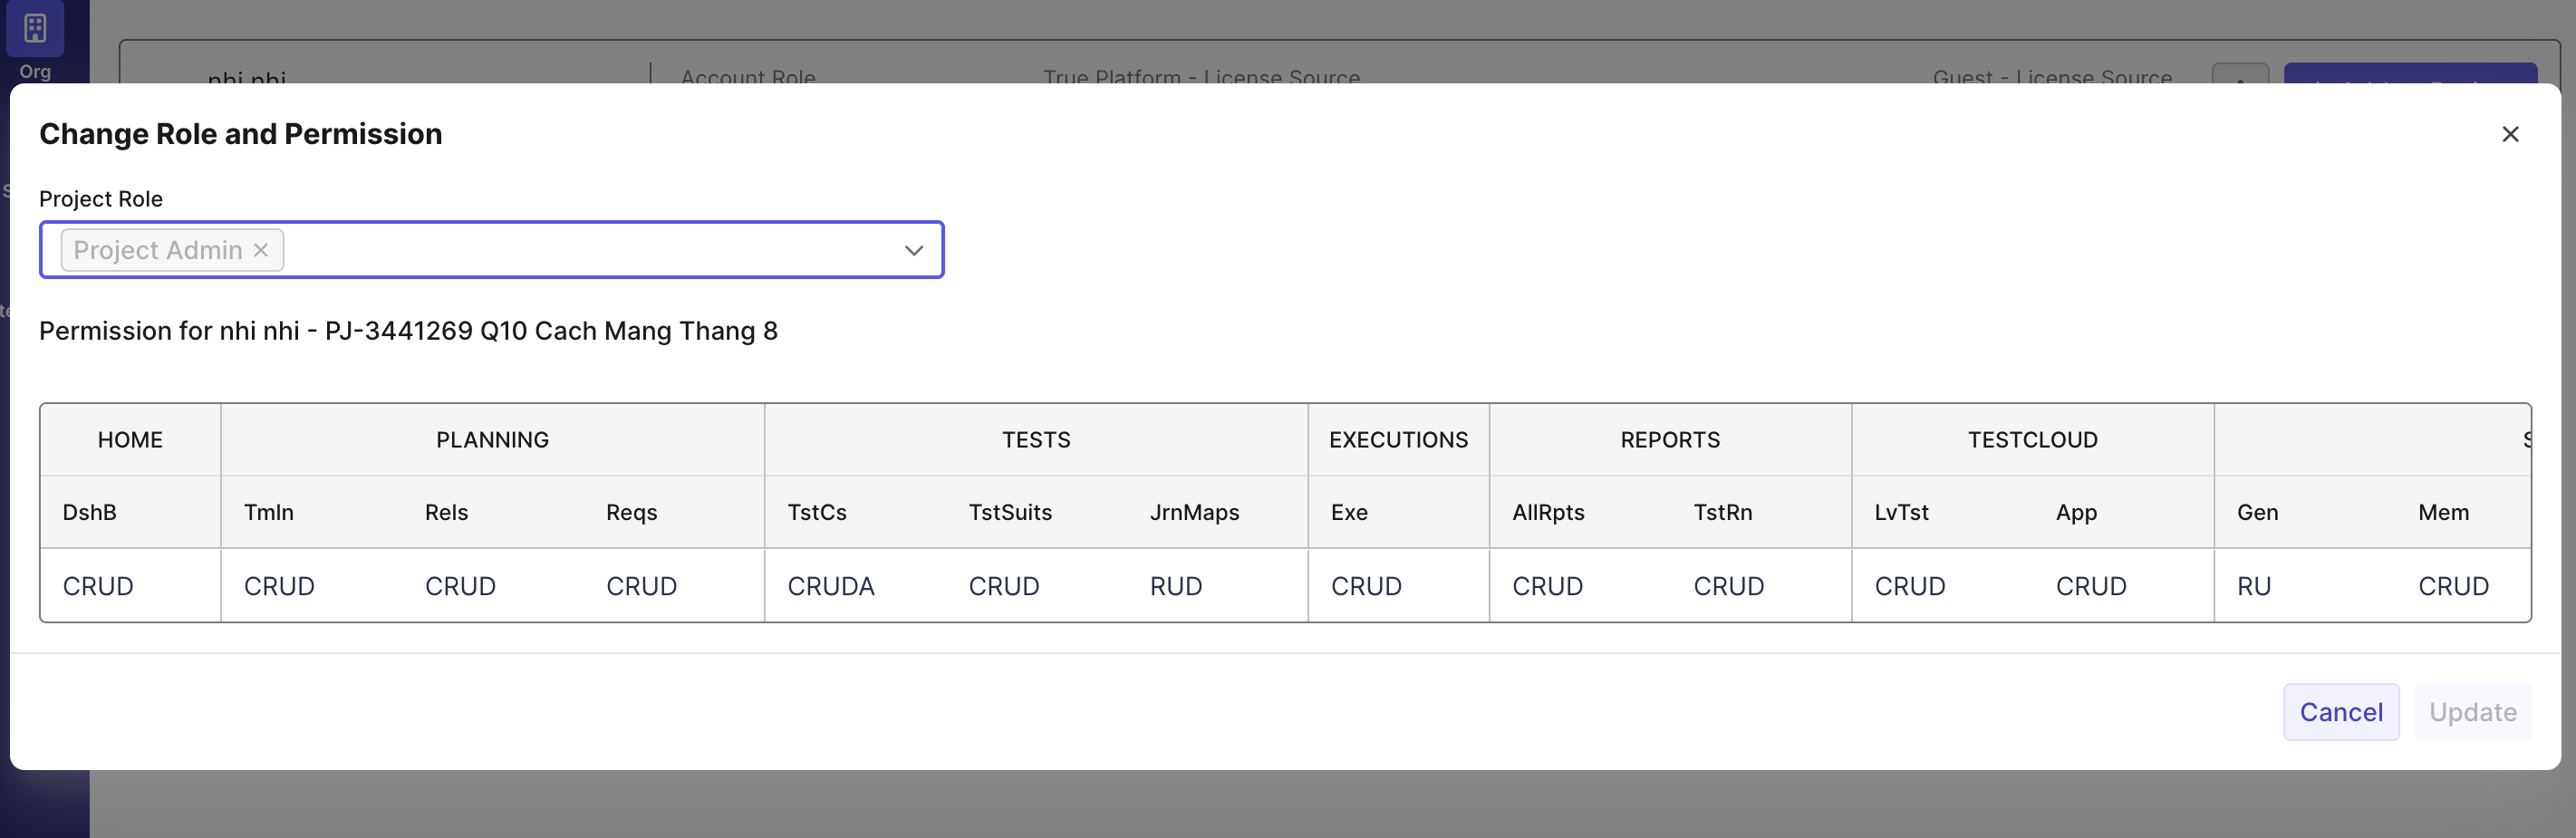
Change a User’s Project Roles
-
Go to Account Settings > Org > User Management.
-
Click the user’s name to open their User Detail page.
-
In the Joined Projects list, click Change Role and Permission.
-
In the dialog, use the Project Role dropdown to assign new permissions.
-
Click Update.
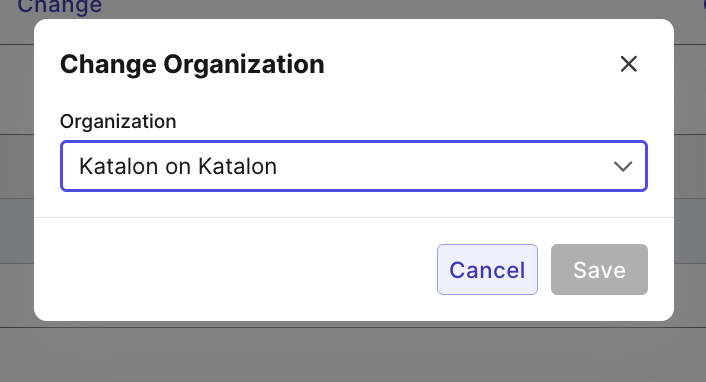
Change a User’s Organization
-
In the User Detail page, click Change under the Organization label.
-
Select the new organization in the dialog.
-
Click Save.
Resend Invitation to a User
If a user was previously Inactive, re-sending an invitation restores their access. Once they accept, their status automatically returns to Active.
If an invitation link expires before the user accepts it, you can resend it.
- Locate the user with Pending status.
- Hover over the right end of the row and click Resend invitation or Copy invitation link.
Deactivate a User
When a user becomes Inactive, their account remains in the system but they no longer have access to the workspace.
You can restore access anytime by re-inviting them — their status will automatically switch back to Active once accept the invitation.
-
Go to the user’s User Detail page.
-
Click the three-dot menu in the upper-right corner and select Deactivate User.
-
In the Deactivate User From Account dialog, click Deactivate to confirm.
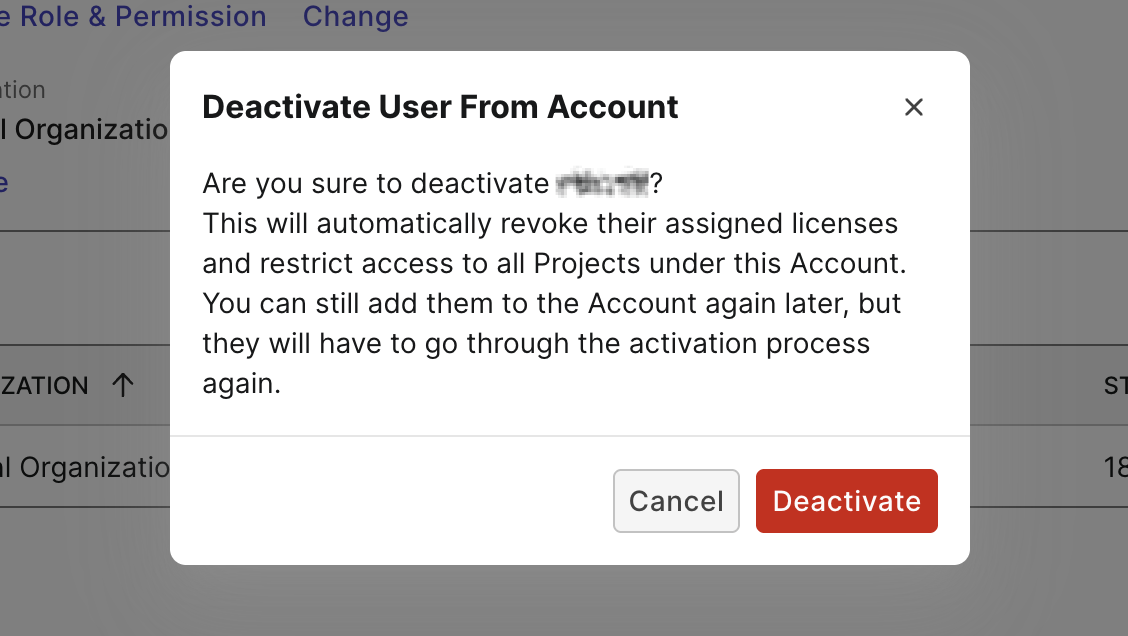
Result
The user’s status changes to Inactive in the User Directory.
User status
- Pending: An invitation has been sent, but the user has not accepted yet. If the link expires, a new one should be sent.
- Active: The invitation has been accepted. The user can use the workspace according to the assigned role and permissions.
- Inactive: The user has been removed from the account and cannot access the workspace. Access can be restored by sending a new invitation; after acceptance, the status changes to Active.