Adjust the pixel sensitivity level
This feature is available for Visual Testing Professional (VTP) package.
When comparing images in Visual Testing, the pixel-based method can pick up minor pixel differences that are not critical to human eyes. To reduce the false positives, you can adjust the pixel sensitivity level and apply it to a whole baseline collection.
To adjust the pixel sensitivity level, follow these steps:
- TestOps Legacy
- TestOps
-
Go to your Project > Visual Testing.
The Visual Test Runs tab appears. Click on a Test Run ID. -
Select one of the screenshots to adjust the pixel sensitivity level. Here you can preview if the level matches your preference.
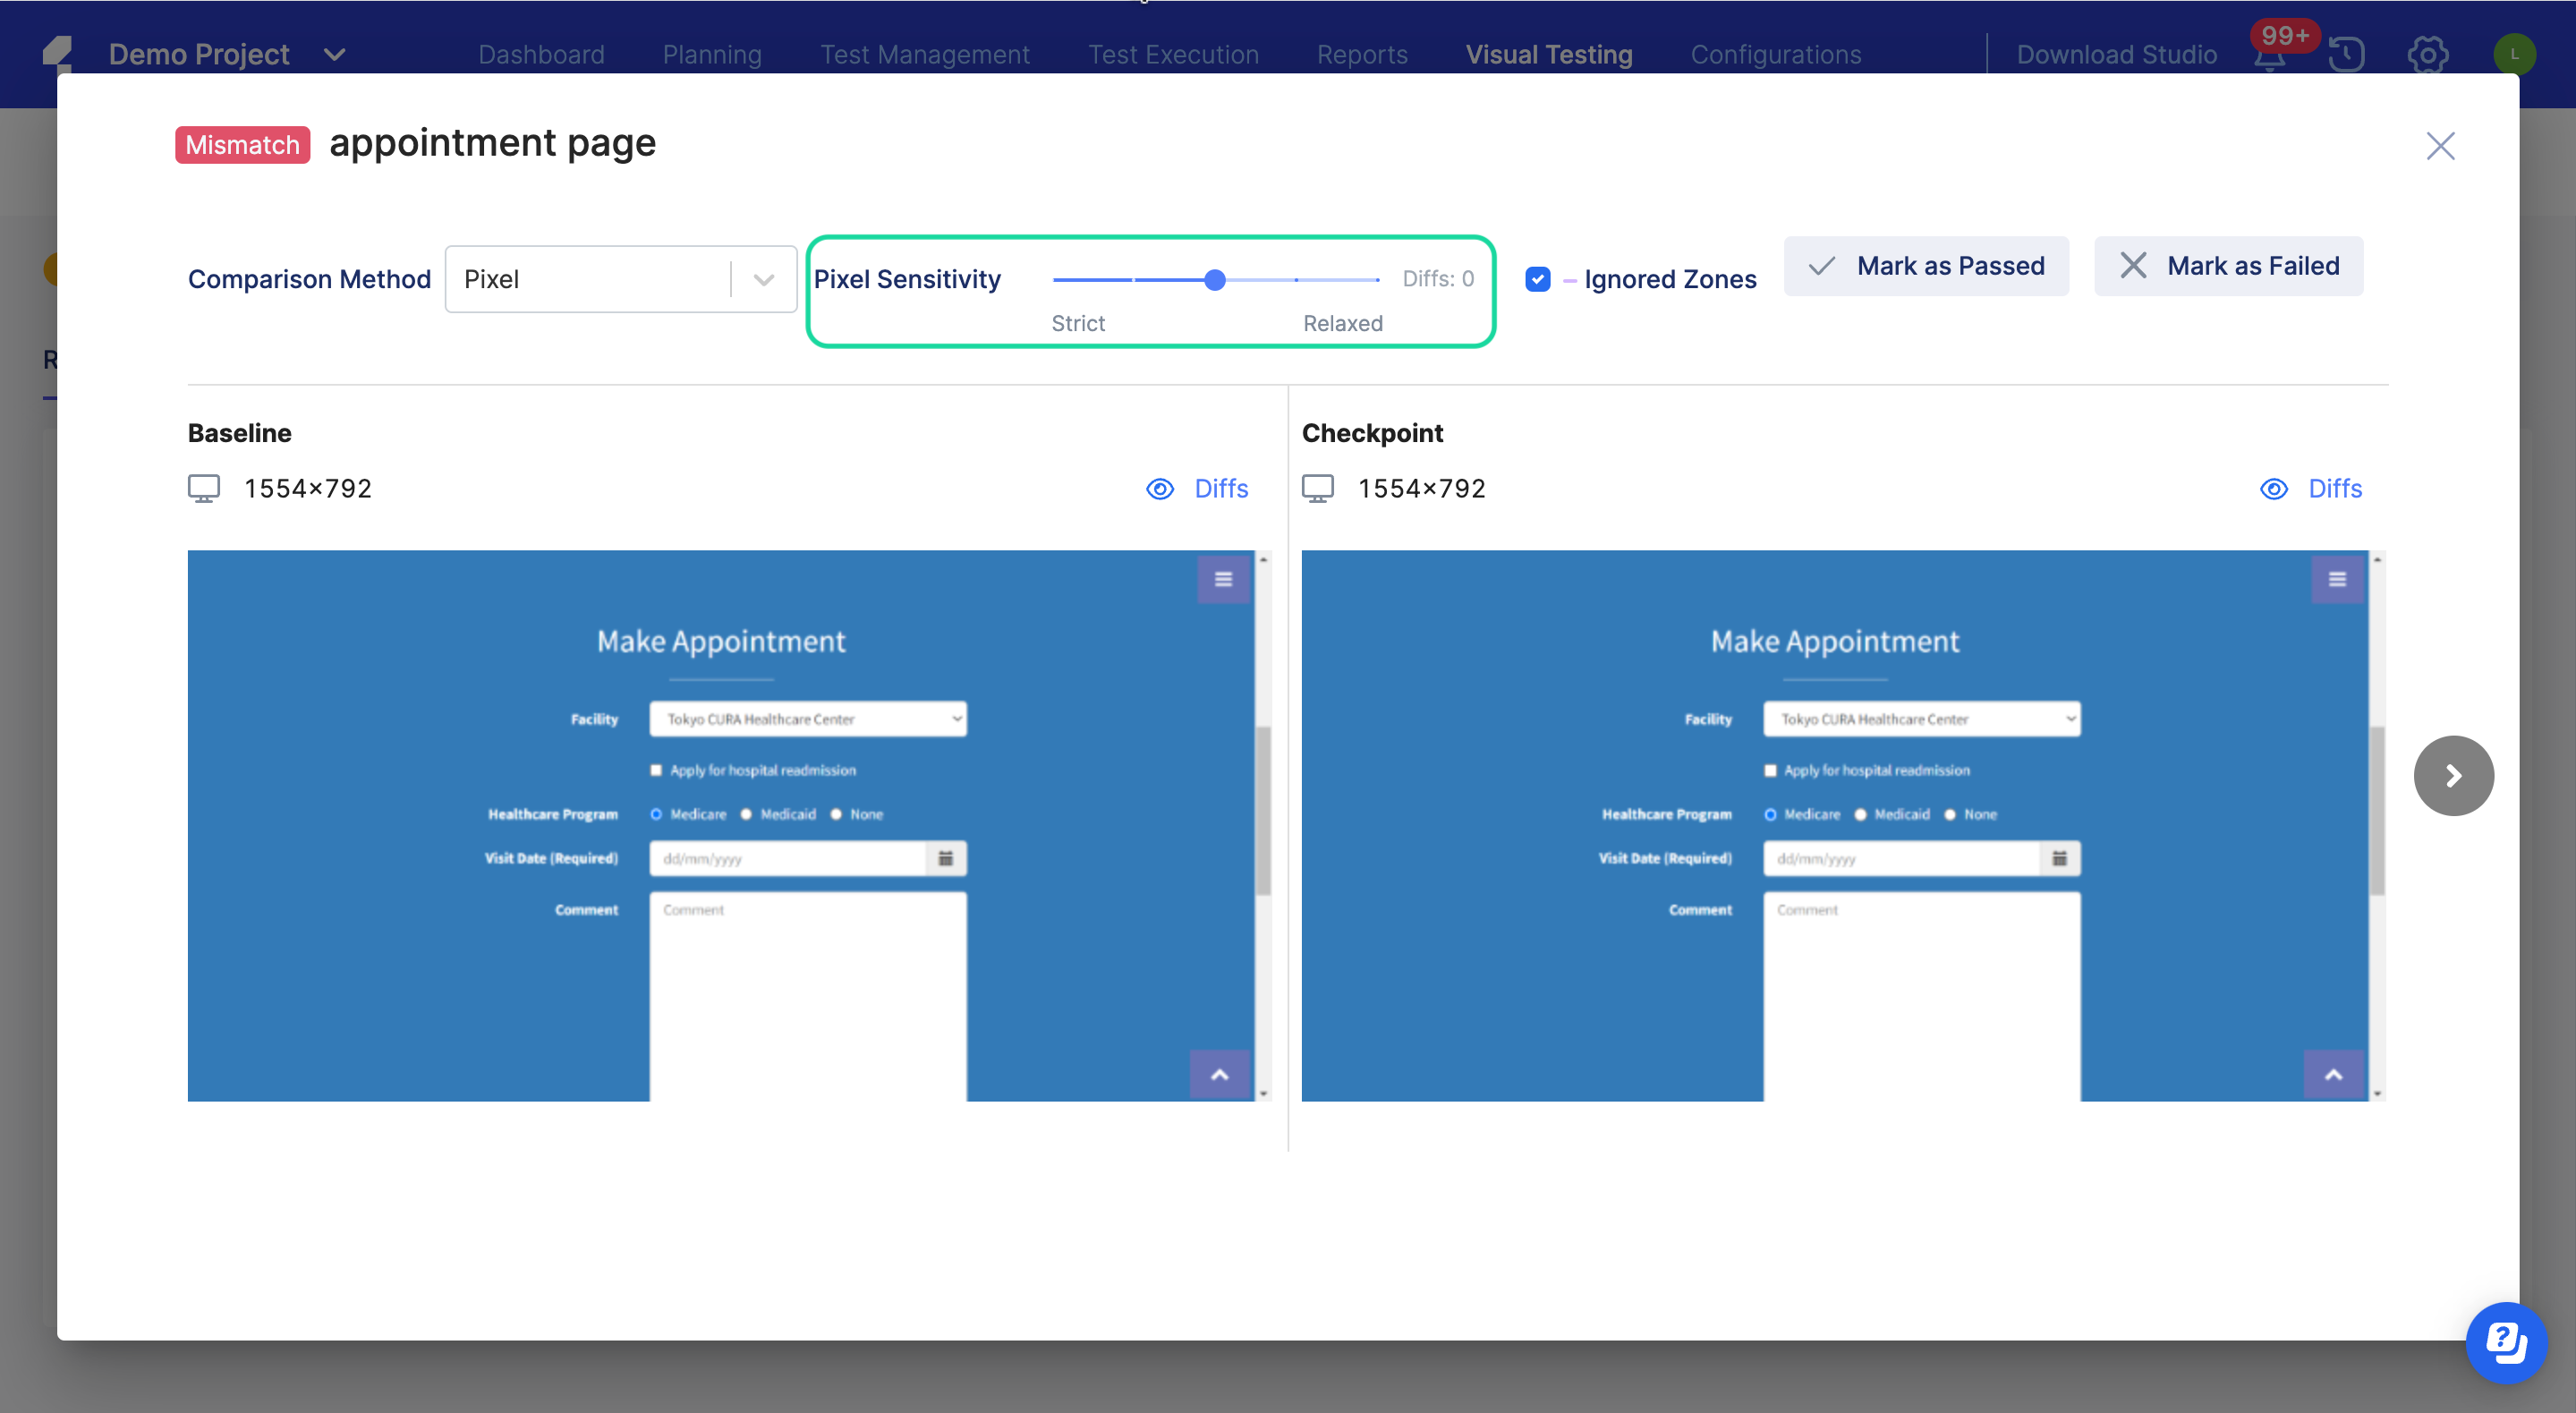
You can adjust the level to be stricter or more relaxed. Once the Diffs number is 0, it means the minor pixel differences are completely eliminated.
-
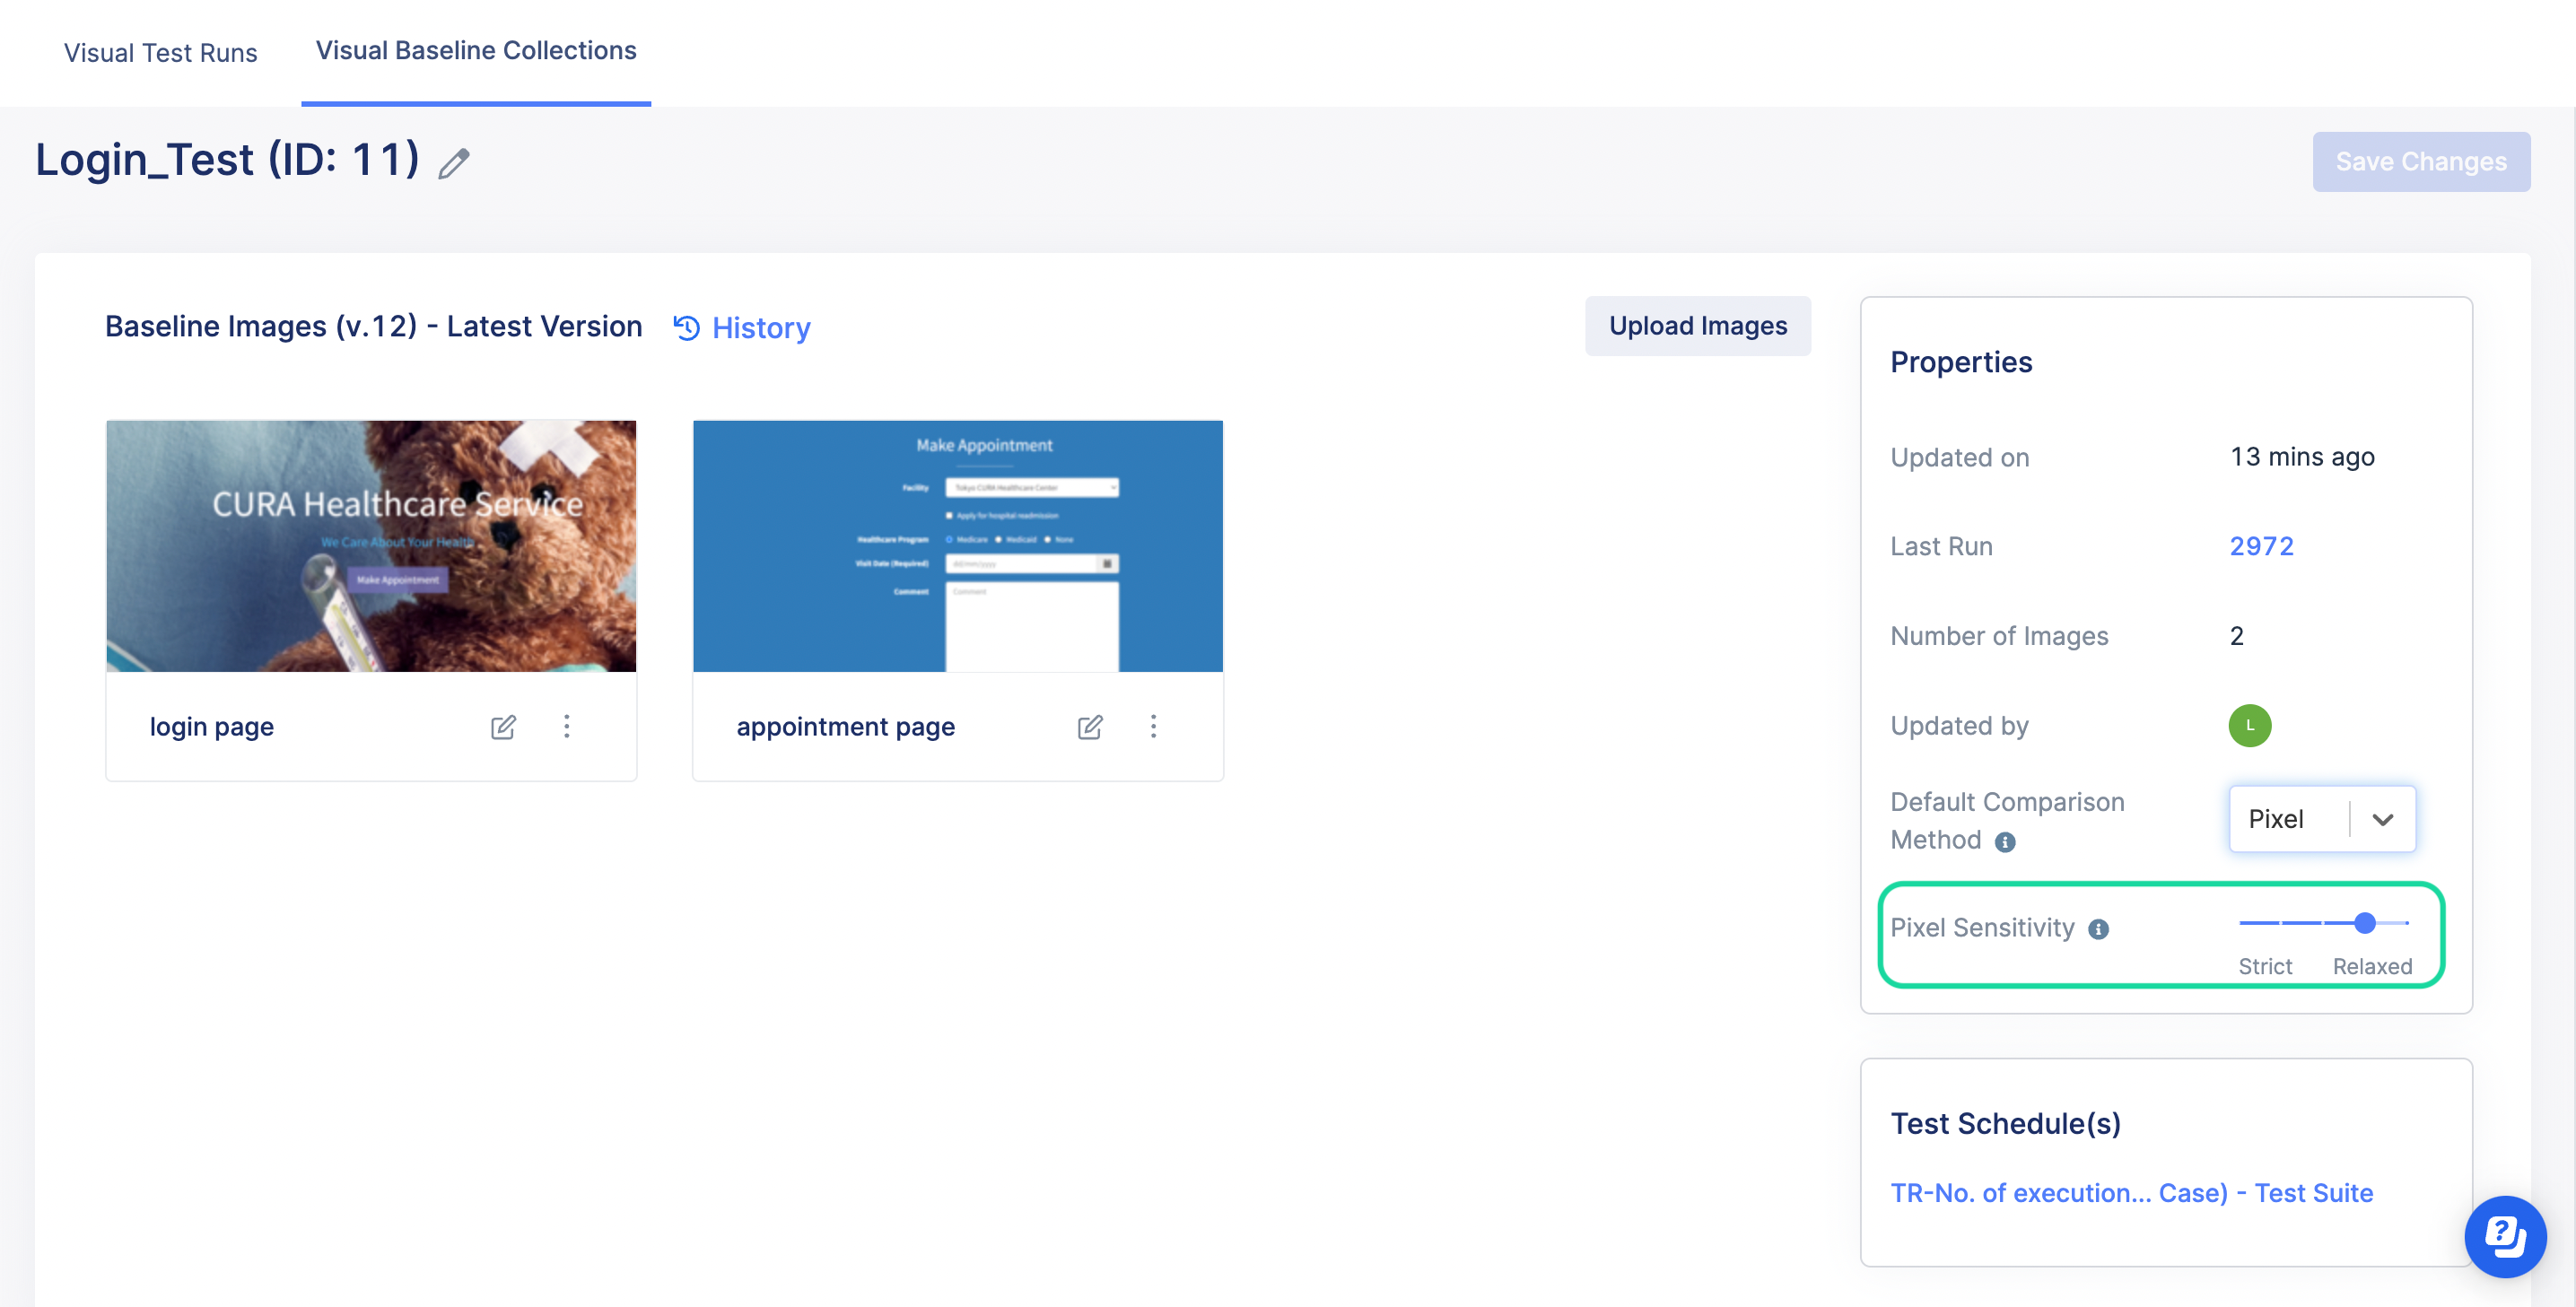
You can then set the same pixel sensitivity level for the Visual Baseline Collection. This level will be applied to all visual test runs that use the same baseline collection.
Result
You have successfully set the pixel sensitivity level for a baseline collection.
- Go to Executions. The Executions list appears by default.
- Select the test run that has the "VISUAL TESTING" label.
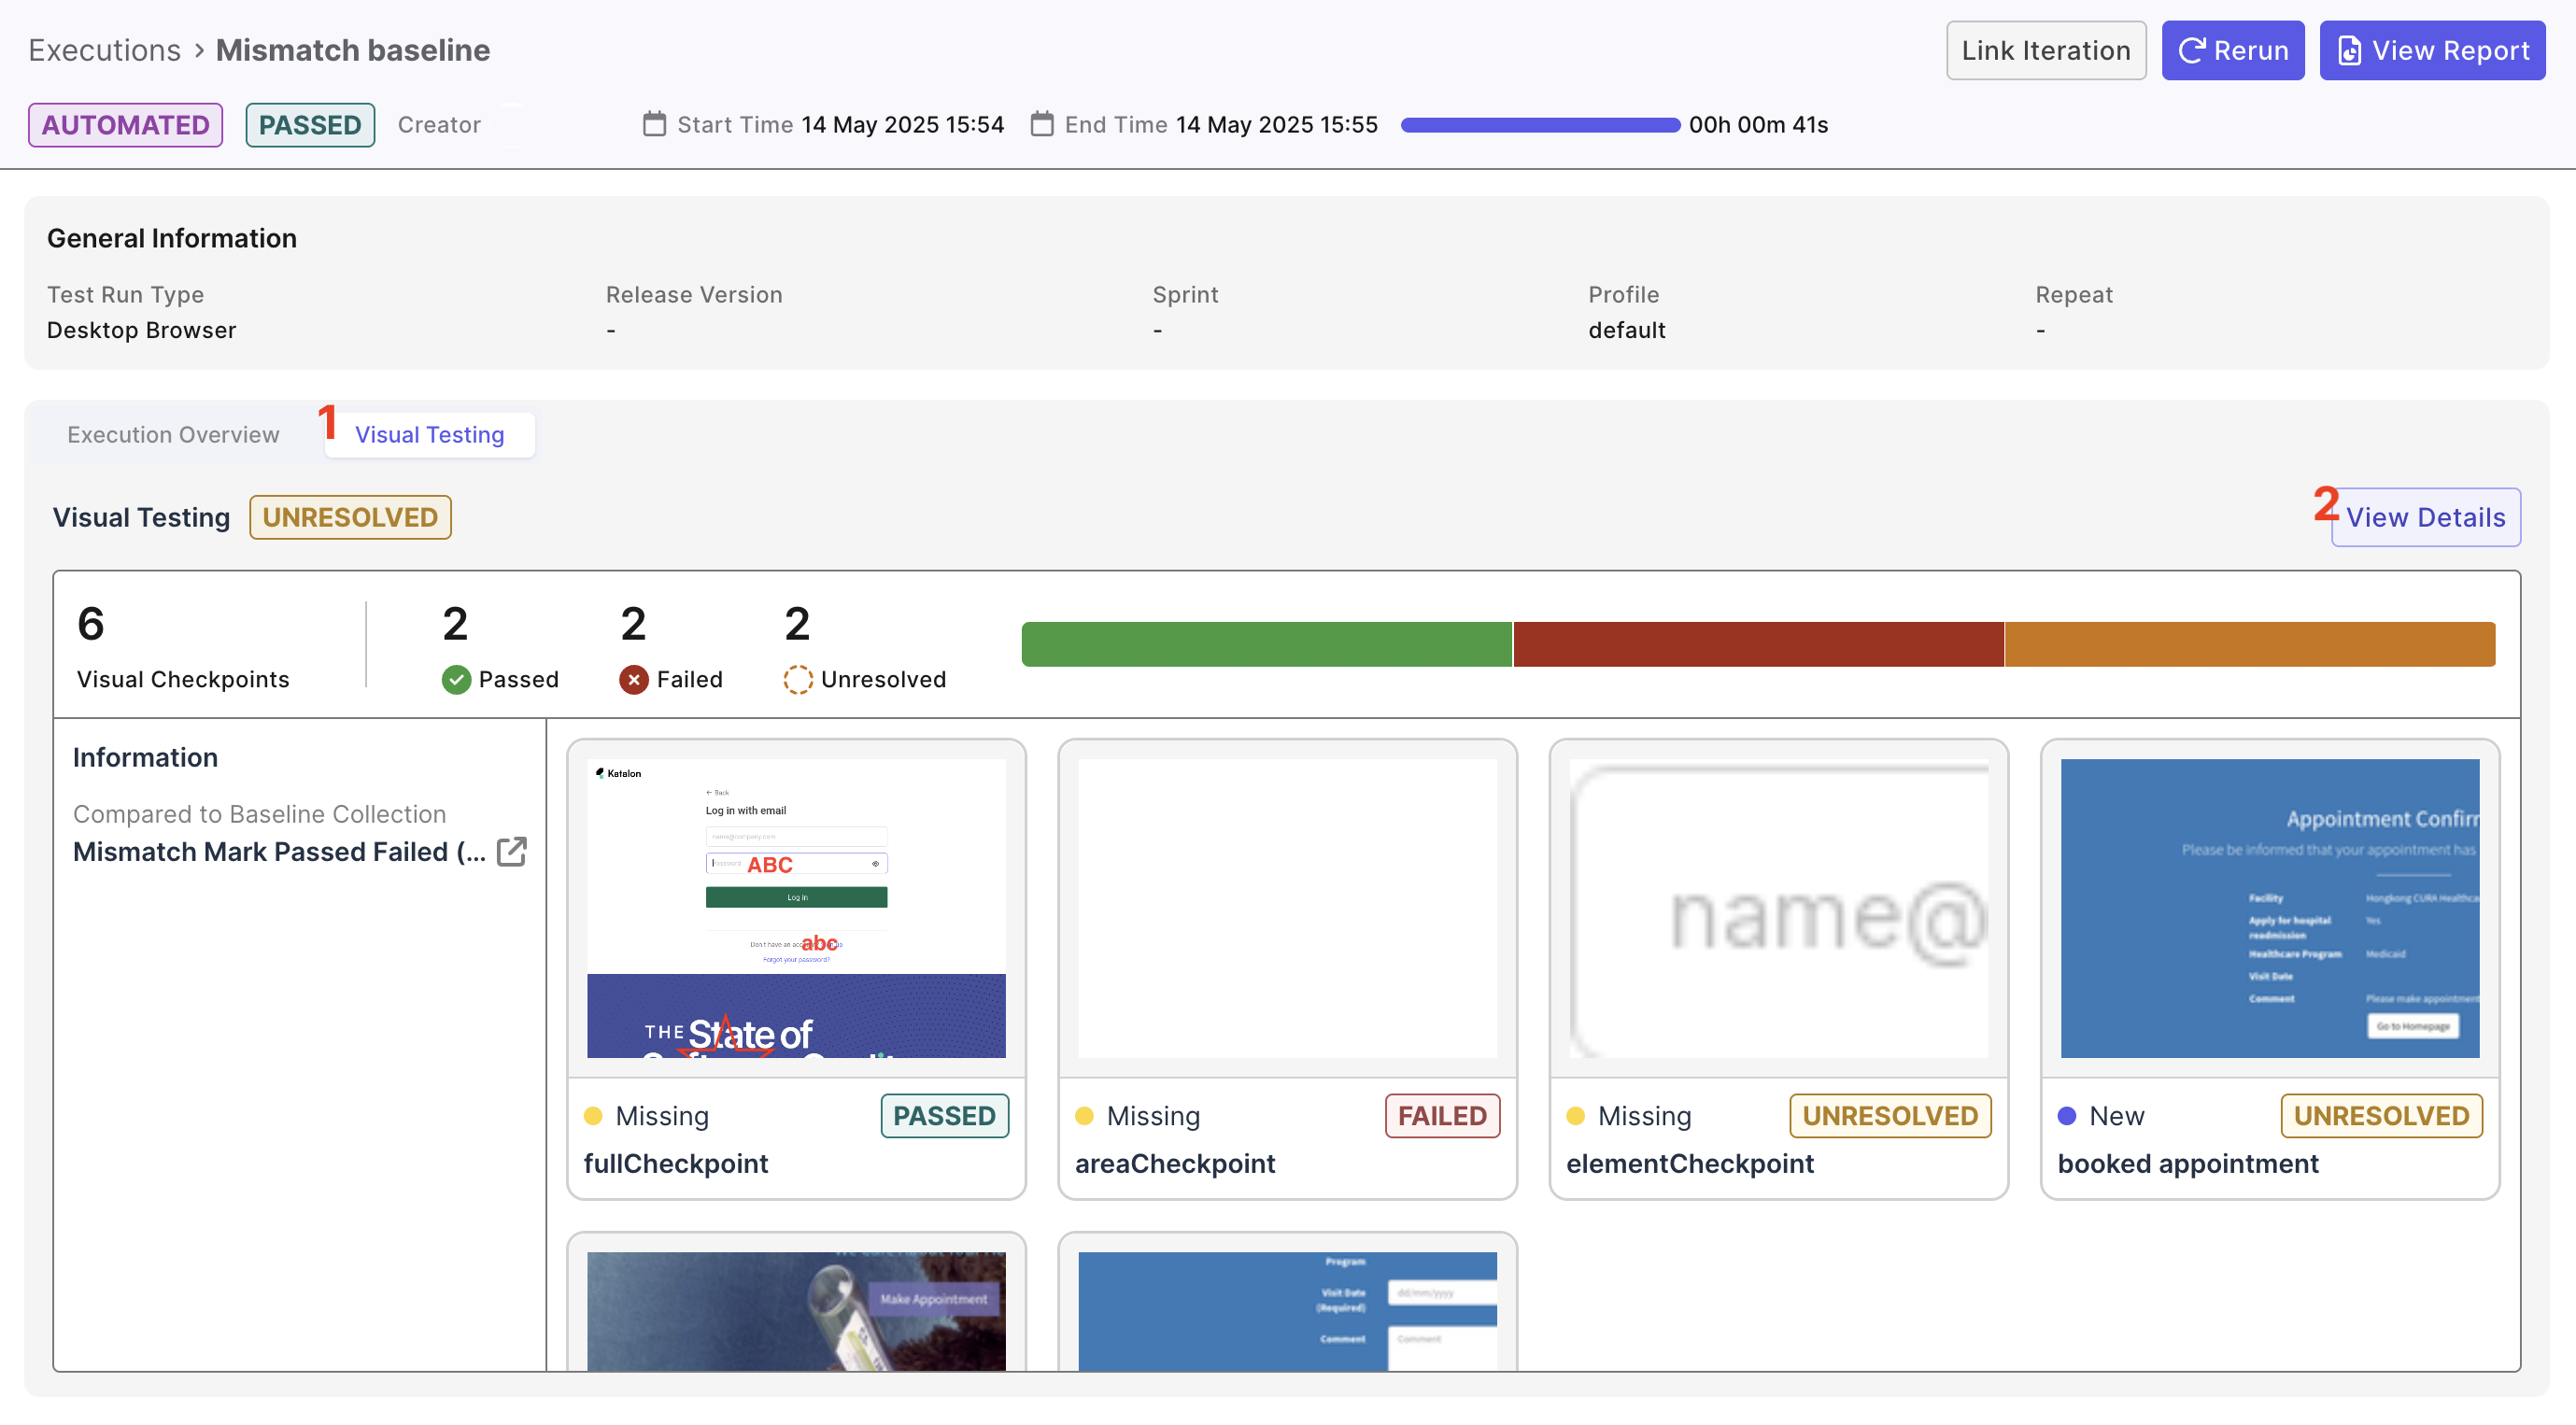
- You are navigated to the Execution Overview page. Switch to the Visual Testing tab and select View Details.
- Select one of the screenshots to to adjust the pixel sensitivity level.
You can select the level to be stricter or more relaxed. Once the Diffs number is 0, it means the minor pixel differences are completely eliminated.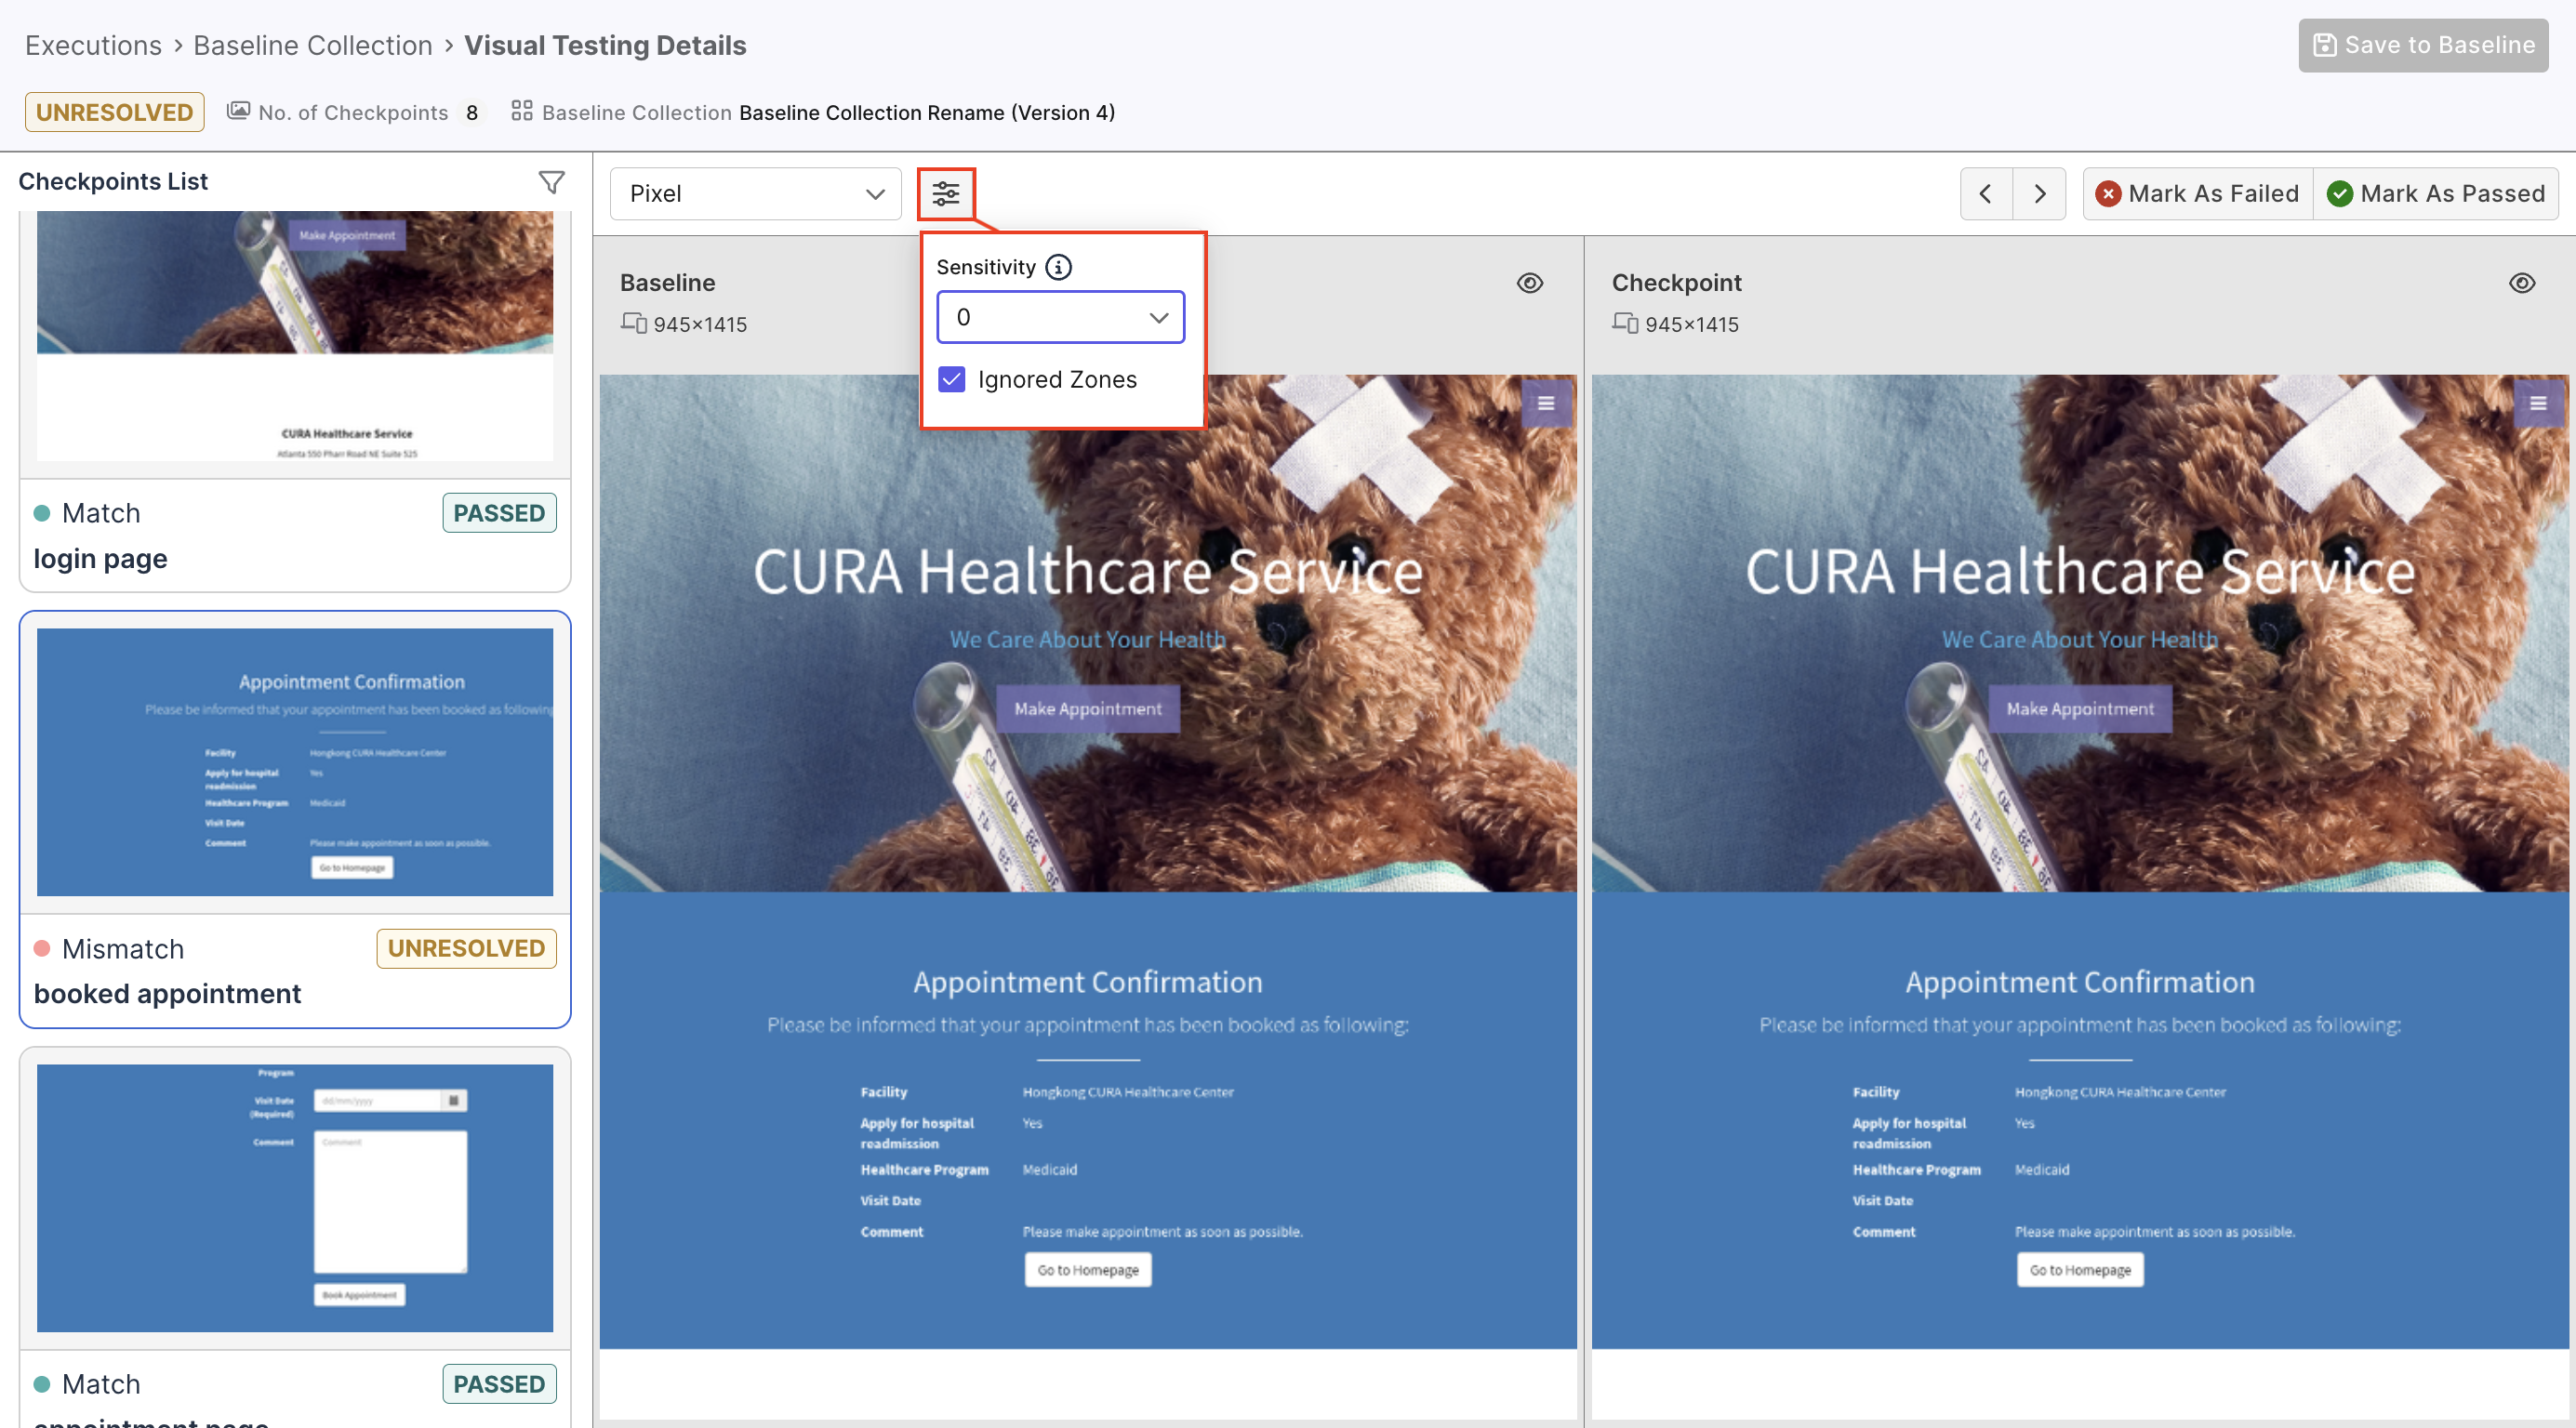
- You can then set the same pixel sensitivity level for the Visual Baseline Collection. This level will be applied to all visual test runs that use the same baseline collection.
Result
You have successfully set the pixel sensitivity level for a baseline collection.