StudioAssist Agent mode
This document introduces StudioAssist’s Agent mode, shows when to use it instead of Ask mode, and walks you through how to set it up and use it for testing tasks, like creating, editing, or troubleshooting test cases automatically.
- Katalon Studio Enterprise version 10.3.2 onwards.
- AI features are enabled in your account settings. If they're disabled, you can enable them with a personal key. For details, see StudioAssist Preferences or contact your Account Admin (see Configure AI Services).
Overview
Starting from Katalon Studio 10.3.2, StudioAssist introduces a new Agent mode alongside its existing Ask mode.
Agent mode is a real-time collaborator. It interprets your natural-language prompts, turns them into multi-step actions, and iterates them until the task is complete.
With Agent mode, you can:
- Automate test case creation and editing: Generate new test cases or update existing ones, reducing manual work and keeping your project consistent.
- Get trusted answers backed by Katalon Docs: Access step-by-step guidance, troubleshooting solutions, release notes, keyword-based references, and best practices drawn directly from official documentation.
- Extend automation beyond Katalon: Connect with third-party MCP servers to streamline workflows, pull external data, or integrate with other systems directly inside Studio.
How Agent mode works
Agent mode is powered by HTTP-based MCP (Model Context Protocol) servers. These servers connect StudioAssist with the tools it needs to perform tasks. Learn more in Understanding MCP Servers.
By default, StudioAssist connects to these three MCP servers:
- Katalon MCP: Connects StudioAssist to Katalon Docs, so your answers are more accurate, up-to-date, and backed by official guides.
- Katalon Studio MCP: Connects StudioAssist directly to your project, allowing it to read, create, and edit test cases automatically.
- Katalon TestOps MCP: Connects StudioAssist to your TestOps projects, allows you to perform operations on TestOps objects, such as Test Cases, Test Suites, Requirements, Sprints, and Releases, directly from the generative AI interface
See Katalon's built in MCP servers for more details on these servers and tools.
You can also extend Agent mode with external MCP servers to integrate systems, pull in additional data, or automate workflows in Katalon Studio. Learn how to connect an external MCP server in Adding an external MCP Server.
When to use Agent mode
Think of Ask Mode as “answer my question” and Agent mode as “help me get this done”. Refer to the table below to see how each mode processes your prompt.
| Prompt | Ask mode | Agent mode |
|---|---|---|
| “Create a new test case” | Suggests code | Looks up best practices in Katalon Docs and automatically creates a new test case in the KS app |
| “Explain this test case” | Explains code | Explains code with references to related Katalon keywords and documentation |
| “How to create a test case?” | Gives basic steps | Guides you with the latest step-by-step instructions |
| “Troubleshoot an error at step 3” | Suggests generic fixes | Analyzes the error, checks docs, and proposes validated solutions |
How to use Agent mode
Open the StudioAssist chat window
When you open a project for the first time, the StudioAssist chat window automatically appears on the right side of your workspace.
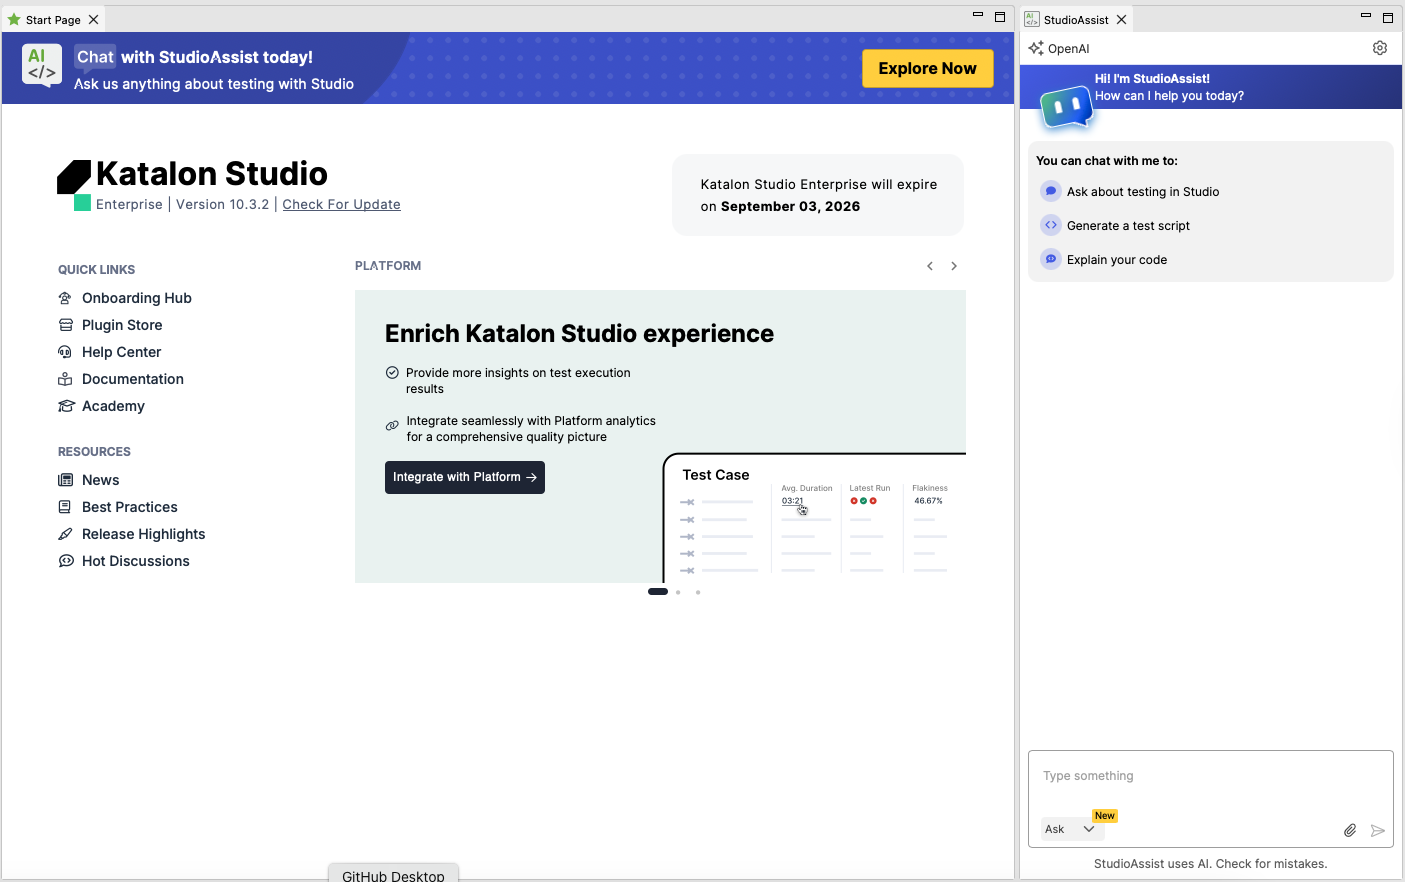
If it's not visible or closed, click the StudioAssist icon in the main toolbar.
Alternatively, use the following shortcuts for quick access.
- macOS:
^ + ⌥ + N - Windows:
Ctrl + Alt + N
- The hotkey on Windows generally works well; however, it may not function when you're focused on the Start Page, and other webview-based screens.
Select Agent mode
Use the chat mode selector to switch from Ask to Agent.
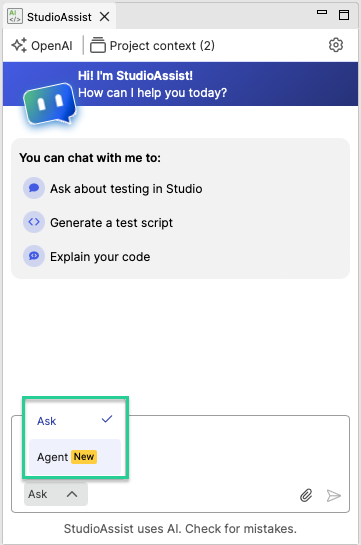
After switching, the chat window updates to show that you are in Agent mode.
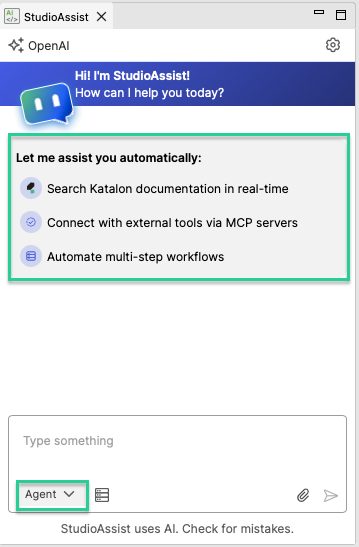
- The chat window will remember your last selected mode until you close Katalon Studio.
- The default mode is Ask when you first enable StudioAssist.
- Chat history is preserved when switching modes.
Connect to the MCP servers
Agent mode connects to MCP servers to process your requests.
When you send a request, the MCP server analyzes your question and uses the proper available tools to complete the task.
Click the tool settings icon to explore the MCP servers and enable/disable which tools to use. Learn more in Manage MCP servers and tools.
Enter your prompt
- Type a prompt describing the task you want to perform. The more details you provide, the better the outcome will be.
- Or you can prompt with context by linking to an existing test case or attach files. See StudioAssist Ask mode.
You can use the Prompt Library to customize engineering prompts and provide more context for Agent mode. This helps improve the accuracy of StudioAssist responses by tailoring how it generates, explains, or chats about code.
Grant tool permission
Before running any tool, StudioAssist will ask you to grant permission. Review each tool, the MCP server, and the input details carefully before approving, as they show exactly what Agent mode will perform.
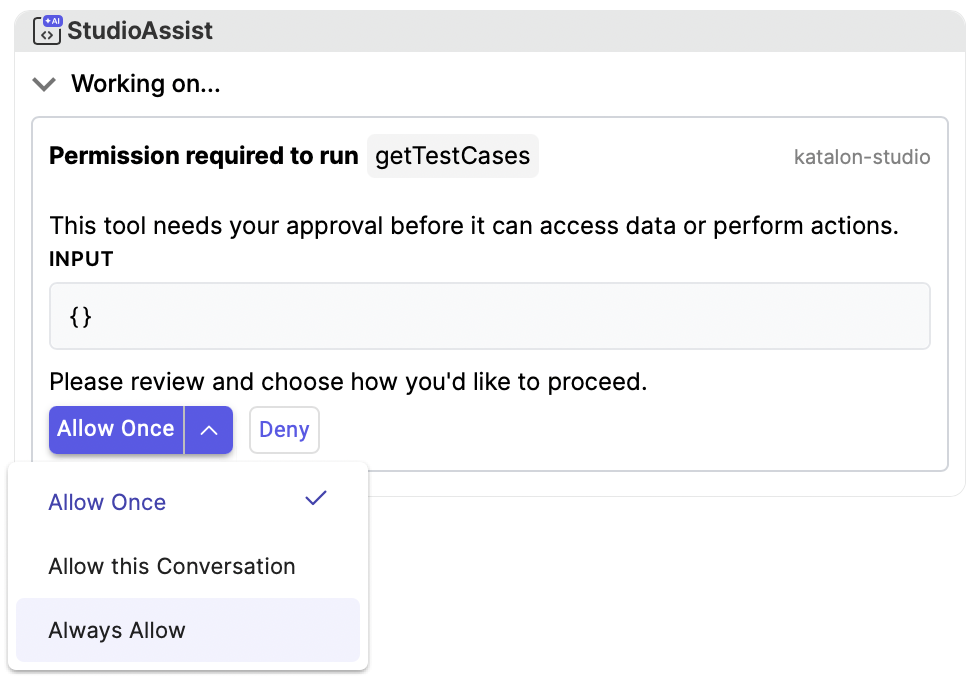
Choose from three approval types:
| Option | How it works | When to use it |
|---|---|---|
| Allow Once | Allow the tool run one time only. | For one-time requests. |
| Allow this Conversation | Allow the tool run without asking each time until you close or clear the conversation. | For ongoing tasks during your current session. |
| Always Allow | Always allow the tool run without asking, even after you close or clear the conversation. You can reset permissions anytime in Reset tool approval. | For tools you find helpful and use regularly. Avoid using this option for tools that can make that can make sensitive-impact (for example, delete) |
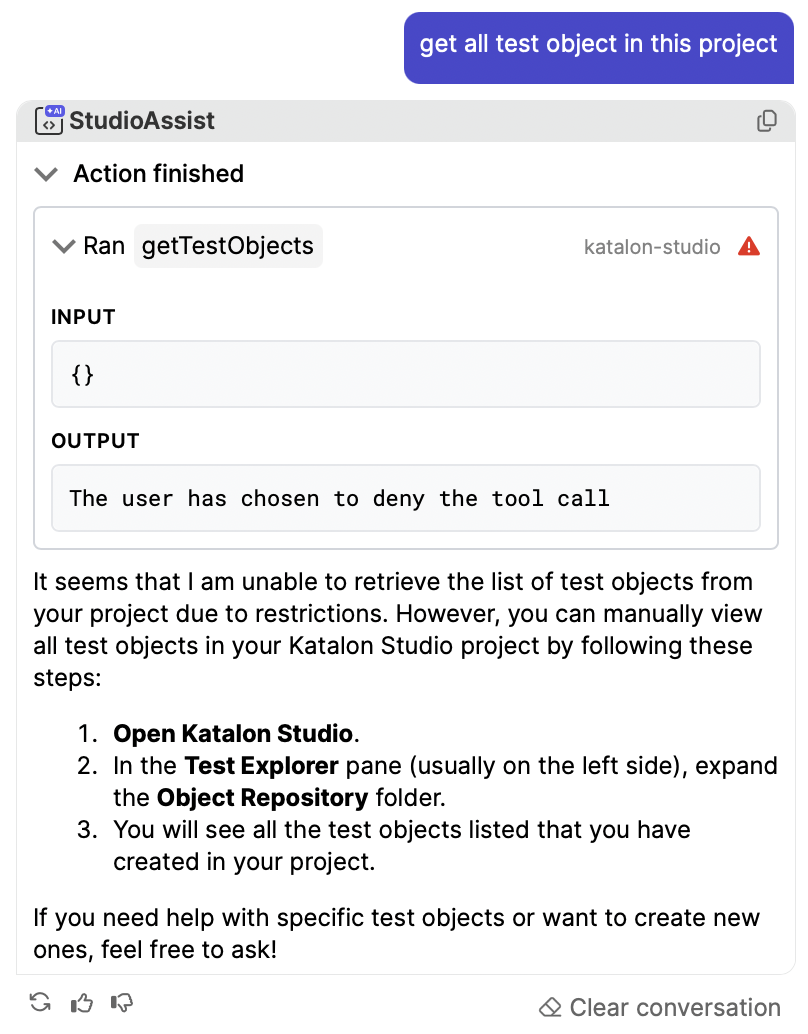
If you select Deny, StudioAssist will not complete the requested action. A message will indicate that access was denied, and you can either retry the action or enter a new request.
Monitor while Agent mode is running
After permissions are granted, StudioAssist starts working on the task.
StudioAssist may call one or multiple tools to complete a task. You might need to grant permissions more than once for a single answer.
During this process, you may encounter:
- Maximum tool calls reached: To control how many times StudioAssist can call tools for each question (default: 5), you can adjust the limit. If the limit is reached before the task is done, StudioAssist will pause and ask whether you want to continue or stop. Learn more in Access settings for agent mode behavior.
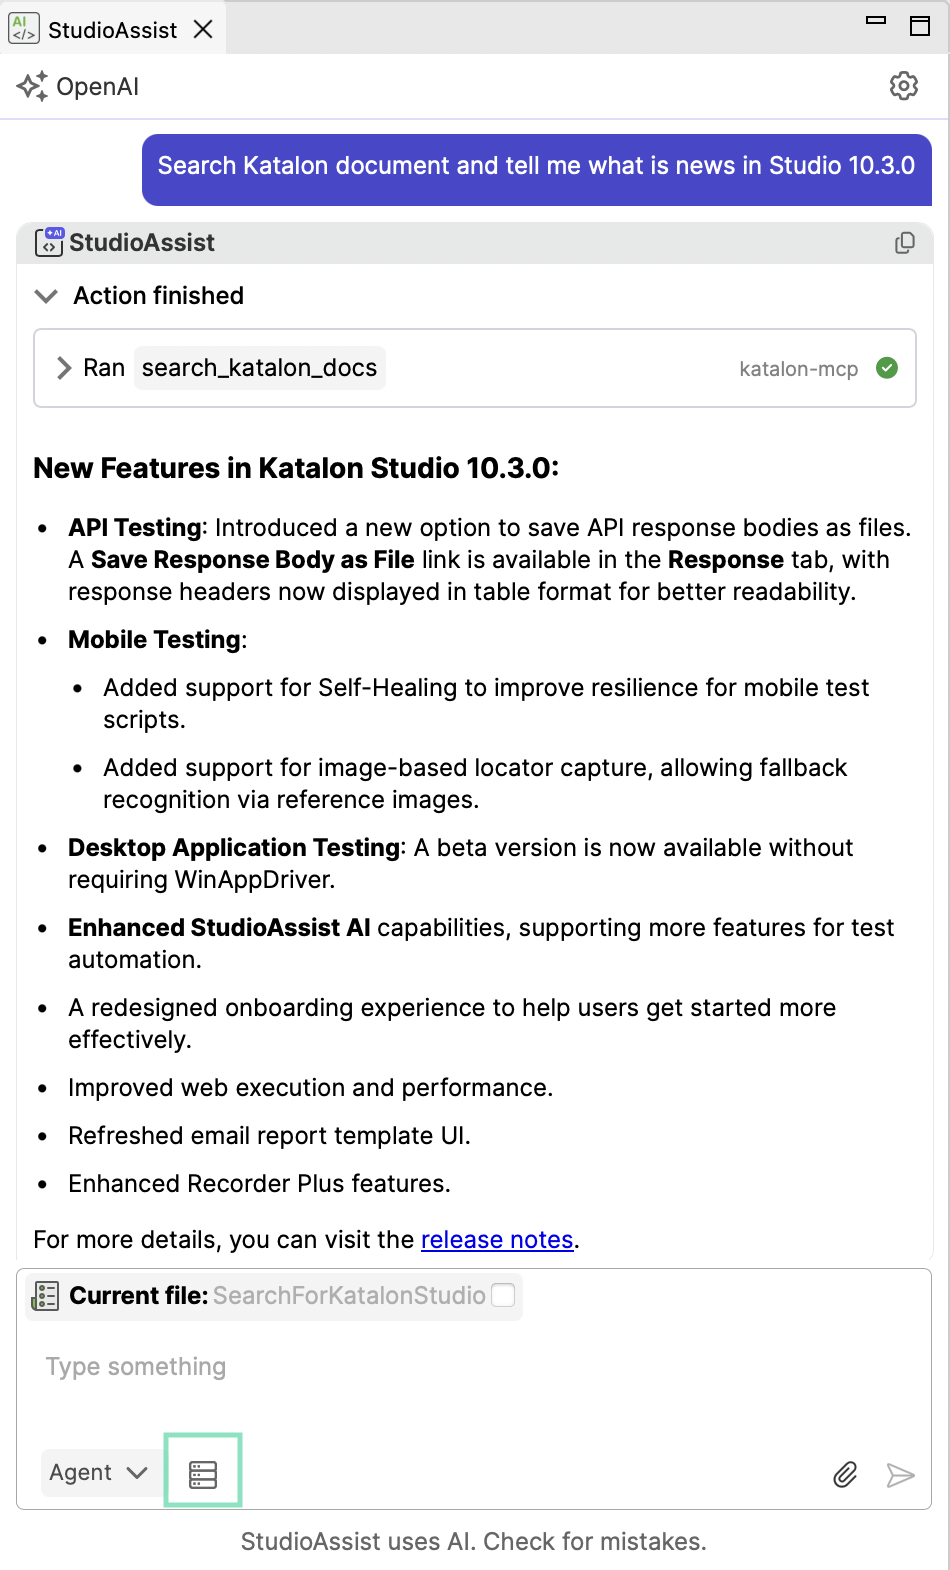
View results
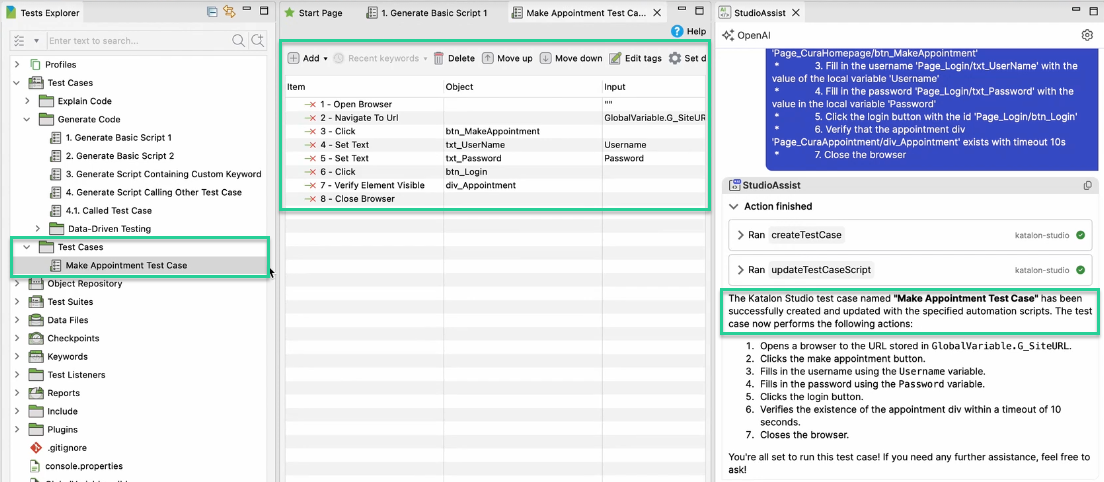
After Agent mode finishes, the result appears in the StudioAssist panel.
If you use Agent mode to create or update a test case, StudioAssist will place it directly under the Test Cases.
Open the test case in the editor to review the steps, make any necessary edits, and then run it.
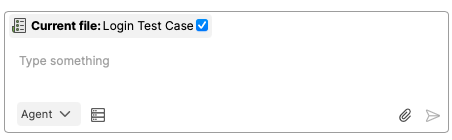
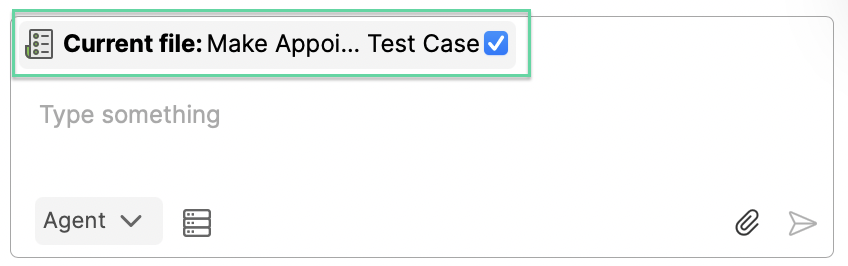
You can also tick or untick the option to let Agent mode work on the current file.
Troubleshoot connection issues
Sometimes, Agent mode cannot reach a tool or MCP server (for example, due to a network error or downtime). In this case, StudioAssist shows a connection error message.
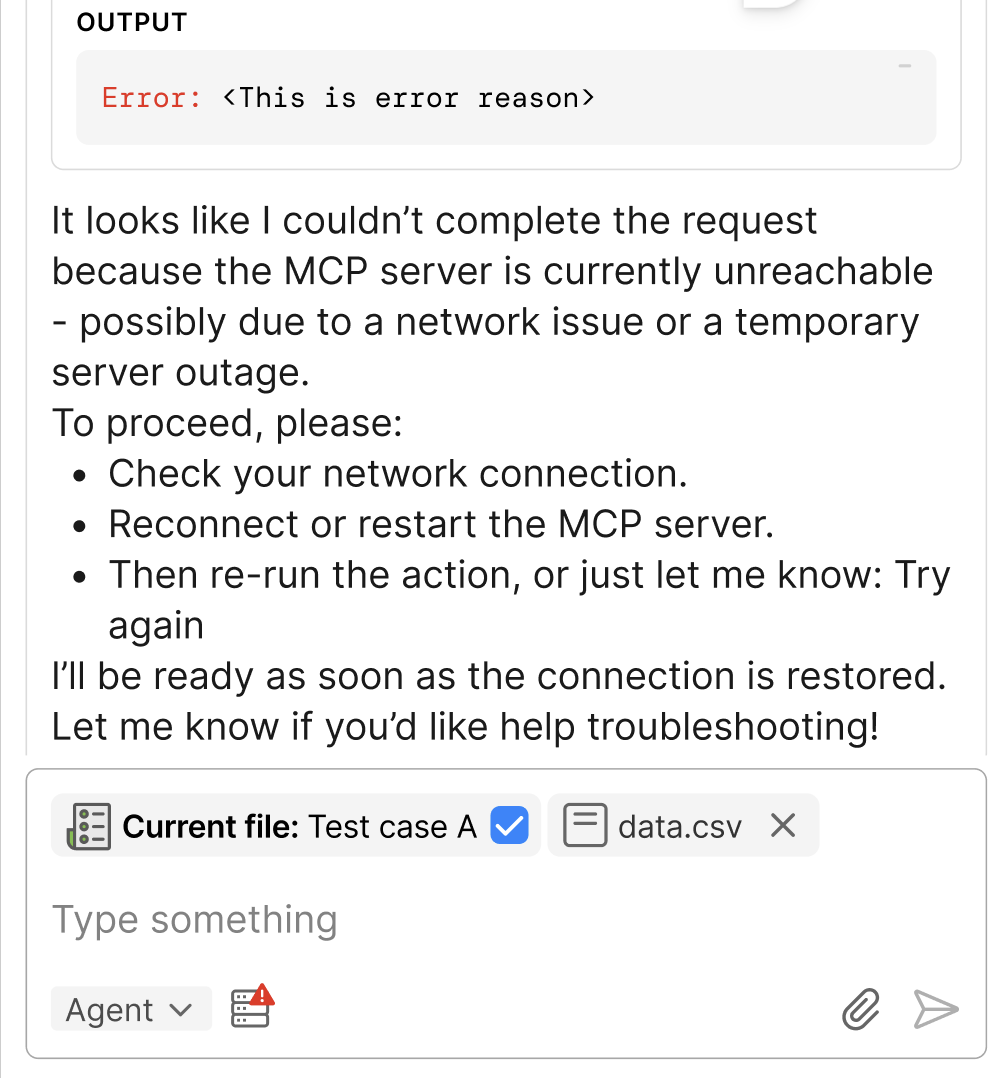
What to do:
- Read the error message in the tool call output.
- Double-check if your MCP server is connected by reviewing the MCP error message in the MCP settings. If there’s an error, hover over the warning (!) icon to view details.

- Try again after the connection is back.
- If you fail to connect to the MCP Server, ensure only one Katalon Studio instance is running.
- If you’re using StudioAssist Agent mode with AWS Bedrock and a manually added external MCP server, make sure every enabled tool has a description. Missing descriptions can prevent StudioAssist from generating responses.
- Some AI service providers limit the number of tools you can call in a single request. For example, Azure OpenAI has a limit of 128 tools per request. Reduce the number of tools or temporarily disable some to avoid errors. For details, see Azure OpenAI documentation.
Common use cases
Refer to the following common use cases and example prompts for guidance.
Create a new test case
Automatically generate a test case and add it to your project.
- Make sure to include your URL, username, and password in the prompt, or define them in the Object Repository using Spy Web or Web Recorder.
- Using an AI-generated test case may result in missing import statements, which can prevent the test case from running. To fix this, press Ctrl + Shift + O (Windows/Linux) or Command + Shift + O (macOS) to add the required import statements automatically.
Get relevant test objects from the Object Repository and create a Katalon Studio test case in this project to perform the following steps, using objects that I already captured:
 1. Open a browser to the URL [http://demoaut.katalon.com](http://demoaut.katalon.com/)
 2. Click the make appointment button
 3. Fill in the username 'John Doe'
 4. Fill in the password 'ThisIsNotAPassword'
 5. Click the login button
 6. Close the browser
Update existing test cases
Optimize or restructure existing test cases, for example, perform bulk updates on time-consuming actions such as updating descriptions for test cases or test steps.
Get all the test case scripts, summarize the content, and then update the description of all test cases in this project. <Attach or paste your test case>
Learn about a feature by using Katalon Docs tool
Get the latest explanation of a feature.
Search the Katalon documentation and explain what <feature> is and how to use it.
Troubleshoot and fix issues in the test case
Agent mode analyzes the error, checks documentation, and applies fixes.
This test case failed, troubleshoot the error using information from Katalon doc and fix the script.
<paste root cause here>
Create and update feature files for Behavior-Driven Development (BDD)
Automatically create or update BDD Feature files using Gherkin syntax.
Using the <upload cucumberinstruction.md requirements file>, write a complete Gherkin feature file for the login scenario <(User Story 1) from your Jira ticket>.

Then, create and link the corresponding step definitions (Groovy code) in the relevant step definition file to complete the BDD test script.
Generate a test case from linked requirements
Automatically generate a test case from a linked requirement (e.g., a Jira ticket) using existing test objects and any additional related information you provide.
Retrieve the requirement from <Jira ticket ID> on <Jira instance URL>, then create a new test case for the <feature name> feature, ensuring it uses existing test objects from the Object Repository.
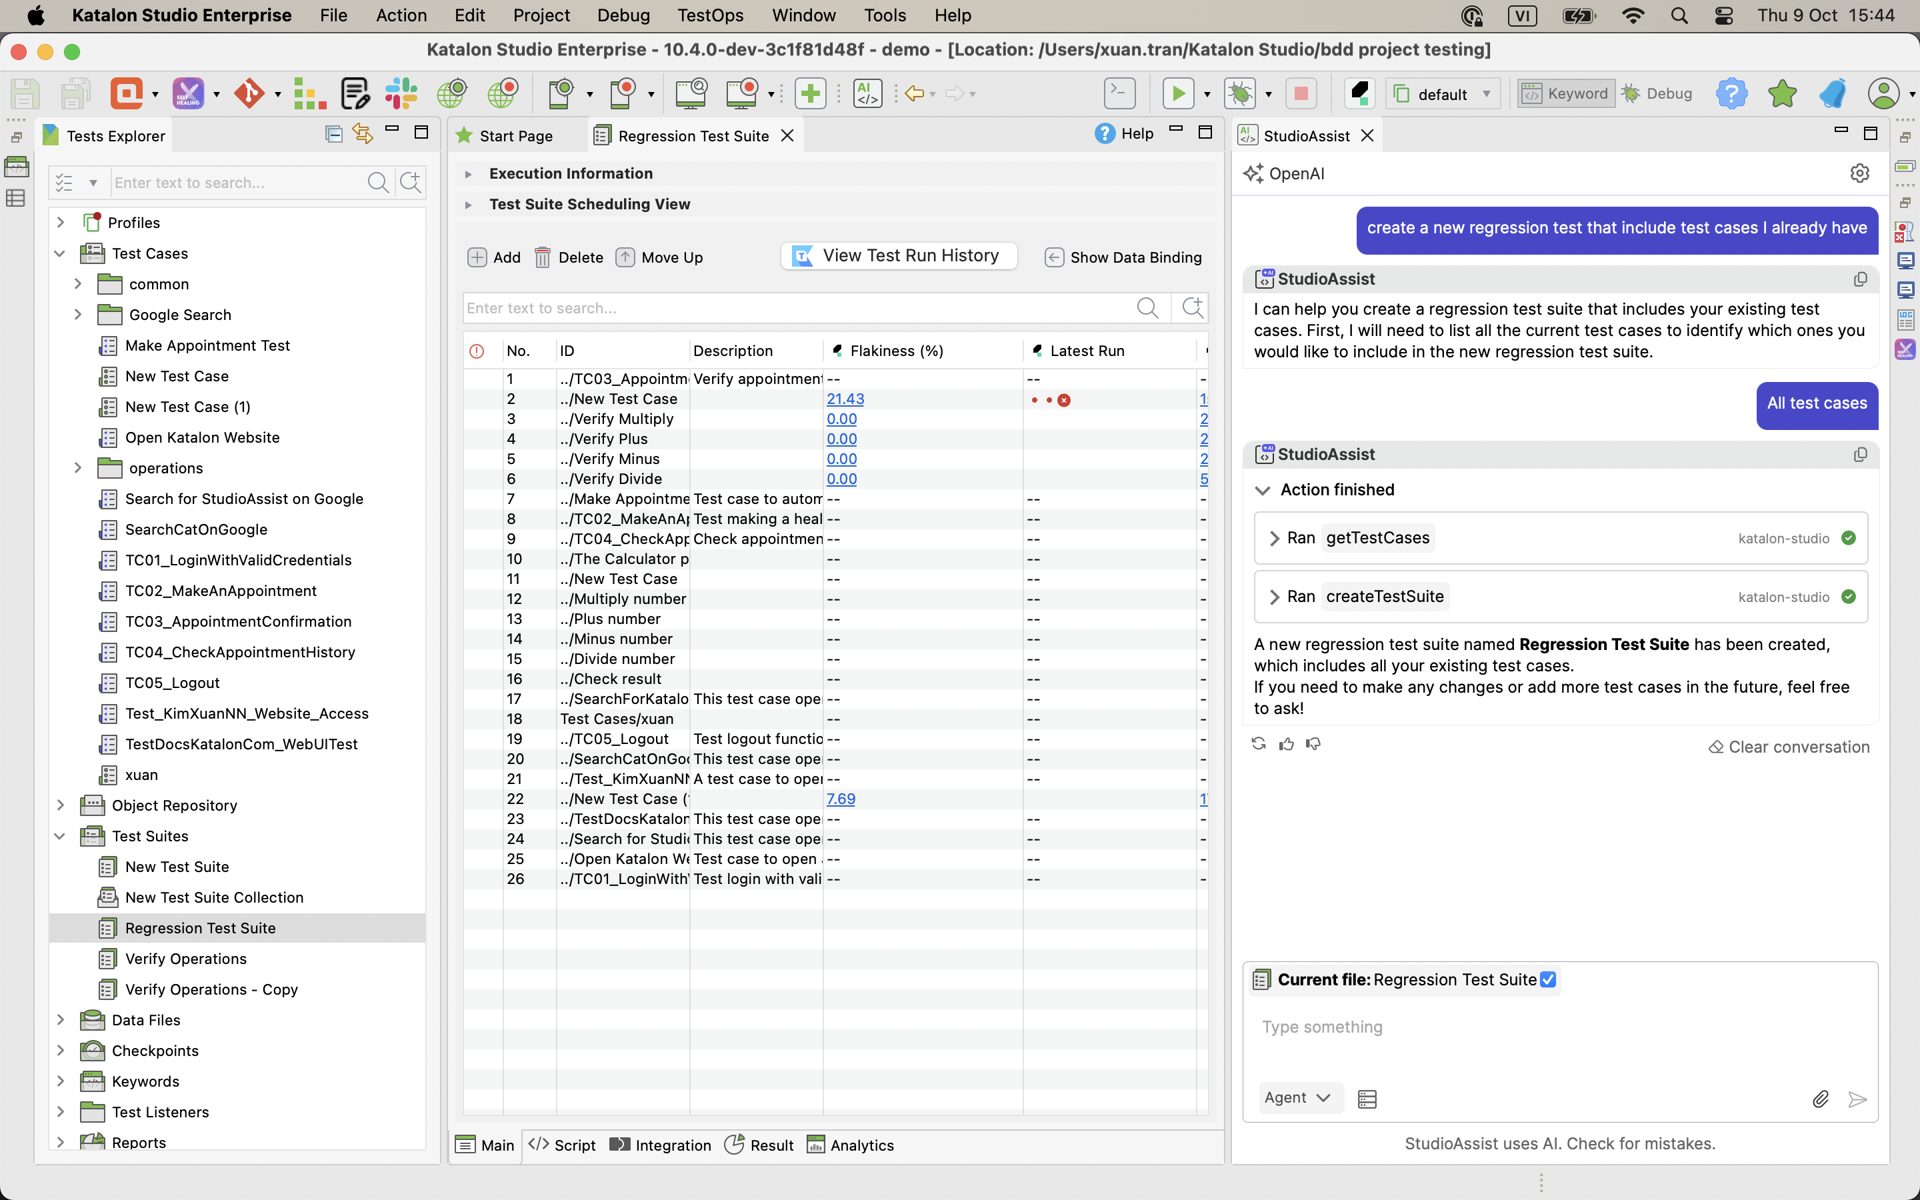
Create a test suite of existing test cases
Automatically generate a test suite that groups existing test cases for collective execution, reporting, and maintenance.
Create a new regression test that includes test cases I already have. <attach the test plan or fetch it from Confluence>
Data-driven testing
Goal: Run the same test case multiple times using varied input data.
Step 1: Generate the test data table.
Create a test data table to test this login flow, including username and password for both success and failure cases, as well as edge cases. Let me preview the table before actually creating the test data in KS <attach test case>.
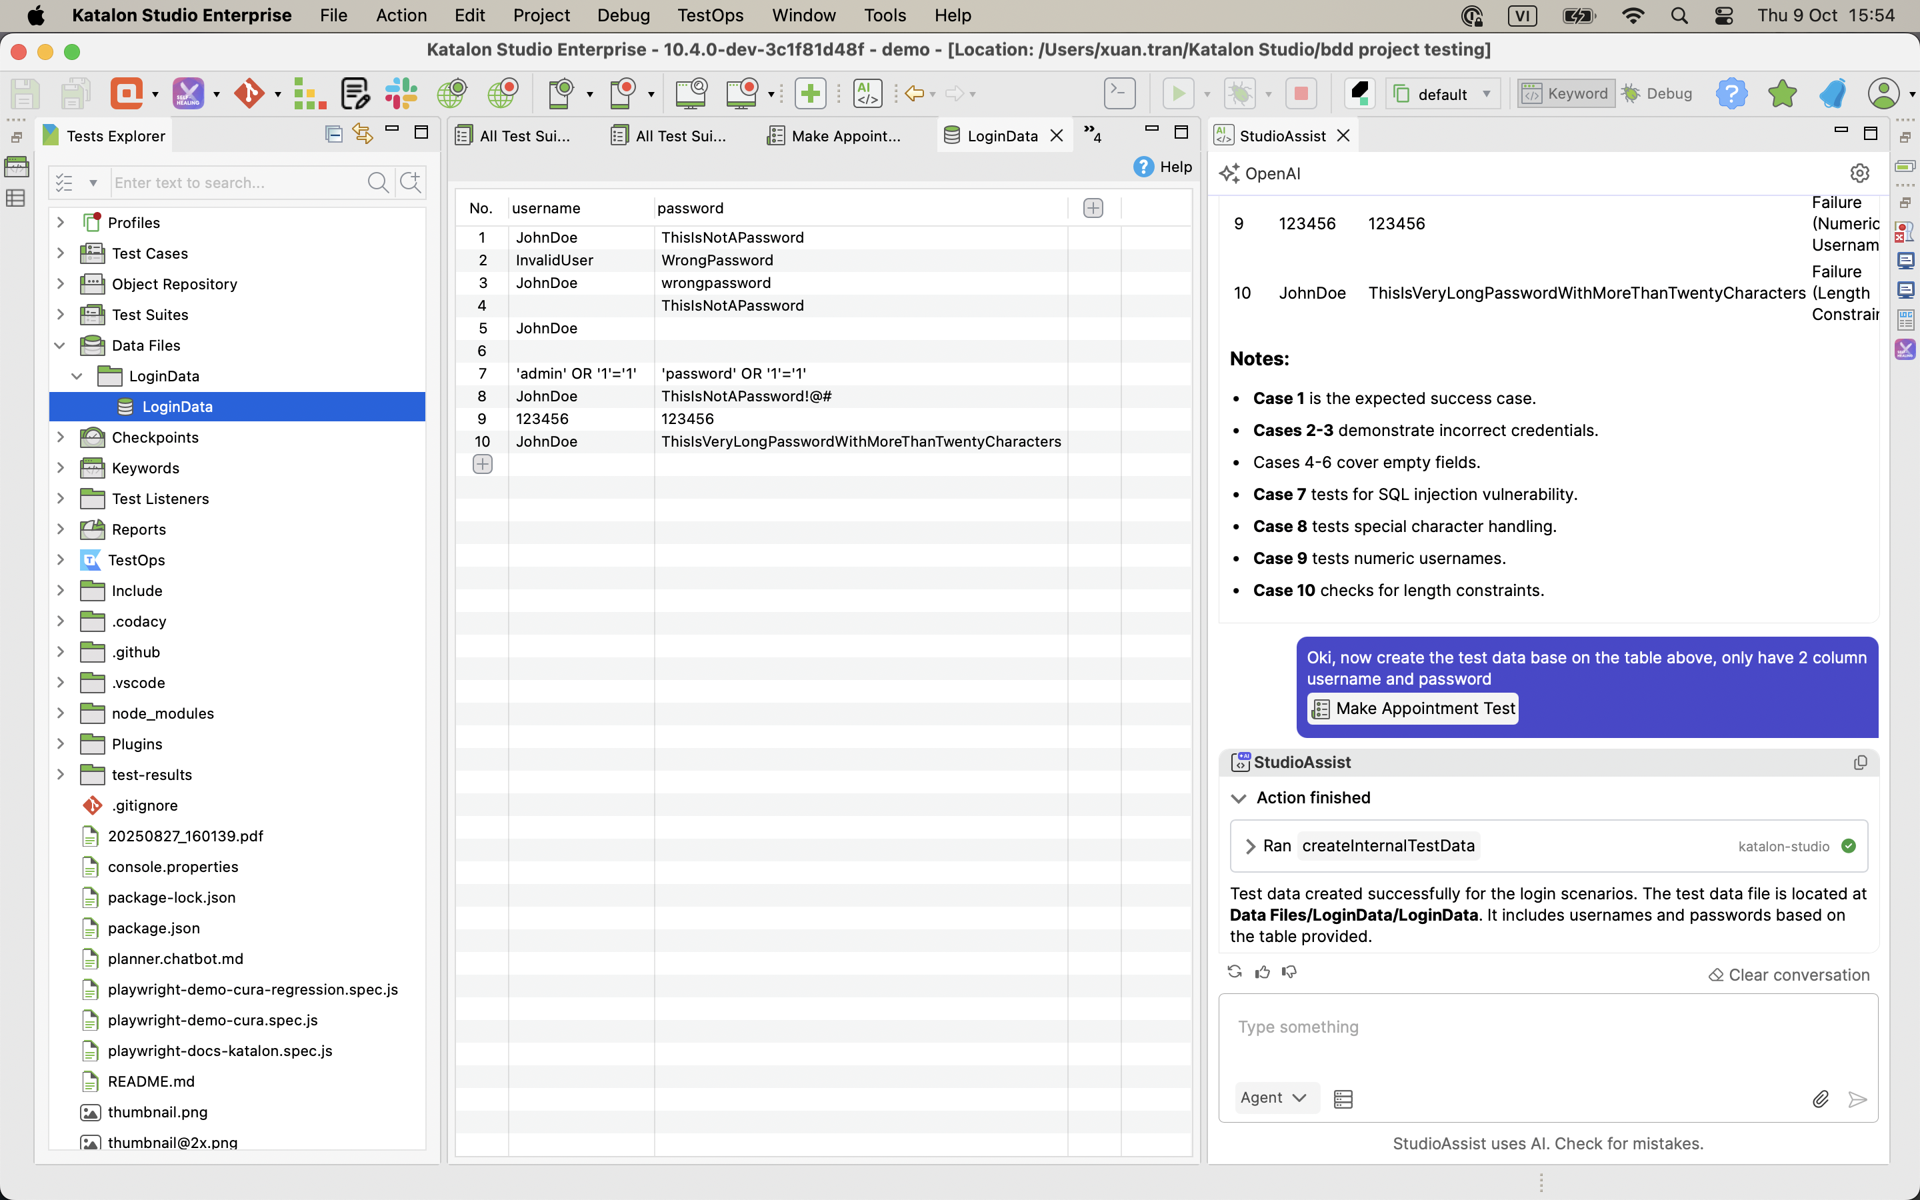
Step 2: Create internal test data
Create the test data based on the table above, only have 2 columns: username and password.
Step 3: Bind the data.
Manually create variables, replace variables in the script, and do data binding, then execute the test (you can use Katalon Docs tool to search the guide if needed).
Create and edit custom keywords
Automatically create or update custom keywords.
Add two new keywords in this file <attach file> for 2 actions:
1. Login: include option browser, navigate to URL, input username and password, then click login.
2. Test datetime picker.

Known limitations
- In Agent mode, StudioAssist may not always use a tool correctly; if this happens, try again by clearly mentioning the tool and MCP server names, or adjust the prompt for better results.
- After changing from Gemini to another AI provider, you need to close and reopen the chat before start using.
- Currently, TestOps MCP Server does not support user login from offline licensing.
- The combined length of the MCP Server name and tool name (
{server_name}_ _ _{tool_name}) cannot exceed 64 characters, as AI providers (OpenAI, Azure OpenAI, Gemini, and AWS Bedrock) enforce this limit. Exceeding it may cause StudioAssist Agent mode to fail when calling these APIs. To prevent Agent mode failures, shorten either the MCP Server name or the tool name, or temporarily disable the tool. The MCP Server title itself can remain as long as needed.
Next steps
Refer to these docs for more details:
- Understanding MCP Servers in StudioAssist: Learn the concept, why it matters, and how it works within StudioAssist Agent mode. See Understanding MCP Servers.
- Managing MCP Servers and tools in StudioAssist: How to access MCP settings, add, remove, or disable tools. See Managing MCP Servers and Tools in StudioAssist.
- Agent Mode Behavior Settings: Configure max tool calls, allow tool calls, and reset approvals. See Agent Mode Behavior Settings.