Add an external MCP server in Katalon AI Assistant
This document explains how to connect to an external MCP server in Katalon AI Assistant.
Supported MCP servers
- Starting version 10.4.0, Katalon Studio supports MCP servers that require authentication (e.g. Atlassian, Linear, Asana, Notion, Webflow... )
Katalon Studio provides 3 built-in MCP servers that help you query Katalon's knowledge base, write/edit test cases in Katalon Studio, and interact with TestOps objects.
For external MCP servers, we support the followings:
| Transport method | Execution environment | User type | Requirement |
|---|---|---|---|
| SSE (HTTP with Server-Sent Event) | Local or remote | Multiple users can access the MCP server | URL to the SSE endpoint |
| HTTP (Modern Streamable HTTP) | Local or remote | Multiple users can access the MCP servers | URL to the HTTP endpoint |
| STDIO | Local | Single user on the local machine running the MCP server | Server command and arguments |
Starting in Katalon Studio 11.1.0, STDIO MCP servers are supported directly in Katalon AI Assistant, so you no longer need to use MCP proxy for these servers. If you are using an earlier version of Katalon Studio, set up MCP proxy as a workaround. Servers hosted via this method can be treated as SSE/HTTP types to connect to Katalon AI Assistant. Learn more at Set up MCP proxy for STDIO MCP servers below.
Add an external MCP Server
Follow these steps to add an MCP server:
- Click the Settings icon, then select Agent Mode settings.
- Click Add MCP Server:

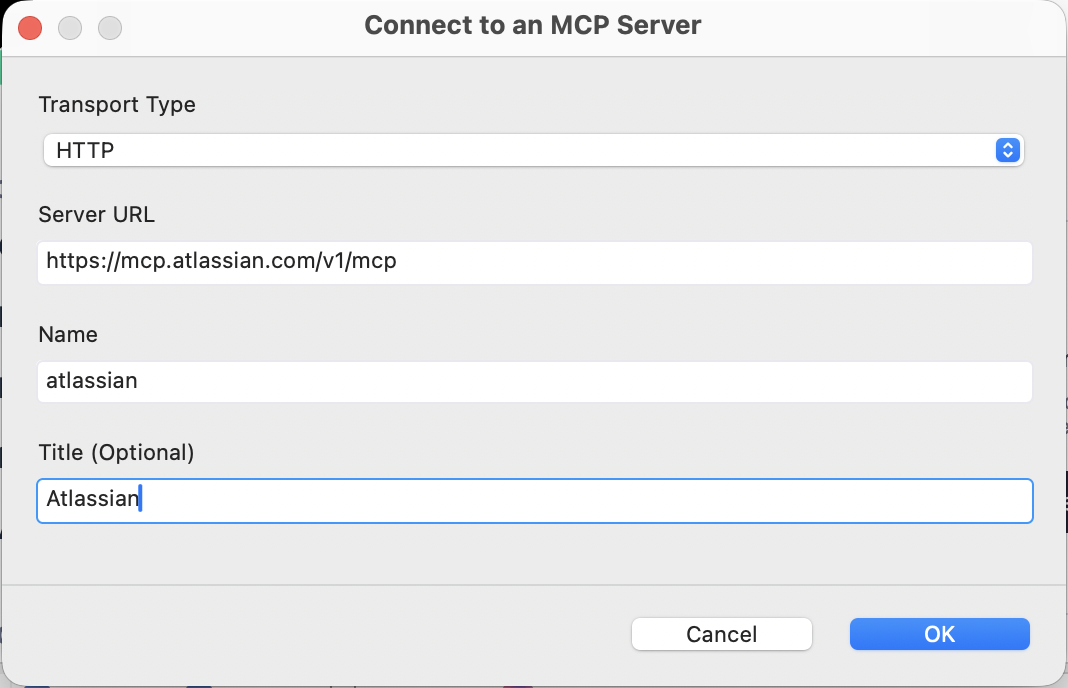
- Fill in these fields:
- Transport Type:
HTTPorSSE. Your MCP server provider should specify this. Check out our external MCP servers for common servers you could add.- Server URL (for
HTTPandSSE): the MCP server's URL.
- Server URL (for
- **Command and arguments (for
STDIO): the command used to start the MCP server and its arguments. The syntax should be:
{
  "command": "npx",
  "args": ["-y", "chrome-devtools-mcp@latest"]
}
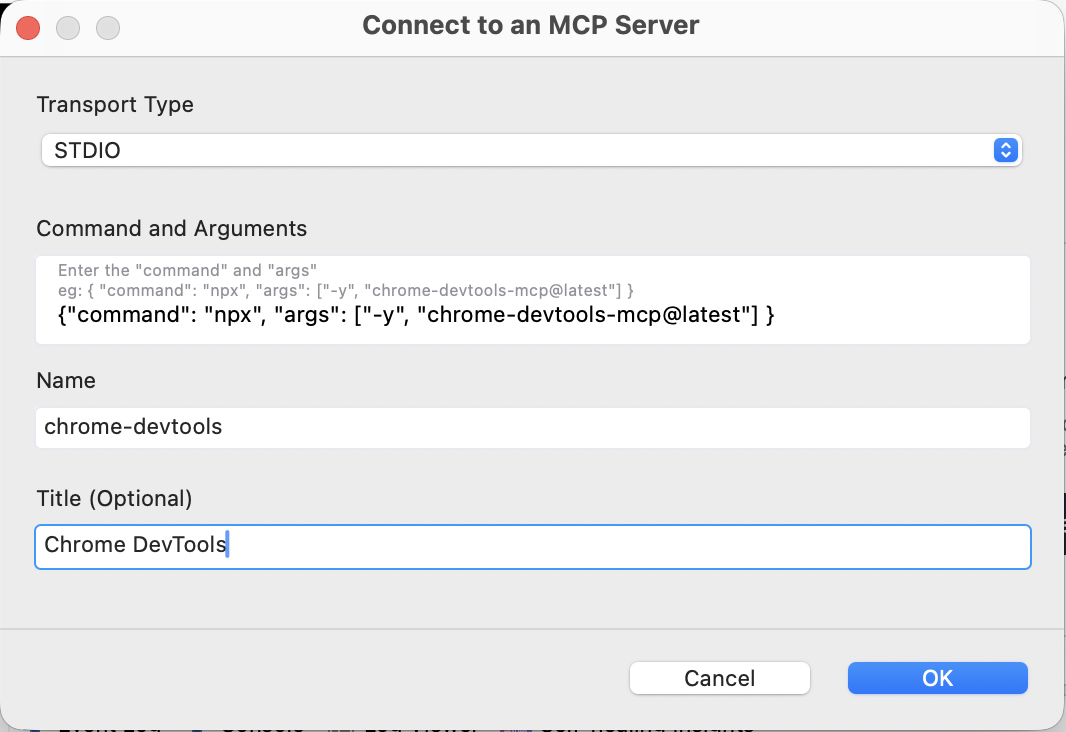
- Name: this name should contain no spaces or special characters (for example, "atlassian-mcp-server"). This name should be unique for the server list, and kept as short as possible (see limitation notes below).
- Title (Optional): the title is the display name of the server. You can have servers with the same name, but we highly recommend giving unique titles to servers.
- Click OK. The server is now added. You can expand to view its tool list.
-
AI providers (OpenAI, Azure OpenAI, Gemini, and AWS Bedrock) enforce a limitation of 64 characters on the combined length of the MCP Server name and tool name (
{server_name}_ _ _{tool_name}). Exceeding this limit may cause Katalon AI Assistant Agent mode to fail when calling these APIs. -
To prevent this, try to keep the MCP Server name (or the tool's name if you host your own server) short, or temporarily disable the tool and revert back later. The Title of the MCP server is not affected by this limit, and can remain as long as needed.
-
Some AI service providers also enforce a limit of
128MCP tools per request. Starting in Katalon Studio 11.3.0, Katalon AI Assistant can automatically select the tools most relevant to your prompt before an Agent mode request. This helps reduce the chance of hitting the tool limit when you add external MCP servers. If the error still occurs, disable tools or servers you do not need.
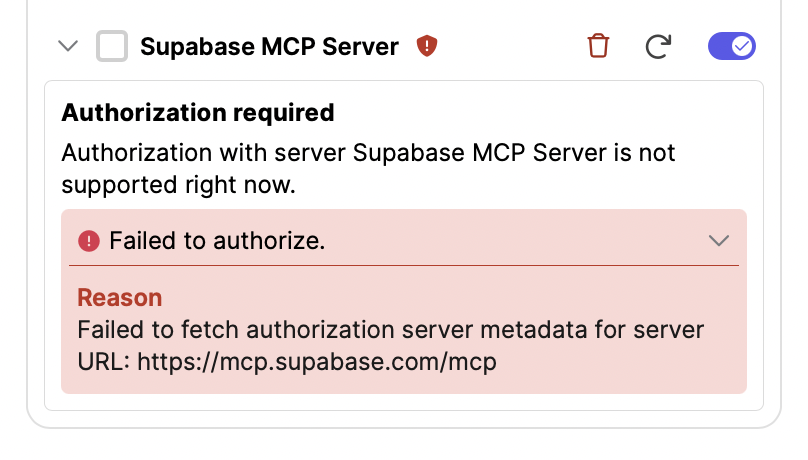
Authentication for MCP servers
Some servers (like Atlassian's) require authentication:
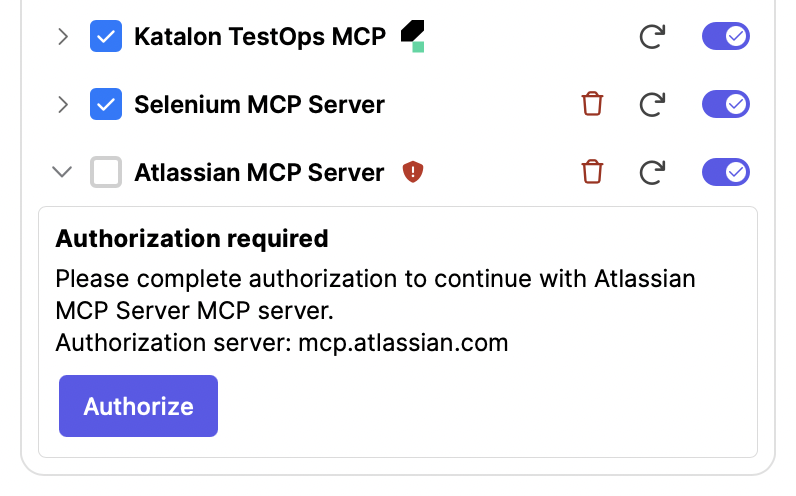
To authenticate, click Authorize. You'll be redirected to the server's authentication site - simply follow through.
When a server's token expires, Katalon Studio reminds you to re-grant authorization.
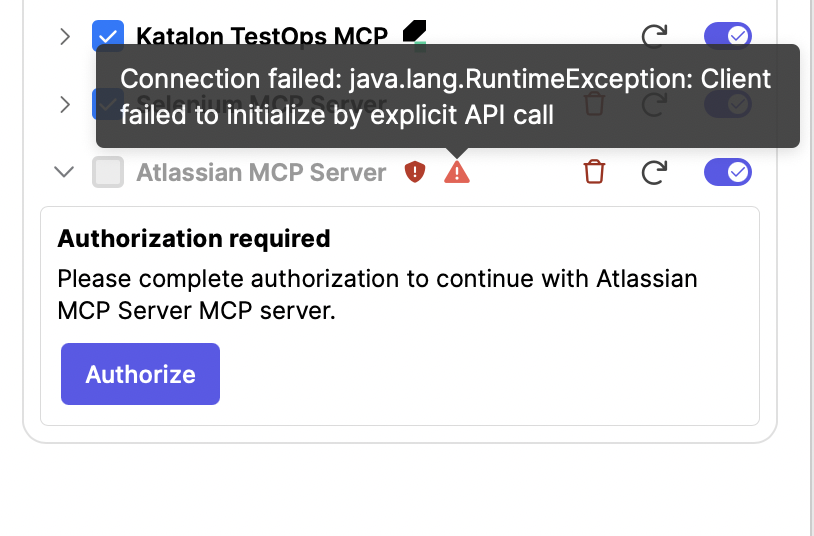
Simply click Authorize, and follow the steps above again. If it doesn't load properly due to connection issues, you can reload it with the Reload button.
External MCP servers to add to Katalon AI Assistant
You can easily add any of the available open MCP servers from the remote MCP servers list.
See below some of the OAuth MCP servers we currently support, grouped by purposes.
Project management
Integrate with these MCP servers to enable Katalon AI Assistant to:
- Create and update ticket descriptions automatically
- Read requirements, documentation, and test plans as context for test generation
- Log and create bugs when tests fail
| Server | Transport type | Server URL/Command and Arguments |
|---|---|---|
| Atlassian | HTTP | https://mcp.atlassian.com/v1/mcp |
| Notion | HTTP | https://mcp.notion.com/mcp |
SSE | https://mcp.notion.com/sse | |
| Linear | HTTP | https://mcp.linear.app/mcp |
| Asana | SSE | https://mcp.asana.com/sse |
| Azure DevOps MCP (ADO) | HTTP when using mcp-proxy | See further setup instructions at Setting up MCP server for Azure DevOps. |
STDIO (KS 11.1.0+) | { "command": "npx", "args": ["-y", "@azure-devops/mcp@next", "Katalon"] } | |
| GitHub | HTTP | https://api.githubcopilot.com/mcp/ with PAT |
STDIO | { "command": "npx", "args": ["-y", "@modelcontextprotocol/server-github"], "env": { "GITHUB_PERSONAL_ACCESS_TOKEN": "ghp_xxxxxxxxxxxx" } } | |
| Google Drive | STDIO (KS 11.1.0+) | { "command": "npx", "args": ["-y", "@piotr-agier/google-drive-mcp"] }. Requires GCP OAuth setup — see further setup instructions at Set up Google Drive MCP server. |
See how we use Katalon AI Assistant to create a test case from requirements, with Atlassian MCP server:
Testing and automation
Integrate with these MCP servers so Katalon AI Assistant can directly interact with browsers and automation tools — enabling test case generation, execution, and debugging.
- Starting Katalon Studio version 11.0.0, you can use Katalon WebUI MCP tools to interact with your AUT. See Katalon WebUI MCP tools for more details.
| Server | Transport type | Server URL/Command and Arguments |
|---|---|---|
| Selenium | HTTP when using mcp-proxy | 1. Run:mcp-proxy --port 3000 --host 127.0.0.1 --stateless --allow-origin "*" -- npx -y @angiejones/mcp-selenium2. The server will run locally at http://127.0.0.1:3000/mcp - use this URL to set up connection in Katalon AI Assistant. |
STDIO (KS 11.1.0+) | See angiejones/mcp-selenium for setup and getting the command/arguments. | |
| Playwright | HTTP when using mcp-proxy | 1. Run:mcp-proxy --port 3000 --host 127.0.0.1 --stateless --allow-origin "*" -- npx -y @playwright/mcp@latest2. The server will run locally at http://127.0.0.1:3000/mcp - use this URL to set up connection in Katalon AI Assistant. |
| Chrome DevTools | HTTP when using mcp-proxy | 1. Run:mcp-proxy --transport streamablehttp --port 8080 -- npx -y chrome-devtools-mcp@latest2. The server will run locally at http://127.0.0.1:8080/mcp - use this URL to set up connection in Katalon AI Assistant. |
| mobile-mcp | STDIO (KS 11.1.0+) | { "command": "npx", "args": ["-y", "@mobilenext/mobile-mcp@latest"] } |
| Windows Desktop MCP | STDIO (KS 11.1.0+) | See CursorTouch/Windows-MCP for setup and getting the command/arguments. Note: Windows only. macOS is not supported. |
| Excel | STDIO (KS 11.1.0+) | See negokaz/excel-mcp-server for setup and getting the command/arguments. |
See how we use Katalon AI Assistant to create a test case using Playwright MCP server and requirements pulled using Atlassian MCP server:
Design and prototyping
Connect to these MCP servers to allow Katalon AI Assistant to analyze design structures and use design assets as context for generating more accurate and visually aligned test cases.
| Server | Transport type | Server URL/Command and Arguments |
|---|---|---|
| Figma | HTTP | Figma's remote MCP Server URL is currently not supported. As an alternative, you can host the MCP server on your local machine, and connect to this server locally: 1. Open a Figma Design file (latest Figma version). 2. In the toolbar at the bottom, toggle to Dev Mode. 3. In the MCP server section of the inspect panel, click Enable desktop MCP server. A confirmation message will appear once the server is running. 4. The server runs locally at http://127.0.0.1:3845/mcp. Use this URL to set up connection in Katalon AI Assistant. |
| Webflow | SSE | https://mcp.webflow.com/sse |
Please note that some OAuth servers are not yet supported. We plan to include support for these in future updates.
Set up MCP proxy for STDIO MCP servers
- Starting Katalon Studio version 11.1.0,
STDIOMCP servers are officially supported. You only need MCP proxy forSTDIOMCP servers if you are using an earlier version of Katalon Studio.
MCP proxy is a tool that acts as an intermediate and handles communication between an LLM model and the target MCP server. Once you set up MCP proxy, you can host multiple MCP servers with STDIO transport type on your local machine.
- Node.js (version 14 or higher) - Download here.
npxis included automatically with Node.js - Python - Download here.
- Either
UV(installation guide here) orpipx(installation guide here) to installmcp-proxy
Run the following command in your terminal to install mcp-proxy. You can choose either UV:
uv tool install mcp-proxy
or pipx:
pipx install mcp-proxy
Once the MCP proxy is installed, you can host an MCP server with a command line (replace {{ package }} with the MCP server's package, e.g. @angiejones/mcp-selenium for Selenium's MCP server)
mcp-proxy --port 3000 --host 127.0.0.1 --stateless --allow-origin "*" -- npx -y {{ package }}
Customize the parameters if you wish:
| Parameter | Description |
|---|---|
--port 3000 | Server port (customize as needed) |
--host 127.0.0.1 | Server host (localhost) |
--stateless | Enable stateless mode |
--allow-origin '*' | Allow all CORS origins (use specific origin in production) |