Set up Azure DevOps MCP server
This document demonstrates how to integrate Azure DevOps MCP server with Katalon AI Assistant.
- MCP proxy installed. See Setup MCP proxy for STDIO MCP servers for more details.
Create and setup a Personal Access Token (PAT)
Before you integrate with the Azure DevOps MCP server, you need a Personal Access Token (PAT) to authenticate with Azure DevOps. Follow these steps:
- Go to Azure DevOps:
<https://dev.azure.com/{YourOrganization}> - Click on User Settings (top right) > Personal Access Tokens.
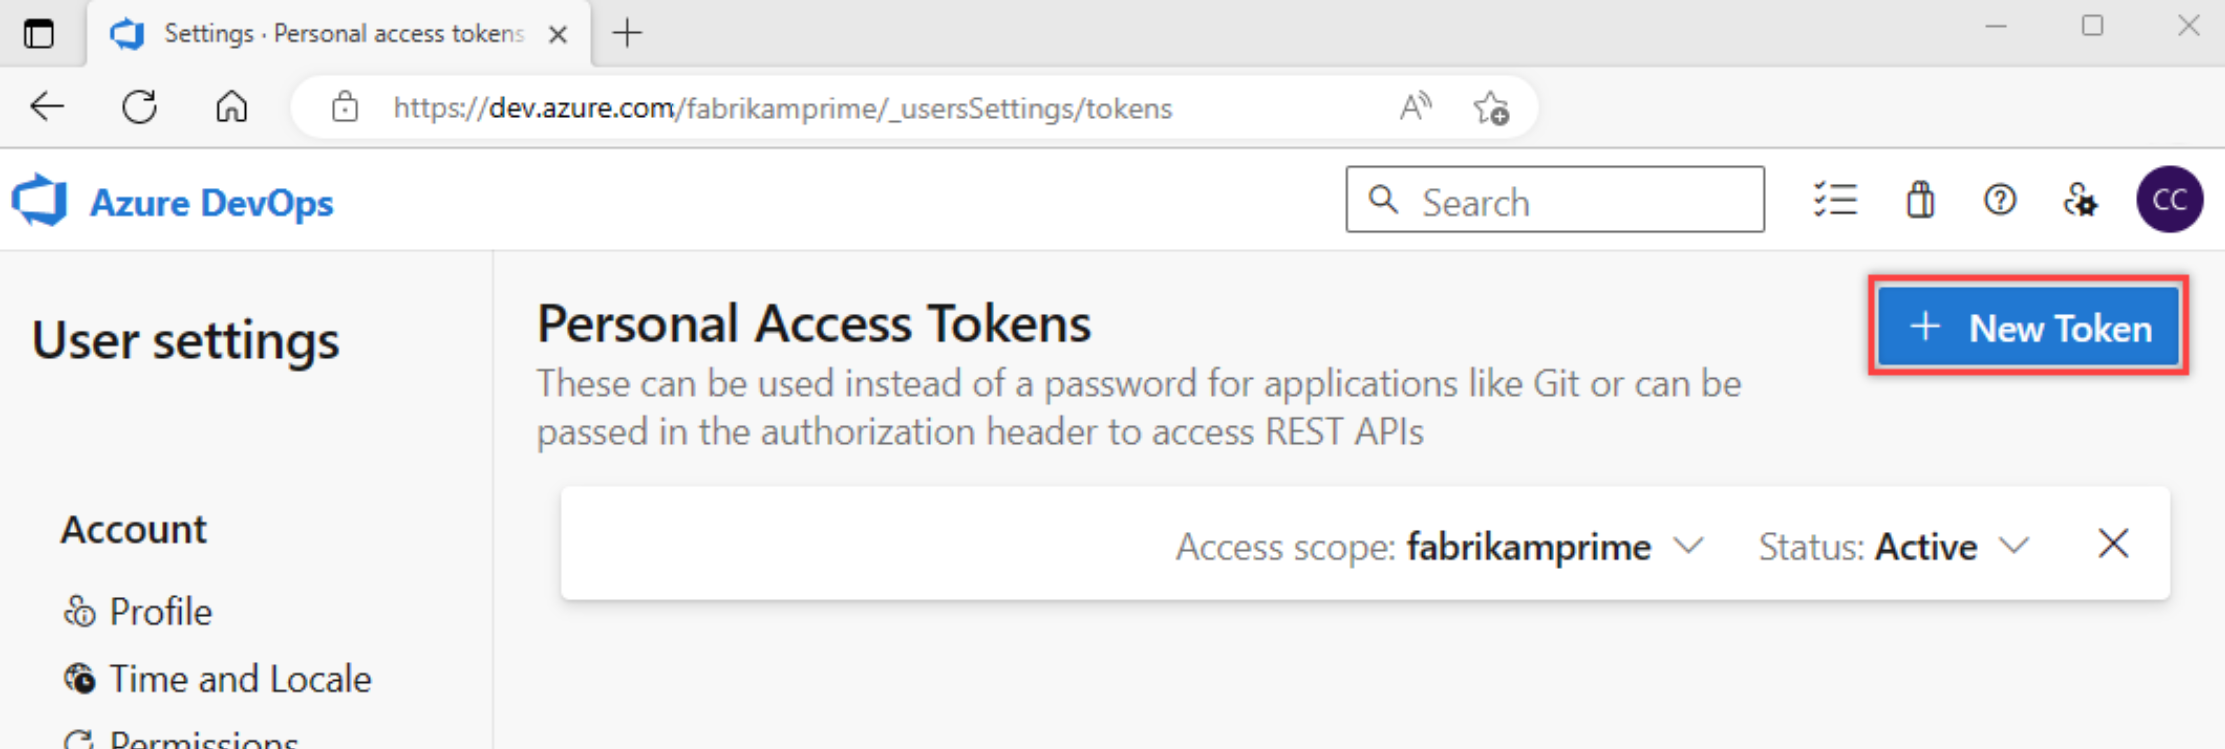
- Click + New Token.
- Configure:
- Name: Give it a descriptive name (e.g., "MCP Bridge")
- Organization: Select your organization (e.g., "Katalon")
- Expiration: Set expiration date
- Scopes: Select the permissions you need:
- Work Items: Read & Write
- Code: Read
- Build: Read
- Or select Full Access for all permissions

-
Click Create
-
Copy the token - you won't be able to see it again.
-
Set up the PAT as an environment variable:
For Windows (PowerShell):
$env:AZURE_DEVOPS_PAT = "your-pat-token-here"For Windows (CMD):
set AZURE_DEVOPS_PAT=your-pat-token-hereFor macOS/Linux:
export AZURE_DEVOPS_PAT="your-pat-token-here"For macOS/Linux (Permanent setup):
Add to your
~/.zshrcor~/.bashrc:echo 'export AZURE_DEVOPS_PAT="your-pat-token-here"' >> ~/.zshrc source ~/.zshrc
Host and integrate with Azure DevOps MCP server
In your terminal, run:
mcp-proxy --port 3000 --host 127.0.0.1 --stateless --allow-origin '*' -- npx -y @azure-devops/mcp "katalon"
Replace "Katalon" with your Azure DevOps organization name.
| Parameter | Description |
|---|---|
--port 3000 | Server port (customize as needed) |
--host 127.0.0.1 | Server host (localhost) |
--stateless | Enable stateless mode |
--allow-origin '*' | Allow all CORS origins (use specific origin in production) |
"Katalon" | Your Azure DevOps organization name |
The server will run locally at: http://127.0.0.1:3000/mcp. Add it to Katalon AI Assistant:
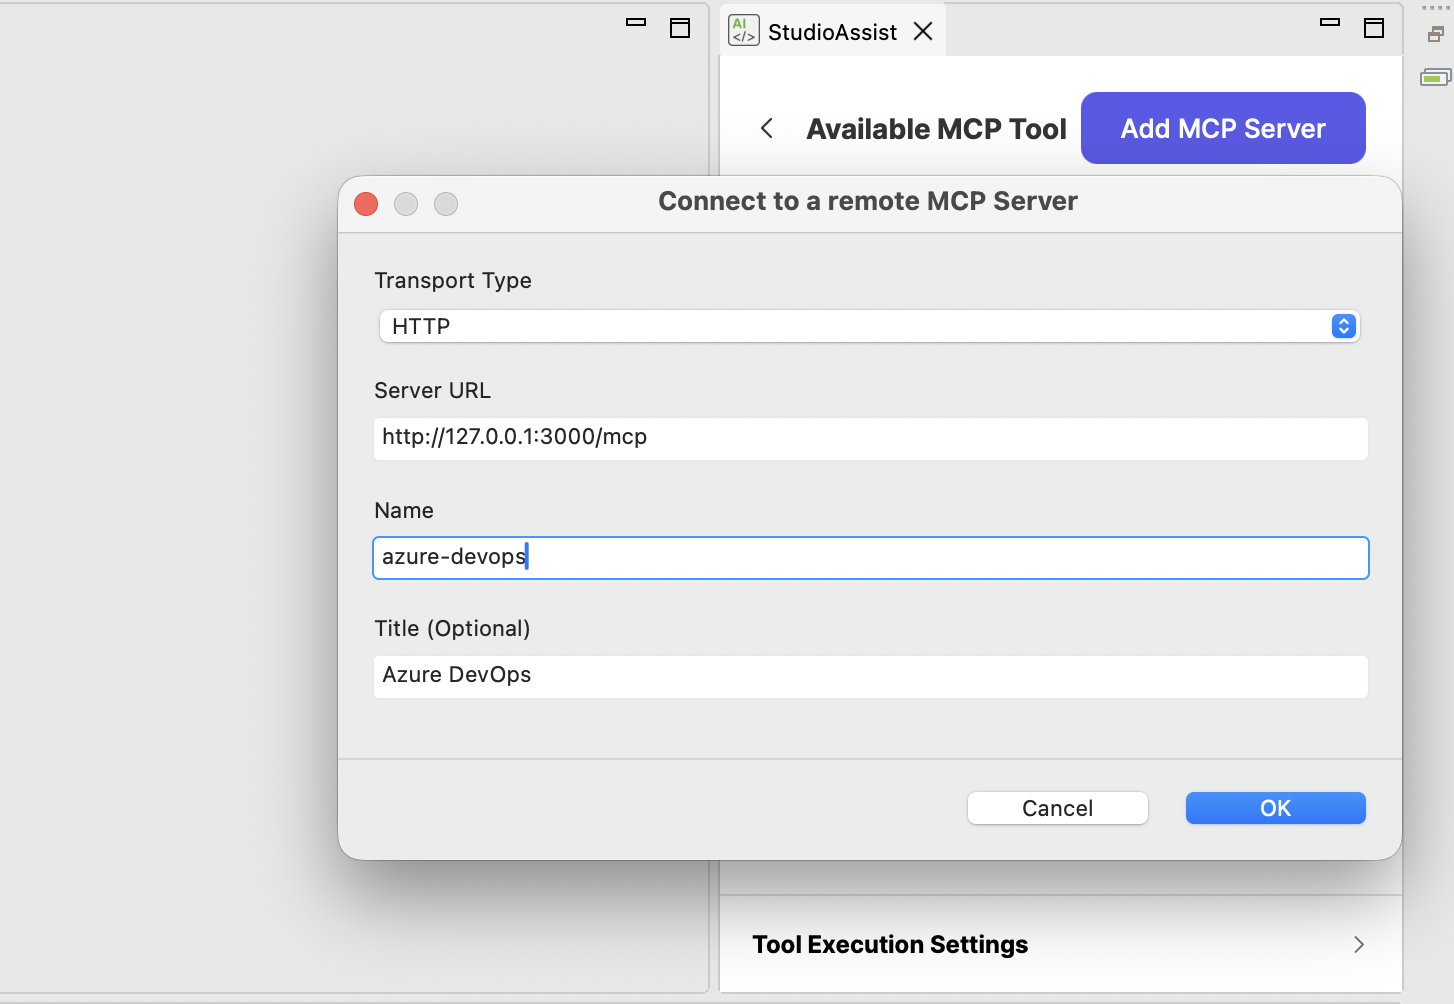
You can see the tool list in the added MCP server for Azure DevOps:

Troubleshoot
If you encounter CORS errors, double-check to make sure --allow-origin "*" is in the command