Katalon AI Assistant Agent mode
Katalon AI Assistant Agent mode helps you complete work in Katalon Studio by using project context, Katalon documentation, and MCP tools. You can use Agent mode to create and update test assets, troubleshoot failures, attach supporting files, and review AI-generated file changes before you keep them.
- Configure an AI provider in Katalon Studio. For more details, see Katalon AI Assistant preferences.
- To troubleshoot test failures with Agent mode, use Katalon Studio version
11.1.0or later.
For some shared features such as opening the chat, managing conversations, and using the current file as context — see Katalon AI Assistant Overview.
What Agent mode does
Ask mode answers questions. Agent mode helps you complete tasks.
| Prompt | Ask mode | Agent mode |
|---|---|---|
Create a new test case | Suggests code. | Looks up relevant context and creates a test case in your Katalon Studio project. |
Explain this test case | Explains the selected code. | Explains the test case with references to related Katalon keywords and documentation. |
How do I create a test case? | Gives general steps. | Guides you with current Katalon documentation. |
Troubleshoot an error at step 3 | Suggests possible fixes. | Analyzes the error, checks available context, and proposes fixes. |
With Agent mode, you can:
- Generate new test cases or update existing test assets with MCP tools.
- Ask questions that use Katalon documentation as supporting context.
- Connect to third-party MCP servers to work with external systems from Katalon Studio.
- Review file changes that Katalon AI Assistant creates before you keep them.
Open Agent mode and manage conversations
-
Click the Katalon AI Assistant icon in the main toolbar to open the chat window.

-
Start prompting in the new chat, or open All chats to return to an existing conversation.
The more context you provide, the better Katalon AI Assistant can understand your project and goal. You can also use the Prompt Library to customize engineering prompts for Agent mode.
Agent mode conversation behavior
Agent mode keeps conversation context local to your machine.
| Behavior | Description |
|---|---|
| Conversation filtering | All chats shows conversations based on project context and enabled Agent Profiles. If no project is open, Ask mode and generic-agent conversations appear. If a project is open, conversations from Agent Profiles enabled in that project also appear. |
| Project-scoped conversations | Agent mode conversations are bound to the project open and close lifecycle. When you close a project, project-specific Agent mode conversations are no longer shown until the related project context is available again. |
| Unavailable profiles | If an Agent Profile is disabled or deleted, conversations associated with it do not appear in All chats while that profile is unavailable. |
Attach context
You can attach files, images, and screenshots to provide more context for test generation, debugging, and failure analysis.
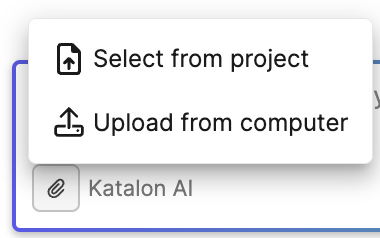
Attach context with one of the following methods:
- Click the paperclip icon.
- Drag image or text-based files from your file explorer or desktop into the chat input area.
- Paste screenshots or images from the clipboard.
| Item | Supported behavior |
|---|---|
| Image formats | PNG, JPEG, WEBP, and GIF |
| File size | Up to 10 MB per file |
| Attachments per prompt | Up to 10 files |
- You can drag multiple files in one operation, up to the file limit.
- Attachments appear above the input field and are also shown under each sent message.
- You cannot add attachments while Katalon AI Assistant is generating a response.
- For attachments in past conversations, Katalon AI Assistant stores a reference to the file. If the original file is renamed, moved, deleted, or cannot be read when you reopen the conversation, the chat indicates that the file is no longer available and asks you to re-attach it.
Review and revert file changes
When Katalon AI Assistant modifies project files, such as test cases or scripts, all affected files appear in the Modified Files section of the chat window. This includes:
- Modified files, with the number of added and removed lines.
- Newly created files, marked with a New label.
Click any file to review it before keeping the changes:
- For updated files, Katalon Studio opens a diff view that highlights the changes.
- For new files or files with only metadata updates, Katalon Studio opens the file for review.
The Modified Files section belongs to the conversation where the changes were made. Reopen it from All chats to continue reviewing.
Configure Agent mode tools and profiles
Agent mode uses MCP servers and tools to access Katalon documentation, Katalon Studio project context, Katalon True Platform objects, and external systems.
Katalon AI Assistant includes built-in MCP tools by default:
| MCP server | What it does |
|---|---|
| Katalon MCP | Connects Katalon AI Assistant to Katalon documentation. |
| Katalon Studio MCP | Connects Katalon AI Assistant to your Katalon Studio project so it can read, create, and edit test cases. |
| Katalon True Platform MCP | Connects Katalon AI Assistant to Katalon True Platform objects, such as test cases, test suites, requirements, sprints, and releases. |
For more details, see Katalon's built-in MCP servers.
By default, you can use Katalon MCP servers without additional setup. If you need more control, you can configure MCP server hosting, including authentication, hosting ports, exposed tools, and standalone server mode. For more details, see Set up Katalon Studio MCP server.
You can also connect external MCP servers. For more details, see Add an external MCP server.
Manage tool behavior
You can manage MCP servers and configure how Katalon AI Assistant uses MCP tools. For more details, see Manage MCP servers and tools.
Agent mode settings include:
- Tool use behavior: Control how Katalon AI Assistant asks for permission when using MCP tools.
- Agent Profile settings: Control tool availability and behavior for a specific Agent Profile without affecting other agents.
- Tool execution: Configure how and when Katalon AI Assistant can use tools.
Before an Agent mode request, Katalon AI Assistant can automatically select the MCP tools that are most relevant to your prompt and active project context. This helps keep requests within model tool limits and reduces unnecessary tool choices when an Agent Profile exposes many tools.
If tool use behavior is not configured, Katalon AI Assistant asks for approval when it needs to use a tool.
| Option | How it works | When to use it |
|---|---|---|
| Allow Once | Allows the tool to run one time only. | Use this option for one-time requests. |
| Allow this Conversation | Allows the tool to run without asking again until you close or clear the conversation. | Use this option for ongoing work in the current conversation. |
| Always Allow | Allows the tool to run without asking again, even after you close or clear the conversation. You can reset permissions in Reset tool approval. | Use this option for tools you use regularly. Avoid this option for tools that can make sensitive changes, such as deleting files or data. |
| Deny | Stops Katalon AI Assistant from using the tool for the current request. | Use this option when you do not want the tool to run. |
Common use cases
Use the following examples as starting points. Replace placeholder values with your own project details.
Create a new test case
When to use: You want Agent mode to generate a test case and add it to your Katalon Studio project.
Example prompt:
Get relevant test objects from the Object Repository
and create a Katalon Studio test case in this project
to perform the following steps,
using objects that I already captured:
1. Open a browser to http://demoaut.katalon.com
2. Click the make appointment button
3. Fill in the username John Doe
4. Fill in the password ThisIsNotAPassword
5. Click the login button
6. Close the browser
Expected result: Katalon AI Assistant creates a test case in your project by using available test objects.
Tip: Include the URL, username, and password in the prompt, or define them in the Object Repository with Spy Web or Web Recorder.
Note: An AI-generated test case may miss import statements. To add required imports automatically, press Ctrl + Shift + O on Windows or Linux, or Command + Shift + O on macOS.
Update existing test cases
When to use: You want to optimize, restructure, or update existing test cases in bulk.
Example prompt:
Get all test case scripts,
summarize the content,
and update the description of all test cases in this project.
<Attach or paste your test case>
Expected result: Katalon AI Assistant reviews the selected test cases and updates their descriptions.
Learn about a Katalon feature
When to use: You want an explanation that uses Katalon documentation as context.
Example prompt:
Search the Katalon documentation
and explain what <feature> is and how to use it.
Expected result: Katalon AI Assistant summarizes the feature and links the answer to relevant Katalon documentation when available.
Troubleshoot a test failure
When to use: You want Agent mode to analyze a test failure and suggest fixes.
Example prompt:
Analyze this failed test case and suggest a fix.
<Attach the failed test case, screenshot, error log, or execution report>
Expected result: Katalon AI Assistant reviews the available failure context and proposes next steps or code changes.
Create and update BDD feature files
When to use: You want to create or update Behavior-Driven Development (BDD) feature files with Gherkin syntax and matching step definitions.
Example prompt:
Using the uploaded cucumberinstruction.md requirements file,
write a complete Gherkin feature file for the login scenario
from User Story 1 in the Jira ticket.

Then, create and link the corresponding Groovy step definitions
in the relevant step definition file to complete the BDD test script.
Expected result: Katalon AI Assistant creates or updates the feature file and related step definition content.
Generate a test case from linked requirements
When to use: You want Agent mode to retrieve requirement details from a linked system and create a test case from them.
Example prompt:
Retrieve the requirement from <Jira ticket ID> on <Jira instance URL>,
then create a new test case for the <feature name> feature,
using existing test objects from the Object Repository.
Expected result: Katalon AI Assistant retrieves the requirement and creates a test case based on the requirement and available test objects.
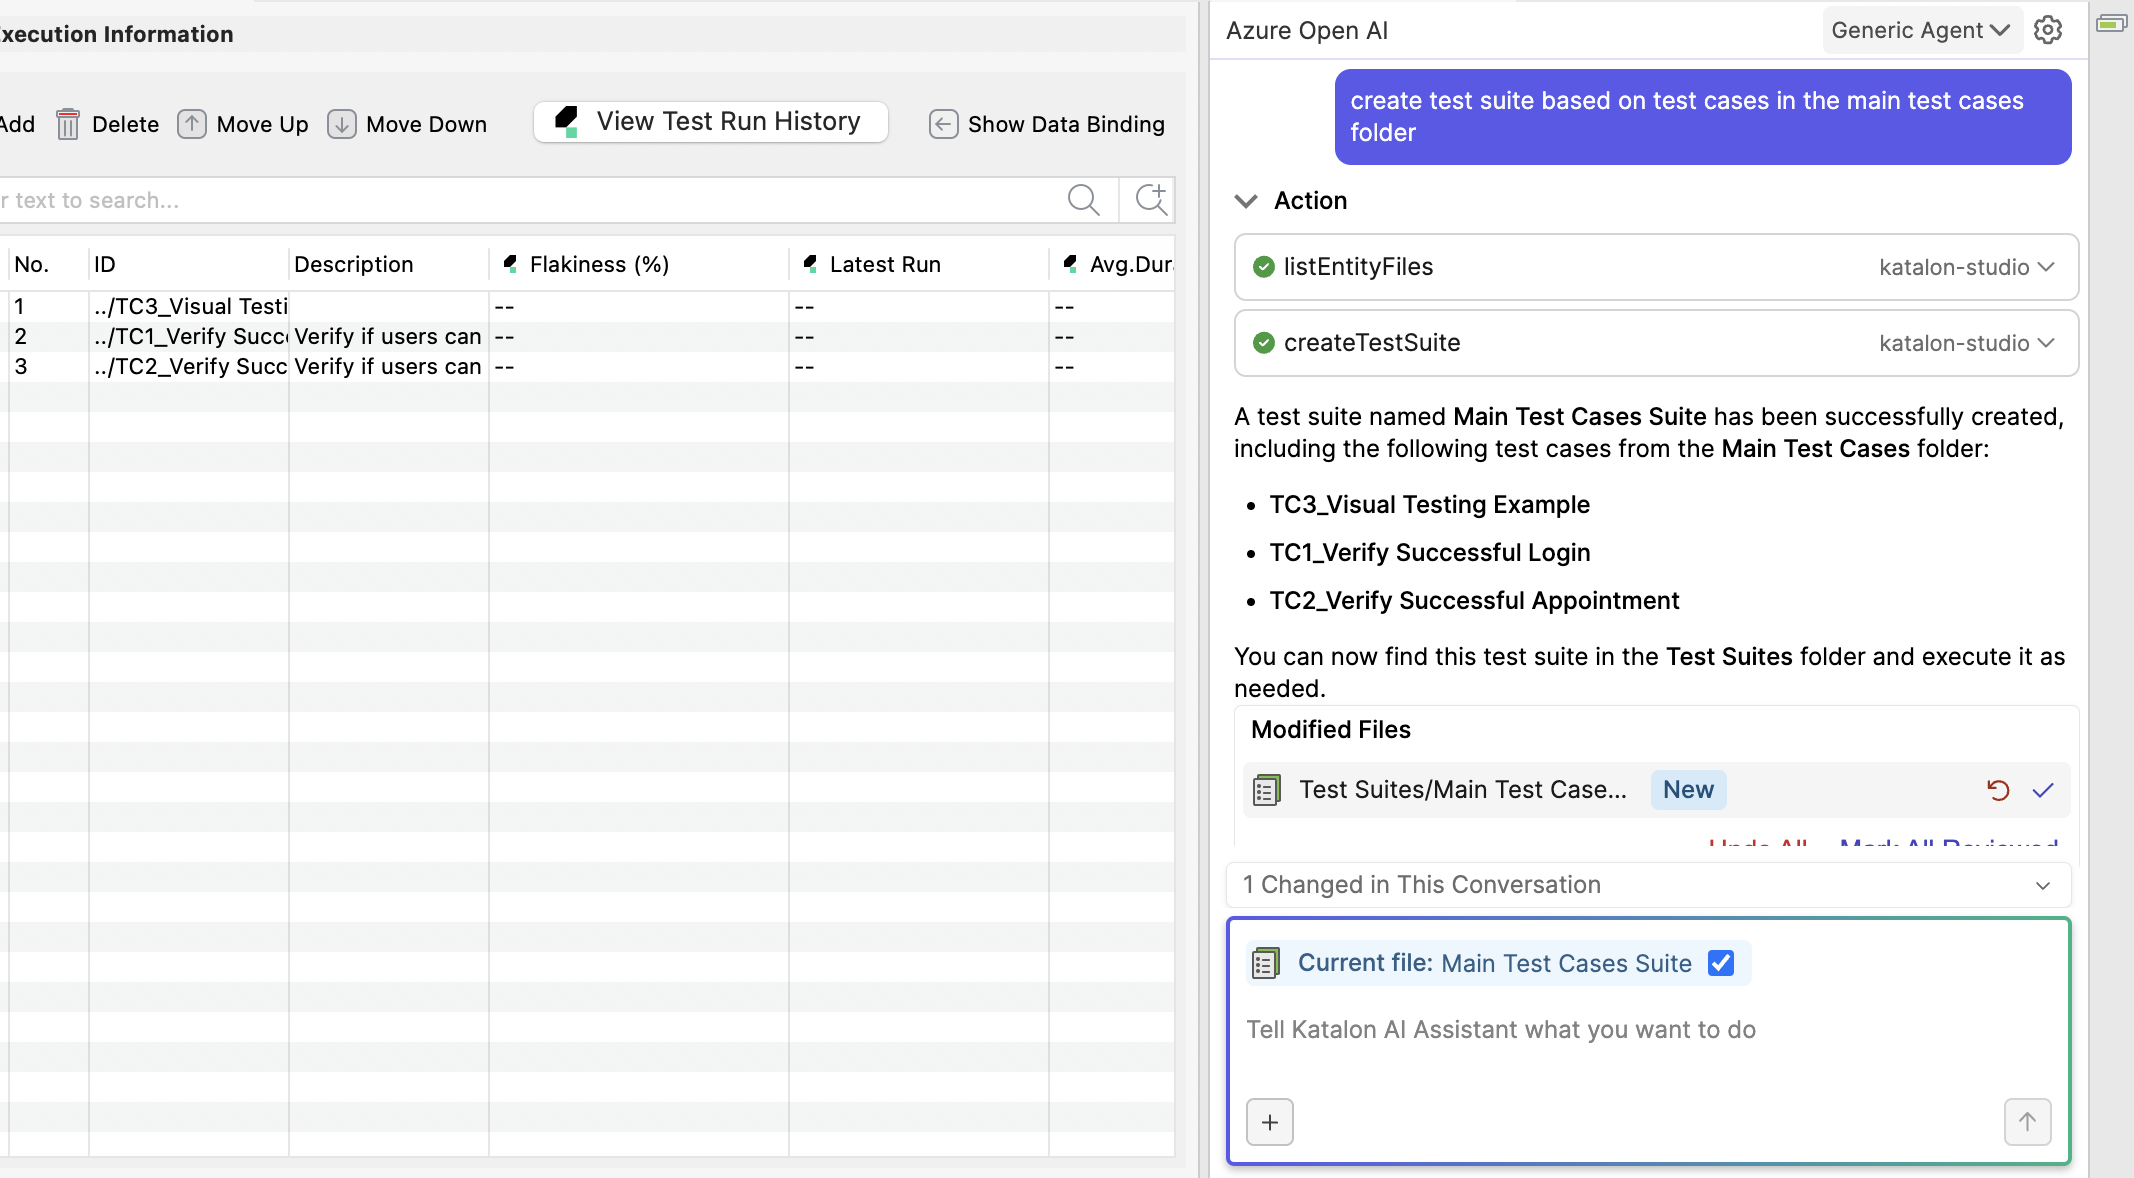
Create a test suite from existing test cases
When to use: You want to group existing test cases for execution, reporting, and maintenance.
Example prompt:
Create a new regression test suite that includes test cases I already have.
<Attach the test plan or fetch it from Confluence>
Expected result: Katalon AI Assistant creates a test suite that includes relevant existing test cases.
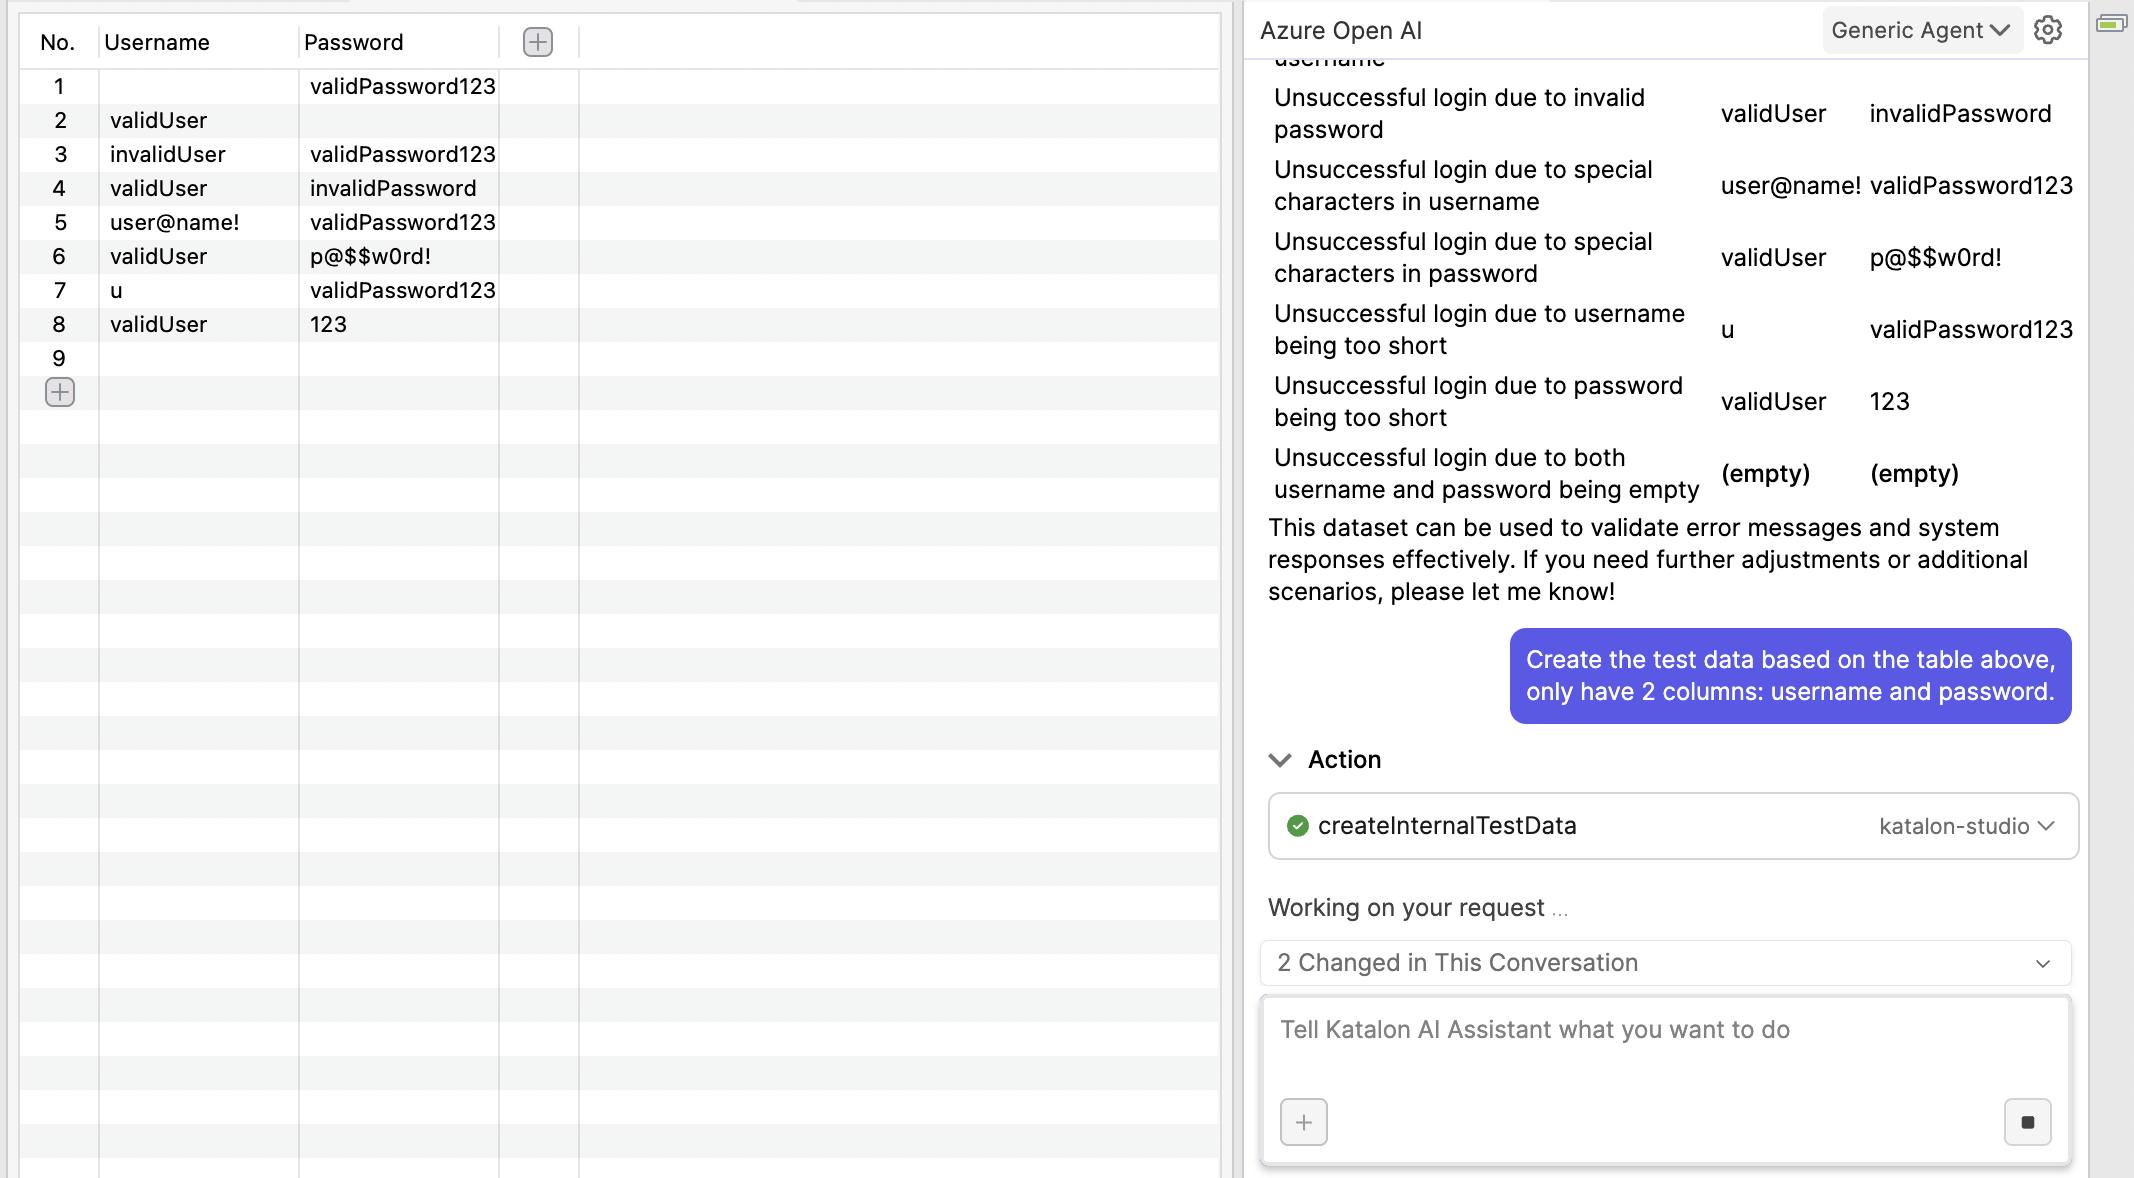
Prepare data-driven testing
When to use: You want to run the same test case multiple times with different input data.
Example prompt:
Create a test data table to test this login flow,
including username and password for success cases, failure cases, and edge cases.
Let me preview the table before creating test data in Katalon Studio.
<Attach the test case>
Expected result: Katalon AI Assistant drafts a test data table for your review.
After you review the table, you can ask Katalon AI Assistant to create internal test data:
Create test data based on the table above.
Use only two columns: username and password.
To complete the workflow, manually create variables, replace values in the script with variables, bind the data, and run the test. You can ask Katalon AI Assistant to search Katalon documentation for data binding guidance.
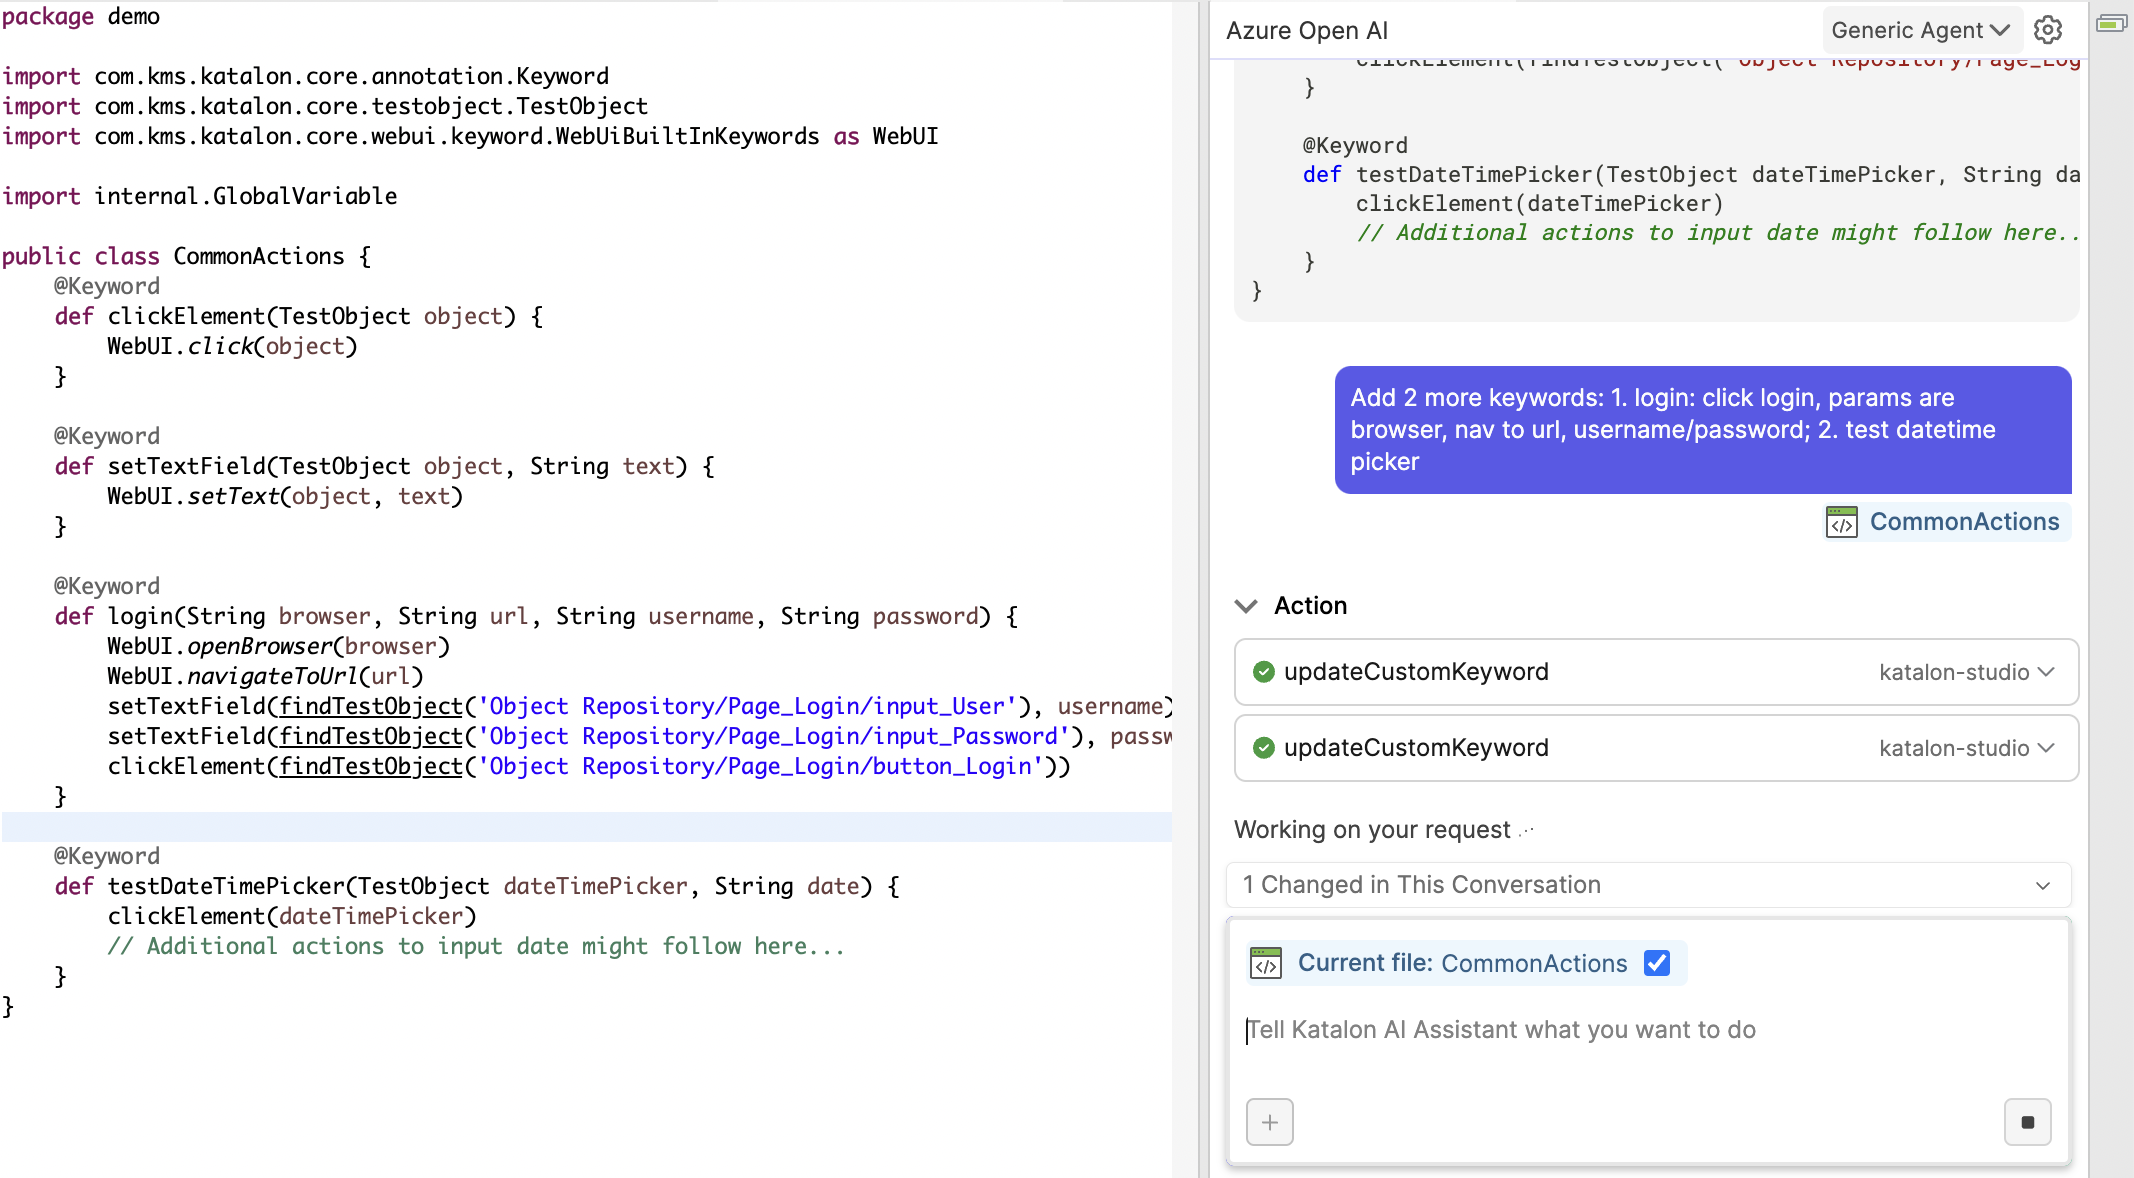
Create and edit custom keywords
When to use: You want to create or update custom keywords for repeated actions.
Example prompt:
Add two new keywords in this file <attach file> for these actions:
1. Login: include browser option, navigate to URL,
   input username and password, then click login.
2. Test datetime picker.
Expected result: Katalon AI Assistant updates the selected custom keyword file.
Troubleshooting
Agent mode may fail to connect because of network issues, server configuration, or multiple Katalon Studio instances.
Solution:
- Go to Agent mode settings > MCP tool.
- Hover over the warning icon to read the error details.
- Refresh the server and try again.
If Agent mode cannot connect to one of the three built-in Katalon MCP servers, make sure only one Katalon Studio instance is running.
Known limitations
- Katalon AI Assistant may not always call tools correctly. When this happens, try again with more context, mention the MCP tool or server you want to use, or adjust the prompt.
- AI provider changes do not apply immediately. When you change AI providers, close and reopen the chat for the change to take effect.
- Katalon True Platform MCP server does not currently support user login from offline licensing.
- Some AI providers, including OpenAI, Azure OpenAI, Gemini, and AWS Bedrock, enforce a
64-character limit for the combined MCP server and tool name. The combined name uses the format{server_name}___{tool_name}. When you add an MCP server, shorten the server name or tool name if the combined name exceeds this limit. - AWS Bedrock requires descriptions for all MCP tools. Provide tools with descriptions only, or temporarily disable tools without descriptions. Missing tool descriptions can prevent Katalon AI Assistant from generating responses.
- Some AI service providers enforce a total tool limit of
128tools per request. If the total number of tools exceeds this limit, Katalon AI Assistant returns theinvalid 'tools': array too longerror. Disable tools you do not need to avoid this error.