Quick guide for testers
This guide shows you the basic steps to automated testing in Katalon Studio, and explores the basic functions of Katalon True Platform and Katalon Runtime Engine.
Requirements
- You have created a Katalon account. You can create an account from Katalon website: Katalon.
- You have downloaded and activated Katalon Studio. For further instruction, see Katalon Studio installation overview.
Create your first test project
- In the displayed New Project dialog:
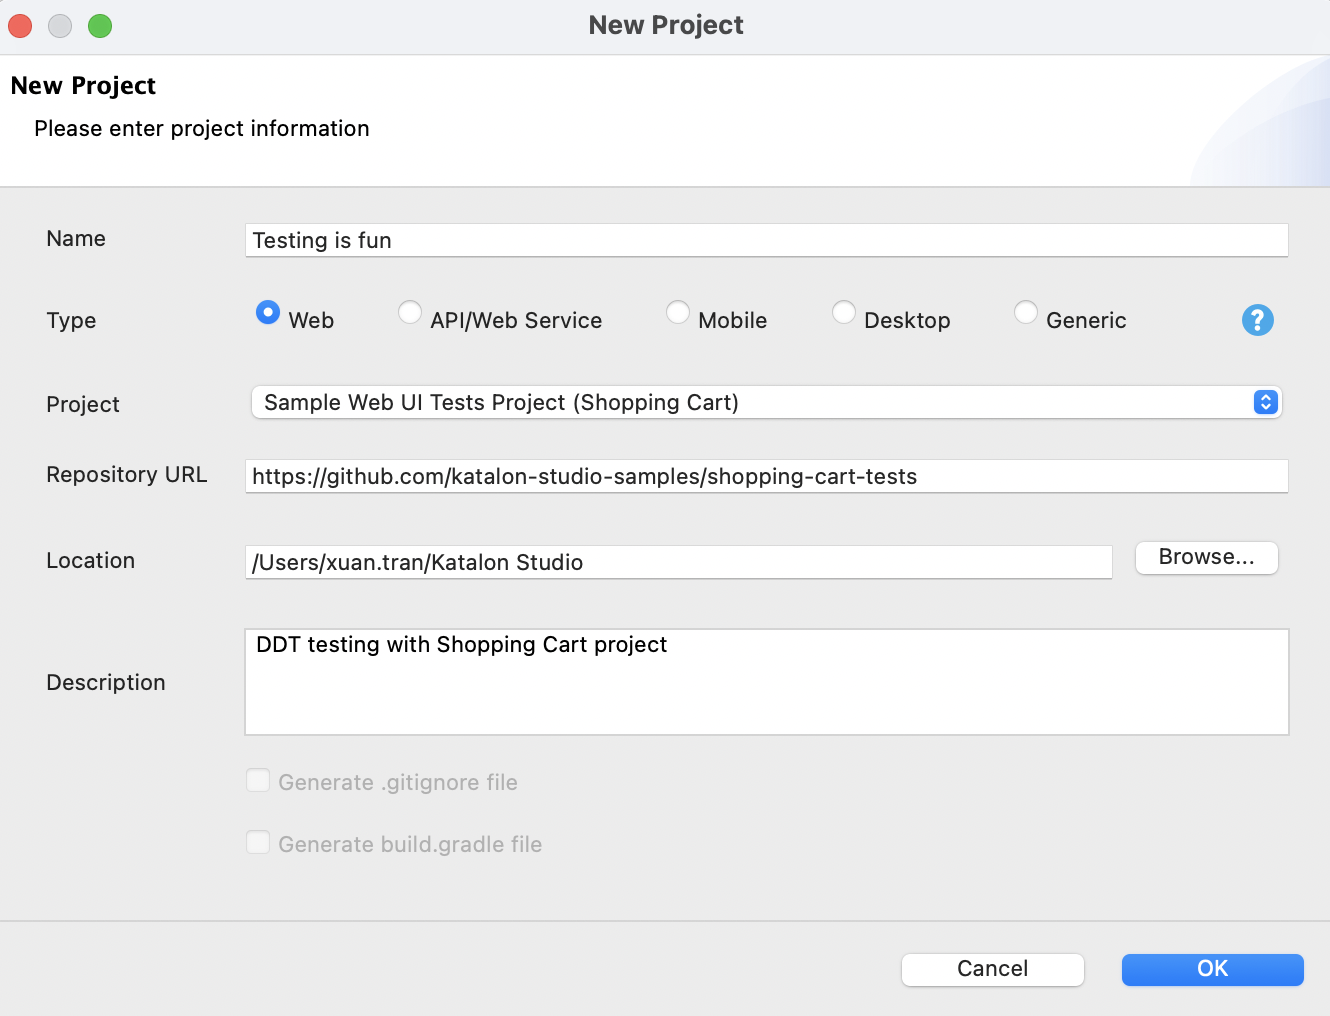
- Project: In the dropdown list, you can either choose to create a blank project or a sample project.
- If you choose to create a sample project, the Git repository URL of that sample project is retrieved in the Repository URL accordingly.
If you choose to create a blank project, you can choose whether to generate .gitignore file or build.gradle file.
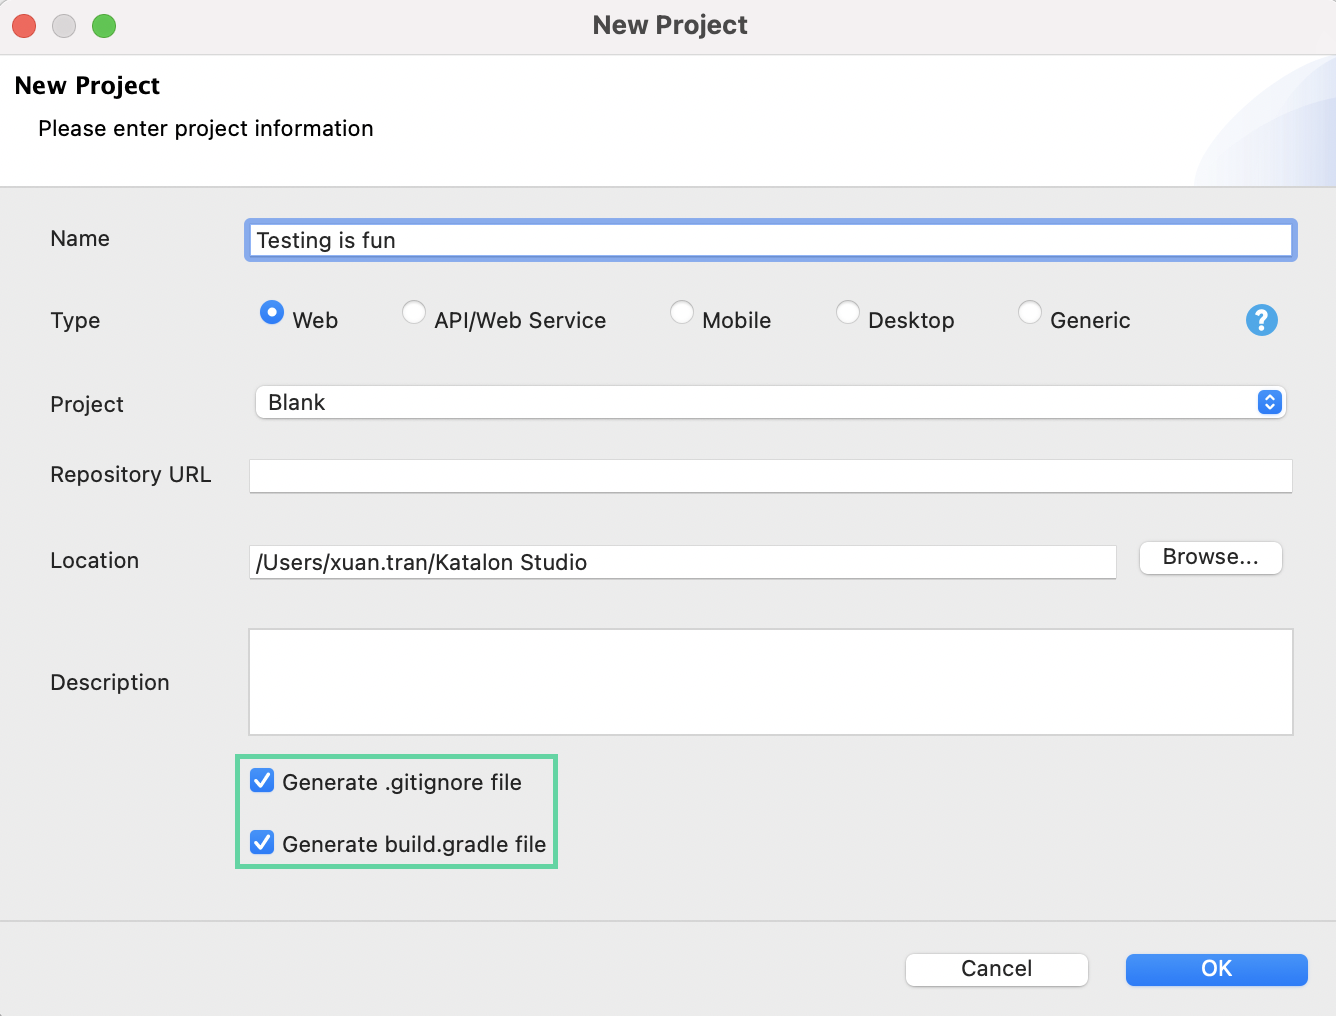
- Project: In the dropdown list, you can either choose to create a blank project or a sample project.
Write your first test case
If you have other project types, see the corresponding guides for Mobile, Desktop, API, and BDD.
The application under test (AUT) is a demo website called CURA Healthcare Service: https://katalon-demo-cura.herokuapp.com/.
You can clone the sample project here: Healthcare sample.
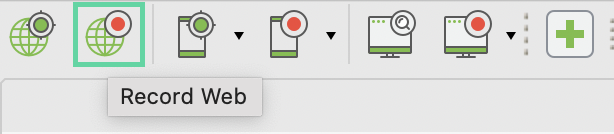
- From the main toolbar, click on Record Web to open the Web Recorder.
 The Web Recorder dialog appears.
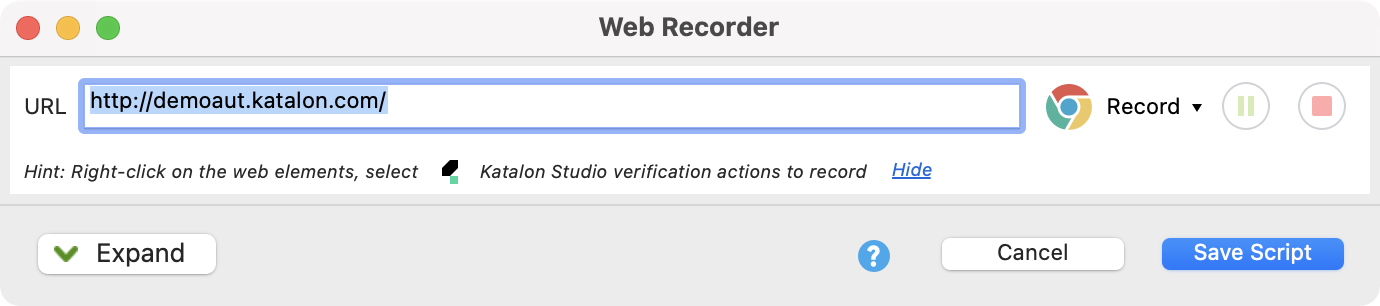
- Select a browser to start recording. Here, we choose the Chrome browser.You can click Expand, then click Show Captured Object to see recorded steps and captured objects while recording.
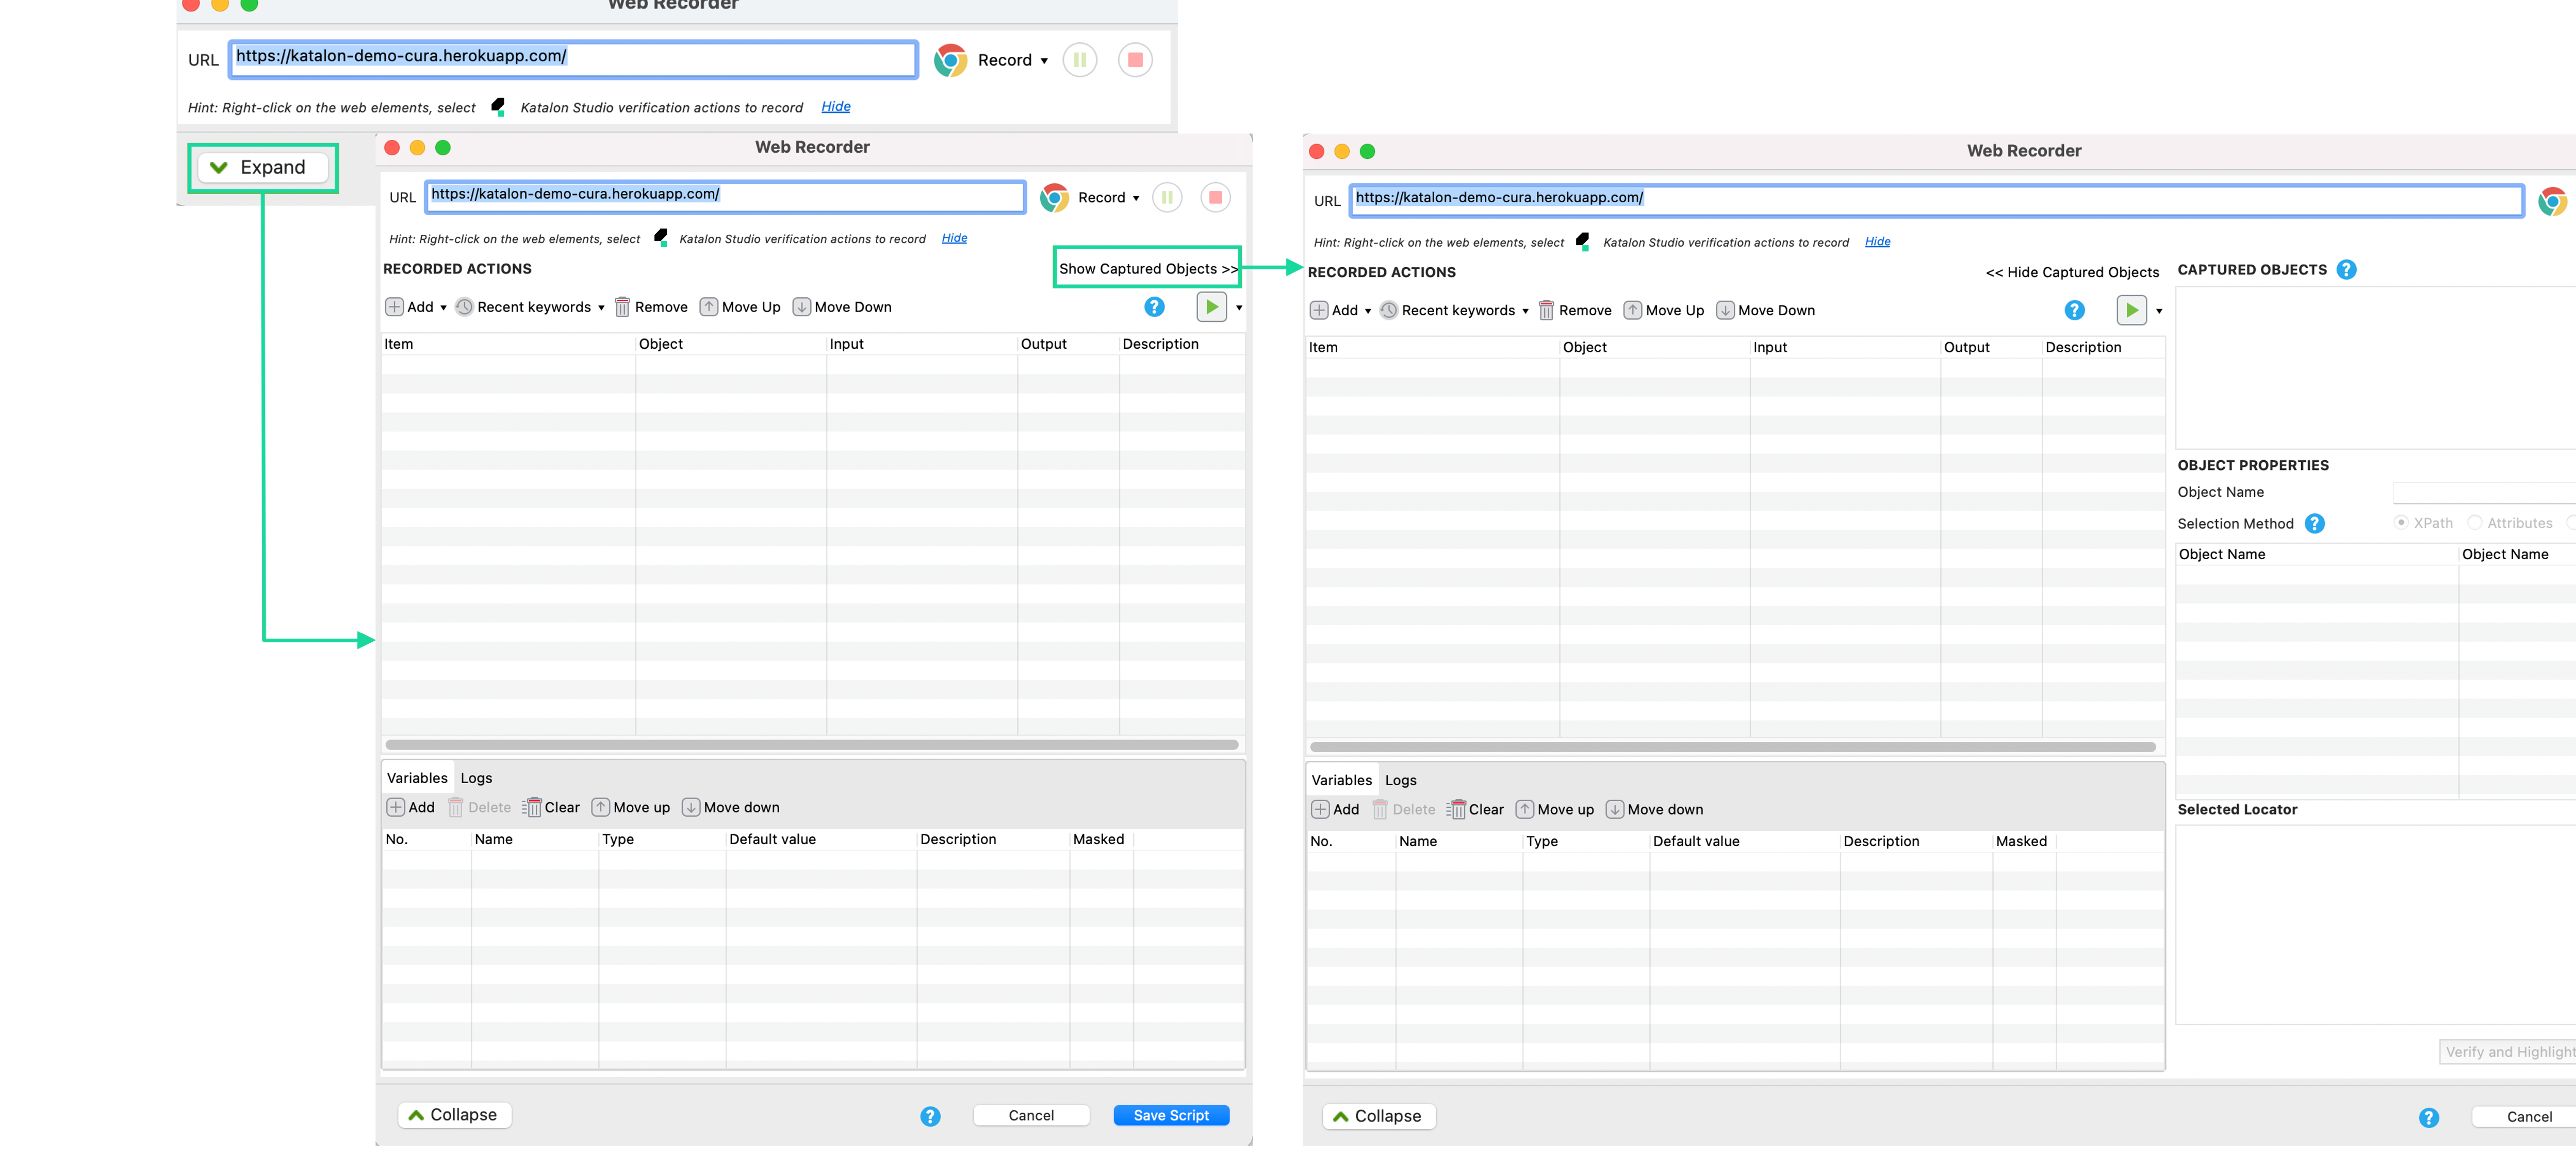
- Click Record. Wait until the browser is launched and ready to interact.When you hover an element, the element is highlighted and displays its correspondent XPath on the top of the page.

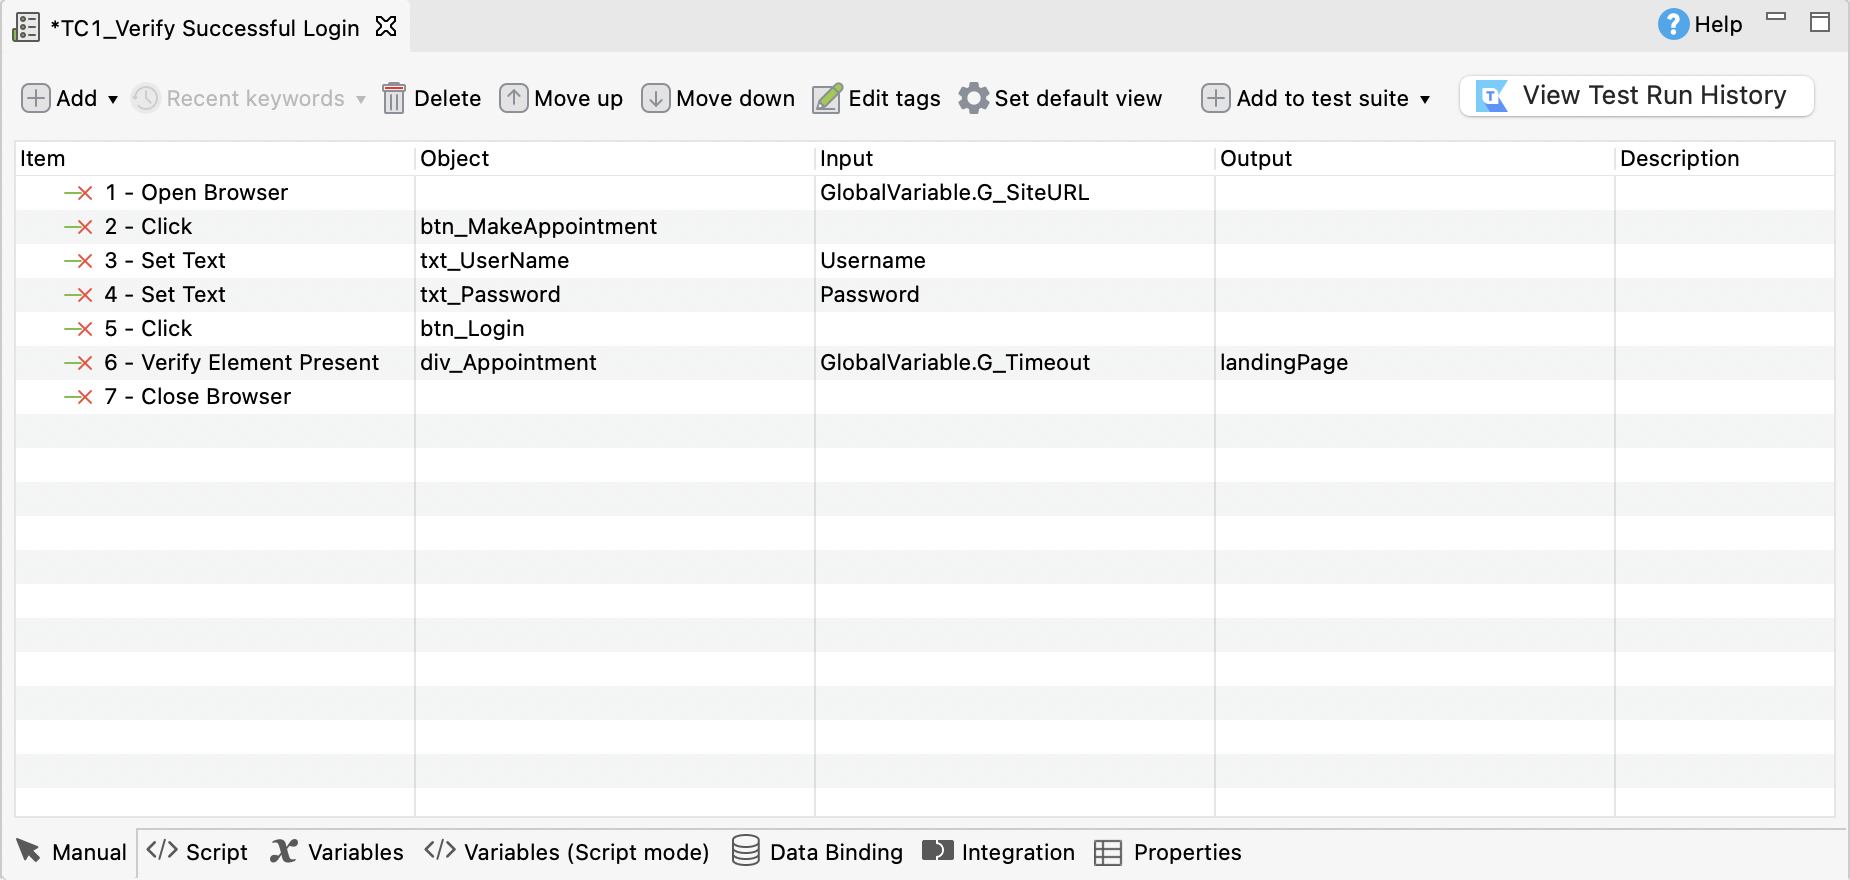
- Record the test script as planned.
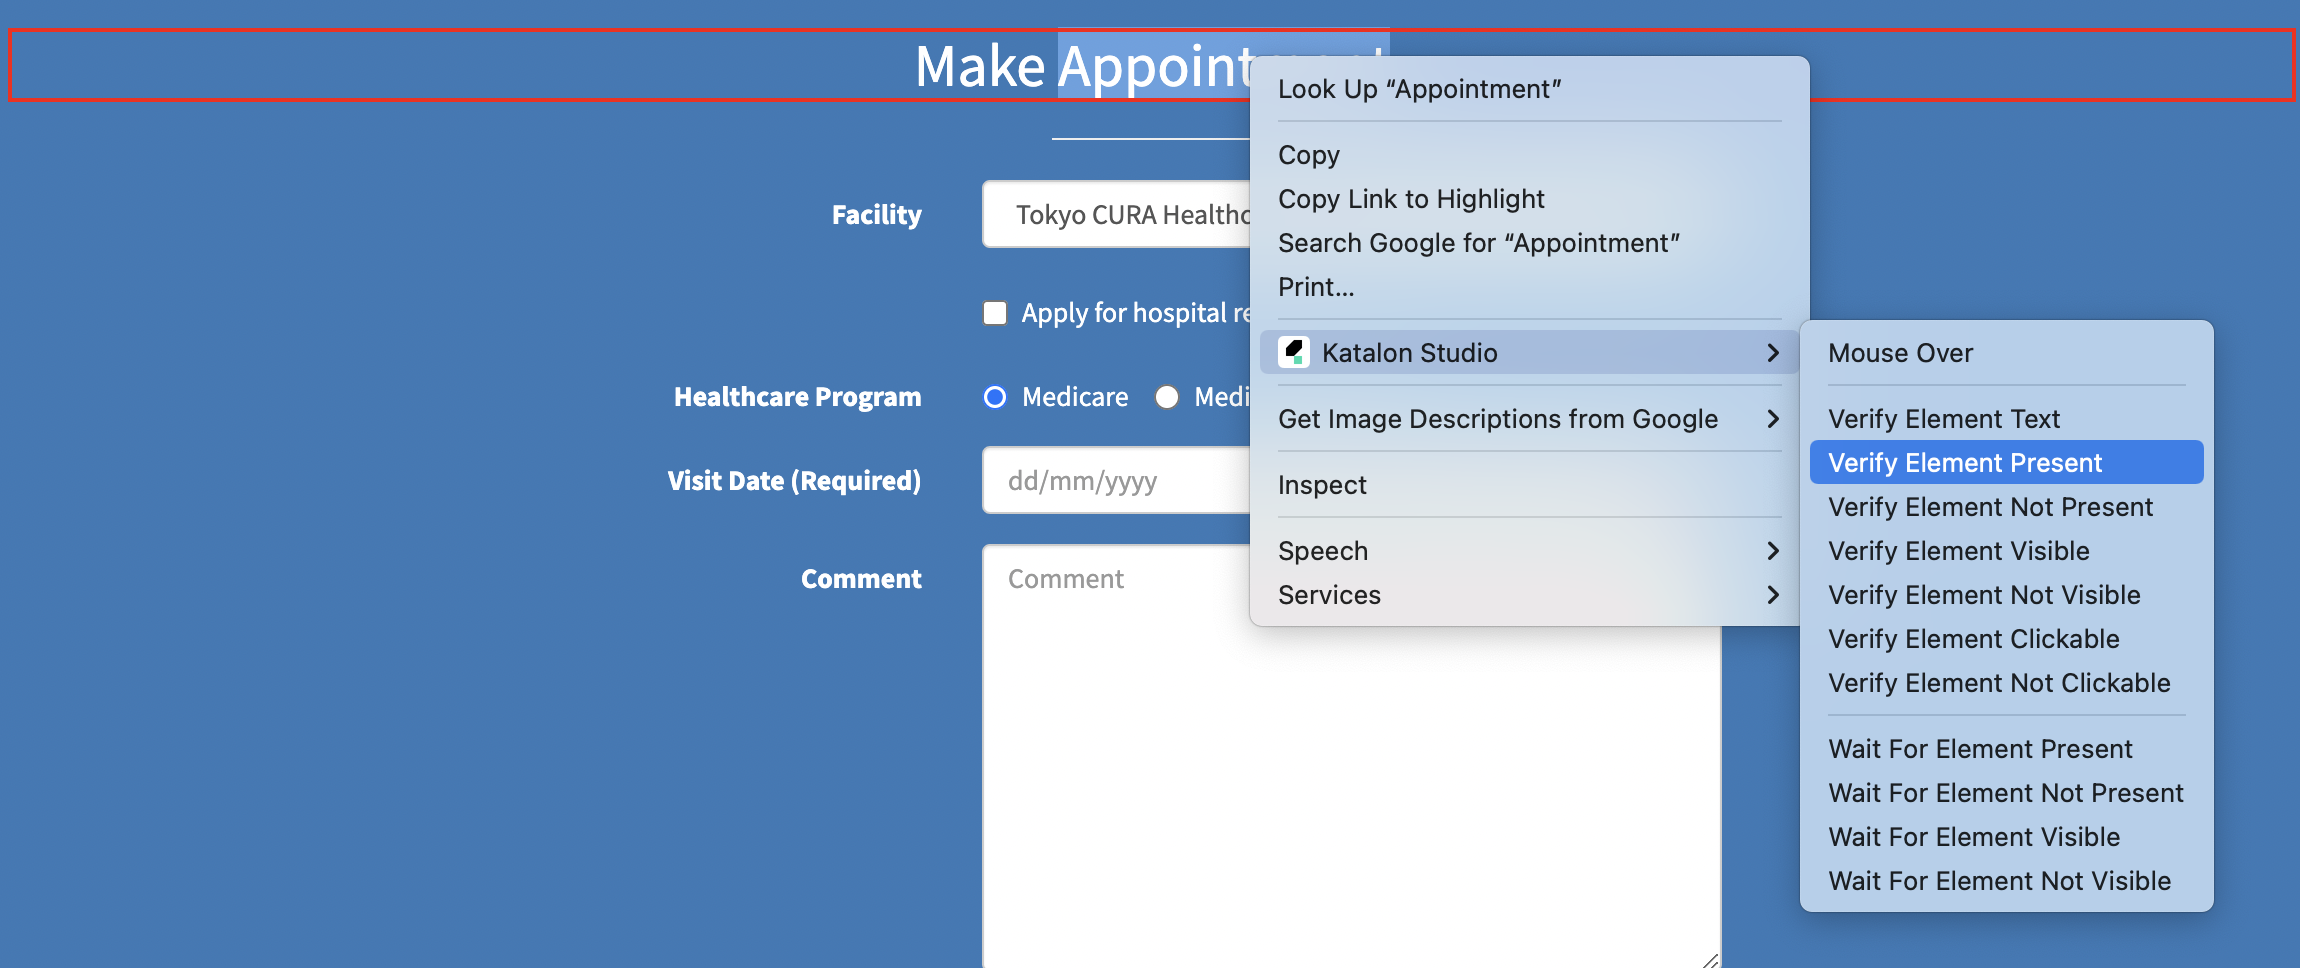
- To verify the Make appointment heading after the successful login, mouse over the Make appointment text, right-click > Katalon Studio > Verify Element Present.
- To verify the Make appointment heading after the successful login, mouse over the Make appointment text, right-click > Katalon Studio > Verify Element Present.
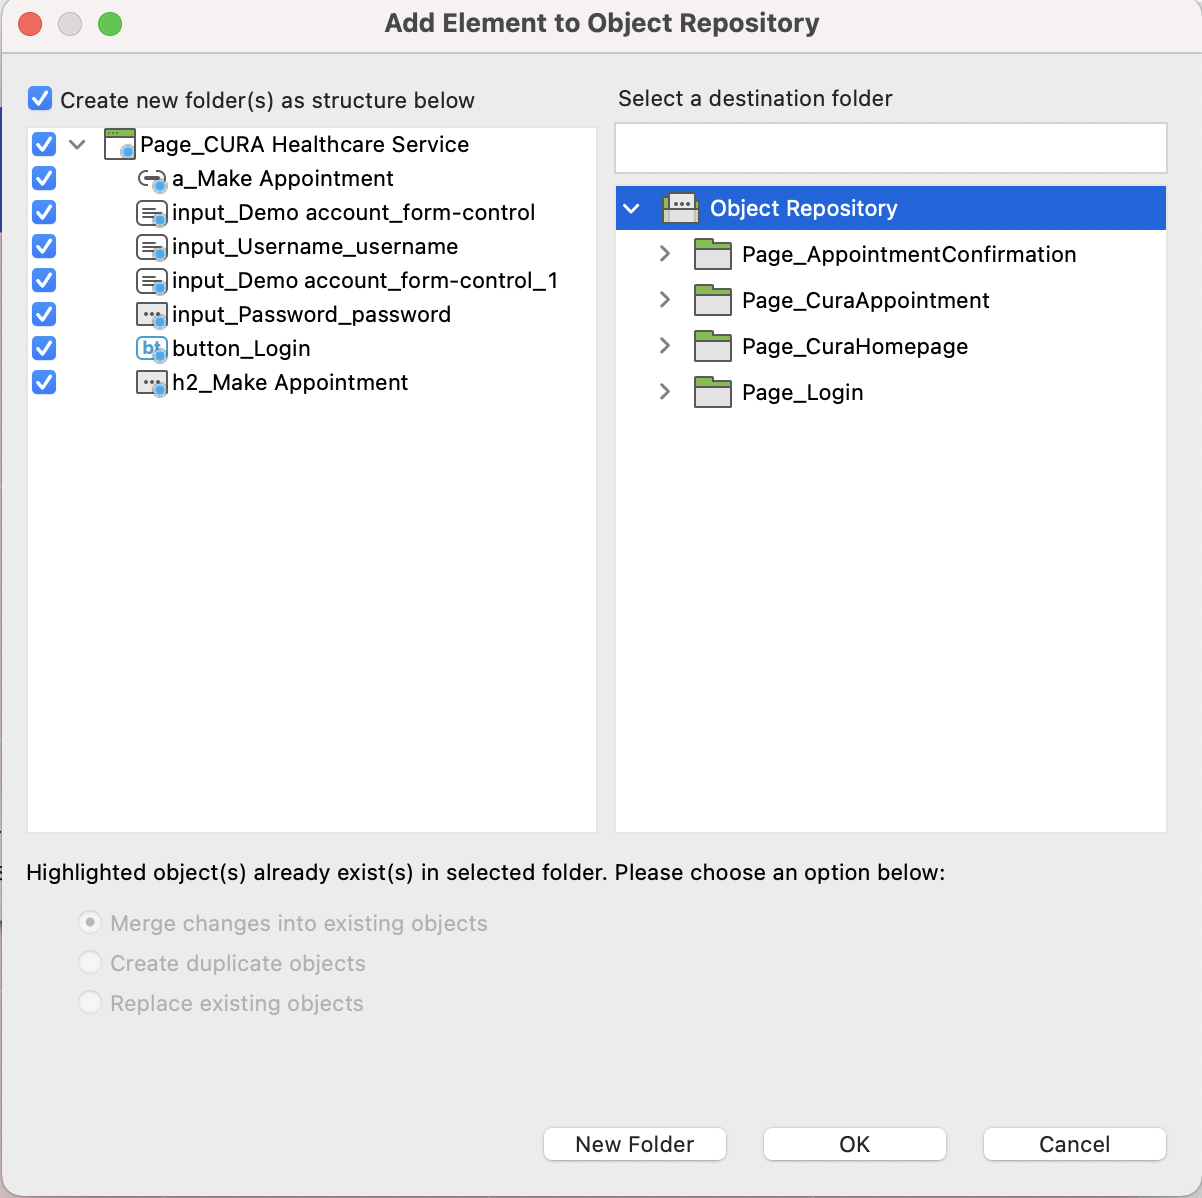
- Once done, click Save script to stop recording and save the captured objects. Web Record Utility exports a list of objects captured in the test case in Katalon Studio.Create a new folder or select an existing one in the Object Repository, then click OK.
- A pop-up dialog prompts you to name a new test case. Here, we name it TC1_Verify Successful Login.
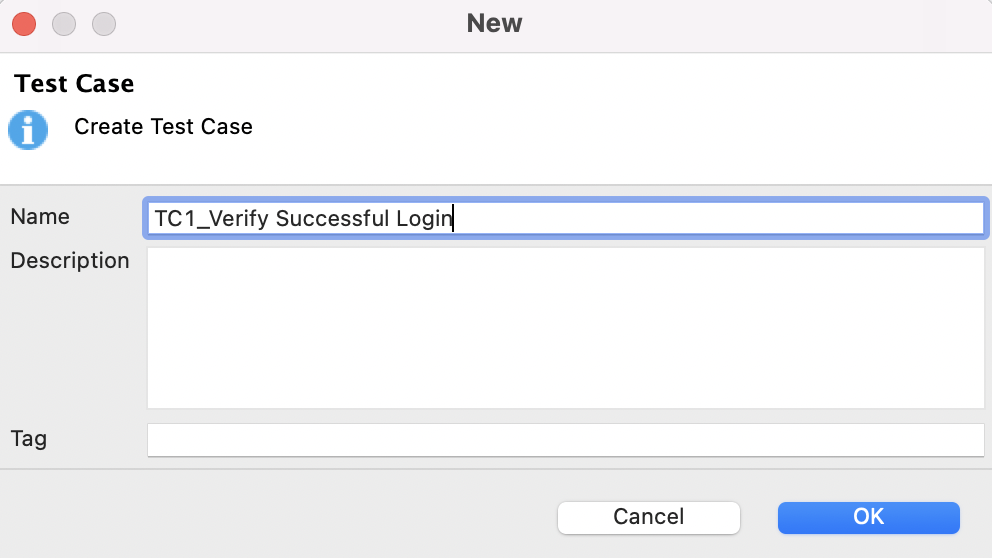
Click OK.
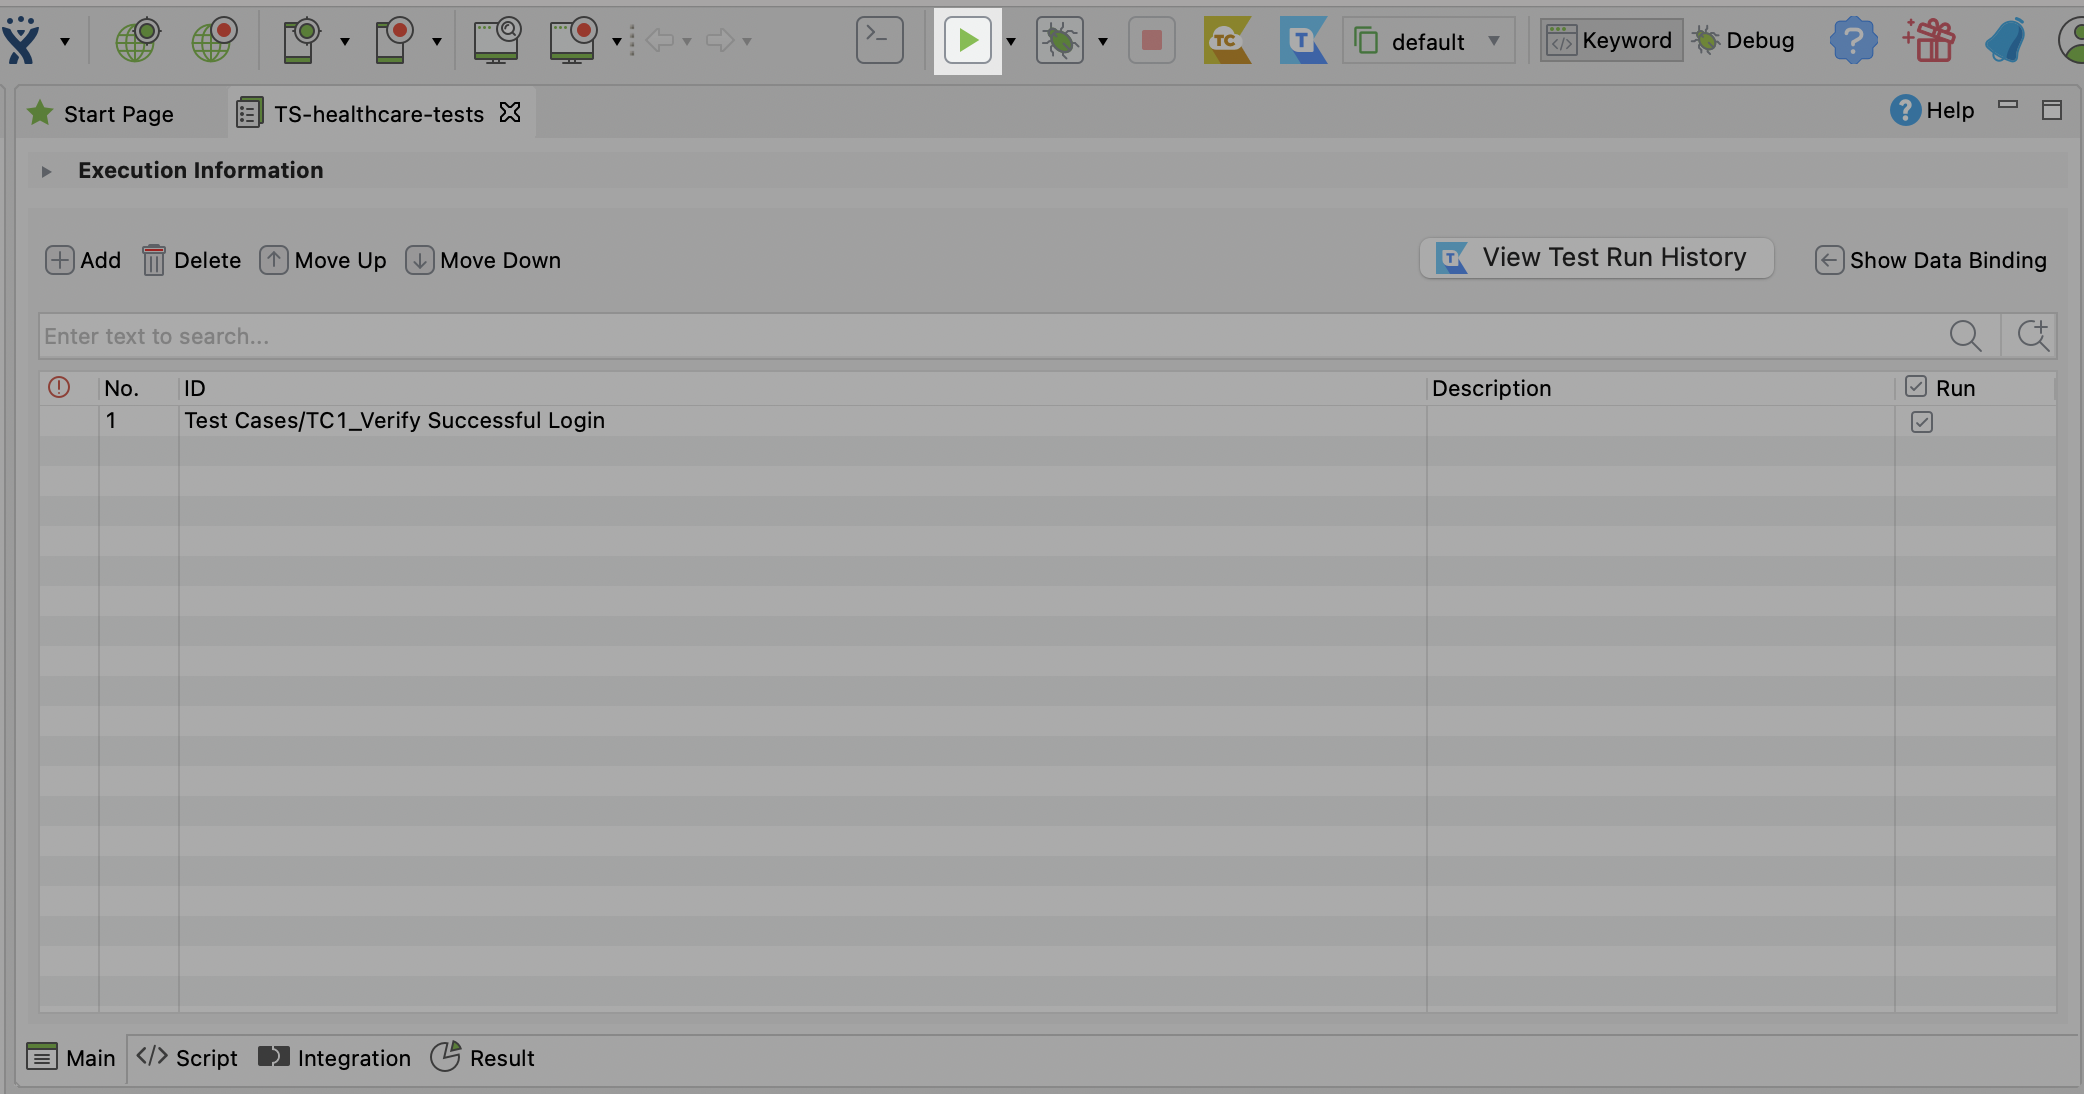
Plan your tests with a test suite
This section shows you the basic steps to plan and run a test suite in Katalon Studio with a local browser.
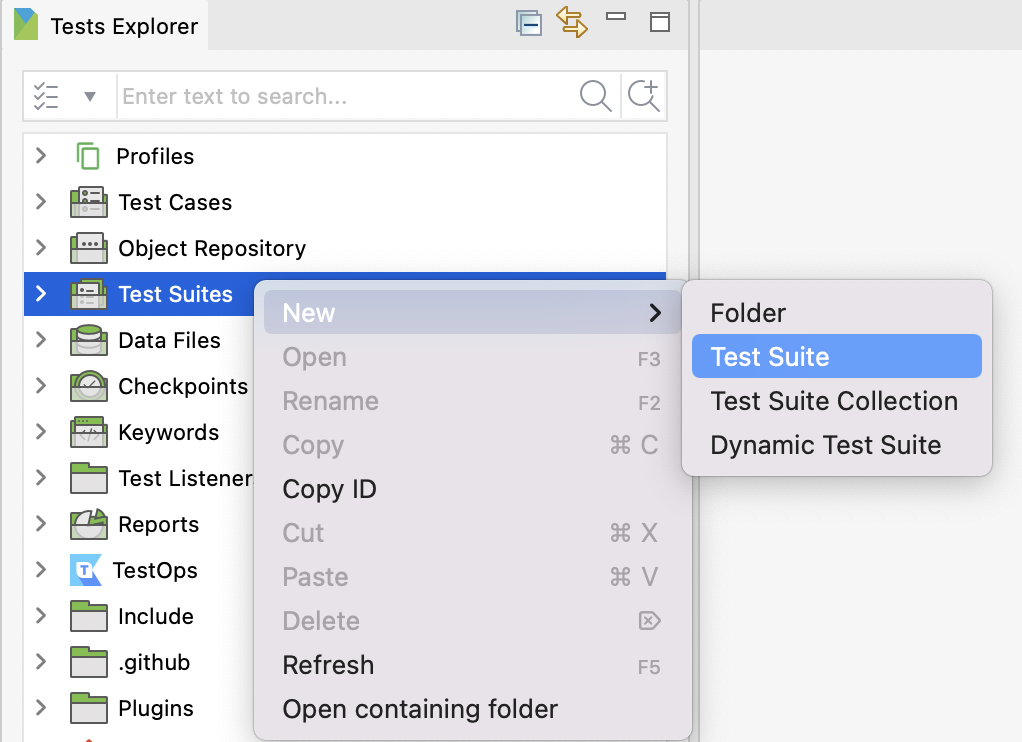
- In the Tests Explorer tab, right-click on Test Suites > New > Test Suite.
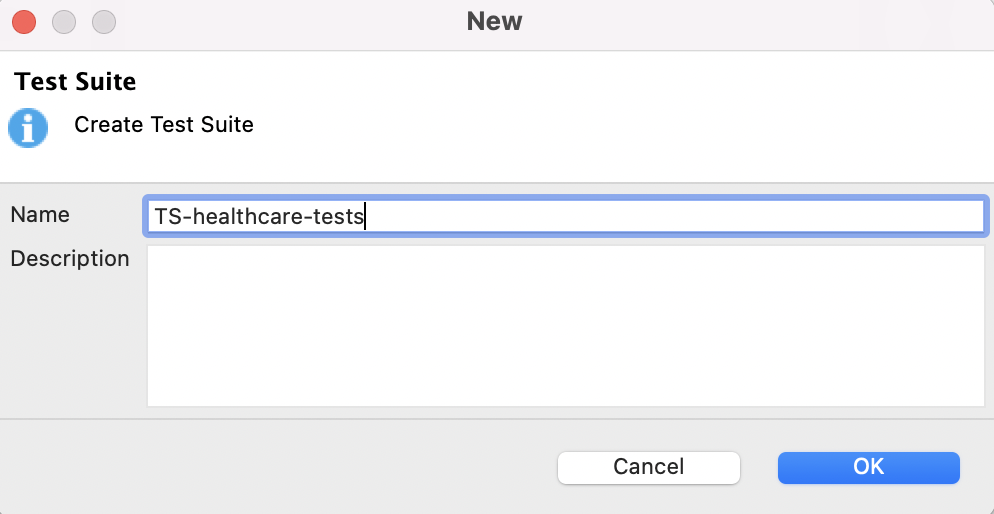
- Input the test suite name in the New Test Suite dialog. Here, we name it TS-healthcare-tests, then click OK.
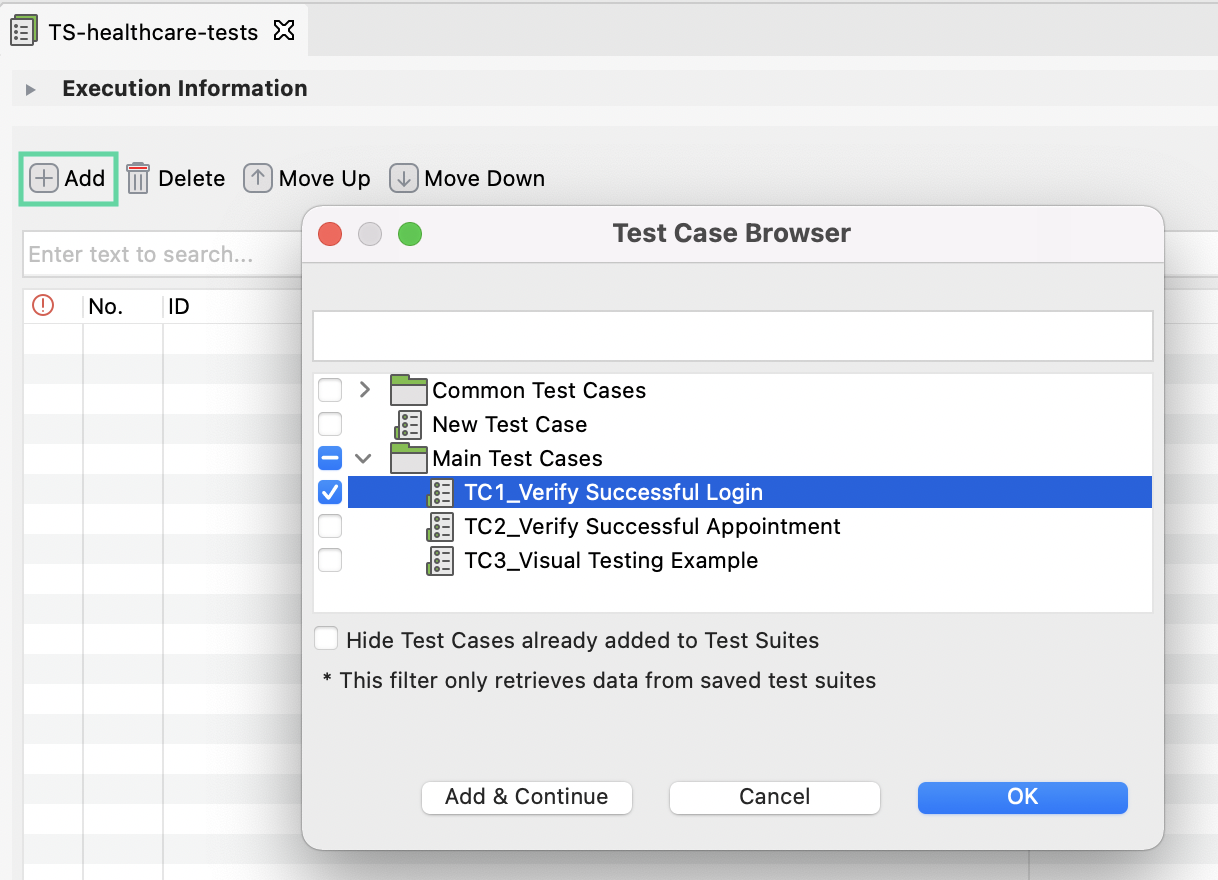
 Katalon Studio opens the test suite editor of the TS-healthcare-tests.
 - In the test suite editor, click Add to open the Test Case Browser.
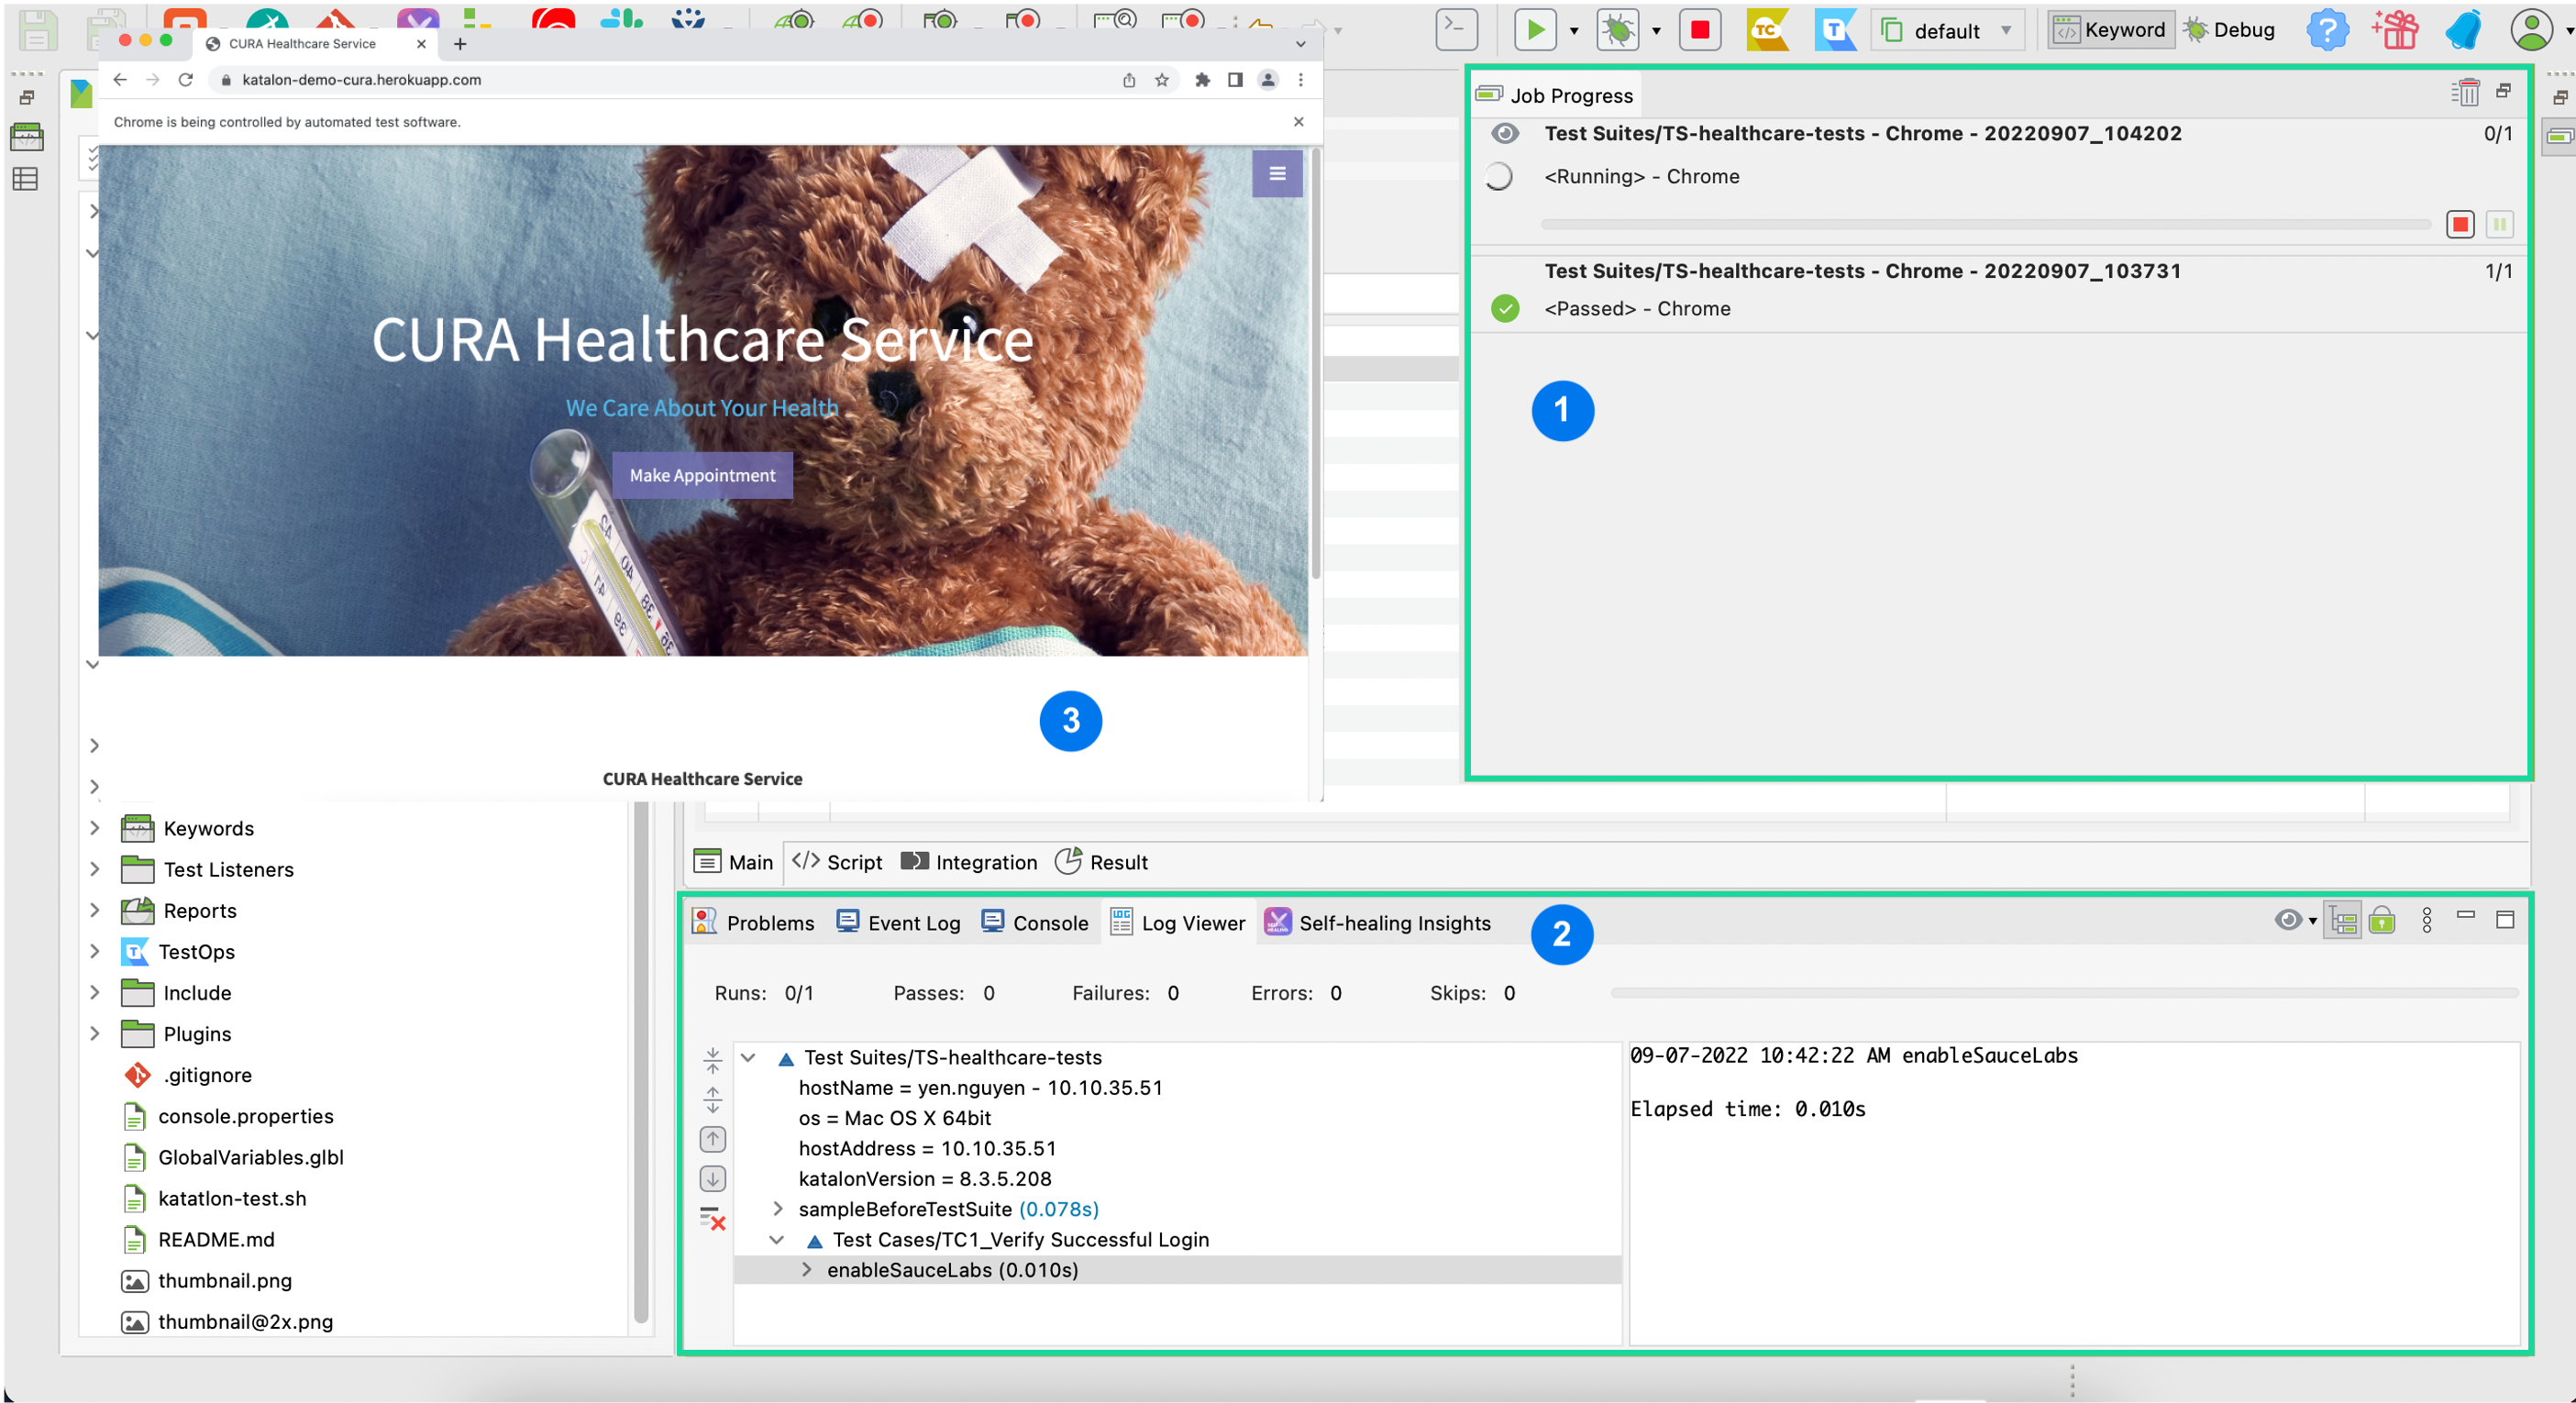
- Click Run.
- Watch the test run. When the test run starts, you can see:
- The Job Progress bar: This bar allows you to see the progress of executing test cases and test suites/test suite collections.
- The Log Viewer tab: This tab shows the real-time report/log of the test execution.
- A pop-up browser window that runs the recording steps.
Run your test with Katalon Runtime Engine using command-line mode execution. To learn more about executing tests with Katalon Runtime Engine, see Command-line syntax in Katalon Runtime Engine
- Run your test with Katalon Test Execution - Cloud on standard browsers and operating systems on the cloud. To learn more about executing tests with Katalon Test Execution - Cloud, see Try cross-browser cloud testing
When the test run finishes, Katalon Studio automatically generates test reports.
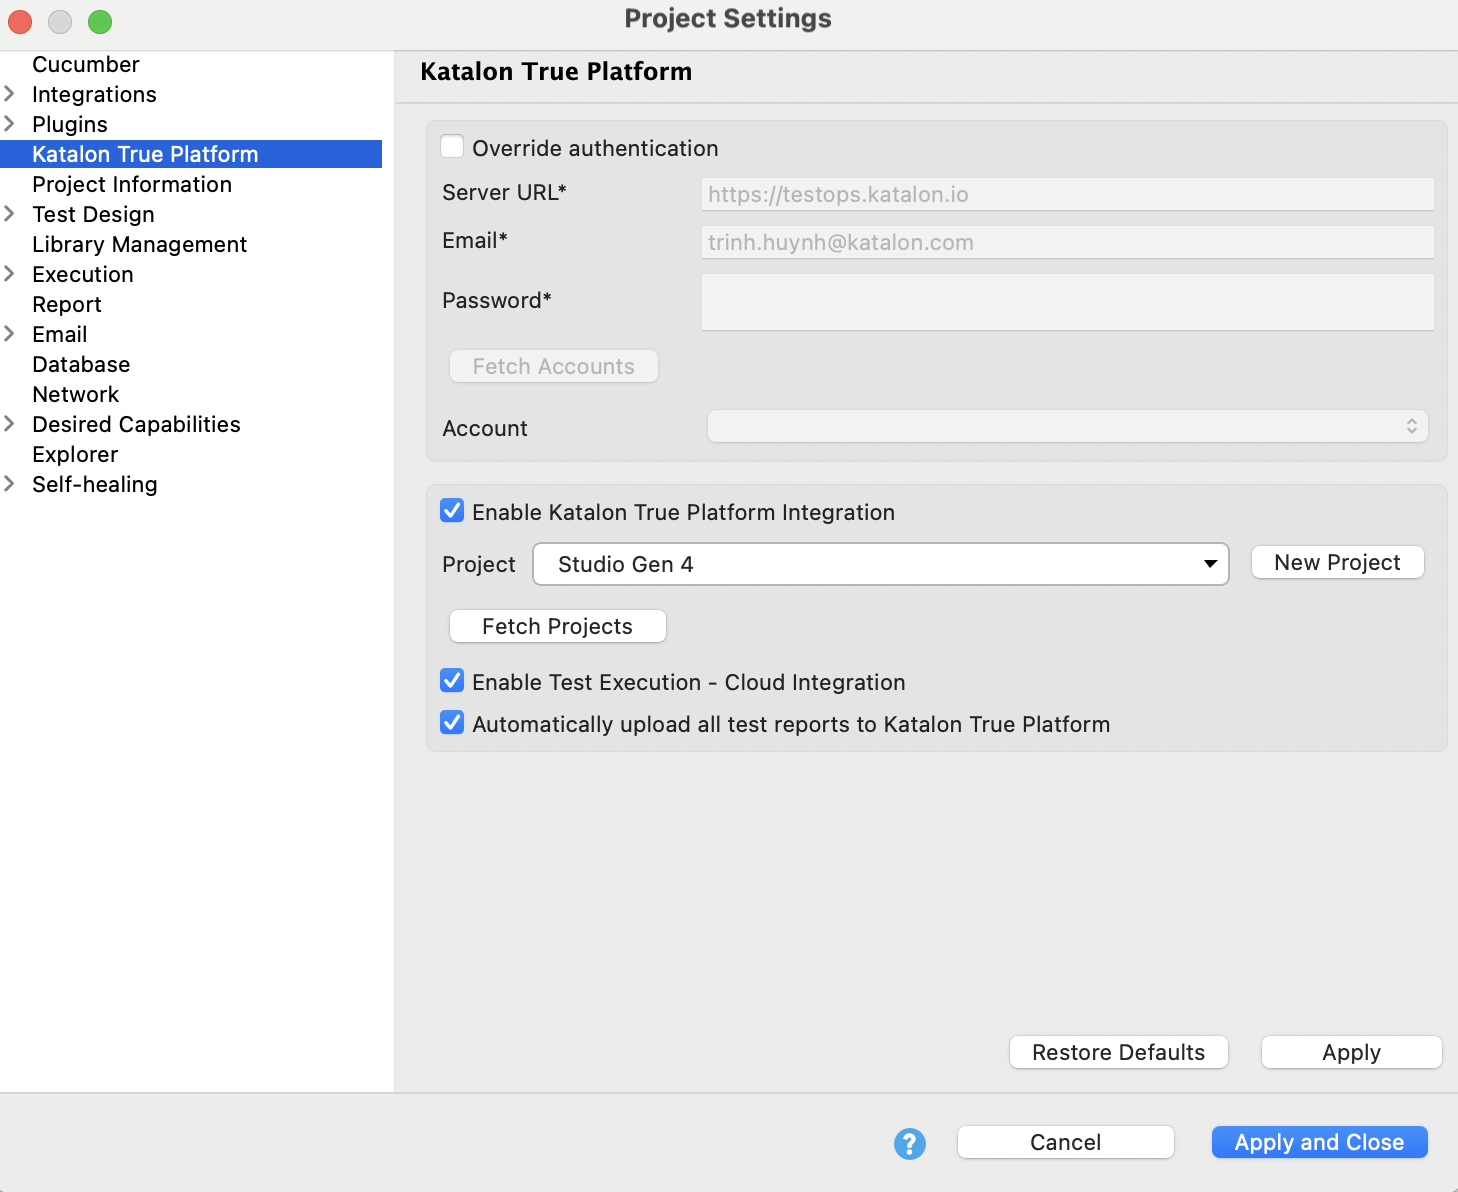
Analyze your test activities with Cloud Platform
You can access advanced test reports of your automated testing activities on Katalon Platform. Enable integration with True Platform so the test reports are automatically uploaded after executions. Learn more in this guide.
Try cross-browser cloud testing
Requirements: You have a Katalon Test Execution - Cloud subscription.
Katalon Test Execution - Cloud is a test automation environment that allows you to execute tests on most standard browsers and operating systems on the cloud. With the 30-day trial of Cloud Execution, you can execute cross-browser tests in a cloud environment.
- Go to Project > Settings > Katalon True Platform. Make sure you have selected Enable Katalon Test Execution - Cloud Integration.
- Open a test suite.
- In the main toolbar, click the dropdown arrow of the Run button and select Test Execution Cloud.
- In the Configuration dialog, Specify the OS, browser, and browser version for Desktop Browsers environment.
- Click Run to launch the test execution.
Execute test via CI/CD pipeline with Katalon Runtime Engine
- You have a Katalon Runtime Engine license or trial.
- You have downloaded and set up Katalon Runtime Engine. For further instruction, refer to Download Katalon Runtime Engine.
This section shows you how to generate and use Katalon Runtime Engine command for test execution.
- In Katalon Studio, open Command Builder from the main toolbar.

- In the displayed Generate Command for Console Mode dialog, select a Test Suite, and configure your execution with the following information:
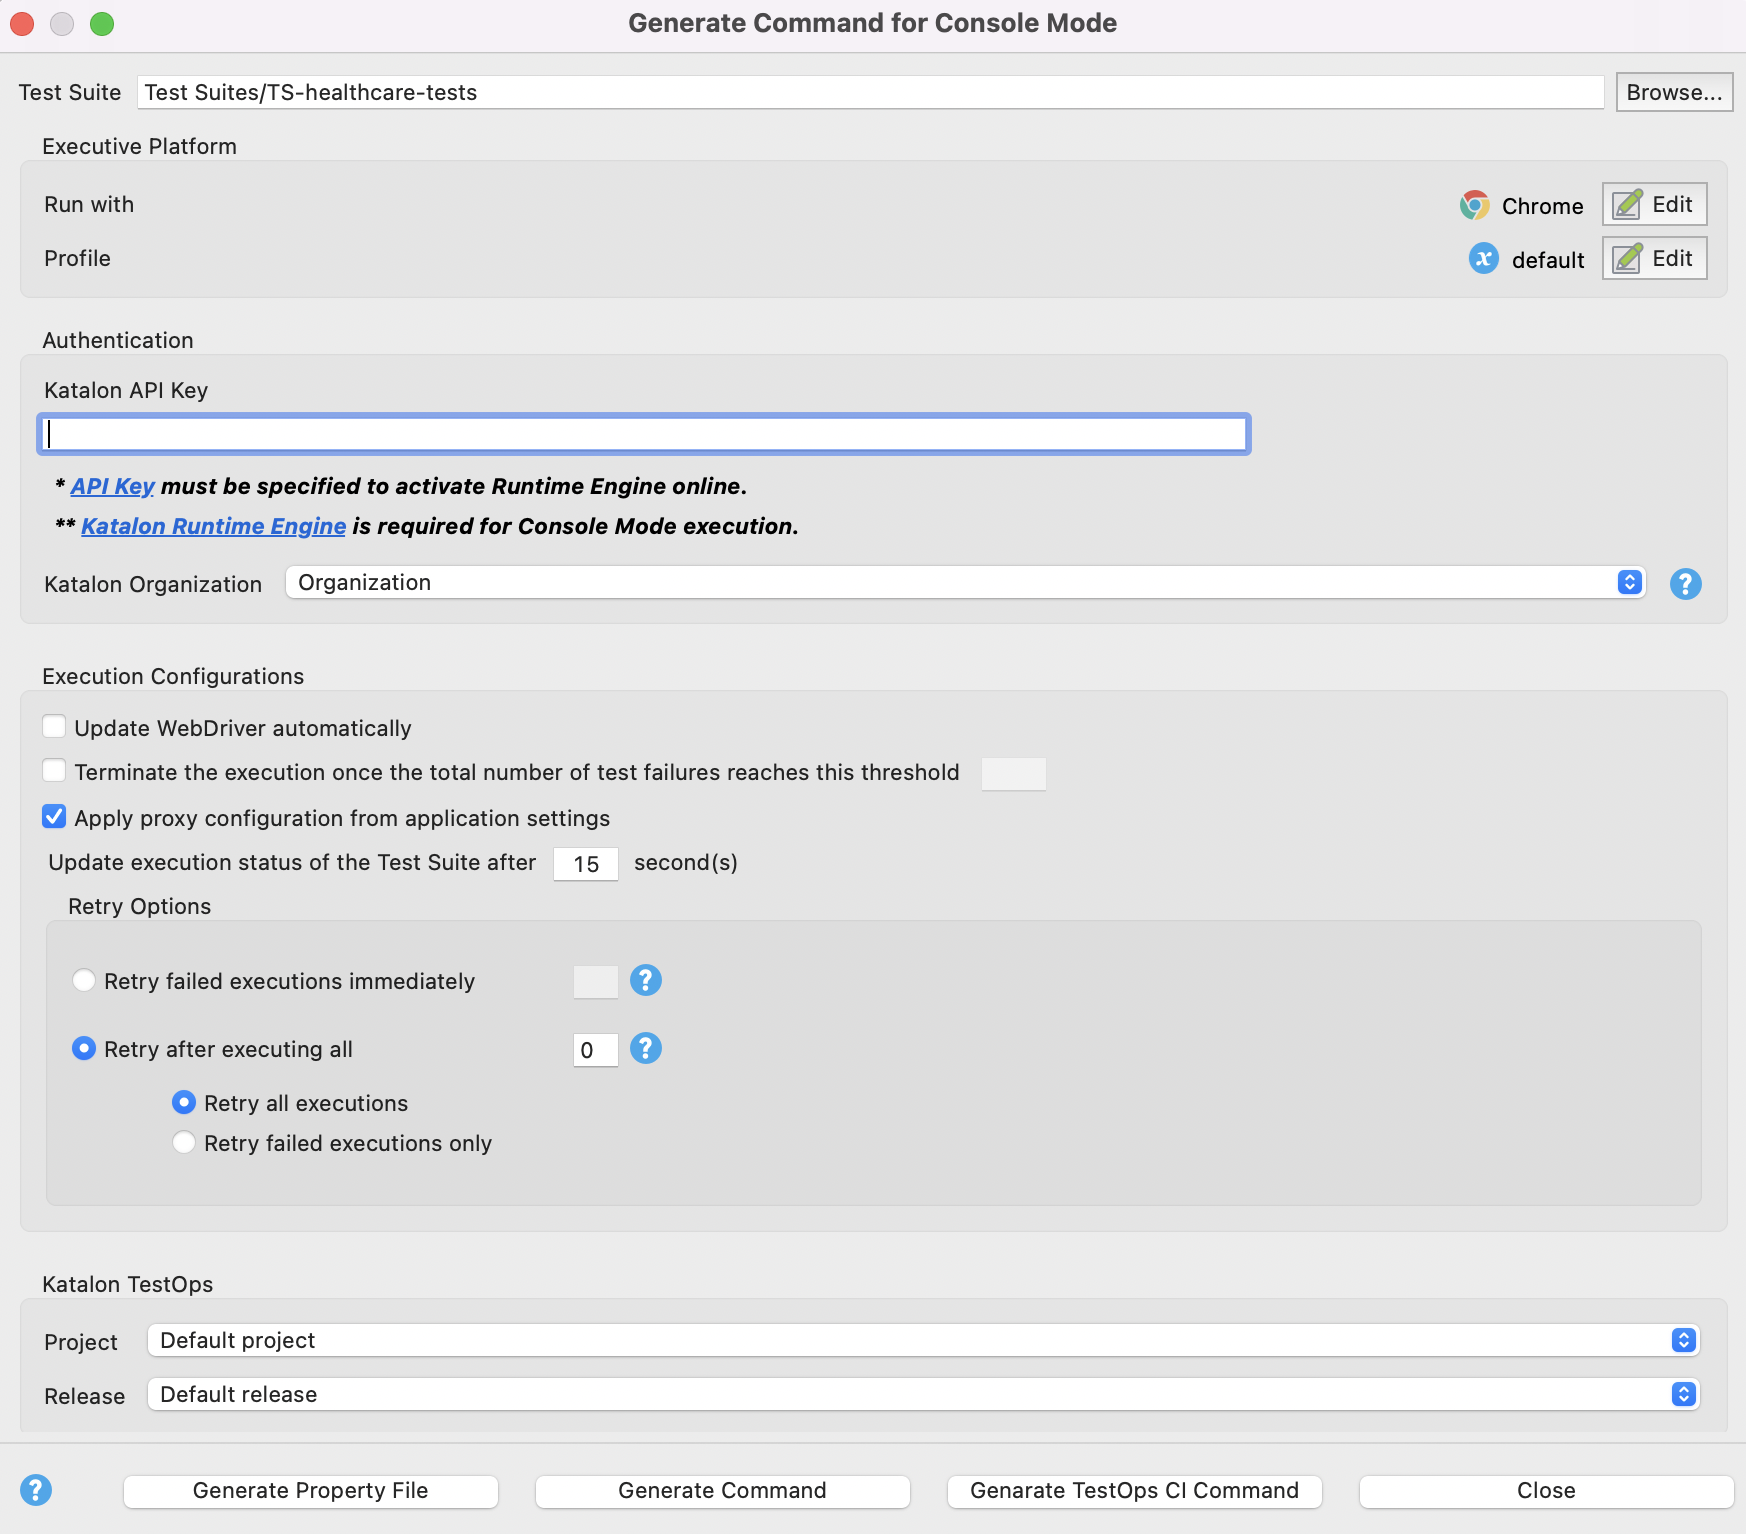
- Executive Platform:
- Run with: Click on Edit and select an environment to run your tests with.
- Authentication: the Katalon API key is auto-filled.
- Executive Platform:
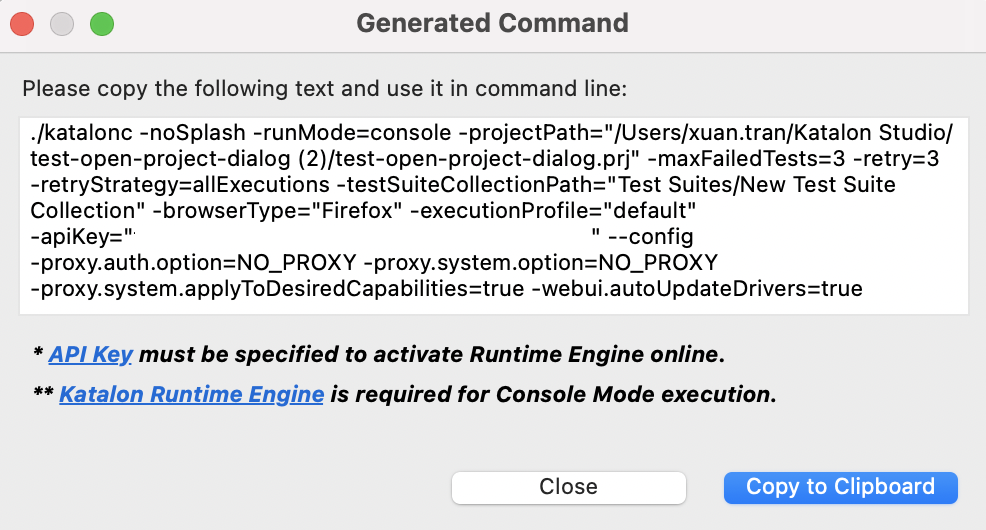
- After completing the configuration, click Generate Command.The Generated Command dialog pops out.
Katalon Runtime Engine also supports integrating your tests with CI/CD pipeline. Depending on your preference, you can integrate with GitLab, GitHub Action, or Azure DevOps. To learn about the supported CI/CD integrations, see Supported CI/CD integrations.
Next steps
- Best practices in Katalon Studio. See Katalon Studio best practices
- BDD testing in Katalon Studio. See BDD Testing Framework (Cucumber integration)
- API testing in Katalon Studio. See Create your first API test with Katalon Studio
- Mobile testing in Katalon Studio. See Mobile Recorder utility
- Data-driven testing in Katalon Studio. See Data-driven testing with Katalon Studio
- Katalon Platform reports. See TestOps dashboard overview