Subdomain, SSO, and SCIM Configuration Guide
- You must have a True Enterprise subscription.
- You must be assigned the Account Admin role to configure this feature.
This document shows you how to configure Subdomain, SSO, and SCIM.
Subdomain
A subdomain allows you to use your own branded URL (e.g., yourcompany.katalon.com). This improves your organization’s branding, makes login easier for users, and provides a more professional experience when accessing your system.
Please note:
- Changes to subdomain can only be donce once. To request or update a subdomain, you must contact Katalon Customer Support at
support@katalon.com. - If a custom domain is not set, the system will automatically generate a default domain when required.
SSO and SCIM Overview
Katalon True Platform supports SAML 2.0 Single Sign-On (SSO) for authentication and SCIM 2.0 for automated user provisioning, attribute synchronization, and deprovisioning.
Integrating with your Identity Provider (IdP) centralizes identity and access management.
Strict SCIM Mode (recommended): When enabled, all user management is controlled by the IdP. Katalon True Platform becomes read-only for SCIM-managed attributes.
Requirements
- A supported IdP that provides SAML SSO and, for provisioning, SCIM 2.0, such as:
- Okta
- Microsoft Entra ID (Azure AD)
- Any SCIM 2.0–compliant IdP
- You must configure SSO before enabling SCIM (required).
- You must have either the Account Admin or System Admin role. See this document for more details on roles.
Configure Single Sign-On
To configure SSO in Katalon True Platform, first generate metadata by setting up an Identity Provider (IdP).
Katalon supports any IdP that conforms to the SAML 2.0 protocol. You can use one of the following platforms to configure your IdP:
To set up the IdP, enter the values below in your IdP settings. Refer to your platform’s documentation for detailed steps.
- All values are case-sensitive.
{custom-domain}is the Custom Domain you configured.
- Single Sign-On (SSO) URL:
https://login.katalon.com/realms/katalon/broker/{custom-domain}/endpoint- Example: If your Custom Domain is testops.katalon.io, the SSO URL is
https://login.katalon.com/realms/katalon/broker/testops/endpoint.
- Example: If your Custom Domain is testops.katalon.io, the SSO URL is
- SP Entity ID:
https://login.katalon.com/realms/katalon/broker/{custom-domain}/endpoint- Example: With Custom Domain testops.katalon.io, the SP Entity ID is
https://login.katalon.com/realms/katalon/broker/testops/endpoint.
- Example: With Custom Domain testops.katalon.io, the SP Entity ID is
- Attribute statement: Email
IdP metadata is typically provided by the IdP as an XML file. Your metadata is automatically encrypted in the Katalon database.
In Katalon True Platform
- Go to Account Settings → System → General → General Setting → Custom Domain and SSO.
- Toggle Enable SSO.
- Select one:
- Require SSO – all users must authenticate through SSO.
- Optional SSO – users may sign in using SSO or standard login.
- Paste the IdP metadata XML into the Metadata field.
- Click Save Changes.
Configure SCIM Provisioning
We recommend using Okta for SCIM. Our team has validated Okta and confirmed it works seamlessly with Katalon. While other IdPs may also work, they could introduce unexpected issues that may affect the stability of your integration.
SCIM (System for Cross-domain Identity Management) is an open standard designed to simplify the automated provisioning and management of user identities across applications. It reduces manual effort and ensuring consistent access control.
In Katalon True Platform
🚧 Important: SCIM requires SSO to be enabled first.
You need to first set up SCIM within Katalon True Platform to use SCIM Base URL and Bearer Token inside Okta:
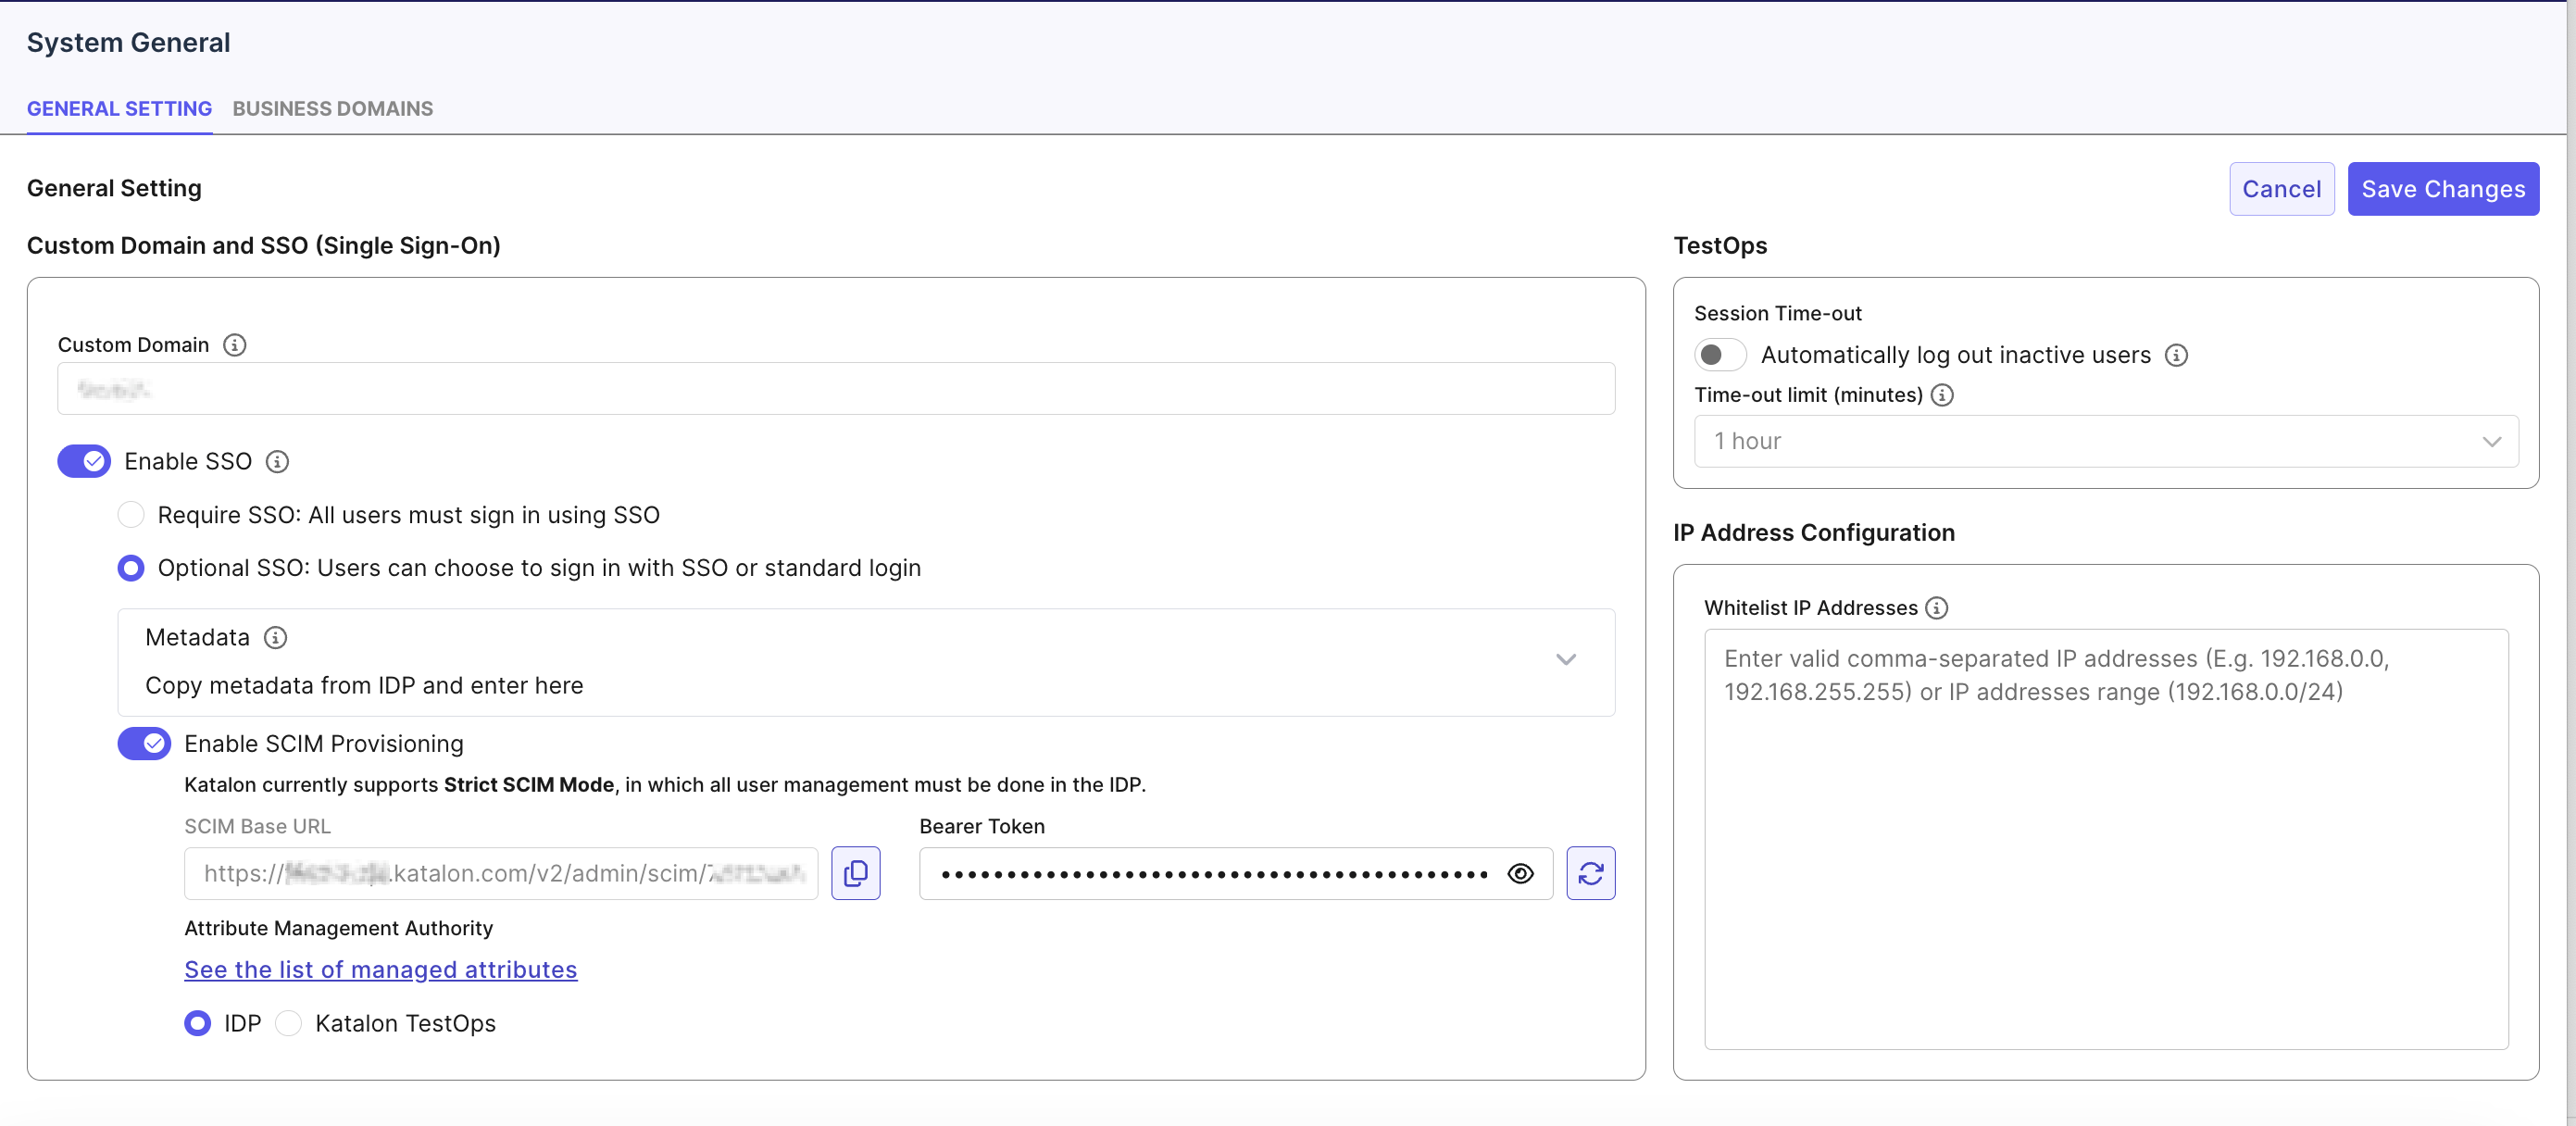
- Go to Account Settings → System → General → General Setting → Custom Domain and SSO.
- Ensure SSO is enabled.
- Toggle Enable SCIM Provisioning.
- Katalon True Platform generates:
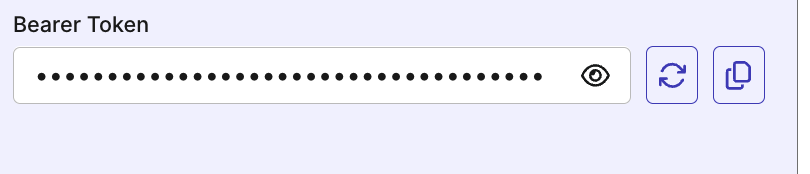
- SCIM Base URL (read-only, copyable)
- Bearer Token (masked, regenerable, copyable)
- Set Attribute Management Authority:
- IdP – attributes are synced from the IdP and locked in Katalon True Platform.
- Katalon True Platform – attributes are managed manually within Katalon True Platform.
List of managed attributes
- License Source
- License Type
- Full Name
- Role
- Username
- Employee ID
- Job Title
- Department
- Click Save Changes.
Example: Okta SCIM Provisioning
Step 1: Configure provisioning integration settings:
- In your Okta application, go to General → Provisioning → Select SCIM.
- The Provisioning tab appears.
- Then configure the following:
- SCIM connector base URL → copy from SCIM Base URL field in Katalon True Platform.

- Unique identifier field for users → email.
- Supported actions → check:
- Import New Users and Profile Updates
- Push New Users
- Push Profile Updates
- Push Group (currently this is not supported)
- Import Groups (currently this is not supported)

- Authentication Mode → HTTP Header.
- Bearer Token → copy from Bearer Token field in Katalon True Platform.
- Click Test Connector Configuration.
Step 2: Configure provisioning To App settings
- Go to Provisioning → To App → Edit.
- Enable:
- Create Users
- Update User Attributes
- Deactivate Users
- Click Save to save changes
Step 3: Configure Custom Attribute
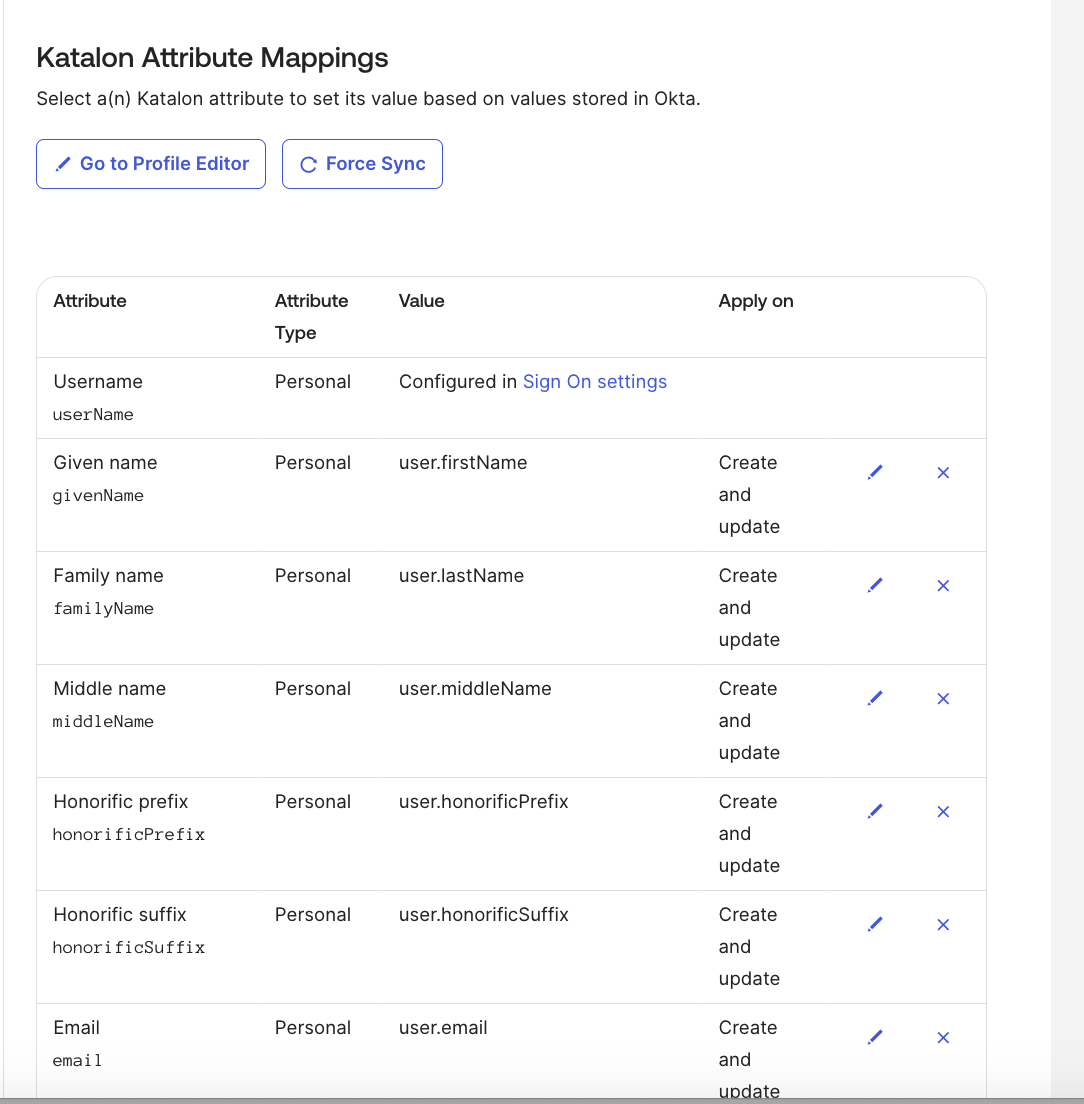
- In your Provisioning tab, scroll down to Katalon Attribute Mappings.
- Click Go to Profile Editors.
-
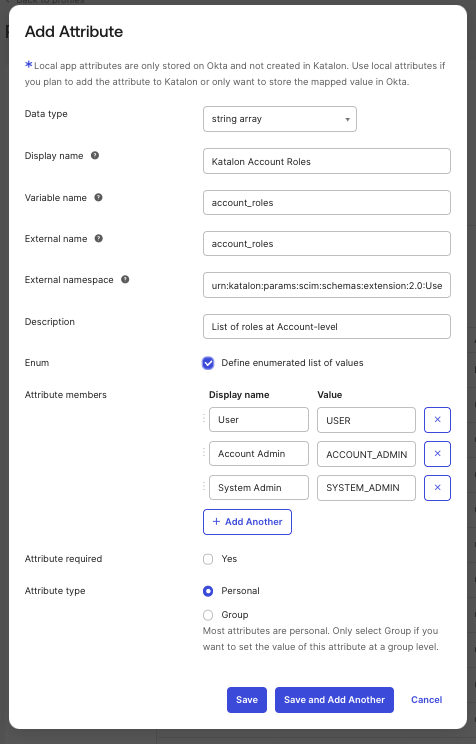
Then, click Add Attribute.
-
Fill out the Add Attribute dialog. You need to complete the following four (4) required fields. Please refer to the screenshot below to follow along.
Note: For Namespace, use this value:
urn:katalon:params:scim:schemas:extension:2.0:User- Account Roles:
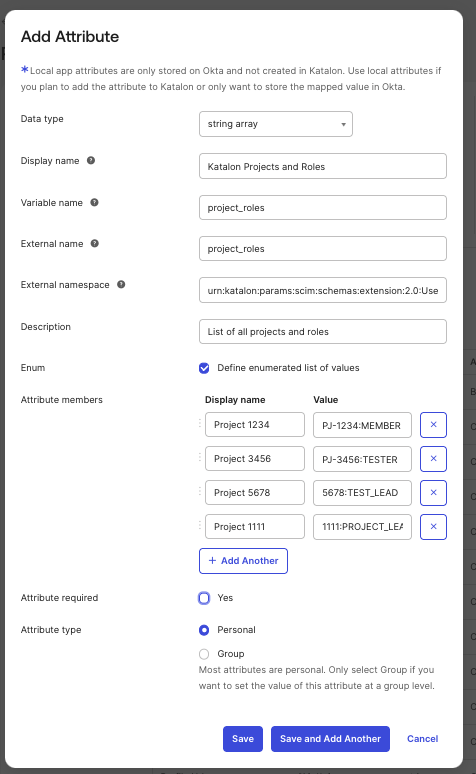
- Project roles:
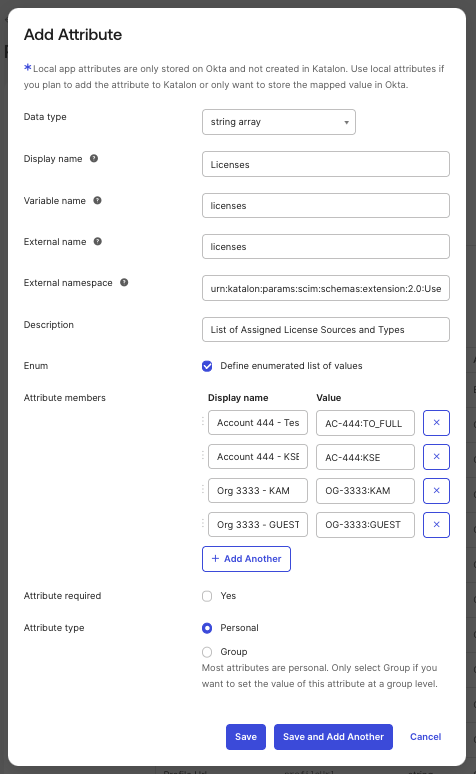
- Licenses:
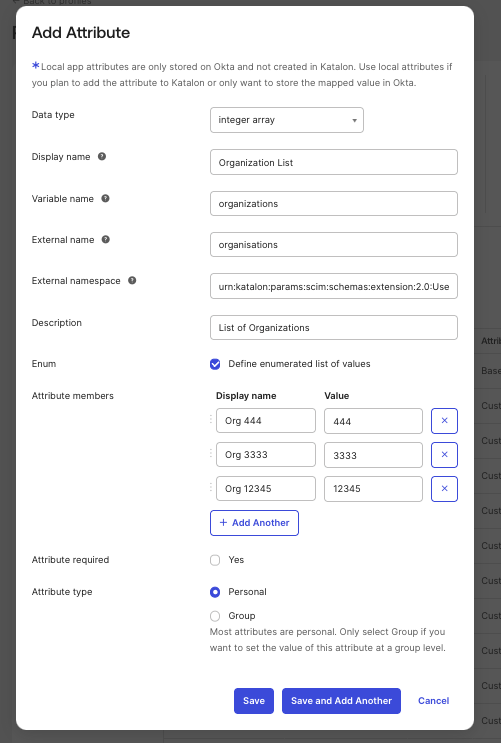
- Organization:
Step 4: Assign Users
- Navigate to the app's Assignments tab.
- Click Assign > Assign to people.
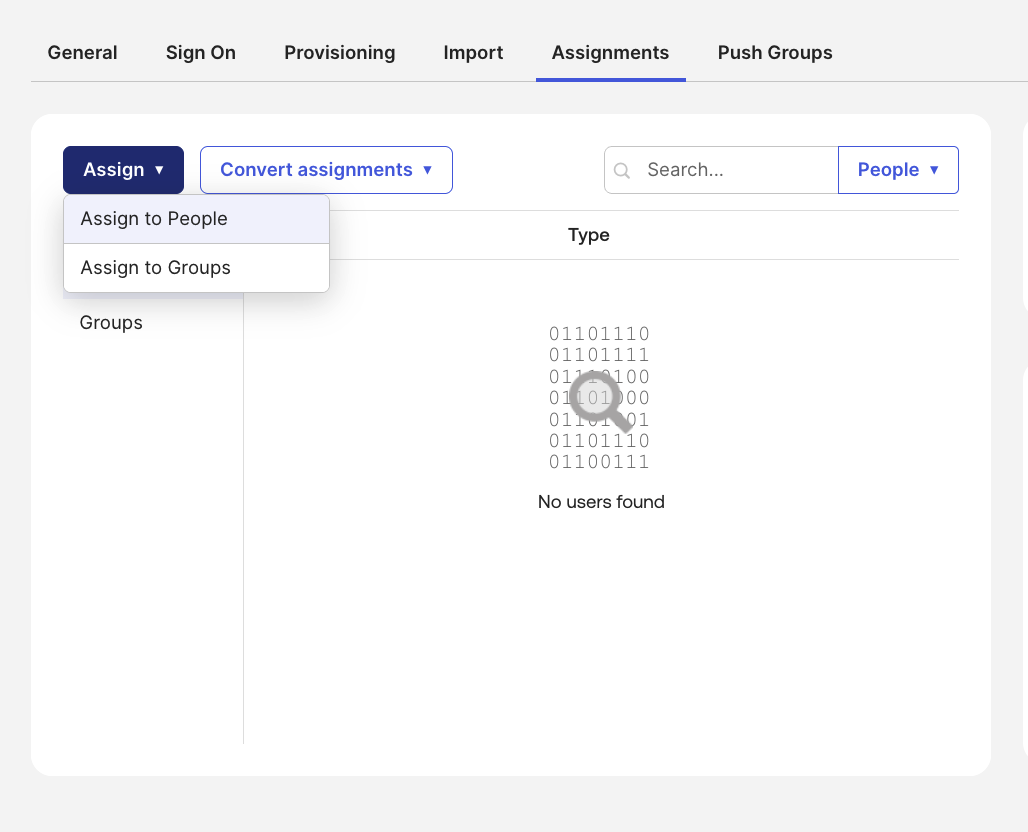
- Select the user you want, then click Assign next to their name.
- In the dialog, some fields (such as Name and Email) will be auto-filled..
- You will also see custom fields (such as the one you created in Step 3). Choose the appropriate value based on your account and organization.
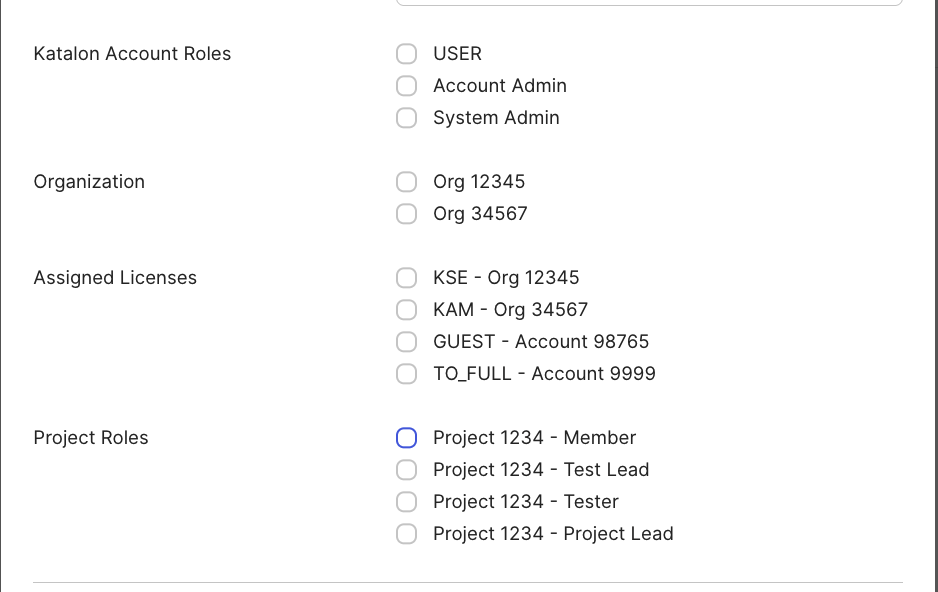
- Click Save and go back when finished.
- Repeat the steps to assign additional users. Once done, click Done.
Custom Attribute Reference
| Data Type | Variable Name | External Namespace | Required? | What to Enter | Allowed Values / Examples | Attribute Type |
|---|---|---|---|---|---|---|
| String array | licenses | urn:katalon:params:scim:schemas:extension:2.0:User | Yes | License Assignments License_Source(Account/Org):License_Types | Format: - AC-<accountId>:<license-type> - OG-<orgId>:<license-type> License types: - KSE (Katalon Studio Enterprise) - TO_FULL (Katalon TruePlatform Full) - KAM (Katalon Account Manager) - GUEST (Guest) Example: ["AC-1234:KSE", "OG-5678:KAM"] | personal |
| String array | account_roles | urn:katalon:params:scim:schemas:extension:2.0:User | No | Roles at the account level | - ACCOUNT_ADMIN - SYSTEM_ADMIN - USER Example: ["ACCOUNT_ADMIN", "USER"] Default Value: USER | personal |
| String array | project_roles | urn:katalon:params:scim:schemas:extension:2.0:User | No | Roles at the project level | Format: - ALL:<role> → applies to all projects - PJ-<projectId>:<role-value> → project with prefix - <projectId>:<role-value> → project without prefix Role values: - PROJECT_ADMIN - TEST_LEAD - TESTER - MEMBER Example: ["ALL:TESTER", "PJ-1234:PROJECT_ADMIN"] | personal |
| Integer array | organizations | urn:katalon:params:scim:schemas:extension:2.0:User | No | IDs of organizations | Organization IDs are integers. Example: [12345, 67890] | personal |
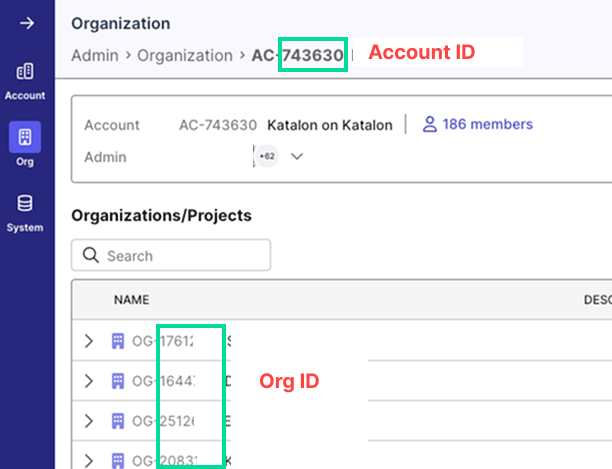
💡Tip:
- To get Organization or Account ID: Go to Account Settings > Org > Organization Management:
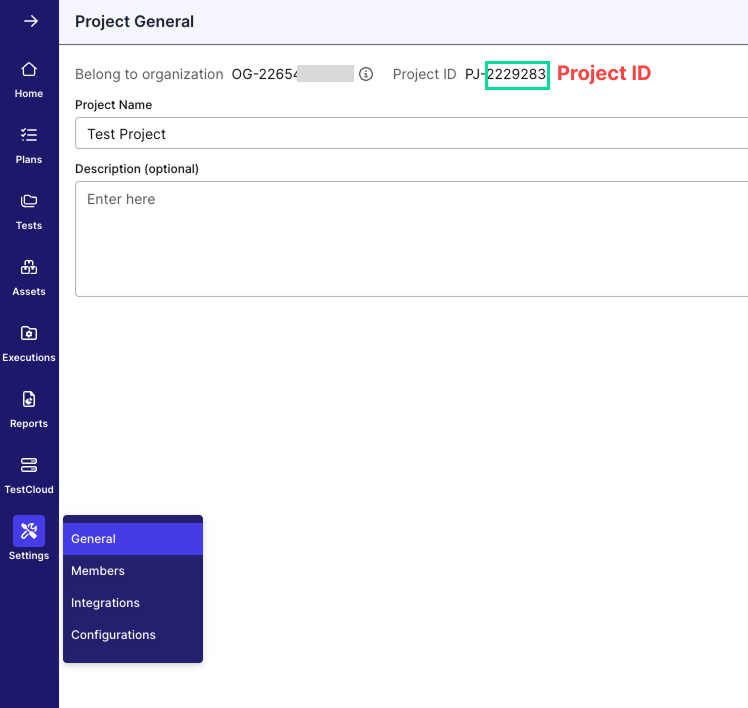
- To get the Project ID: Go to a specific project > Settings > General: