Customizable Fields
Last updated: April 2026
requirements
To configure customizable fields:
- You must have a True Enterprise subscription.
- You must have the Account Admin or System Admin role.
This document explains how to configure and manage customizable fields in Katalon True Platform to organize, categorize, and report on your testing data effectively.
Overview
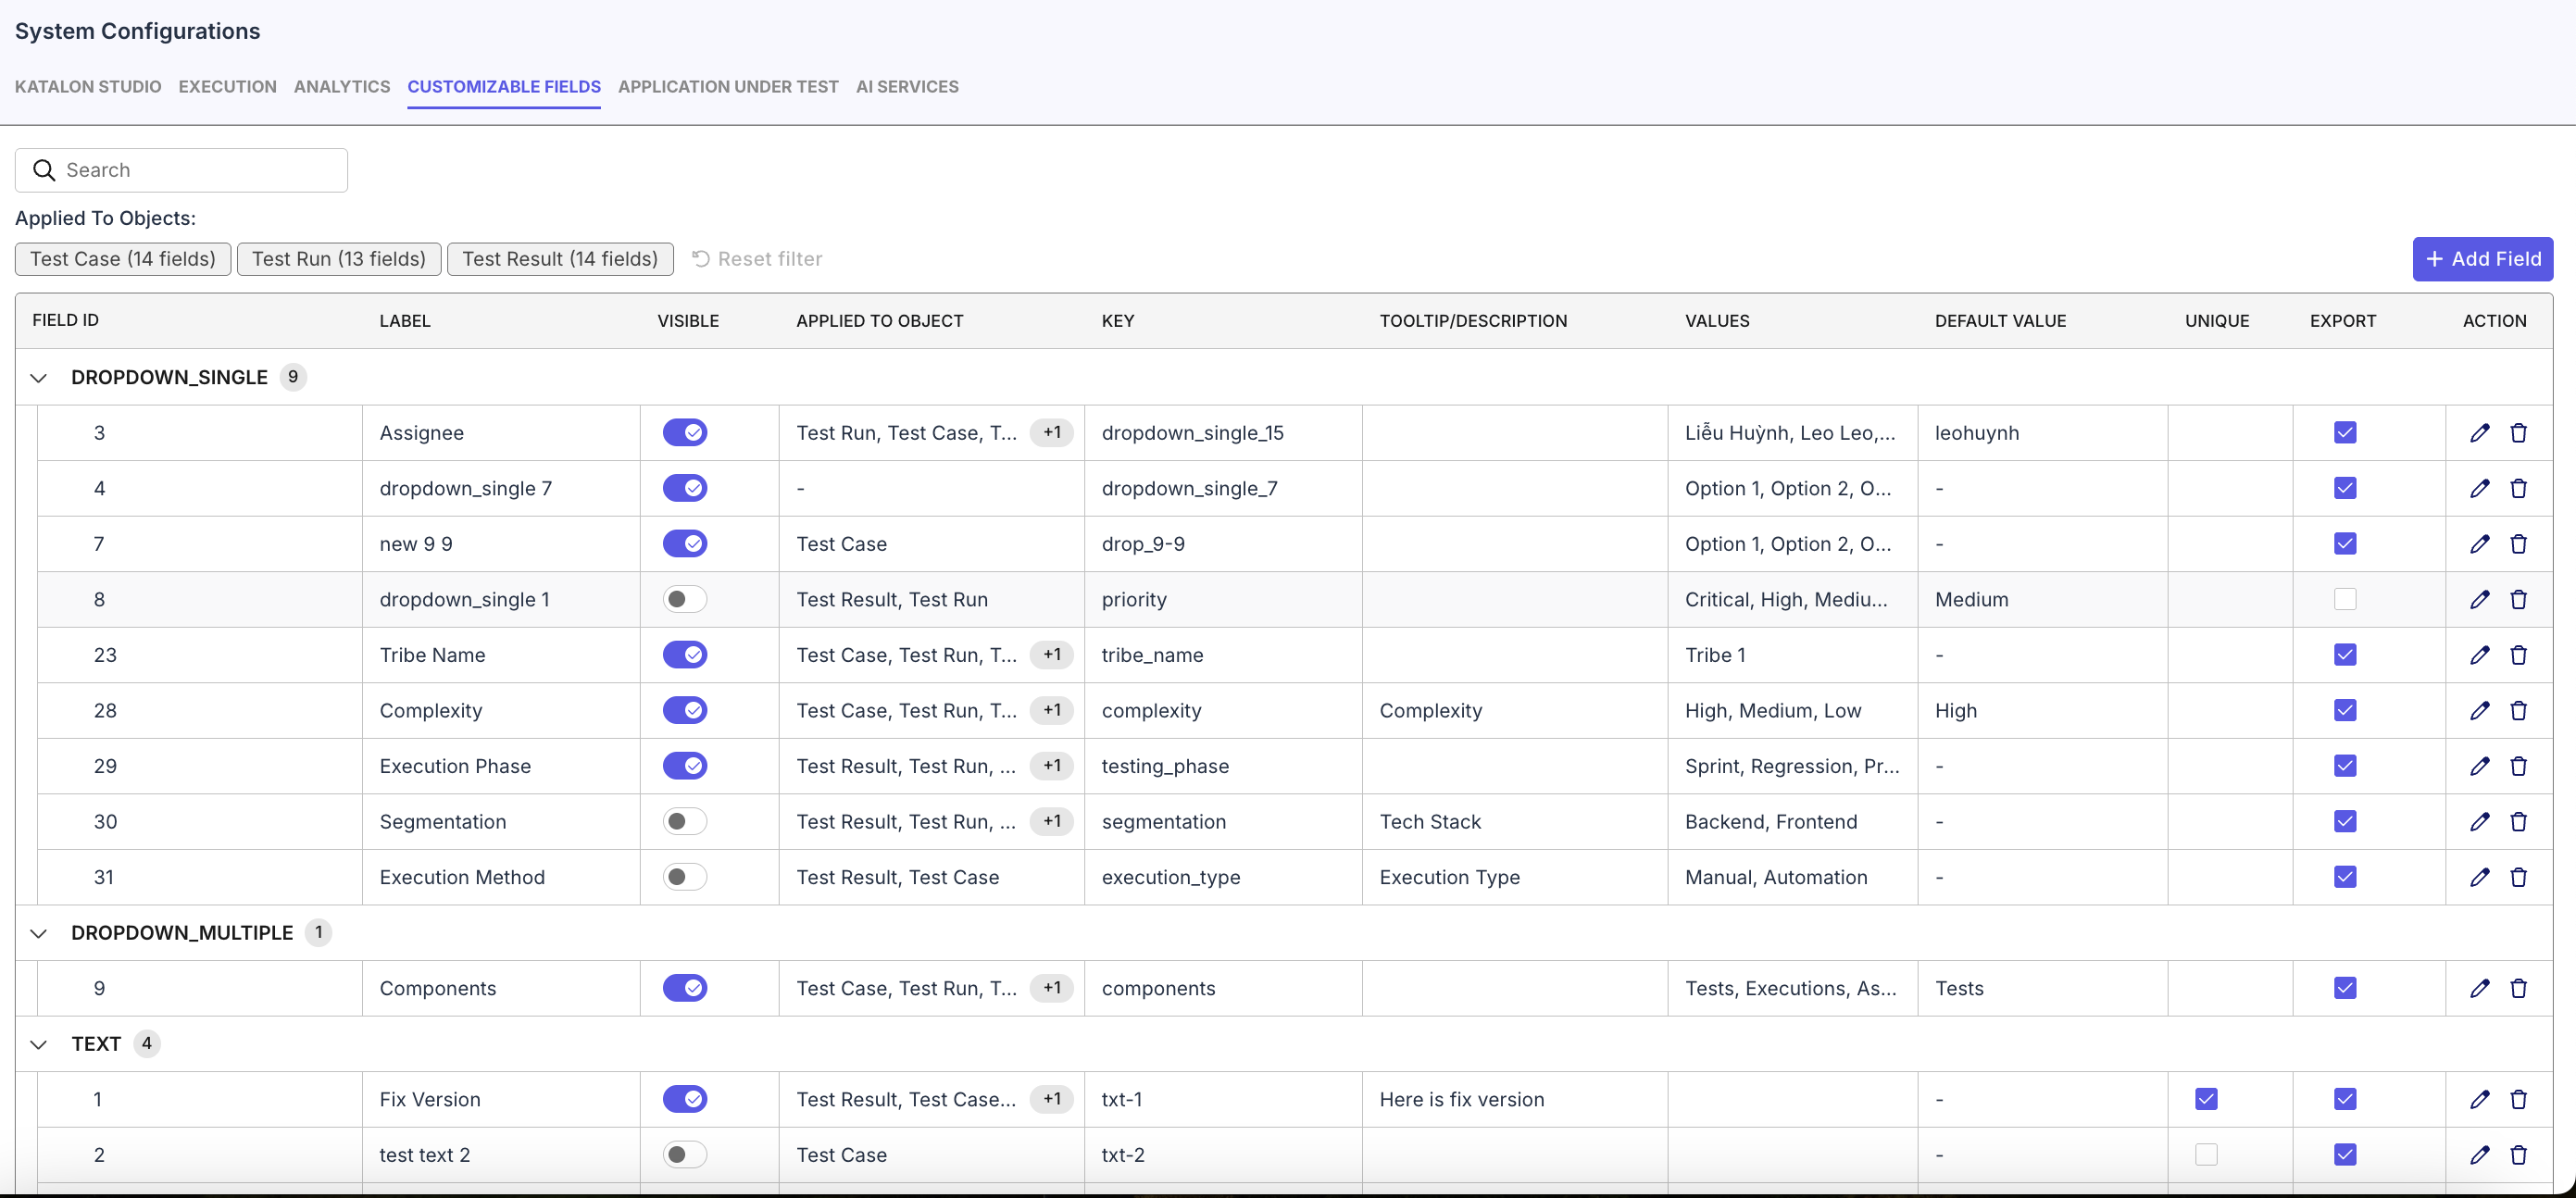
Customizable Fields allow teams to add metadata attributes to testing entities such as Test Case, Test Run, and Test Result, configurable by users.
By configuring these fields, you can categorize, filter, and organize your testing data effectively across the entire test management lifecycle.
-
Go to the Account Settings in Katalon True Platform.
-
Navigate to System → Configurations → Customizable Fields tab.
Benefits
- Align testing with business context: Capture key information like project phase, release cycle, or environment directly in your test entities for easier collaboration and reporting.
- Boost productivity in reporting and filtering: Quickly filter, sort, and group test data using meaningful labels, making it easier to find relevant results or patterns.
- Improve visibility across teams: Enable QA, Dev, and PM stakeholders to track progress and coverage based on shared attributes such as priority, feature area, or owner.
- Simplify audits and compliance tracking: Maintain consistent metadata that supports traceability for audits, version control, and regulatory requirements.
- Scale effectively with governance: Manage metadata growth through predefined limits and standardized field configurations, ensuring performance and consistency across large teams.
Field Types and Descriptions
| Field Type | Description |
|---|---|
| Dropdown (Single Select) | User can only select one value from a dropdown |
| Dropdown (Multiple Select) | User can only select one or more values from a dropdown |
| Text | Text input |
| Number | Number only input |
| Date | Date only input |
| Checkbox | Boolean (true/false) input |
| URL | URL/link input |
Important Notes
- Changes to field configuration apply globally to all users in the workspace.
- Modifying or repurposing a field affects existing data associated with that field.
Adding a Custom Field
- To add a new field, click Add Field. To edit existing field, on the Customizable Fields page, click the ✏️ Edit icon next to the field you want to modify.
- The Edit Custom Field dialog appears.
- Configure the following settings:
| Setting | Description |
|---|---|
| Visible | Toggle ON to make the field appear in the UI. |
| Applied To Objects | Choose one or more entities (Test Case, Test Run, Test Result) where this field will appear. |
| Label | The display name that appears in your workspace. |
| Key (Cannot be edited) | The internal identifier that uniquely distinguishes each customizable field within the system. |
| Tooltip/Description | Optional text that describes the field’s purpose. |
| Menu Options (for Dropdown fields only) | Add or modify the selectable values (up to 30). |
| Default Value | Specify a value that appears by default. |
| Exportable | Enable this to include the field data in exports and reports. |
| Unique (for Text and Number fields only) | Enable to require unique values across all objects using this field. |
- Click Save to apply your changes.
- The updated field will immediately reflect across the selected entities.
Result
Your customizable field will be visible on all test cases (or whichever object you chose).
