Create a local test environment with an Agent (Legacy)
This document covers TestOps Legacy version only.
This shows you how you can create and manage a local test environment with an Agent using Windows or Mac.
A Katalon Agent manages a local server for executing the scheduled test runs in a local test environment. Katalon TestOps supports compatible Agents for different executing environments.When you install the Agent in your local test machine, you have created a local test environment where you can run or execute your tests.
Prerequisites
- You have a verified Katalon account.
- You have installed Git SCM.
Download and Install an Agent from Katalon TestOps
-
Sign in to Katalon TestOps.
-
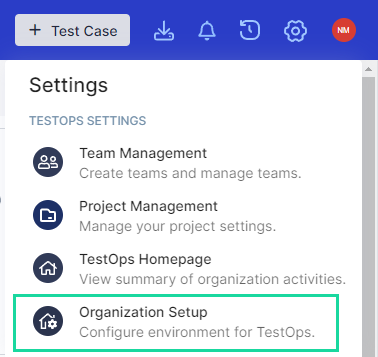
Go to TestOps Settings > Organization Setup.
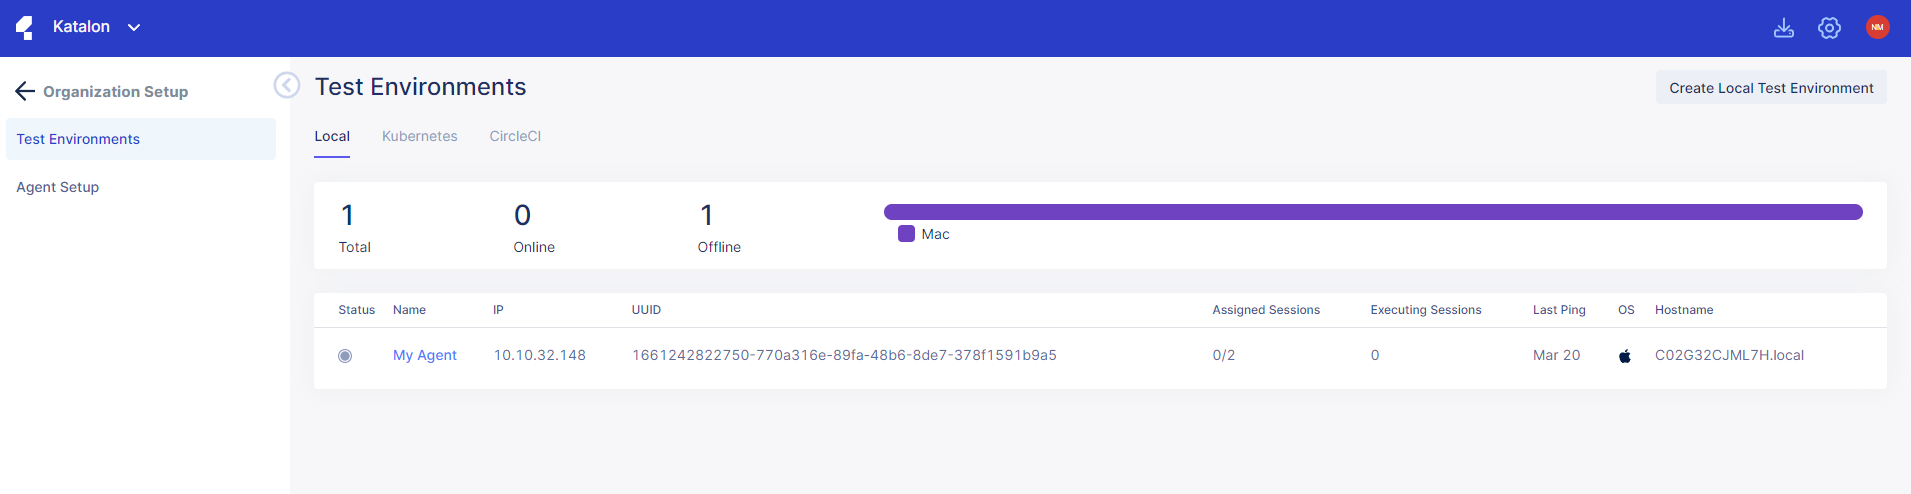
This shows the Test Environments page. It also lists the agents you have.
-
Click on Create Local Test Environment. Alternatively you can click on Agent Setup to go to the same page.
This shows the Agent Setup page.
-
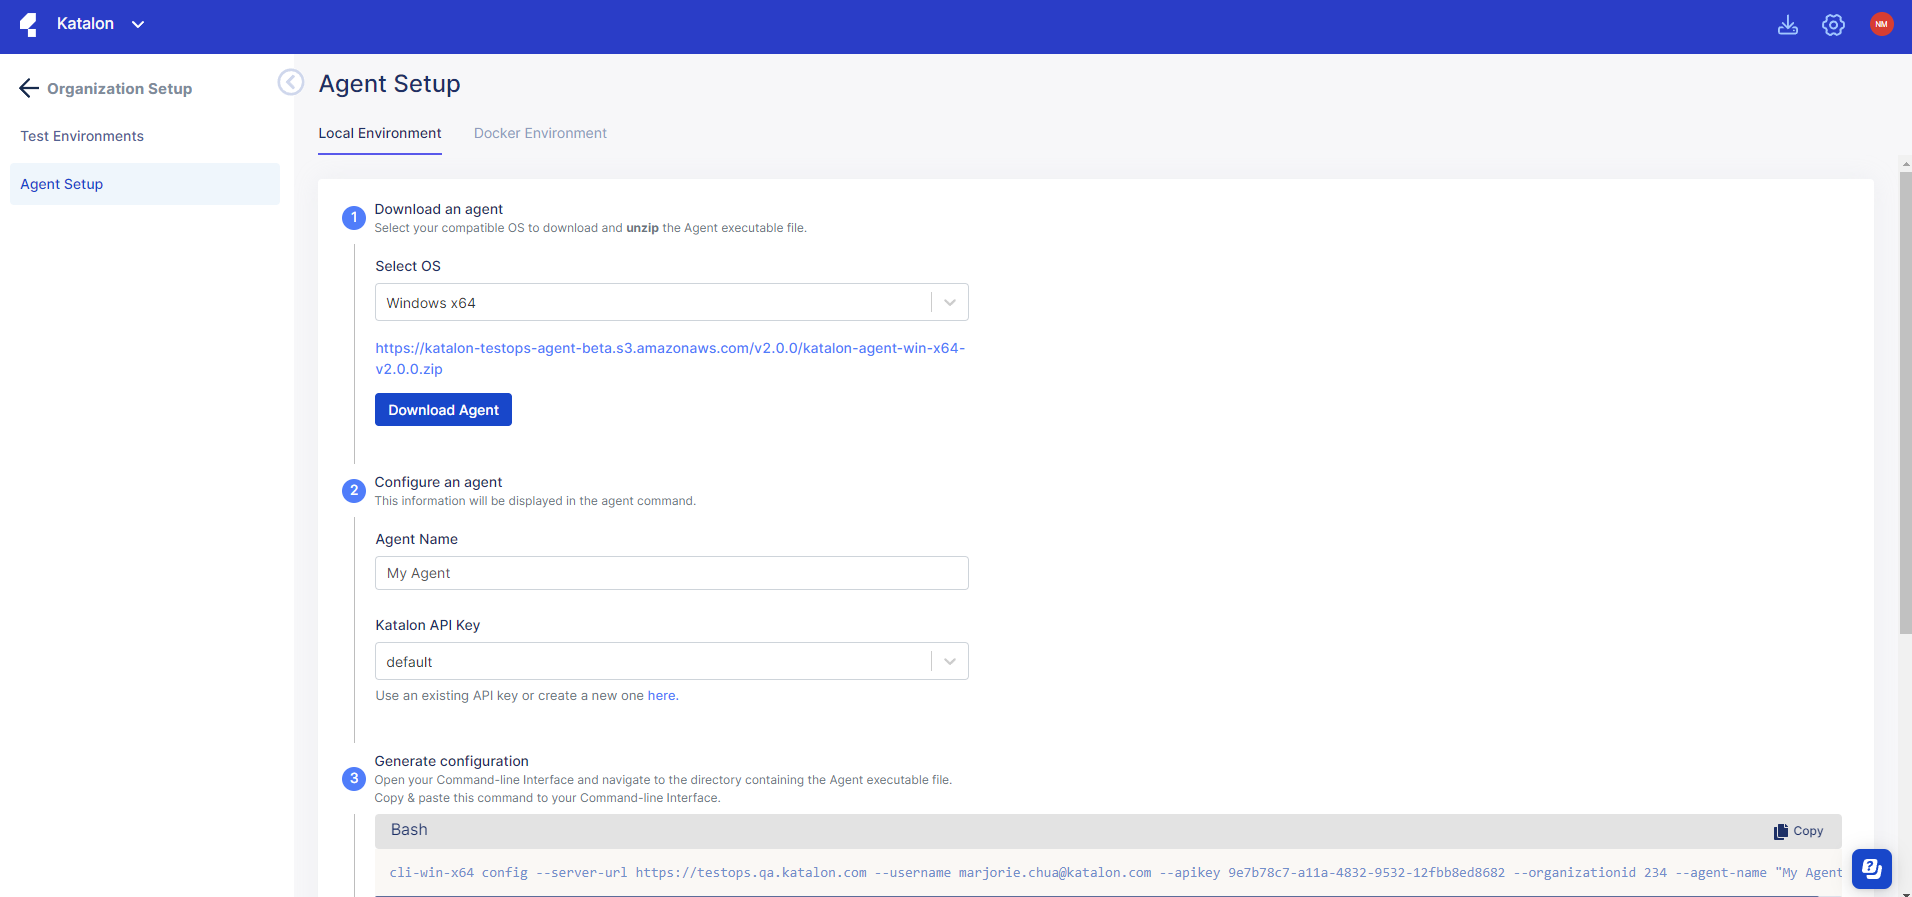
In Select OS, choose your operating system (Windows, macOS, etc.), then click Download Agent.
- You have downloaded the Agent file (.zip file) to your computer. Unzip it and keep it open for now.
-
In the Agent Name section, create a name for the Agent (e.g., My Agent).
-
In the Katalon API Key section, select default or create your own.
-
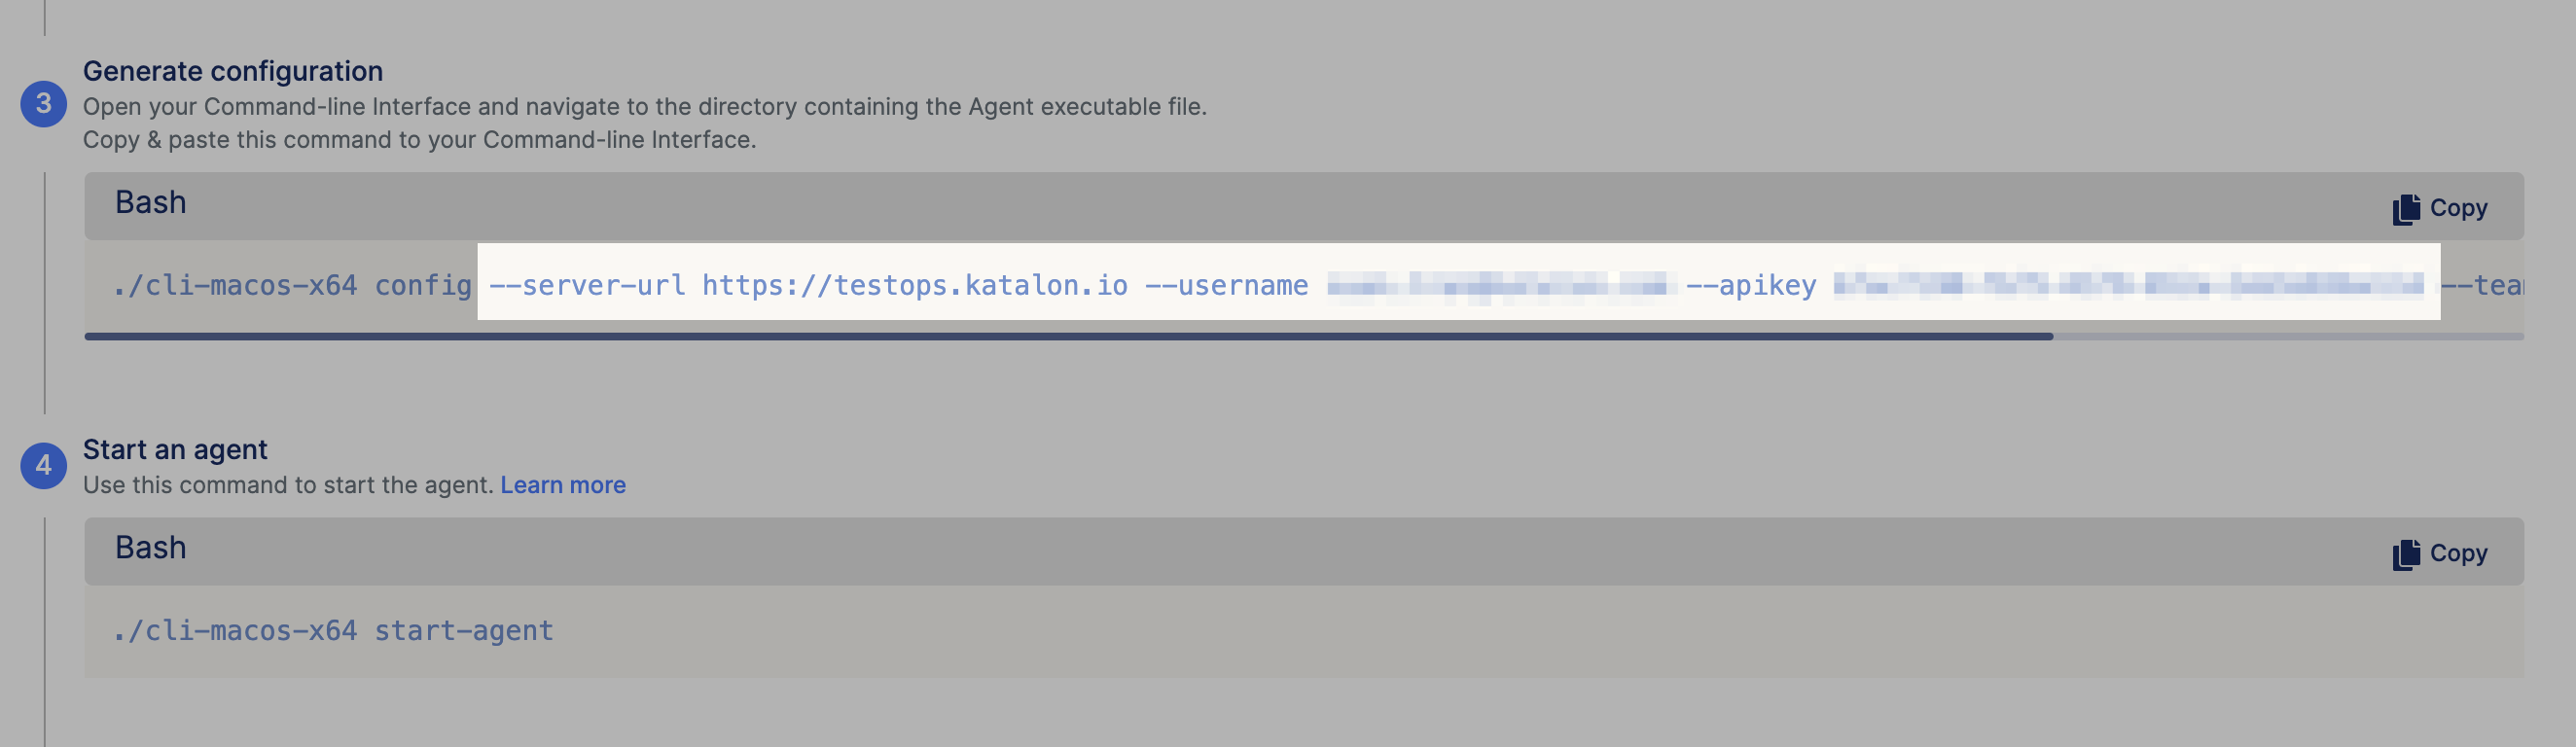
Open any command line interface and navigate to the directory containing the Agent executable file.
-
Go back to the Agent Setup page and copy and paste the command labeled Bash to your command line interface. Hit Enter or Return.
-
Use the next command labeled Bash to start the agent. Hit Enter or Return.
-
After the agent successfully starts, assign your agent to a project. To learn how, see: Manage the Agent status.
Set up an Agent in a Windows local machine
To set up an Agent in a Windows local machine, do as follows:
-
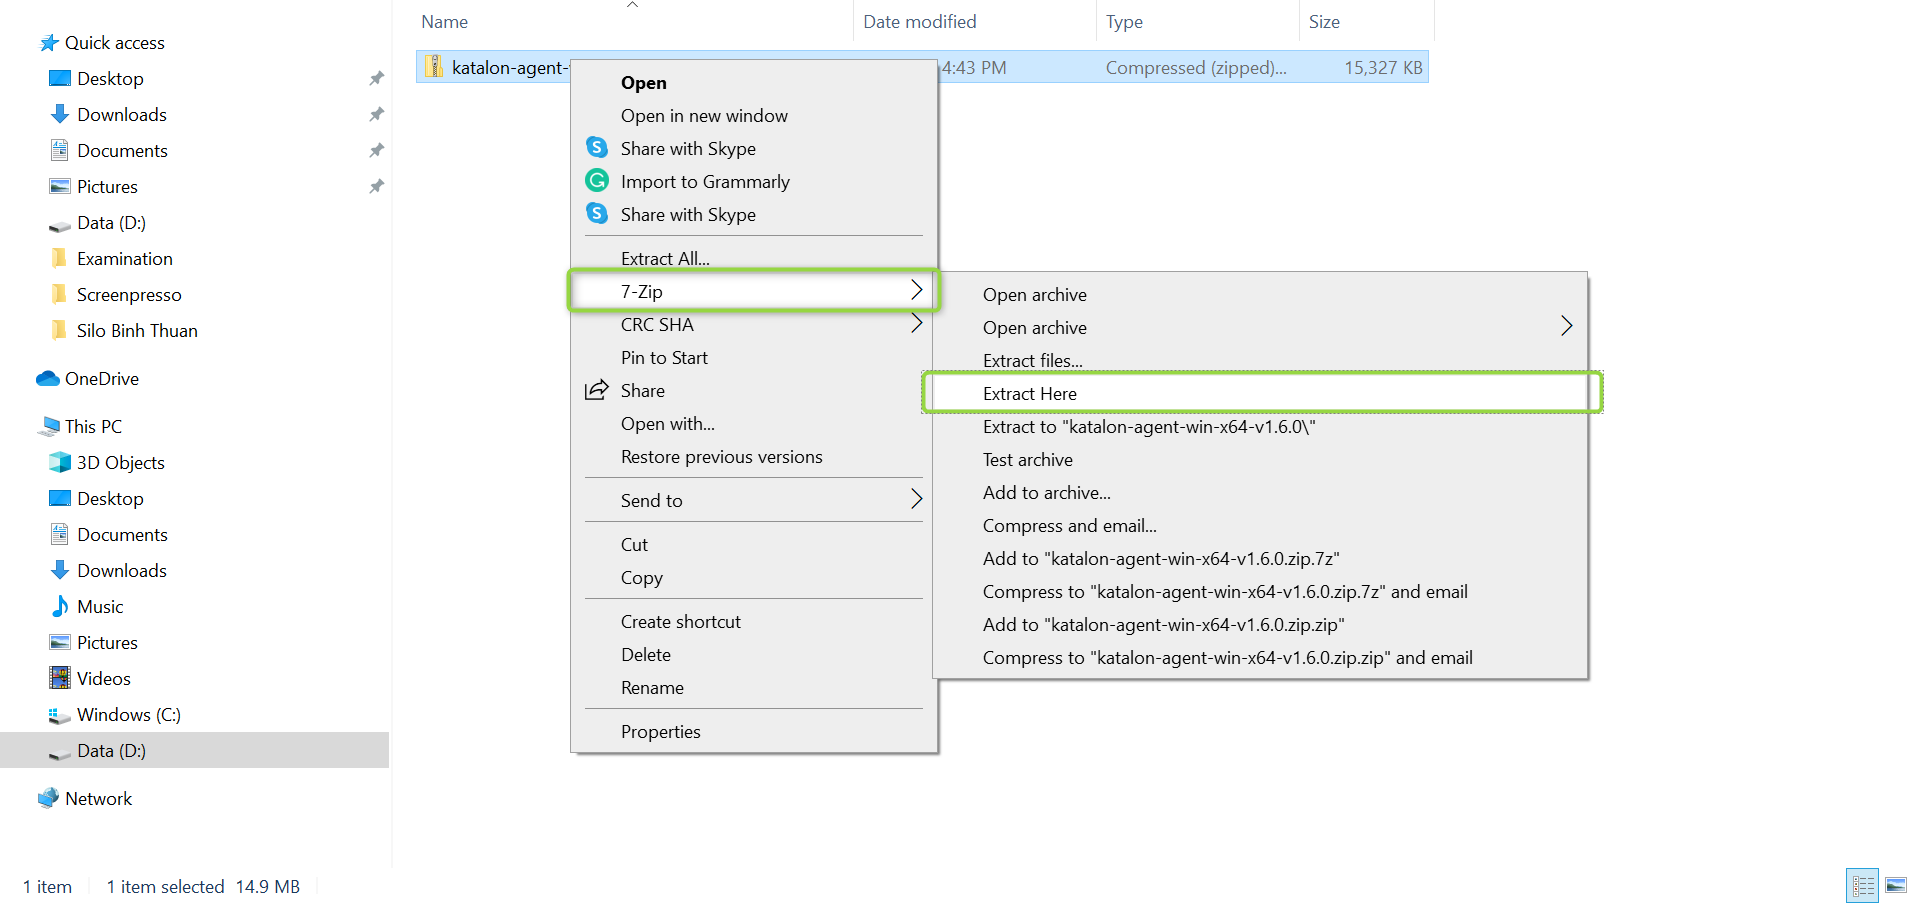
Unzip the Agent file you have downloaded.
-
Open your command line interface and navigate to the directory containing the Agent executable file.
-
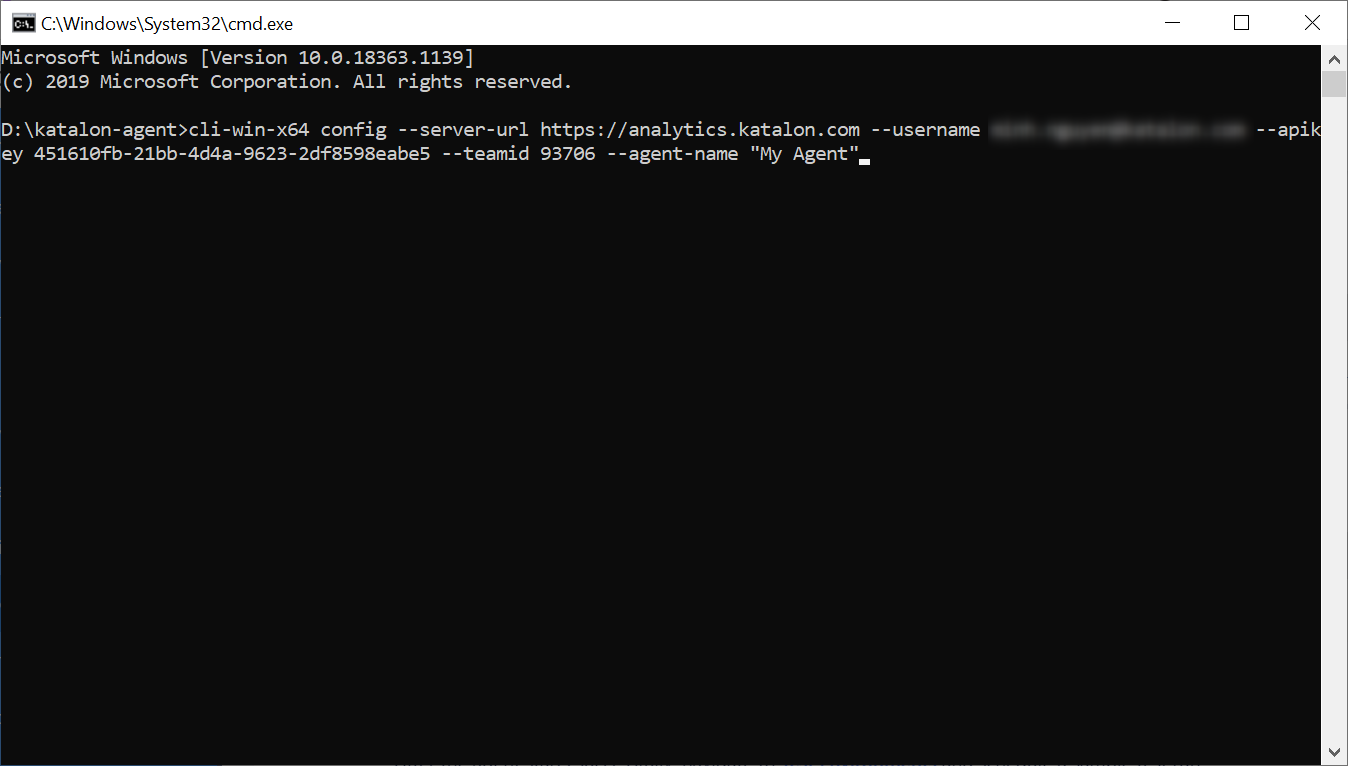
Copy the command in the Generate configuration section on the Agent Setup page, and then paste it into the command window. Hit Enter to run the command.
-
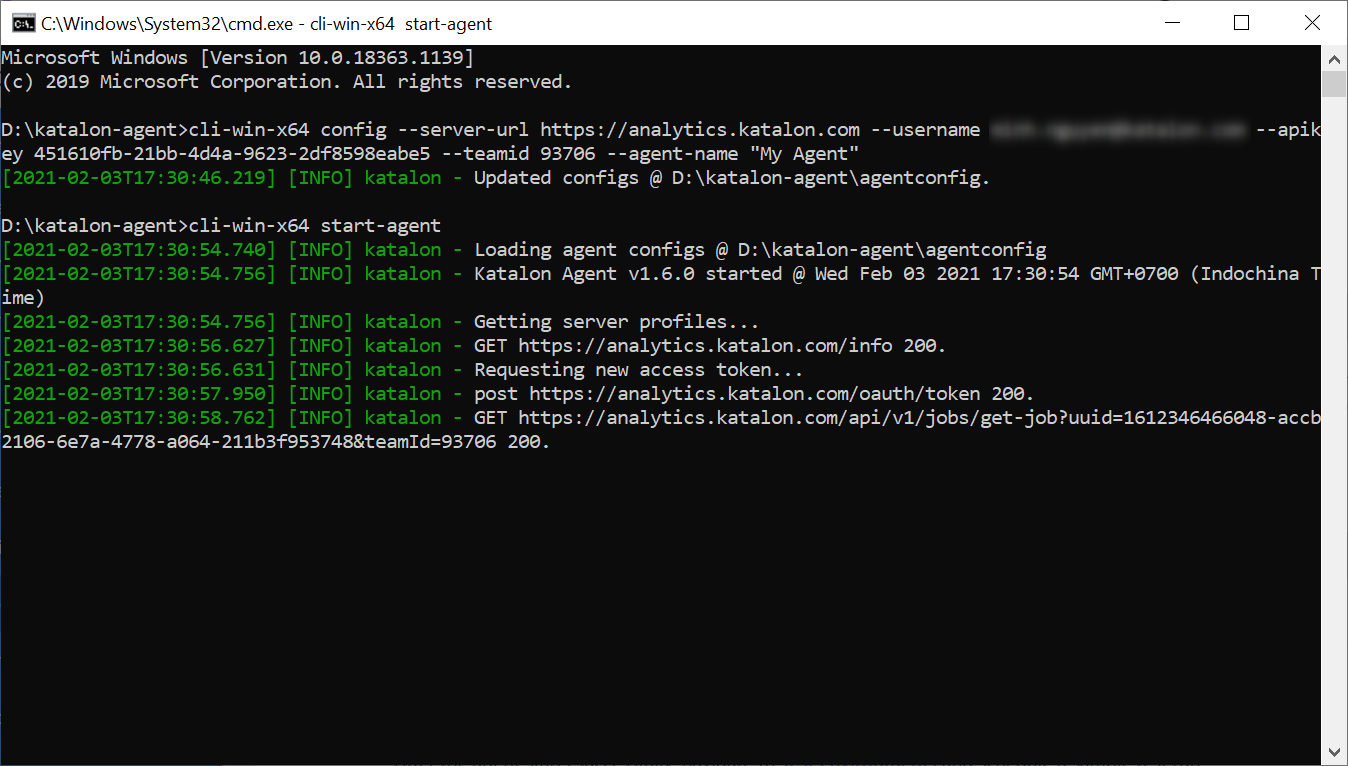
Copy the command in the Start an agent section, and paste it into the command window. Hit Enter to run the command.
Results
You have successfully set up your Agent on Windows. The next step is to view or manage your Agent's linked Projects. See: Manage the Agent status.
Set up an Agent in a macOS local machine
-
Unzip the Agent file you have downloaded.
-
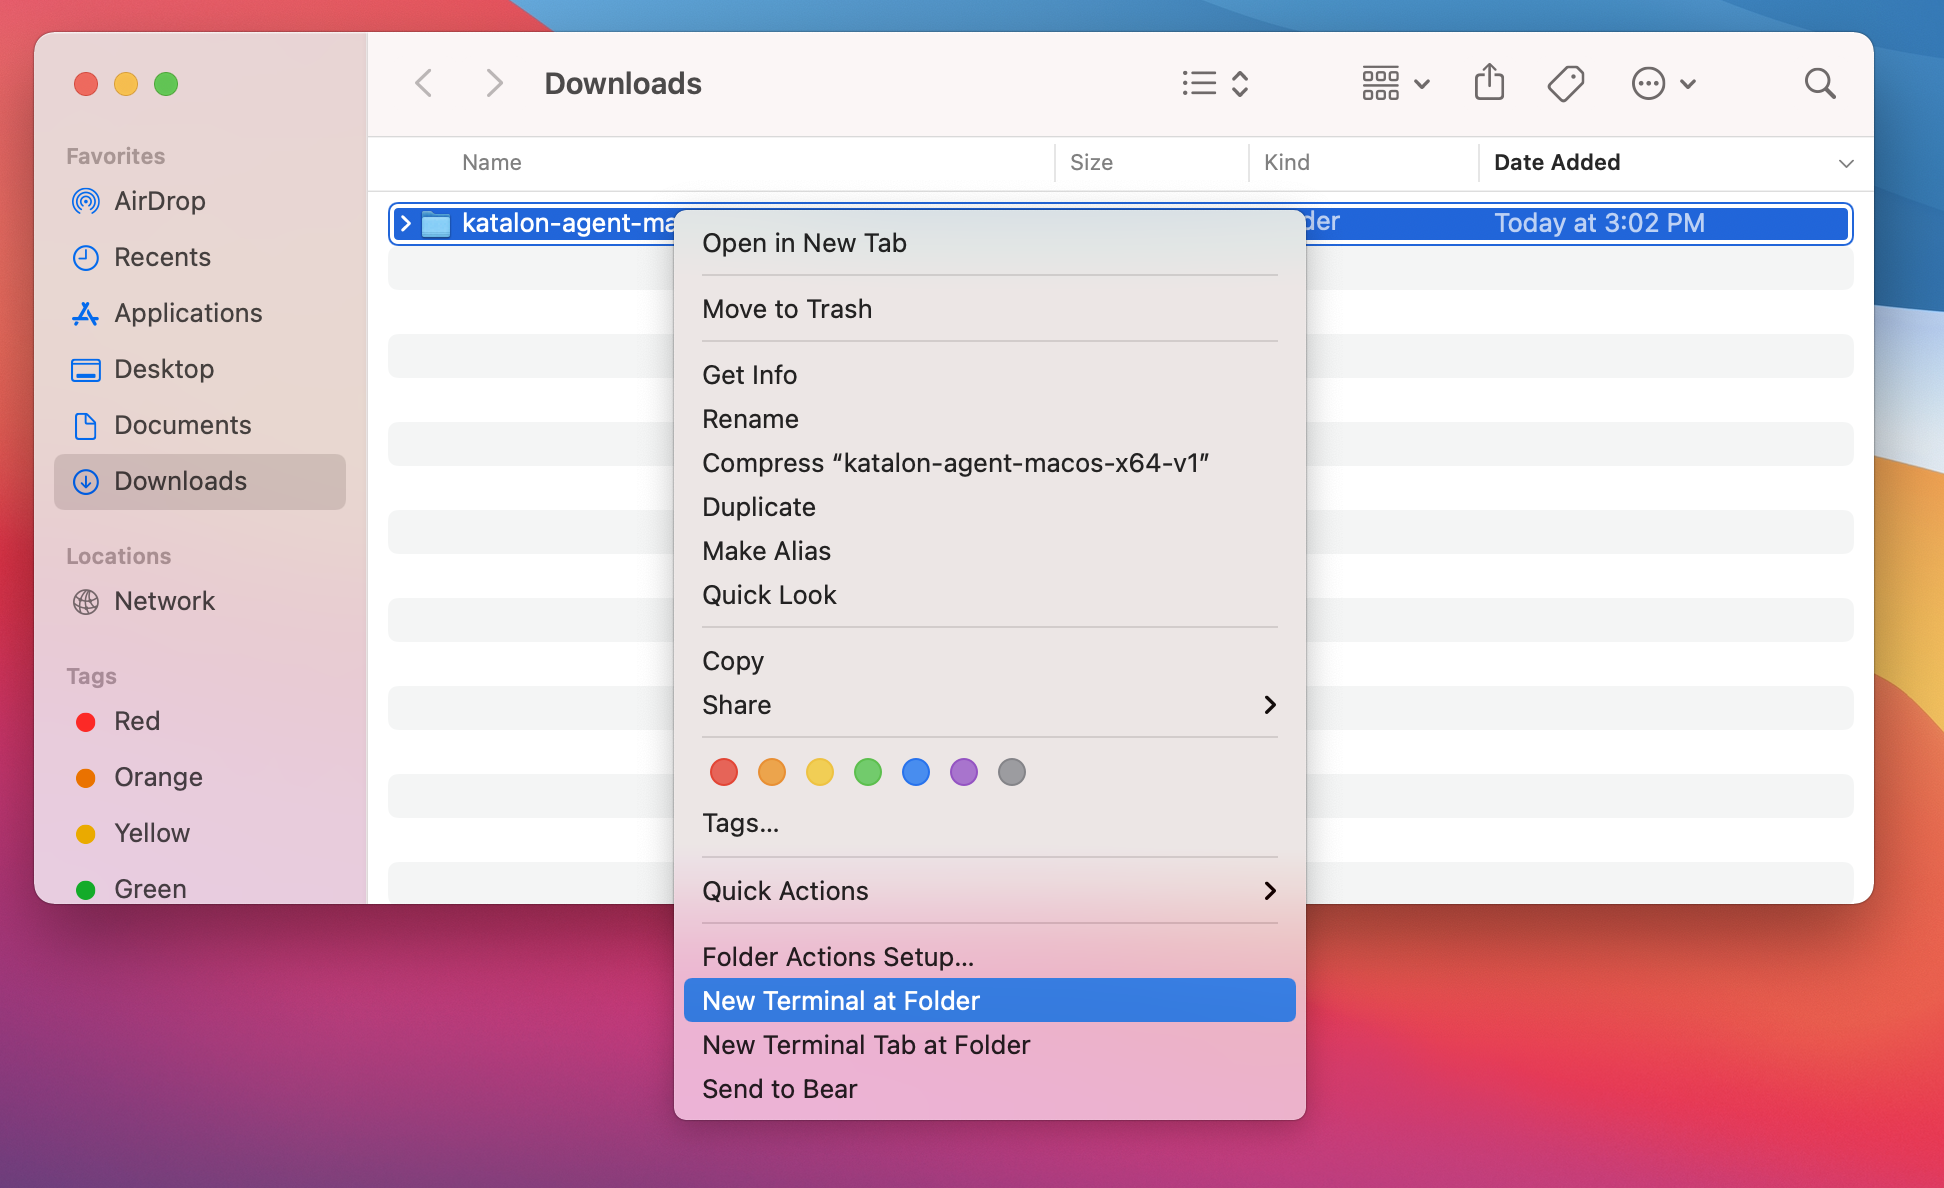
Right-click on the Agent file and select New Terminal at Folder.
-
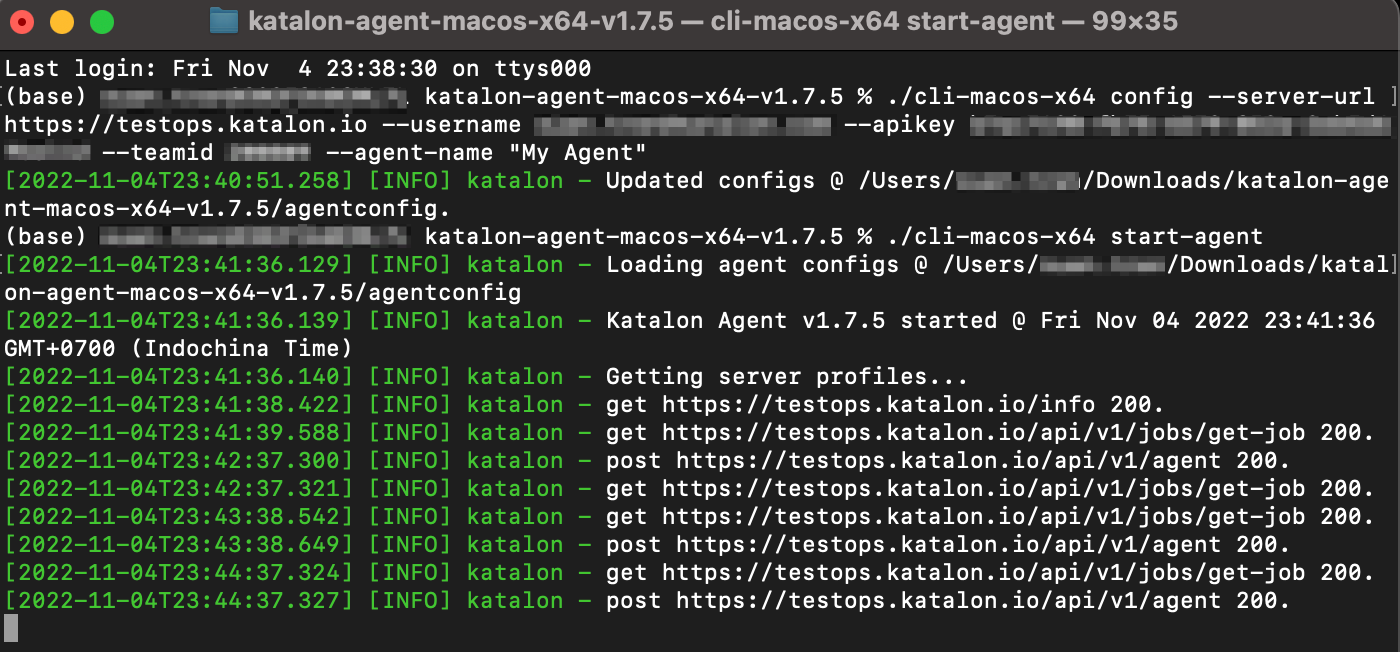
Copy the command in the Generate configuration section on the Agent Setup page, and paste it into the Terminal. Hit Return on the keyboard to run the command.
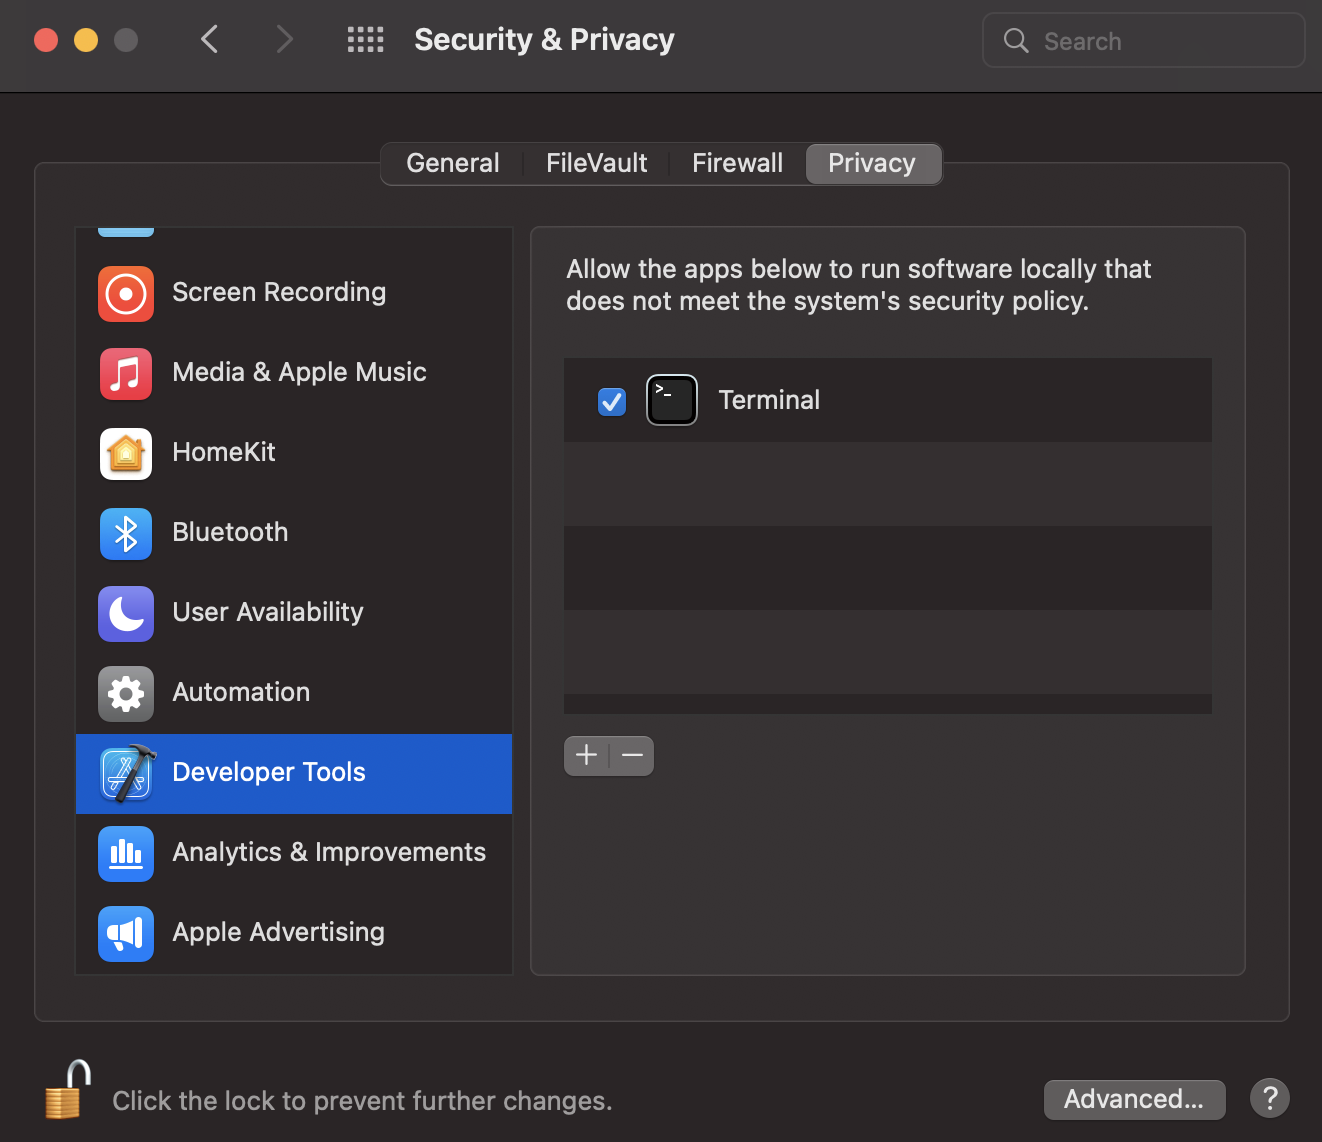
Make sure you have enabled Terminal for Developer Tools in the Security & Privacy settings of your macOS.
- Copy the command in the Start an agent section, and paste it into the Terminal. Hit Return to run the command.
Results
You have successfully set up your Agent on Mac. The next step is to view or manage your Agent's linked Projects. See: Manage the Agent status.
Manage the Agent status
-
Log in to TestOps and go to Settings > Organization Setup > Test Environments.
-
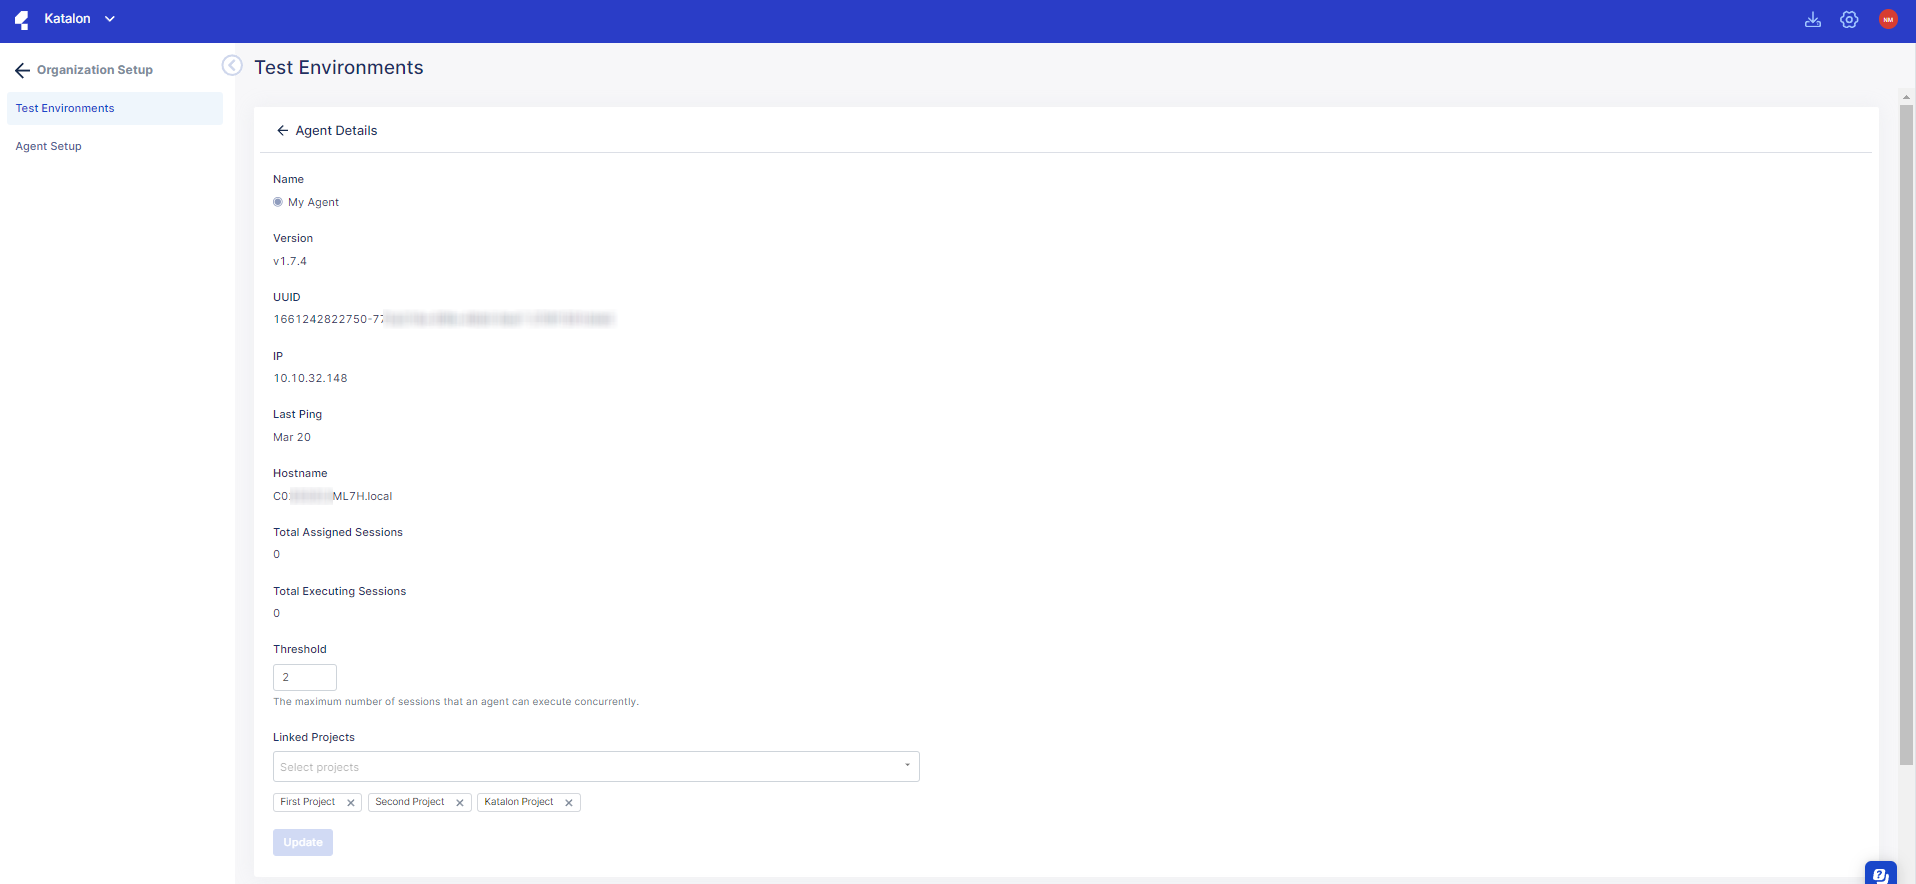
Click on the Name of your Agent to navigate to its Agent Details page. In the example below, "My Agent" is the name of the Agent.
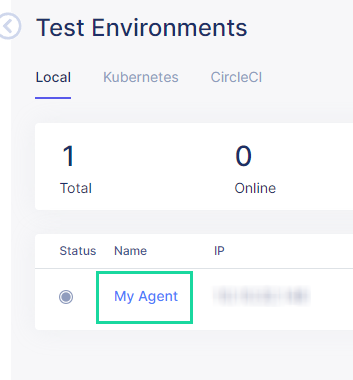
The Agent Details page shows.
Link or un-link a Project to an Agent
-
Navigate down to the Linked Projects section and click on the dropdown menu to assign projects you would like to link this agent to. Once they are linked, you will see them as tags. In the example below, the projects "First Project" and "Second Project" are shown as tags below the dropdown menu.

-
To remove a linked project, click on the x next to the project name. This action deletes the project tag, which means that the project is now un-linked.
- You can link your projects back any time.
Results
You have linked your agent to a project. Now you can Schedule test runs.
Agent Authentication
Agents use serverurl and apikey in agentconfig to:
- Activate Katalon Runtime Engine.
- Send test results to Katalon TestOps.
To locate the serverurl and apikey of your agent, navigate to the Generate configuration section on the Agent Setup page, as shown in the example below.
Configure proxy for Agents
You can set up proxy for the Agent in the agentconfig file, using the proxy option. For example, proxy=http://localhost:8080.