Configure qTest integration in Katalon Studio
Submit test results automatically and manually from Katalon Studio to qTest.
Generate Katalon Studio - qTest parity reports.
Manage version control between qTest and Katalon Studio.
Enable qTest integration in Katalon Studio
Set up qTest integration with Katalon Studio. You can do this via the setup wizard or manual setup. In the manual setup, you can connect to qTest account using username and password or SSO token .
Map test status between qTest and Katalon Studio
Manage test cases between qTest and Katalon Studio
Manage test suites between qTest and Katalon Studio
Requirements
An active Katalon Studio license.
Enable qTest integration in Katalon Studio
- Check the Enable integration checkbox.

Set up qTest integration in Katalon Studio
Katalon Studio supports pushing screenshots (PNG files) to qTest to generate reports.
You can set up qTest integration manually or with the Setup Wizard as follows.
Set up qTest integration via the setup wizard
- To open the setup wizard, after checking the Enable Integration box, click Yes in the pop-up window.
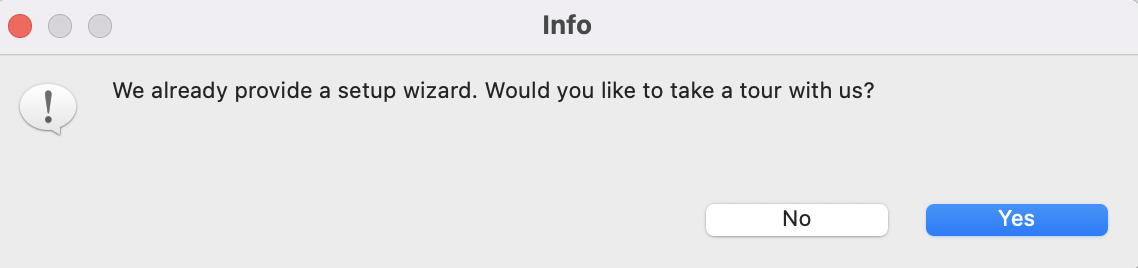
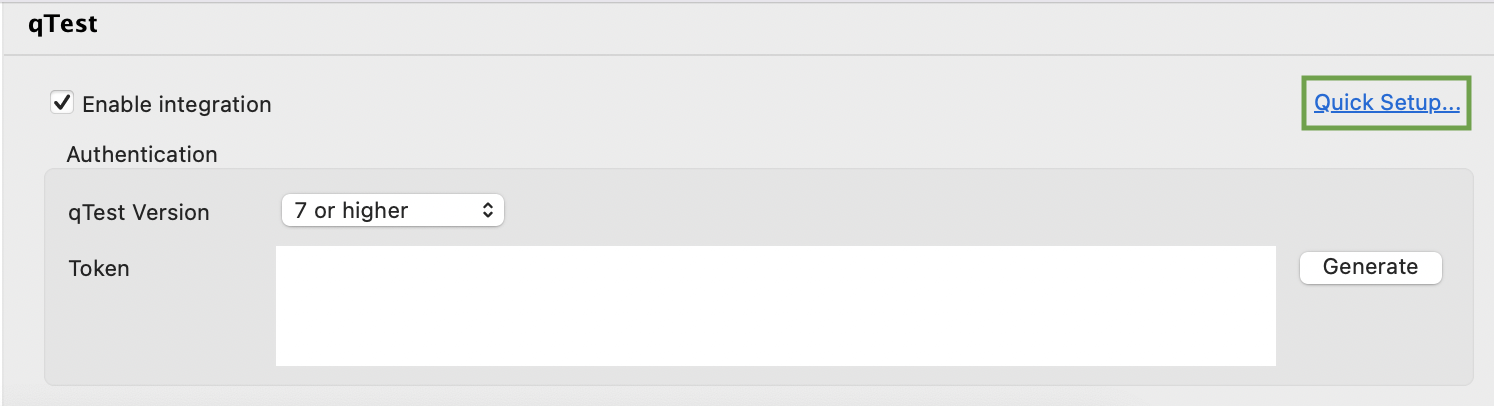
Alternatively, you can also click on the Quick Setup... hyperlink.
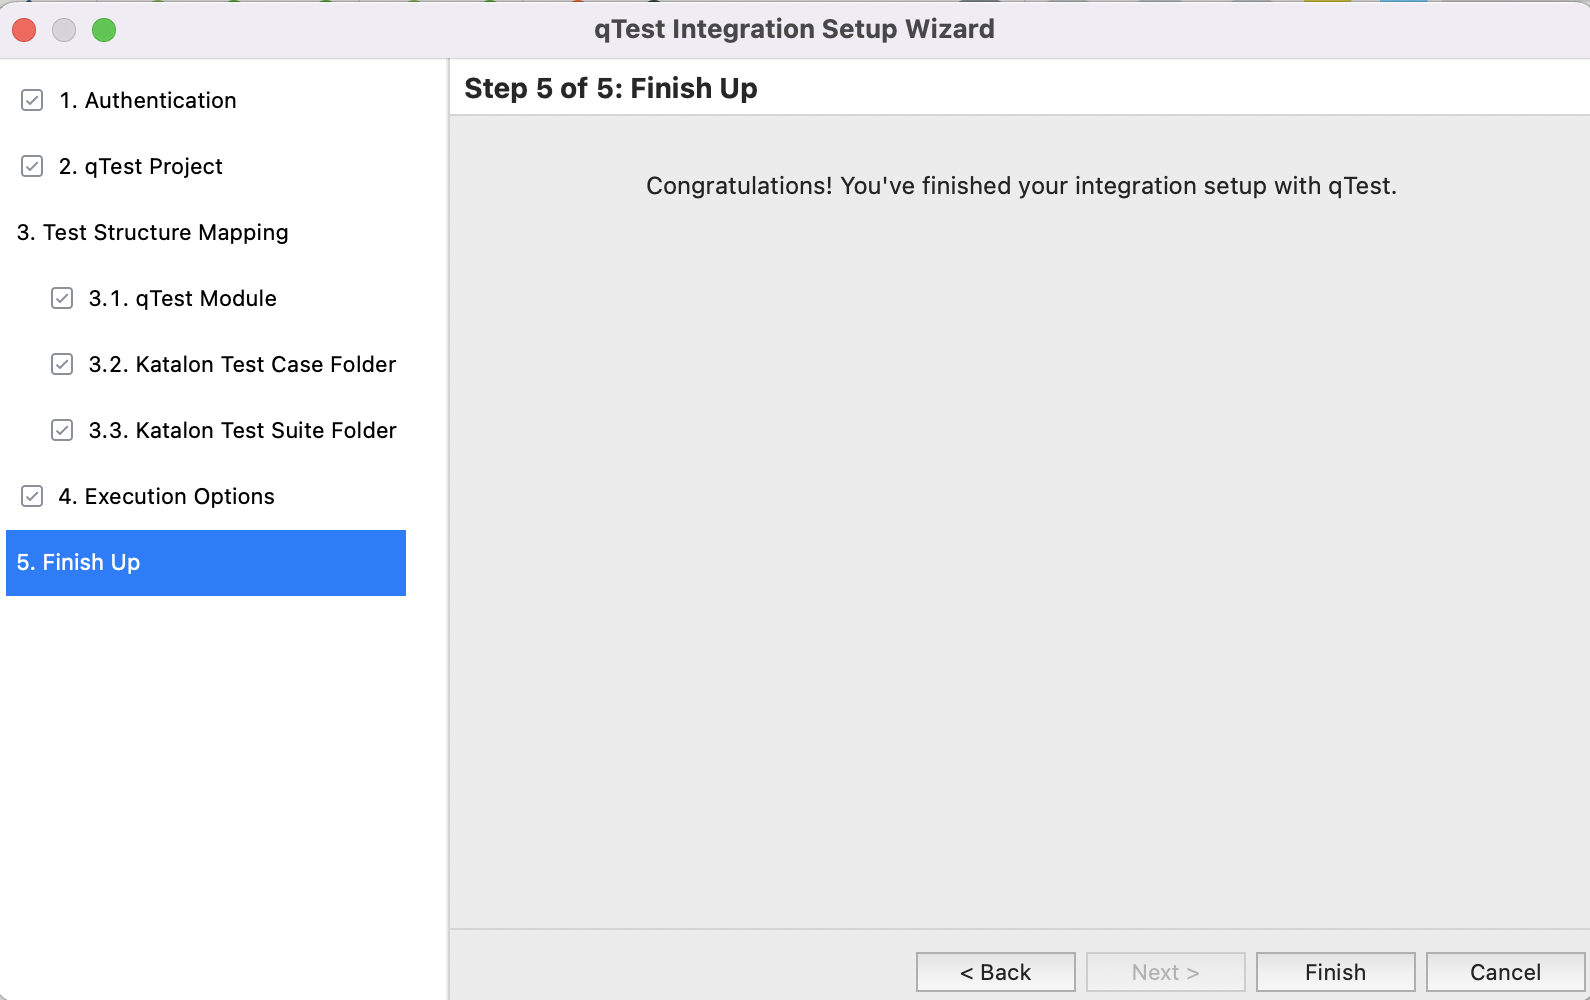
 The qTest Integration Setup Wizard dialog opens. Complete all items to finish the setup.
 - In the Authentication section, select your qTest version and enter you qTest account for authentication information.In the version options, we recommend selecting 7 or higher. This is because earlier versions might be deprecated soon.
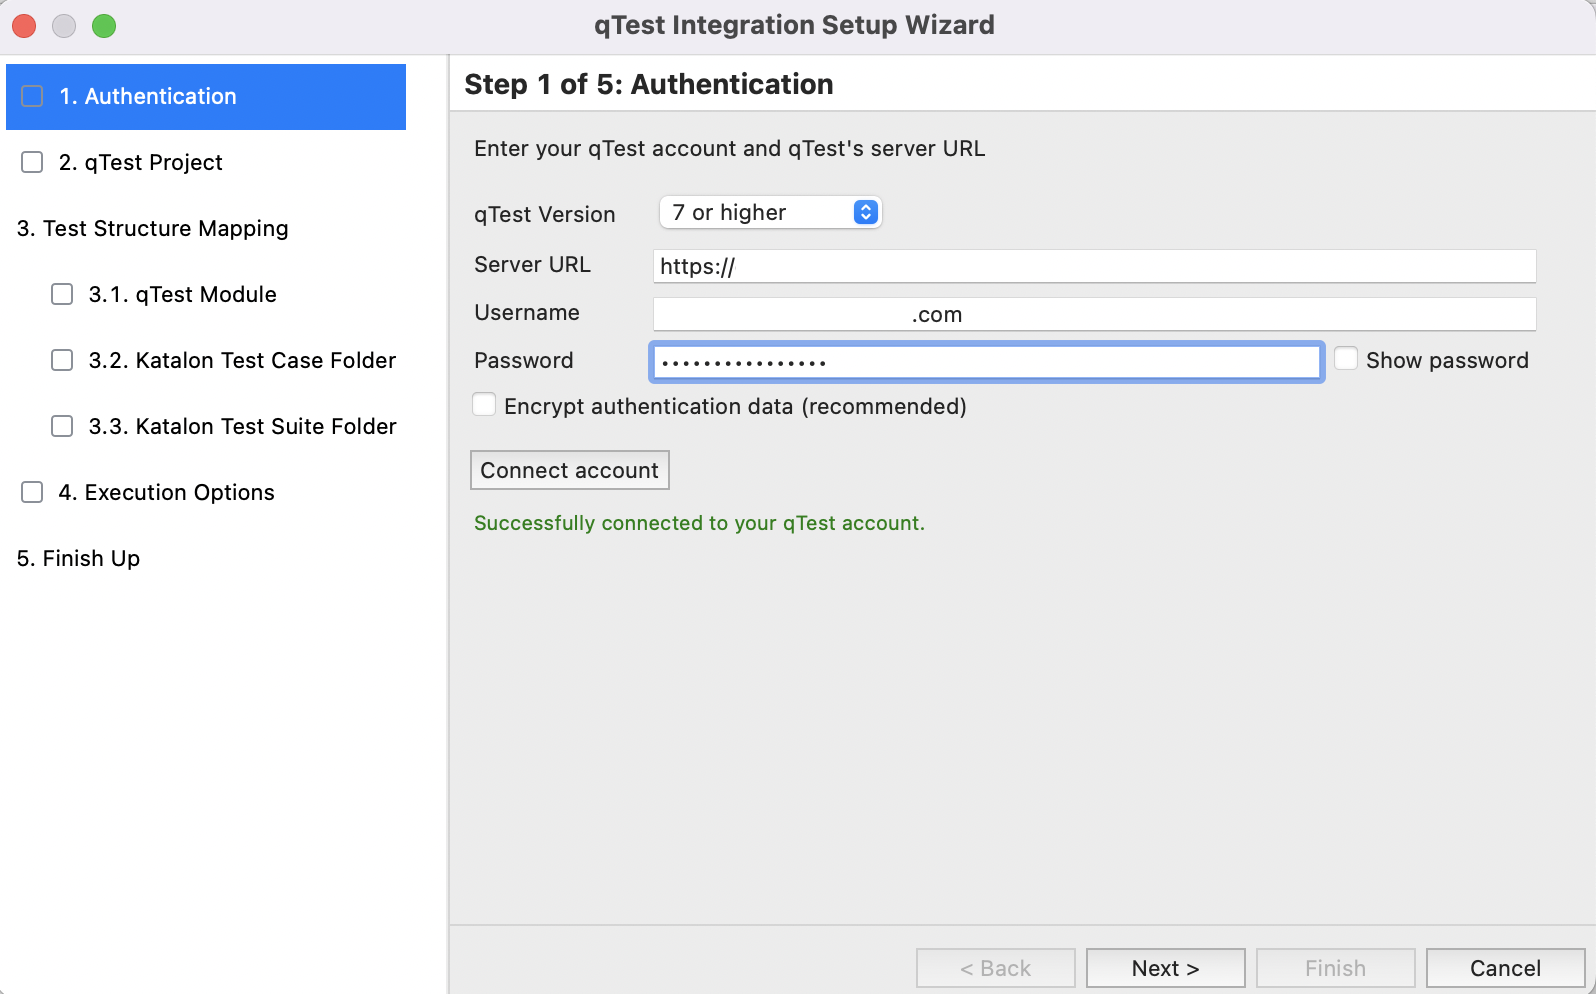 Click Connect account to establish connection with your qTest account.
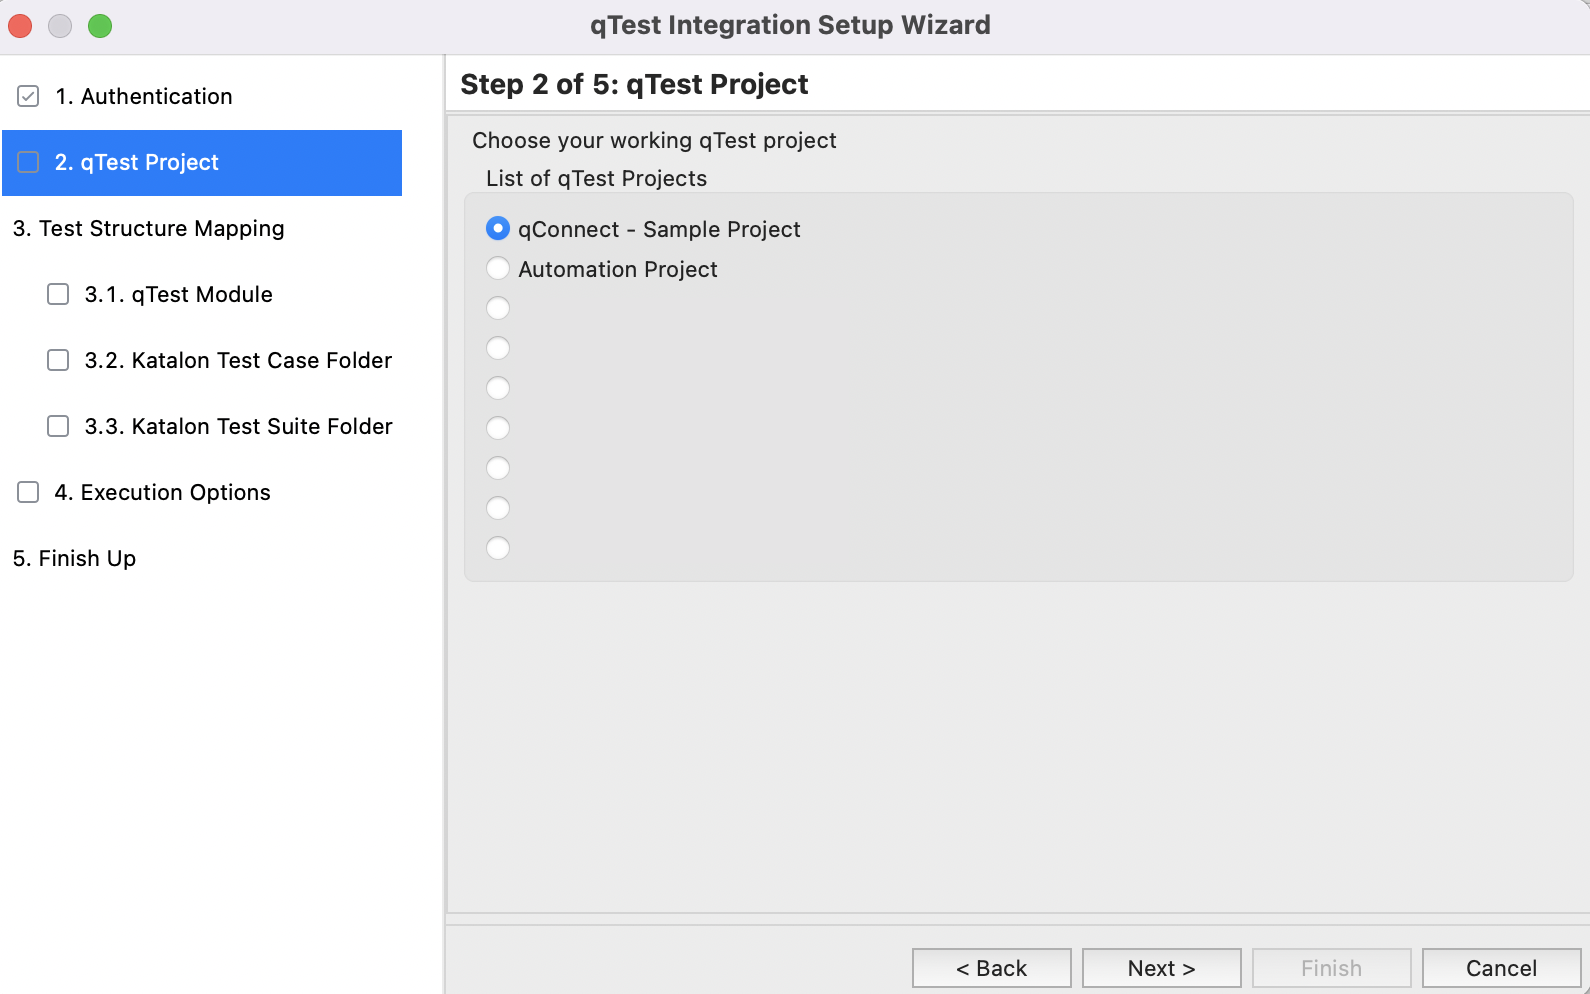
 - In the qTest project section, select your project.
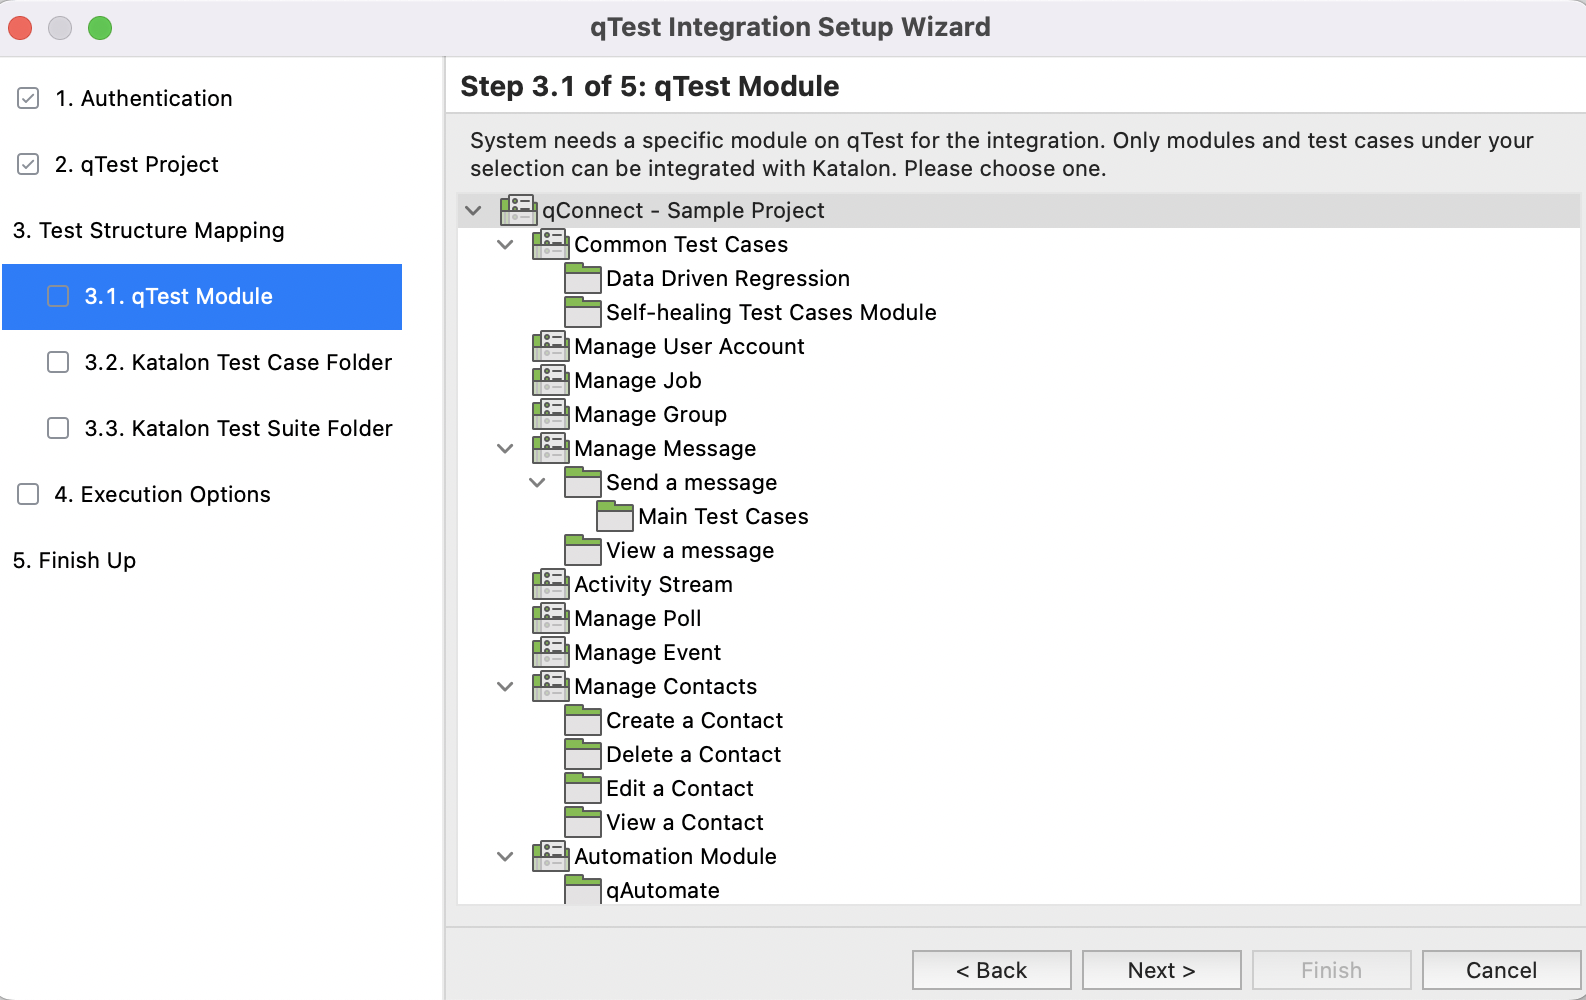
- In the Test Structure Mapping section, you need to map the tests between the two systems.
- In the qTest module section: select one of the qTest modules fetched from your account to store the uploaded Katalon test cases.
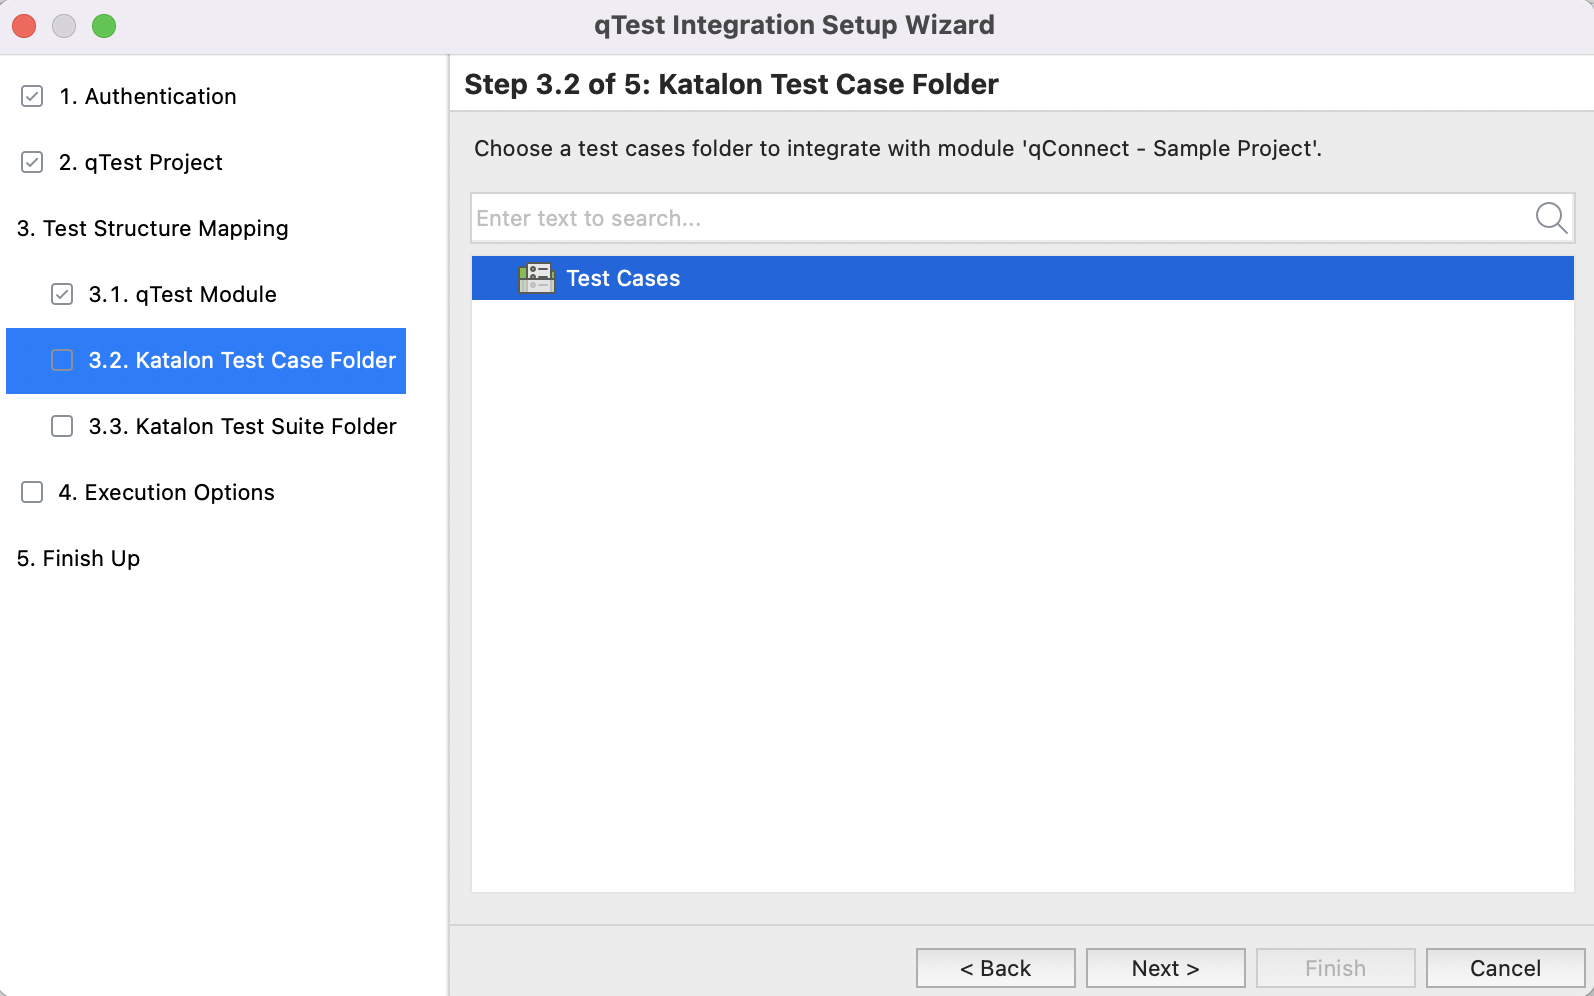
- In the Katalon Test Case Folder section: select a test case folder to integrate with the qTest module selected above.
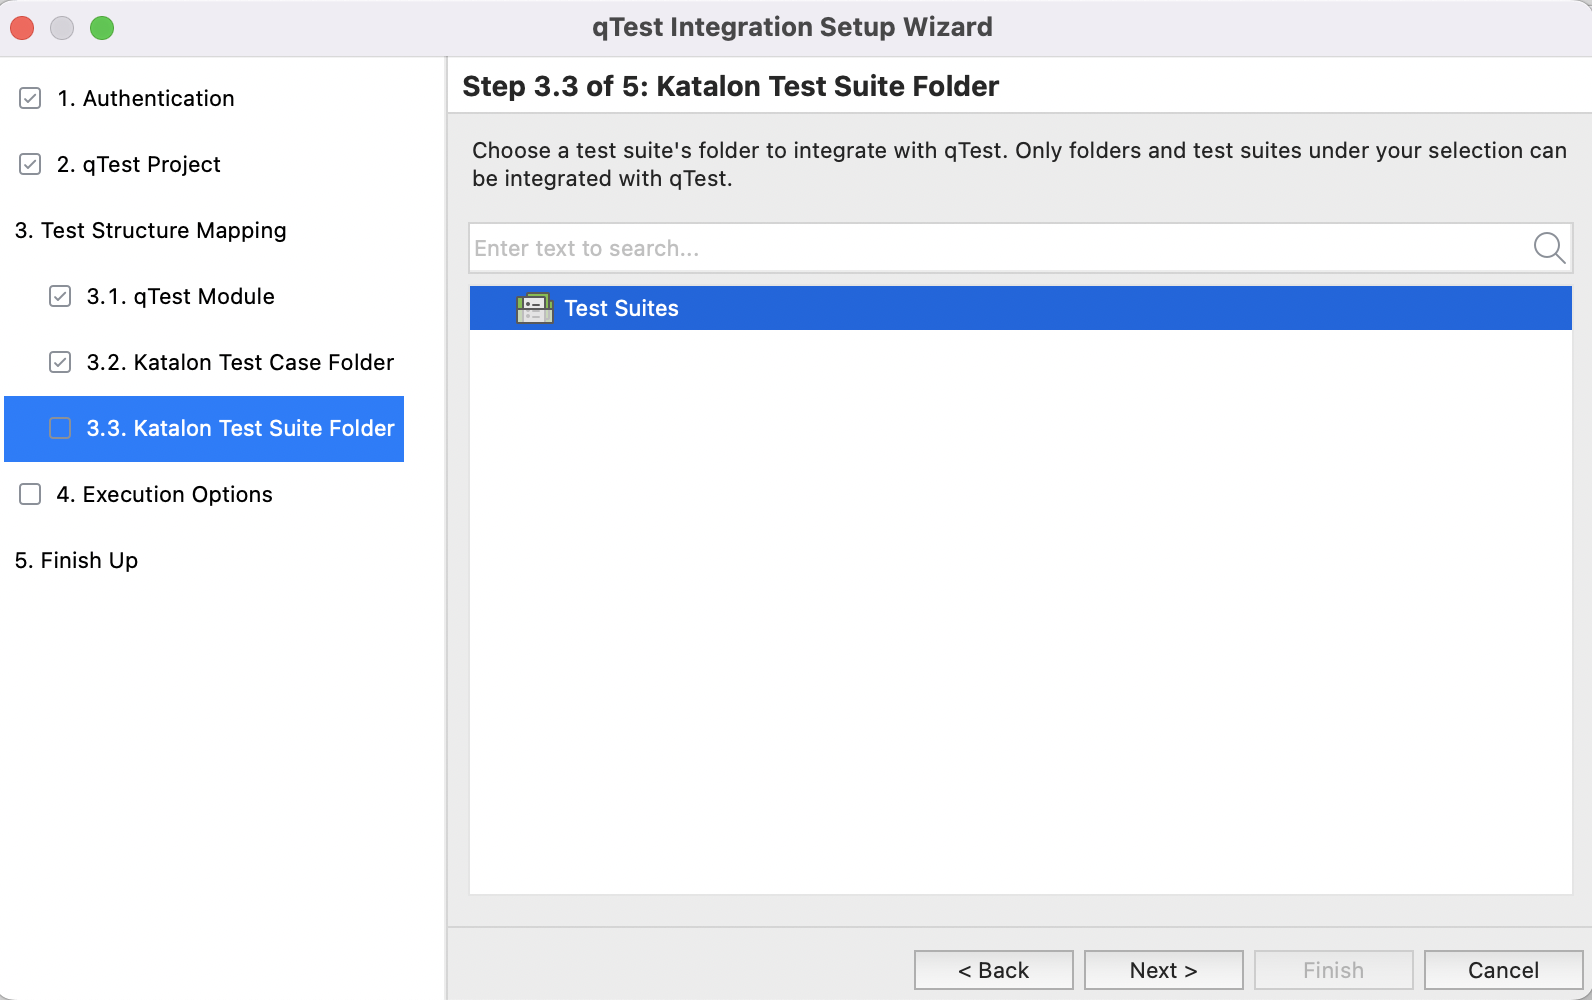
- In the Katalon Test Suite Folder section: select a test suite folder to integrate with the qTest module selected above.
- In the qTest module section: select one of the qTest modules fetched from your account to store the uploaded Katalon test cases.
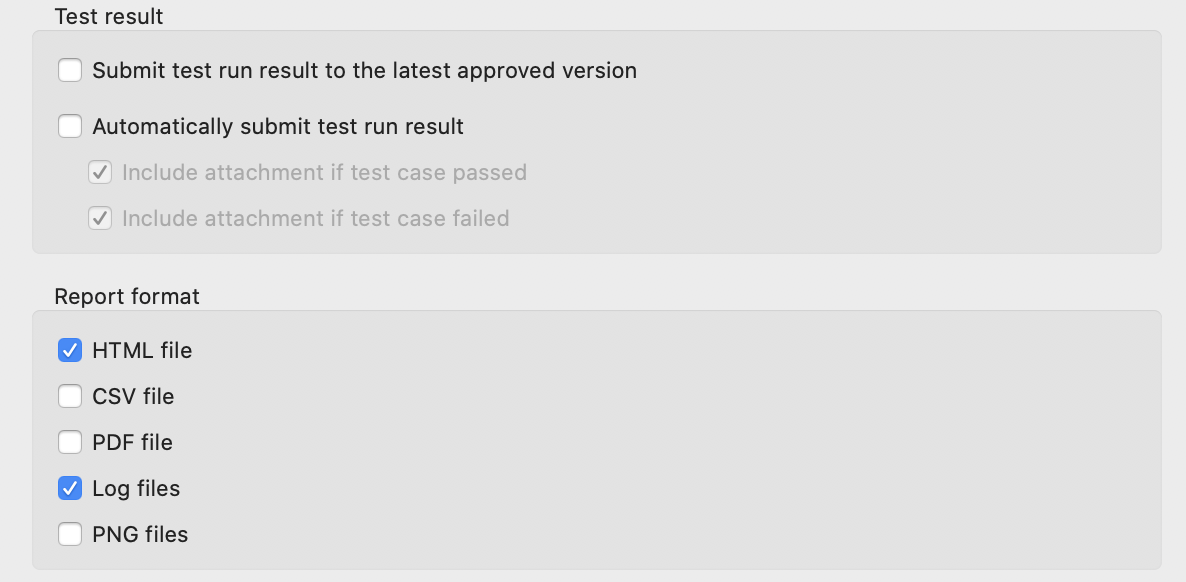
- In the Execution Options section, choose the settings for uploading results to qTest.
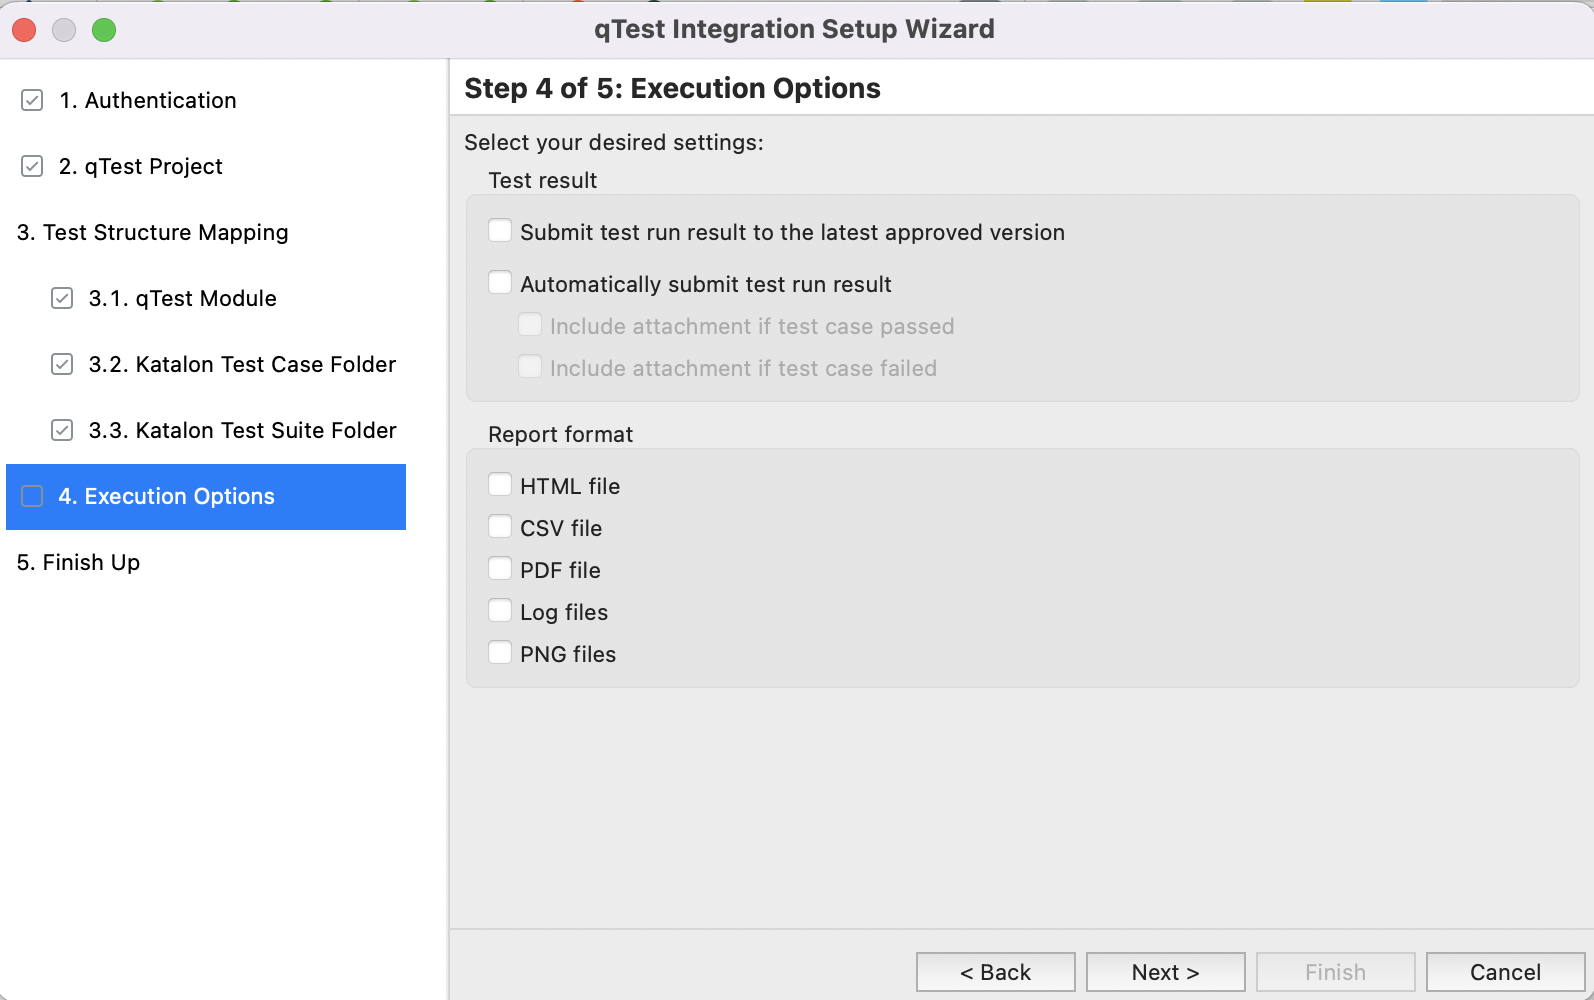
Field Description Automatically submit test run result Results of executed test cases are uploaded automatically to qTest. Submit test run result to the latest approved version Test run results are submitted to the latest approved version of the mapped qTest test case. Report format Additional attachments for reports to be uploaded to qTest. These report formats only apply to test suites. To learn more about test suite and test suite collection reports, see View test suite and test suite collection reports in Katalon Studio. - Click Finish.
Set up qTest integration manually
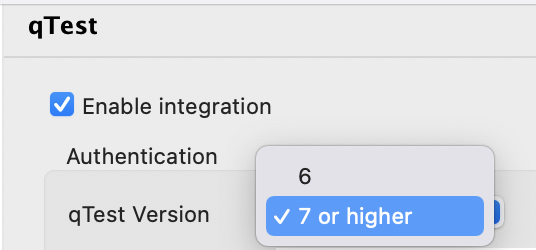
- In the Authentication section, select your qTest version.We recommend selecting 7 or higher. This is because earlier versions might be deprecated soon.
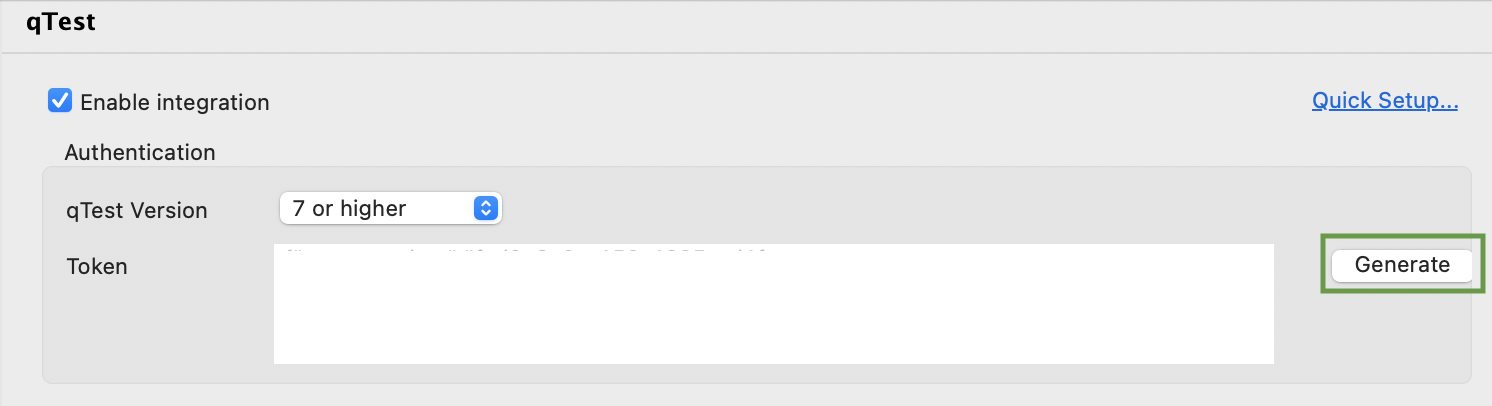
- To generate a token for authentication, you can choose either log in with username and password or with an SSO token.
- Log in with username and password
Click Generate. The Generate new token dialog opens.
Fill in your qTest account information. Then click Generate.
Katalon Studio connects to qTest using the provided information. The token is generated.
Log in with SSO token
If you are using Single Sign-On (SSO) to log in to qTest, ignore the Generate button, copy and paste the following token format in the Token text field:
{"access_token":"<bearer_token_value>","token_type":"bearer","scope":"read write create delete administration execute import export share baseline"}To find the
<bearer_token_value>, access qTest Manager. Sign in with your SSO account. Navigate to the Download qTest Resources page. In the API & SDK section, you can see the Bearer Token value.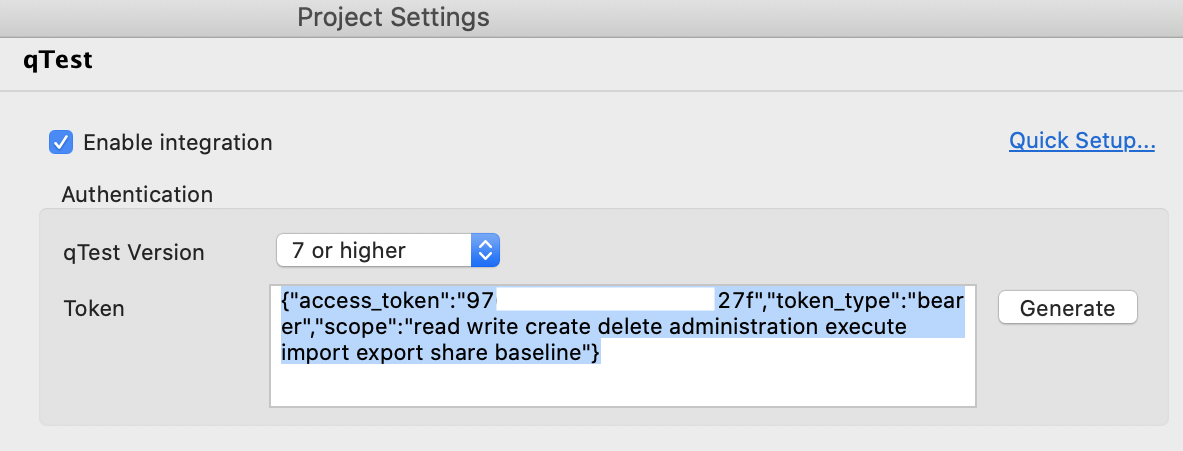
- Select your preferred test submission method from the following options:
Field Description Automatically submit test run result Results of executed test cases are uploaded automatically to qTest. Submit test run result to the latest approved version Test run results are submitted to the latest approved version of the mapped qTest test case. Report format Additional attachments for reports to be upload to qTest. These report formats only apply to test suites. To learn more about test suite and test suite collection reports, see View test suite and test suite collection reports in Katalon Studio. - To conduct test case mapping, follow these steps:
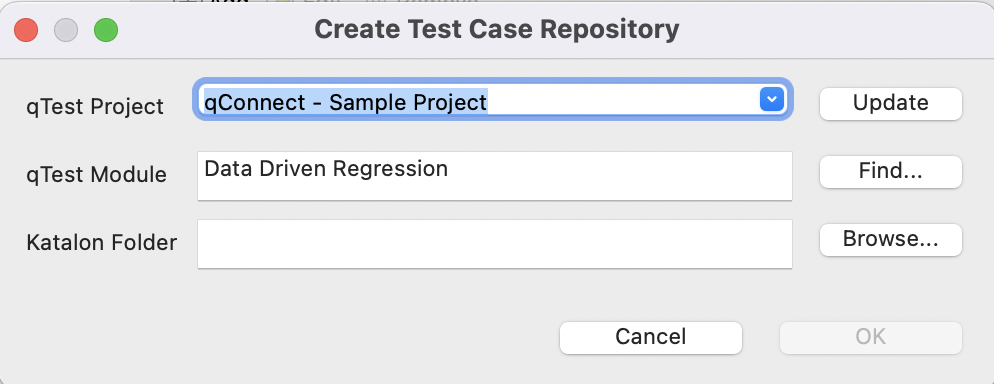
- To create mappings between qTest modules and Katalon test case folders, go to Project > Settings > Plugins > qTest > Test Case Repositories.
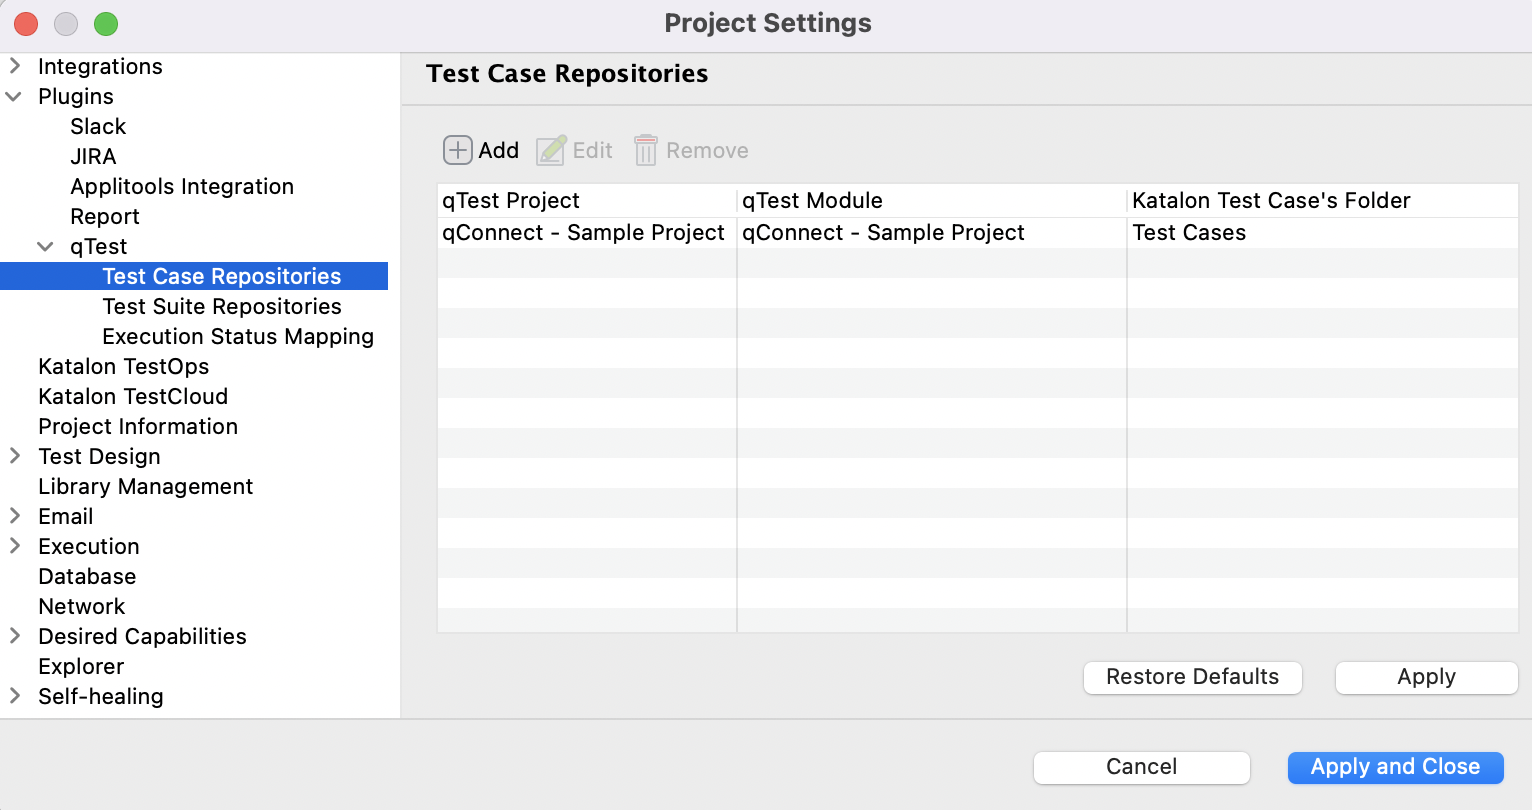
- Click OK when you are done.
- To create mappings between qTest modules and Katalon test case folders, go to Project > Settings > Plugins > qTest > Test Case Repositories.
- To conduct test suites mapping, follow these steps:
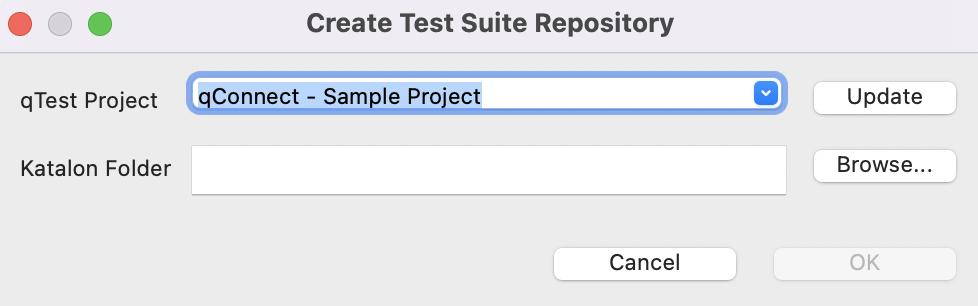
- To create mappings between qTest projects and Katalon test suite folders, go to Project > Settings > Plugins > qTest > Test Suite Repositories.
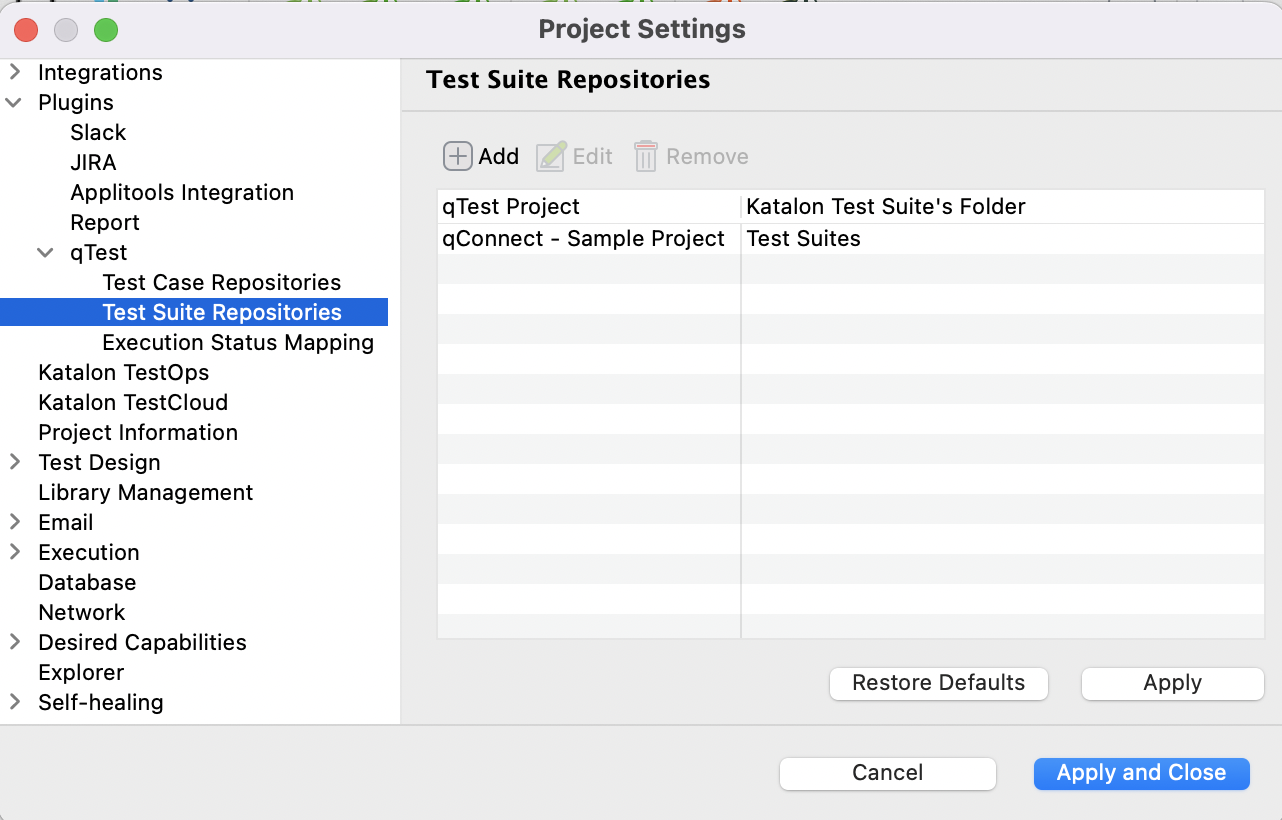
- Click OK when you are done.
 Note:
Note:You should select test suites that contain test cases defined in the Test Case Repositories settings.
- To create mappings between qTest projects and Katalon test suite folders, go to Project > Settings > Plugins > qTest > Test Suite Repositories.
Map test status between qTest and Katalon Studio
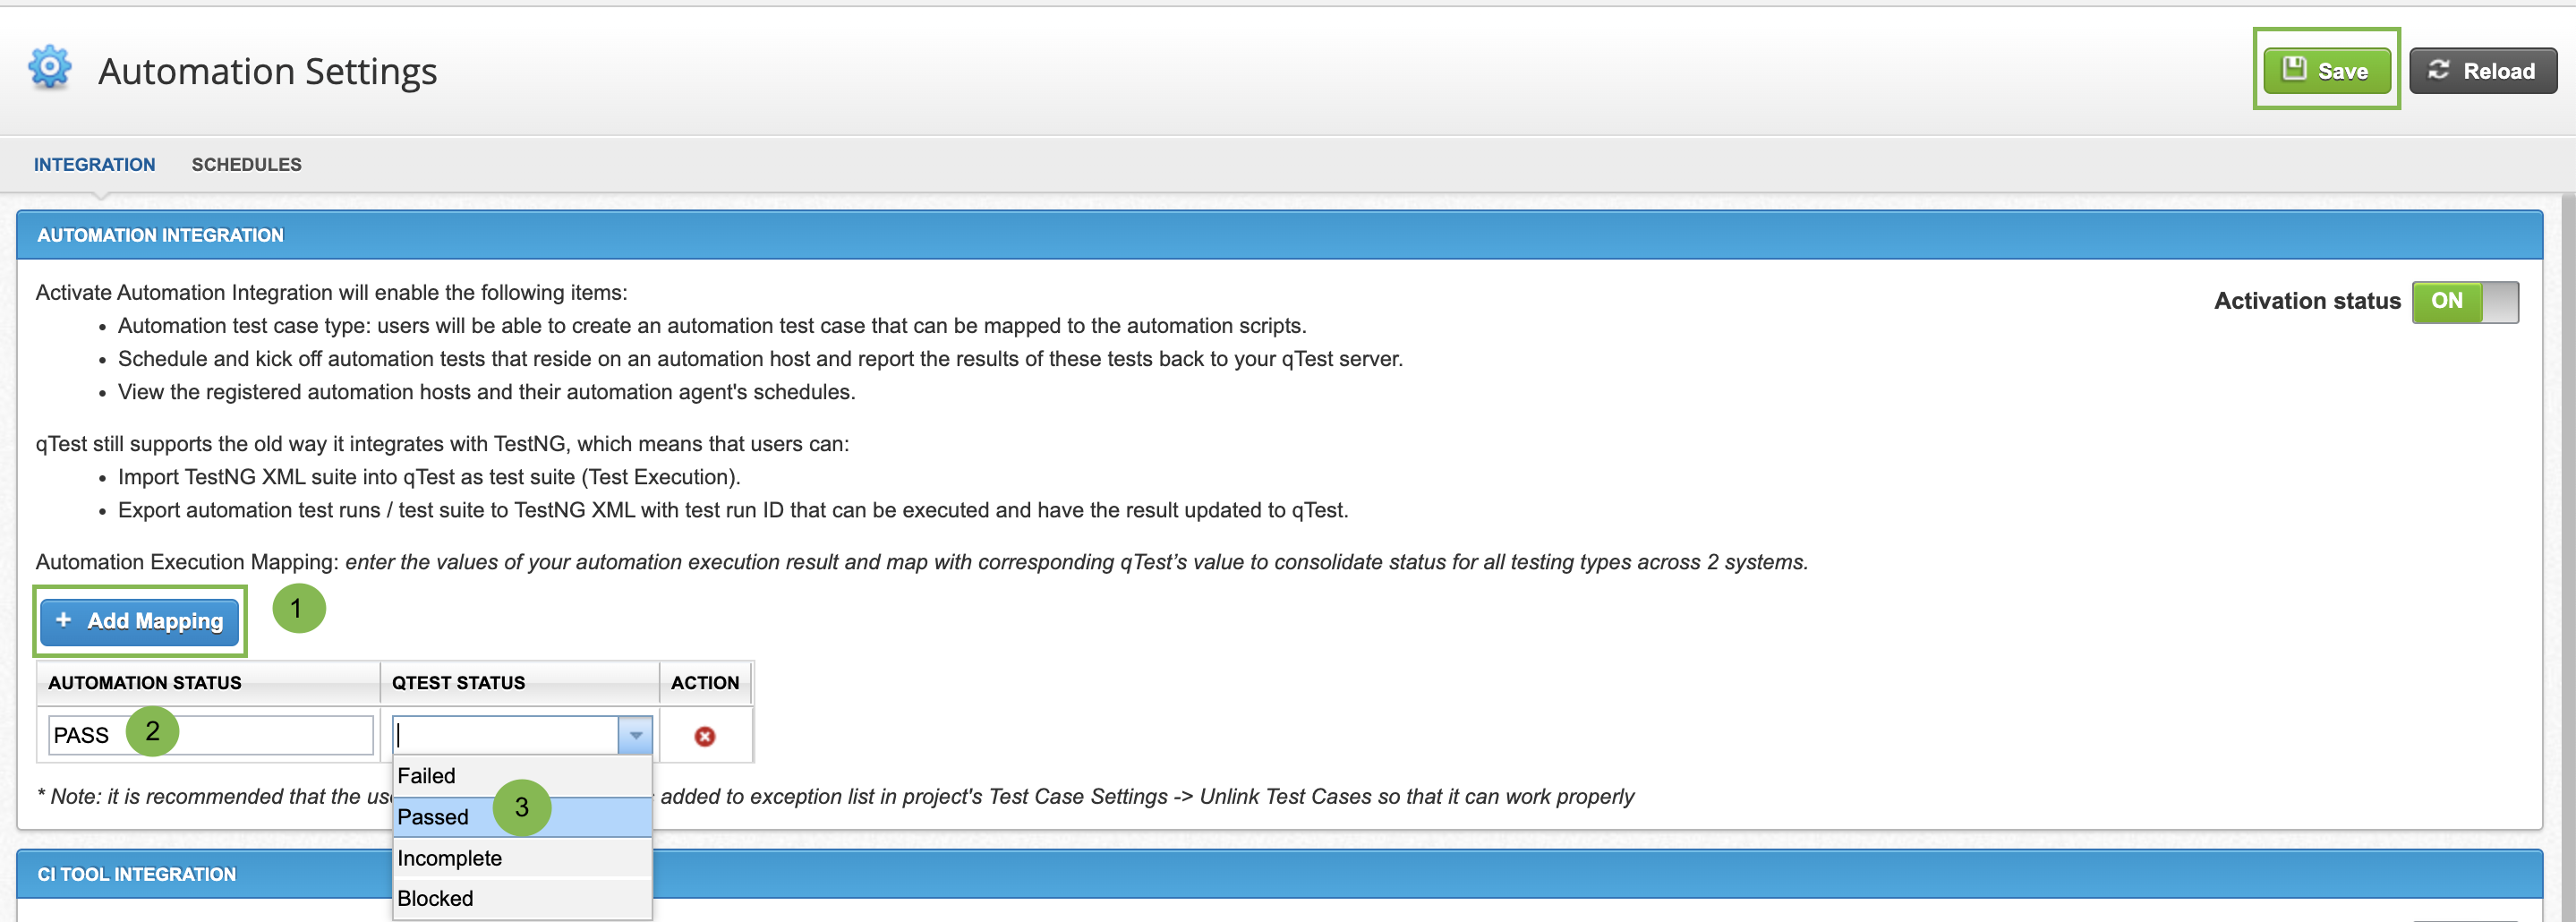
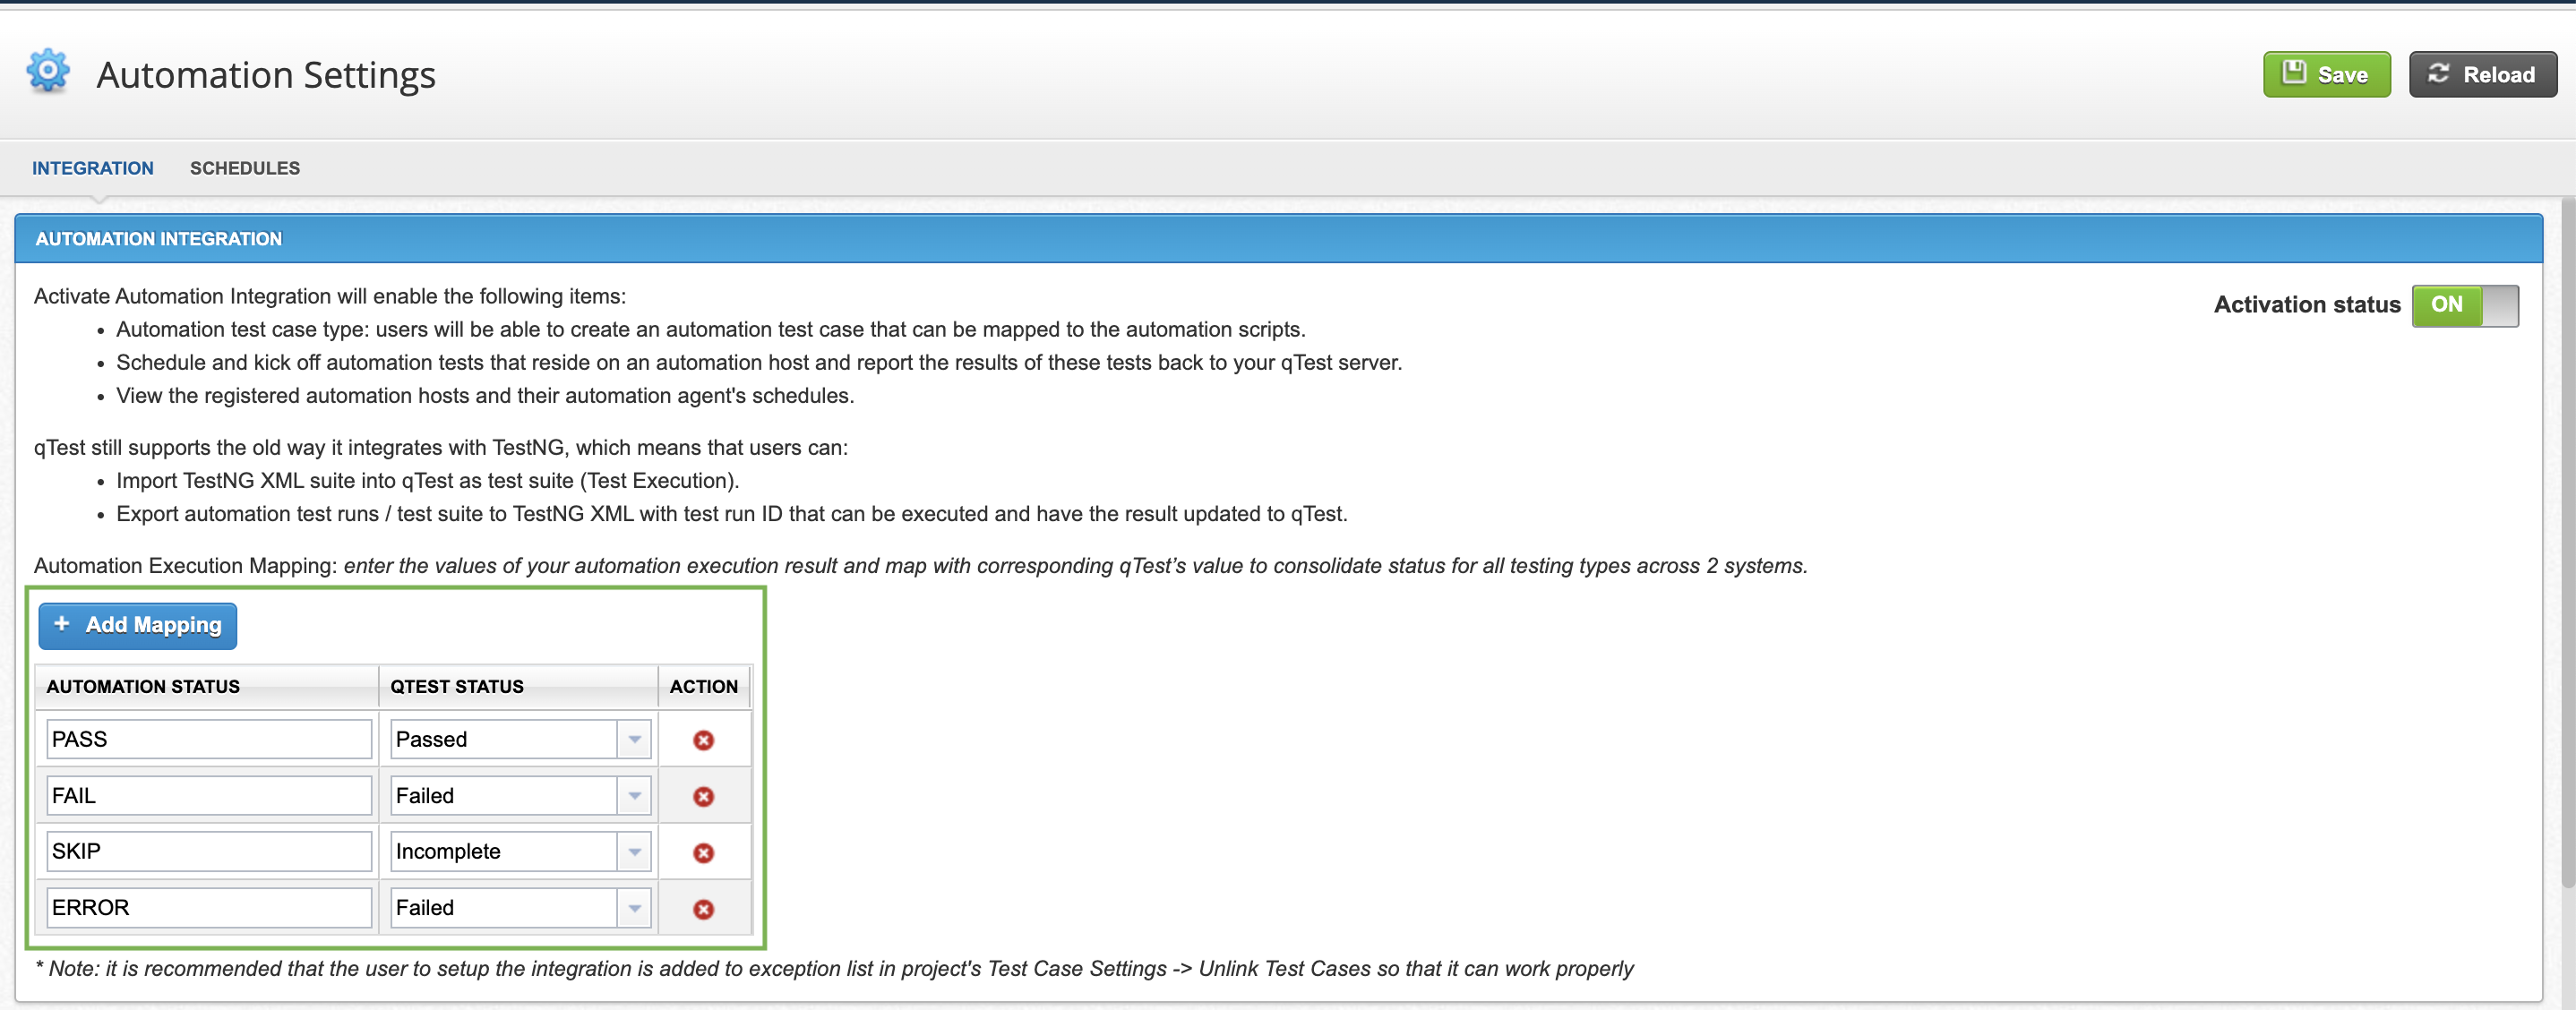
- Open your qTest project, activate the Automation Integration settings and map the automation status to the test run status in qTest. You can learn more about activating the Automation Integration settings in the qTest document here: Activate Automation Integrations.
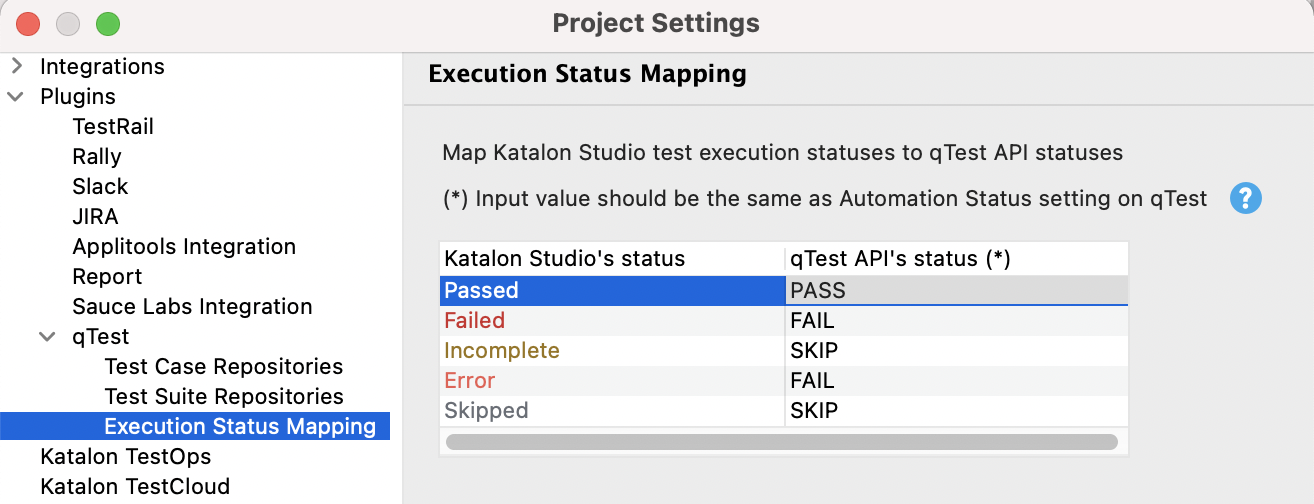
- Then, go to Katalon Studio and go to Project > Settings > Plugins > qTest > Execution Status Mapping. In the qTest API's status column, input the value that matches the Automation Status column you configured from step 1.
Manage test cases between qTest and Katalon Studio
After enabling qTest integration in Katalon Studio, you can perform interactions between qTest and Studio test cases.
You have test cases in Studio but not in qTest, you can upload Studio test cases to qTest. You can do so with one or many test cases.
You have test cases in qTest but not in Studio, you can download qTest test cases to Studio.
You can have existing test cases in both qTest and Studio, you can map a Katalon test case to a qTest test case by database ID.
You can check which Katalon Studio test cases need updating when the integrated qTest test cases change the test step content and retrieve the latest content.
You can also disintegrate a qTest and Katalon Studio test case connection if you no longer need to submit test results from the test case.
Upload Katalon Studio test cases to qTest
Katalon allows you to upload a test case or all test cases in a test case folder to qTest.
The test case or the test case folder you wish to upload must locate in the integrated test case folder with qTest. To learn more about integrating a test case folder with qTest, refer to step 4 in manual setup. See above: Set up qTest integration manually.
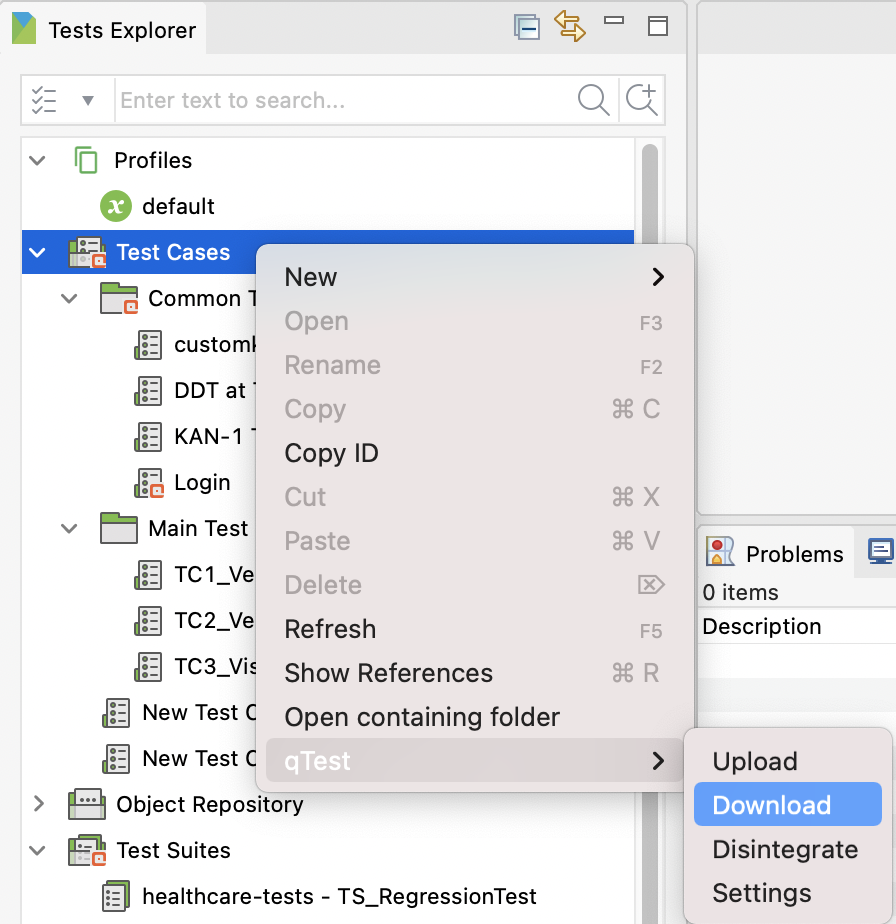
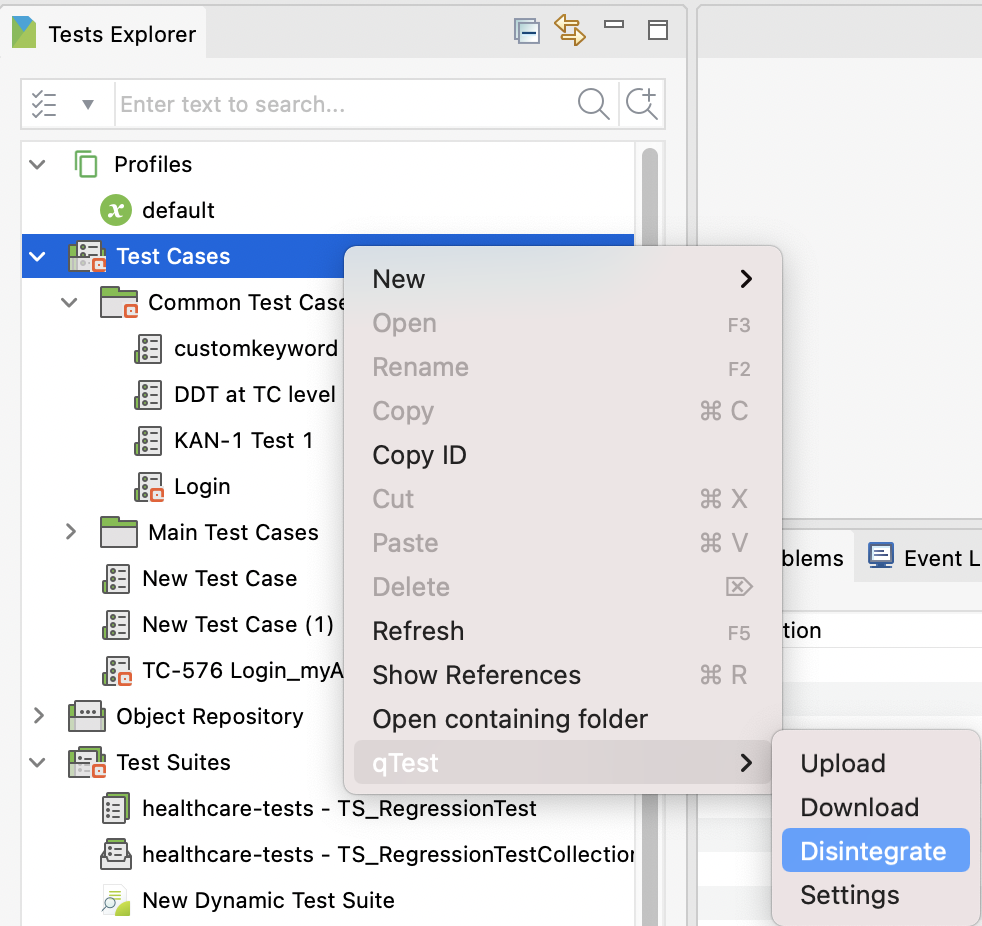
- To upload a test case to qTest, in the Tests Explorer panel, right-click on the test case to trigger its context menu. Select qTest > Upload.
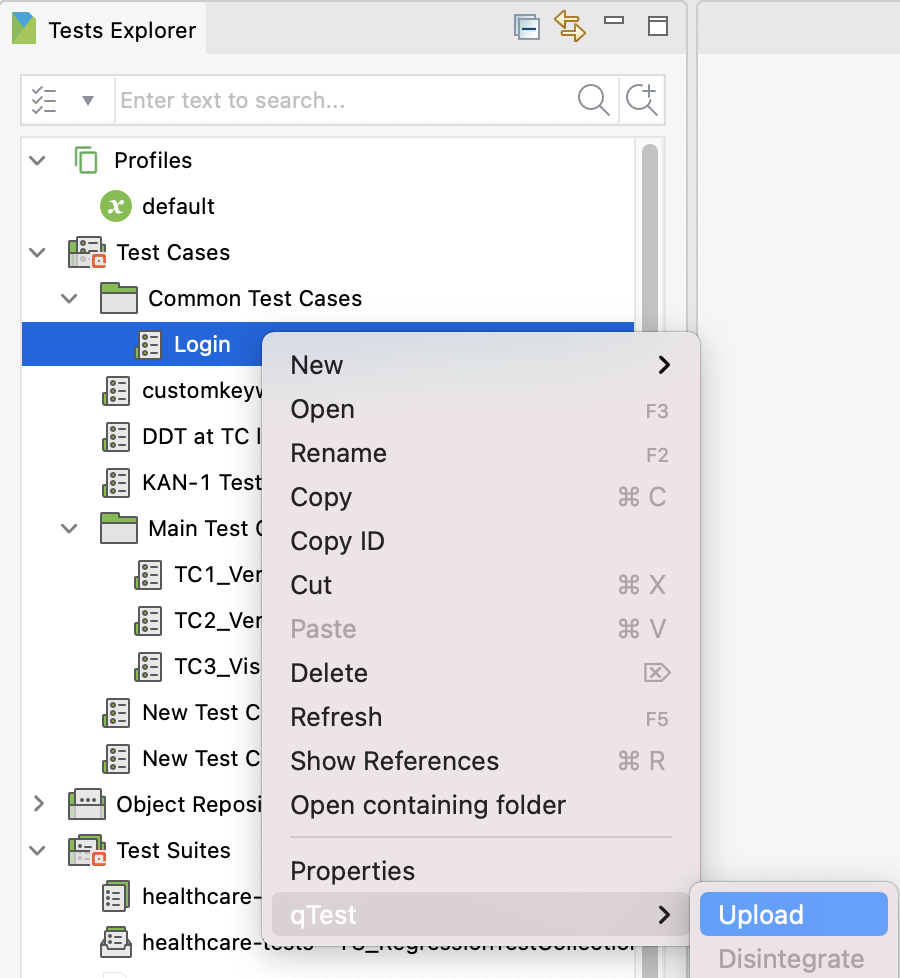
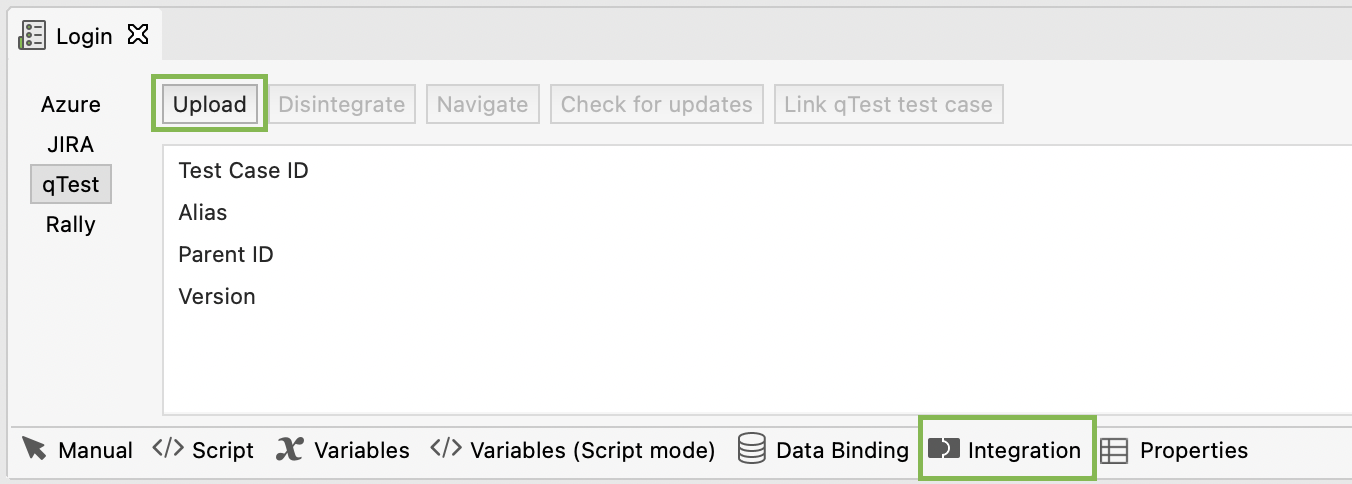
- Alternatively, you can also navigate to the Integration tab of the test case. Click Upload.
- Select qTest > Upload.
![]()
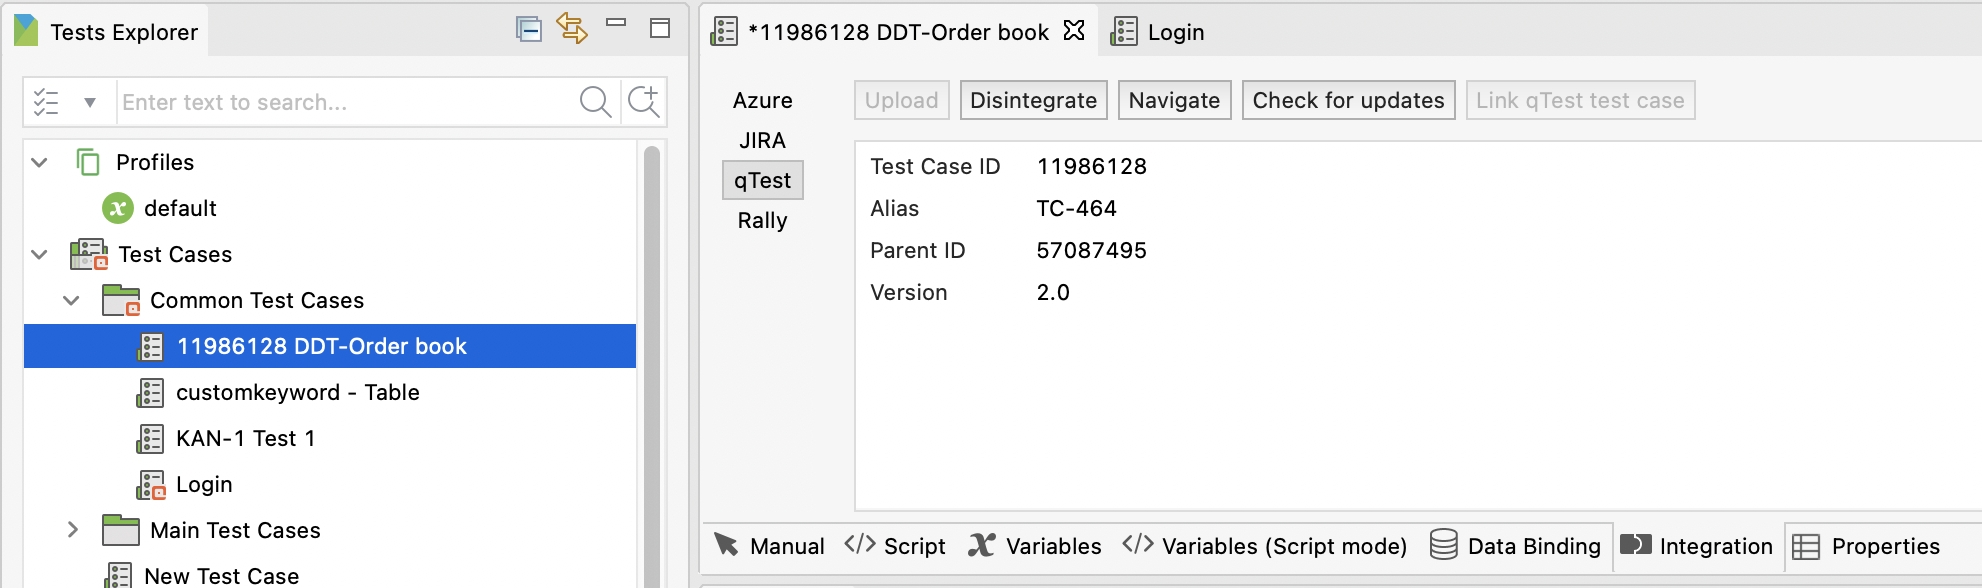
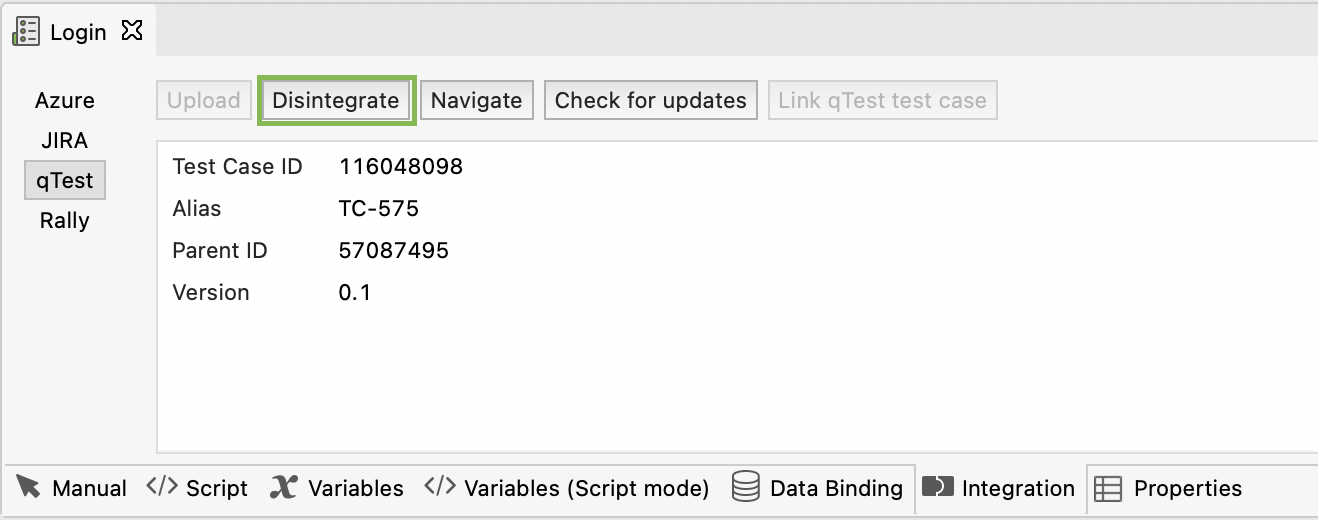
Click Navigate to go to qTest to verify whether the Katalon Studio test case is successfully uploaded to the integrated qTest module.
You can also see the following information in the Integration tab of the integrated test case.

| Field | Description |
|---|---|
| Test Case ID | The ID of the integrated qTest test case. |
| Alias | The alias of the integrated qTest test case. |
| Parent ID | The ID of the integrated qTest module. |
| Version | The qTest test case version. |
Download qTest test cases to Katalon Studio
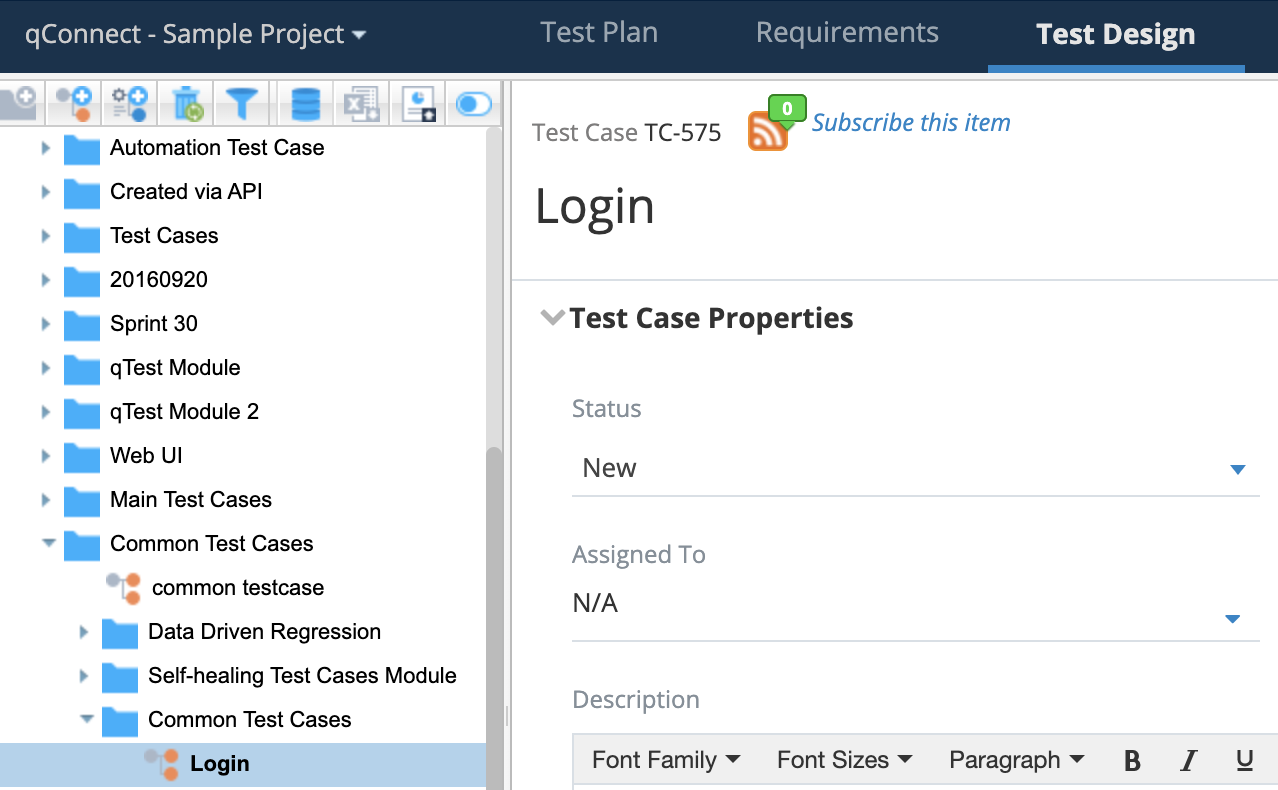
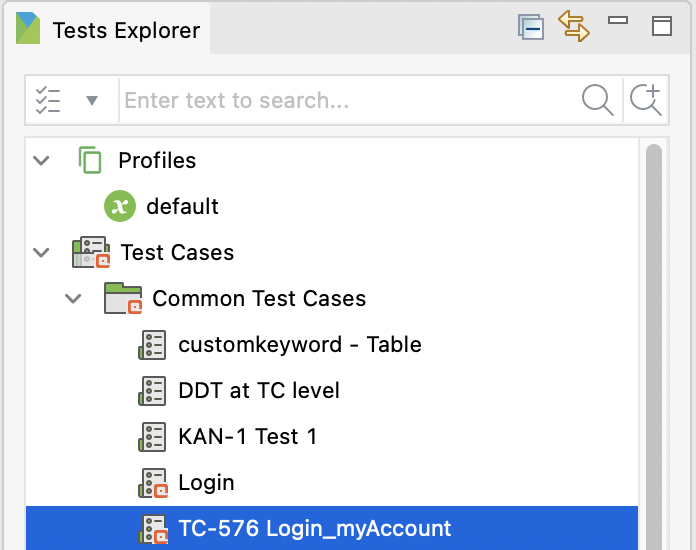
- In qTest, switch to the Test Design tab. Move the test cases you wish to download into the qTest module that is integrated with Katalon Studio. For example, we want to download the Login_myAccount test case to Katalon Studio. We move it to the Common Test Cases qTest module, which we have integrated with Katalon Studio beforehand.

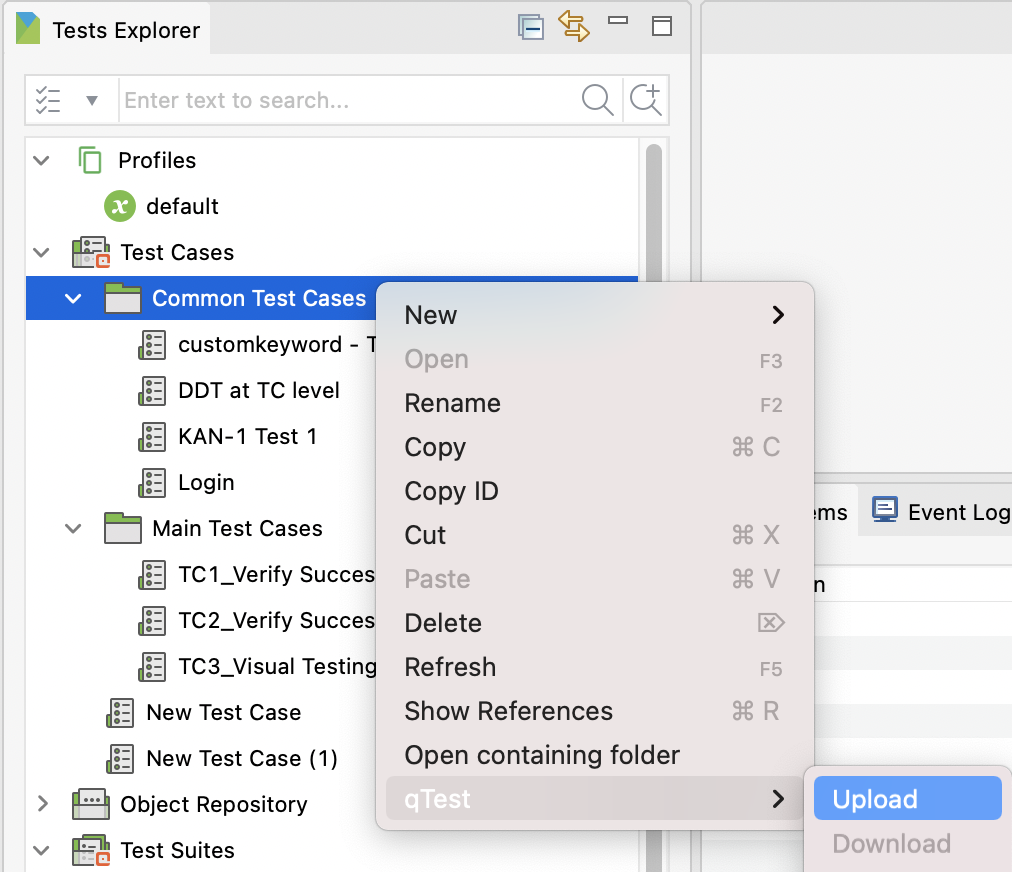
- Switch to Katalon Studio. In the Tests Explorer panel, right-click the test case folder that is integrated with the above qTest module. Select qTest > Download.
- The Downloaded test case preview dialog opens. You can see all test cases in the integrated qTest module that are available for download. Select the test case you want to download. Click OK to continue.
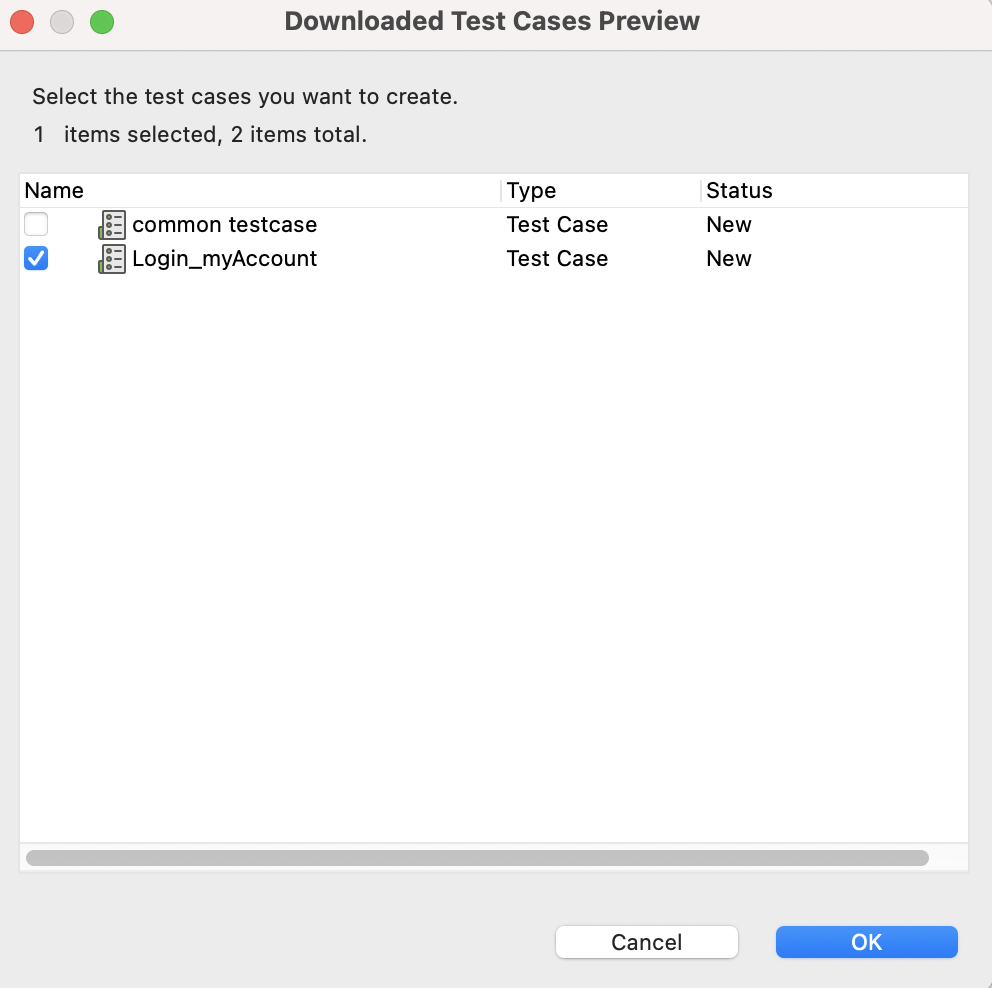 Note:
Note:Test cases that are downloaded will not be displayed again.
Map a Katalon Studio test case to a qTest test case by database ID
The test case you wish to upload must locate in the integrated test case folder with qTest. To learn more about integrating a test case folder with qTest, refer to step 4 in manual setup. See above: Set up qTest integration manually.
- In qTest, you can get a qTest test case database ID in the test case URL.

- Click Link qTest test case.

- Save your change when the test case is linked to qTest successfully.
Manage qTest test cases version and synchronization
The associated test case is uploaded to qTest.
- Wait for the test engine to retrieve information from the qTest server.
- If you wish to save the latest content of test steps and test case version, in the pop-up qTest Integration Update dialog, click Sync up.
Disintegrate Studio test cases from qTest
Katalon allows you to disintegrate a test case or all test cases in a test case folder from qTest.
- To break the connection between a Katalon Studio test case and qTest, navigate to the Integration tab of the test case. Click Disintegrate.
 Alternatively, you can right-click the test case you wish to disintegrate, select qTest > Disintegrate.
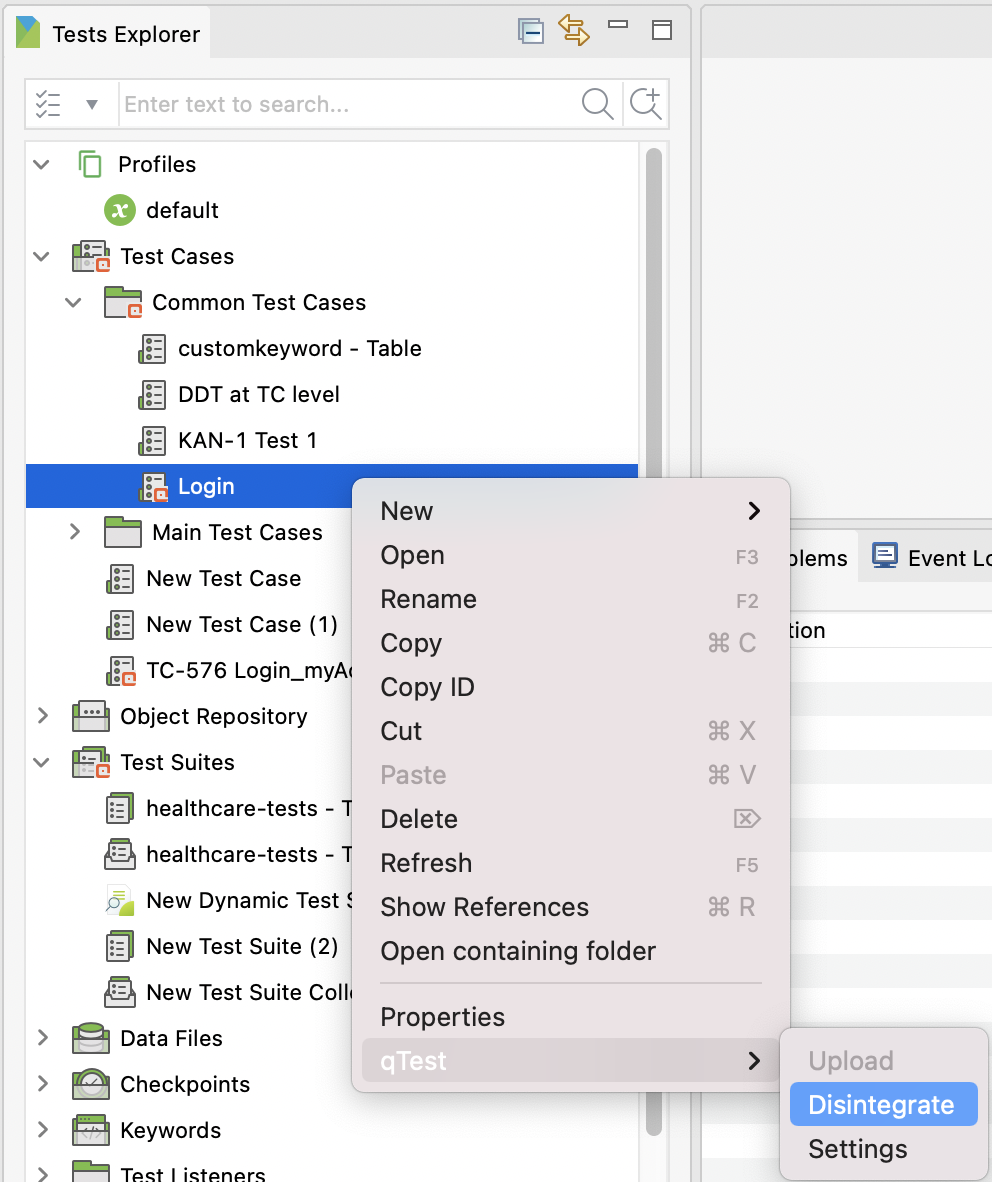
- In the Tests Explorer view, right-click the test case folder you wish to disintegrate. Select qTest > Disintegrate.
Manage test suites between qTest and Katalon Studio
After creating connections between qTest - Studio test cases, you need to upload Studio test suites to qTest. You can do this automatically or manually.
If you no longer want to upload test suite results to qTest, you can also disintegrate the connection.
Upload Katalon Studio test suites to qTest automatically
The test suite you wish to upload to qTest should be located in the integrated test suite folder with qTest. To learn more about integrating a test suite folder with qTest, refer to step 5 in the manual setup. See above: Set up qTest integration manually.
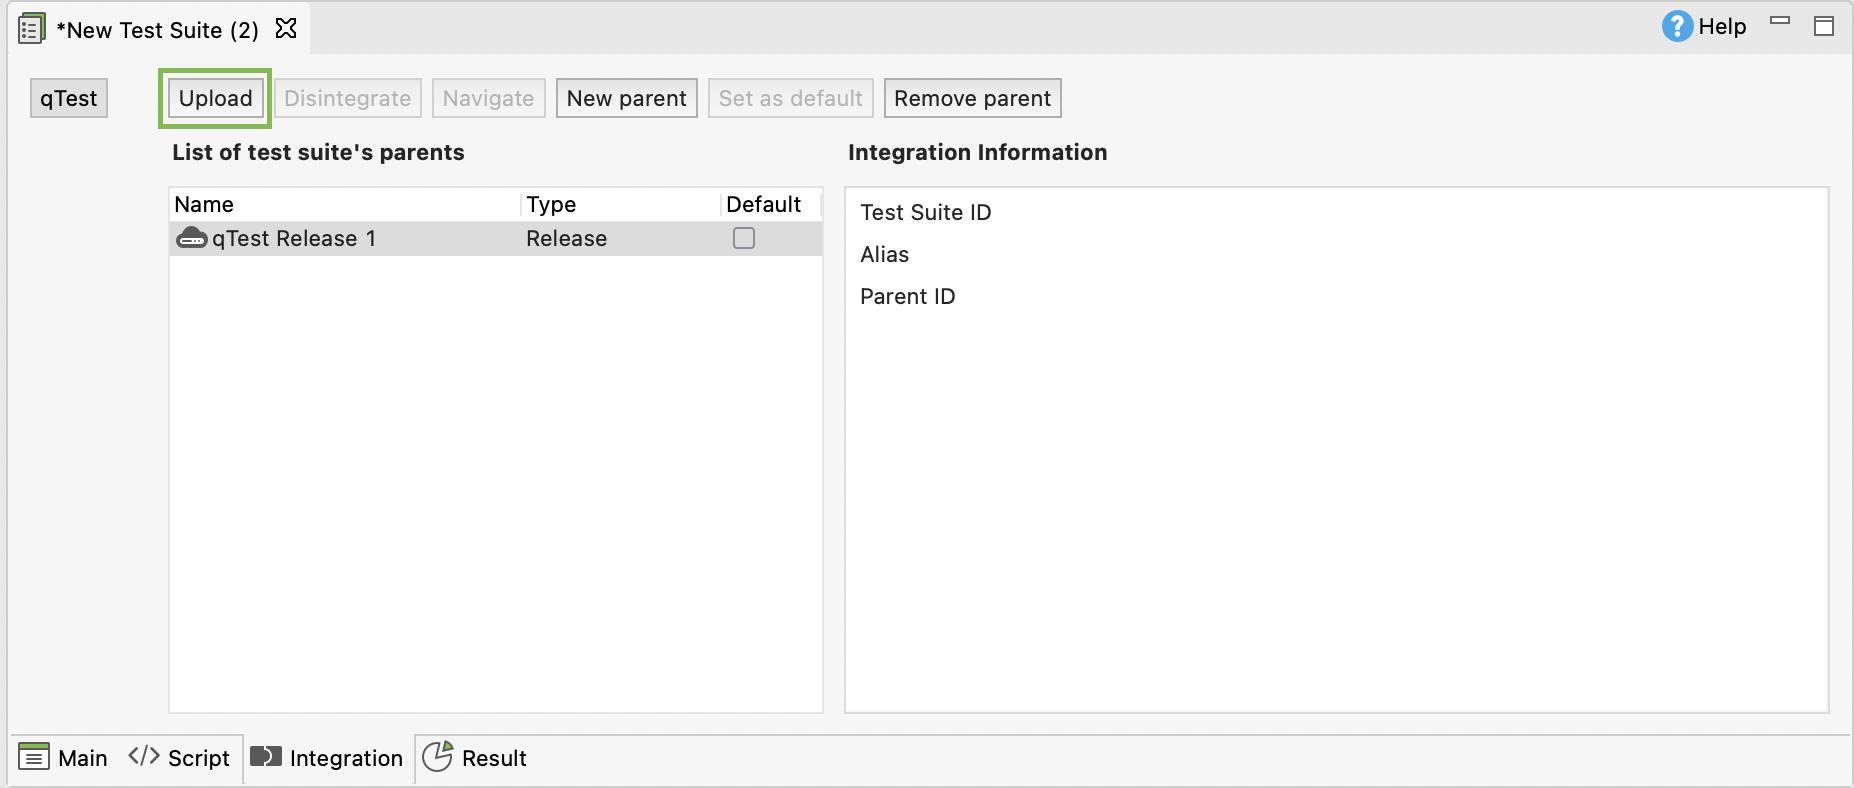
- Navigate to the Integration tab of the test suite. Click on the New parent button.
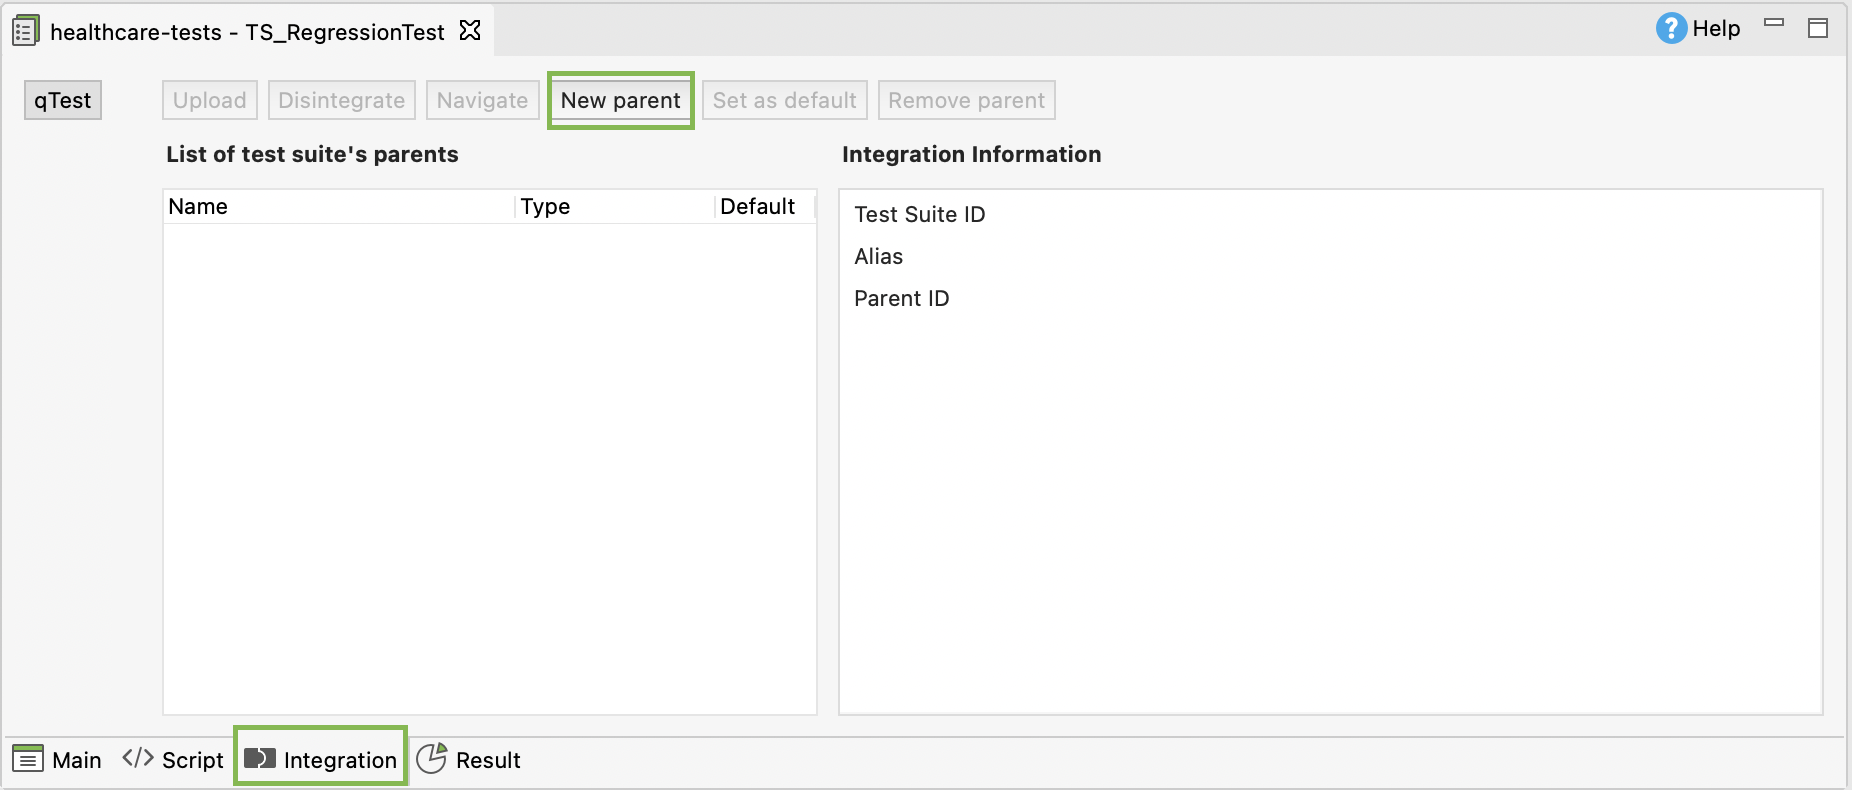 The Create Test Suite's parent dialog opens.
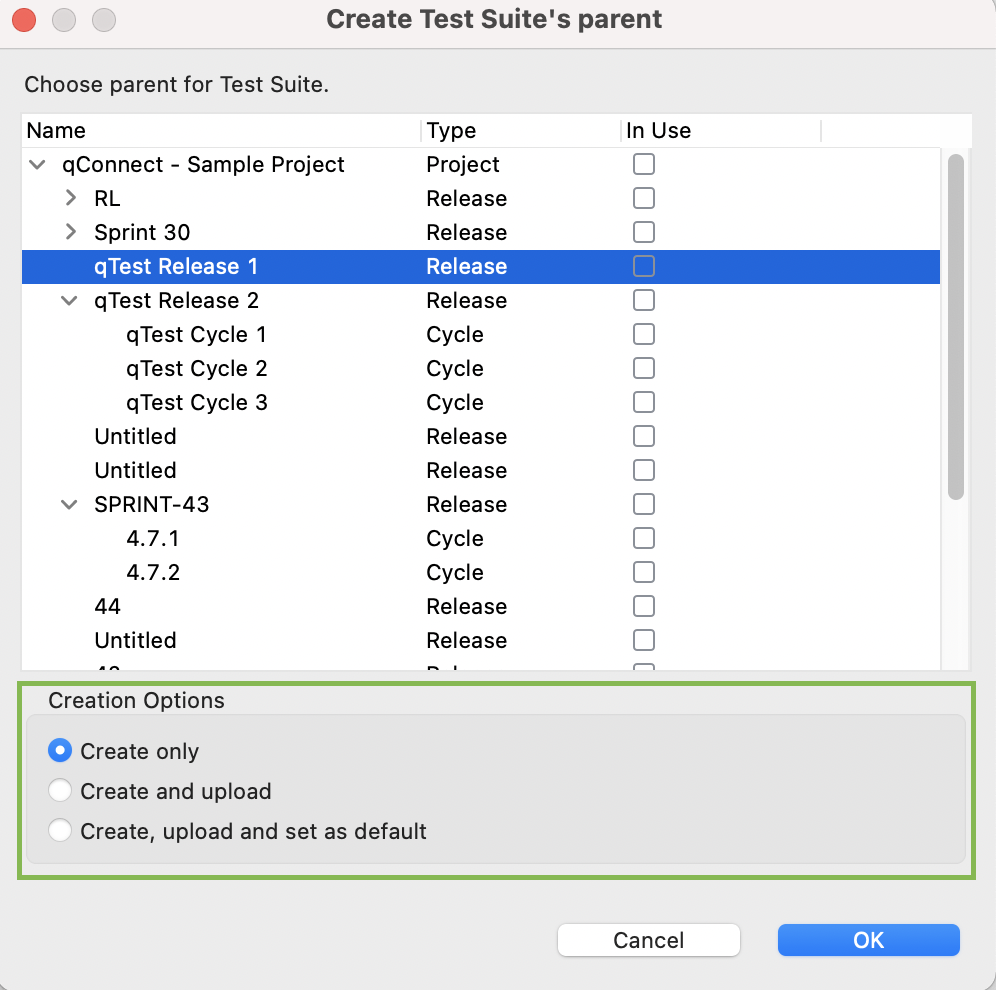
 - In the Creation Options section, choose one of the the following options to upload test suites automatically:
Option Description Create and upload - Create an association between the Katalon test suite and the selected qTest location.
- Upload the Katalon test suite to the selected qTest location.
Create, upload, and set as default - Create an association between the Katalon test suite and the selected qTest location.
- Upload the Katalon test suite to the selected qTest location.
- Set the qTest location as default for uploading the execution result of the Katalon test suite.
Note:A test suite can be registered in many qTest locations, but only one qTest location can be set as default.

- Click OK to continue. Once integrated, you can see the location and the name of the parent folder on qTest.
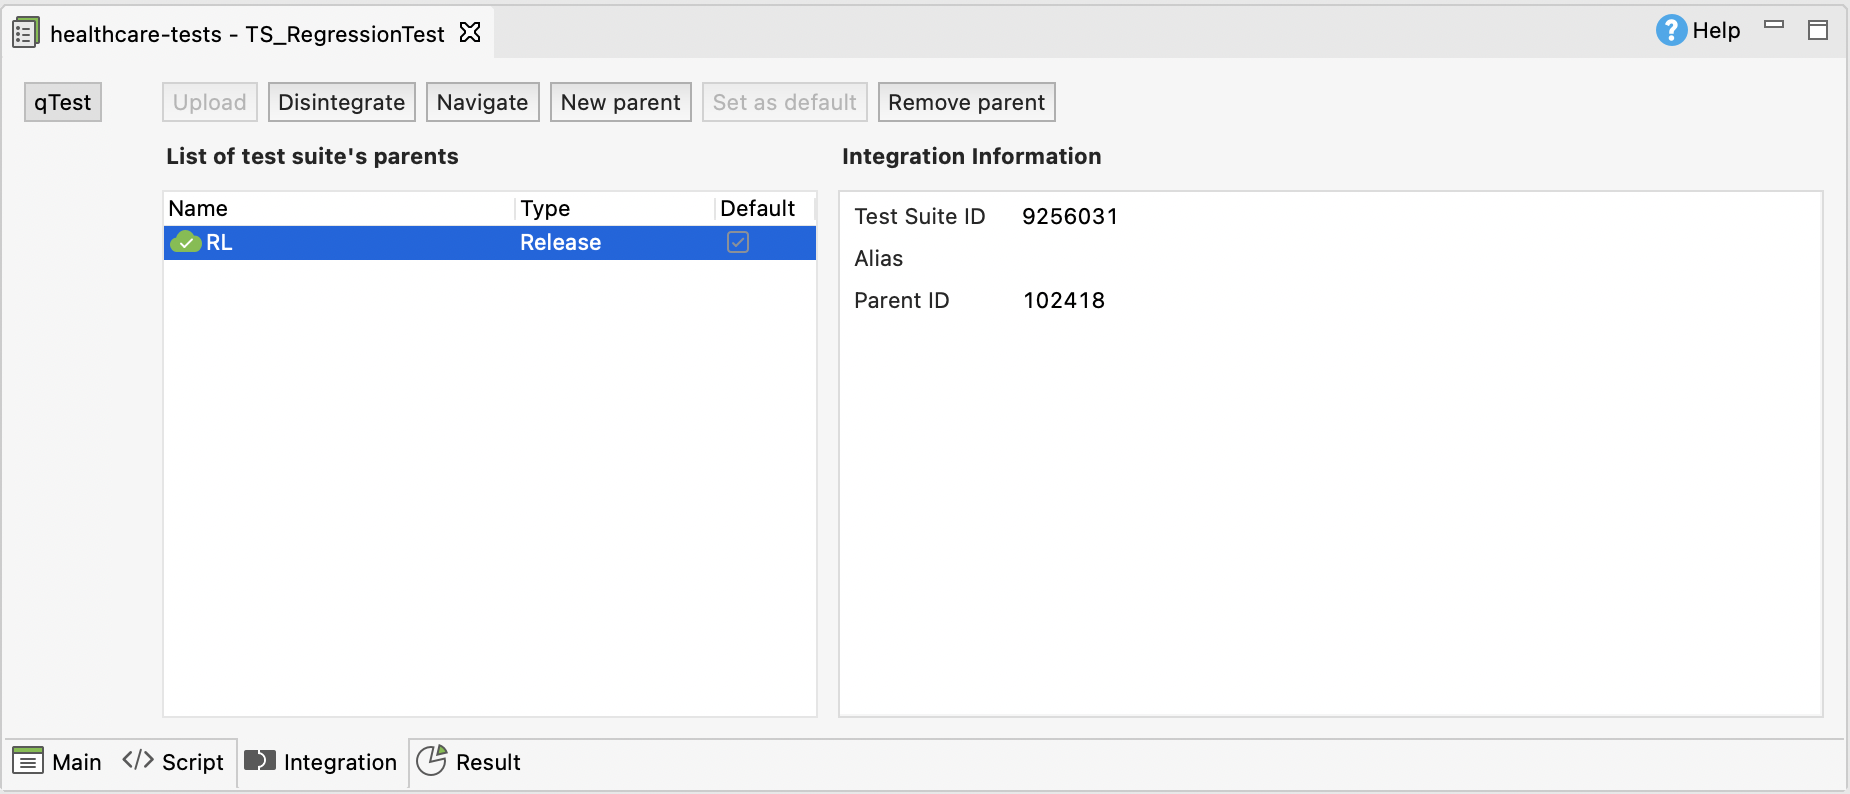
Icon Description 
The Katalon test suite is integrated with the qTest location. 
The Katalon test suite is not integrated with the qTest location. You can also view the integration information, including Parent ID, Test Suite ID, and Alias, as shown below:Field Description Test Suite ID The ID of the integrated qTest test suite. Alias The alias of the integrated qTest test suite. Parent ID The ID of the integrated qTest location. Note:You can quickly open the uploaded test suite in qTest by clicking Navigate.
Upload Katalon Studio test suites to qTest manually
Katalon allows you to upload a test suite or all test suites in a test suite folder to qTest.
- In the Creation Options section, select the Create only option.This option allows you to create an association between the Katalon test suite and the selected qTest location.
- To upload a test suite manually to the predefined qTest location, navigate to the Integration tab of the test suite. In the List of test suite's parents window, select a qTest location, then click Upload.
 Alternatively, you can also right-click on the test suite to trigger its context menu. Select qTest > Upload.
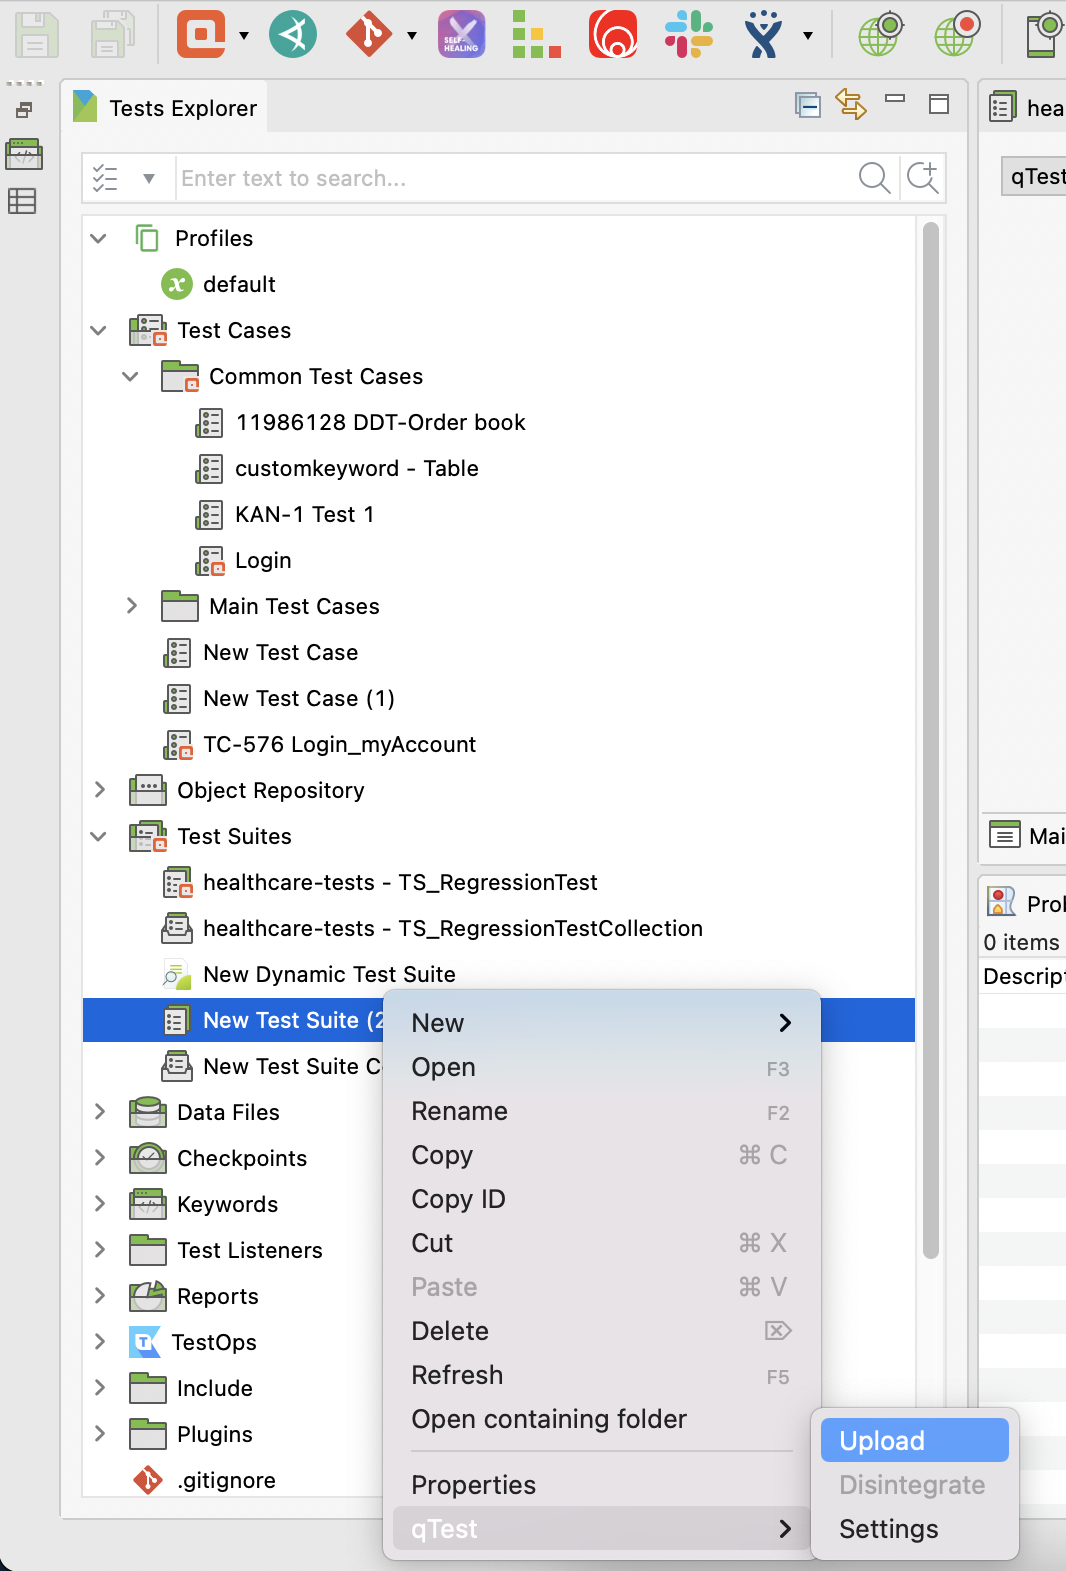
Disintegrate test suites from qTest
Katalon allows you to disintegrate a test suite or all test suites in a folder from qTest.