Salesforce testing
This integration provides assistance for certain user-specific use cases, but it is not officially supported. Compatibility with all user requirements is not guaranteed.
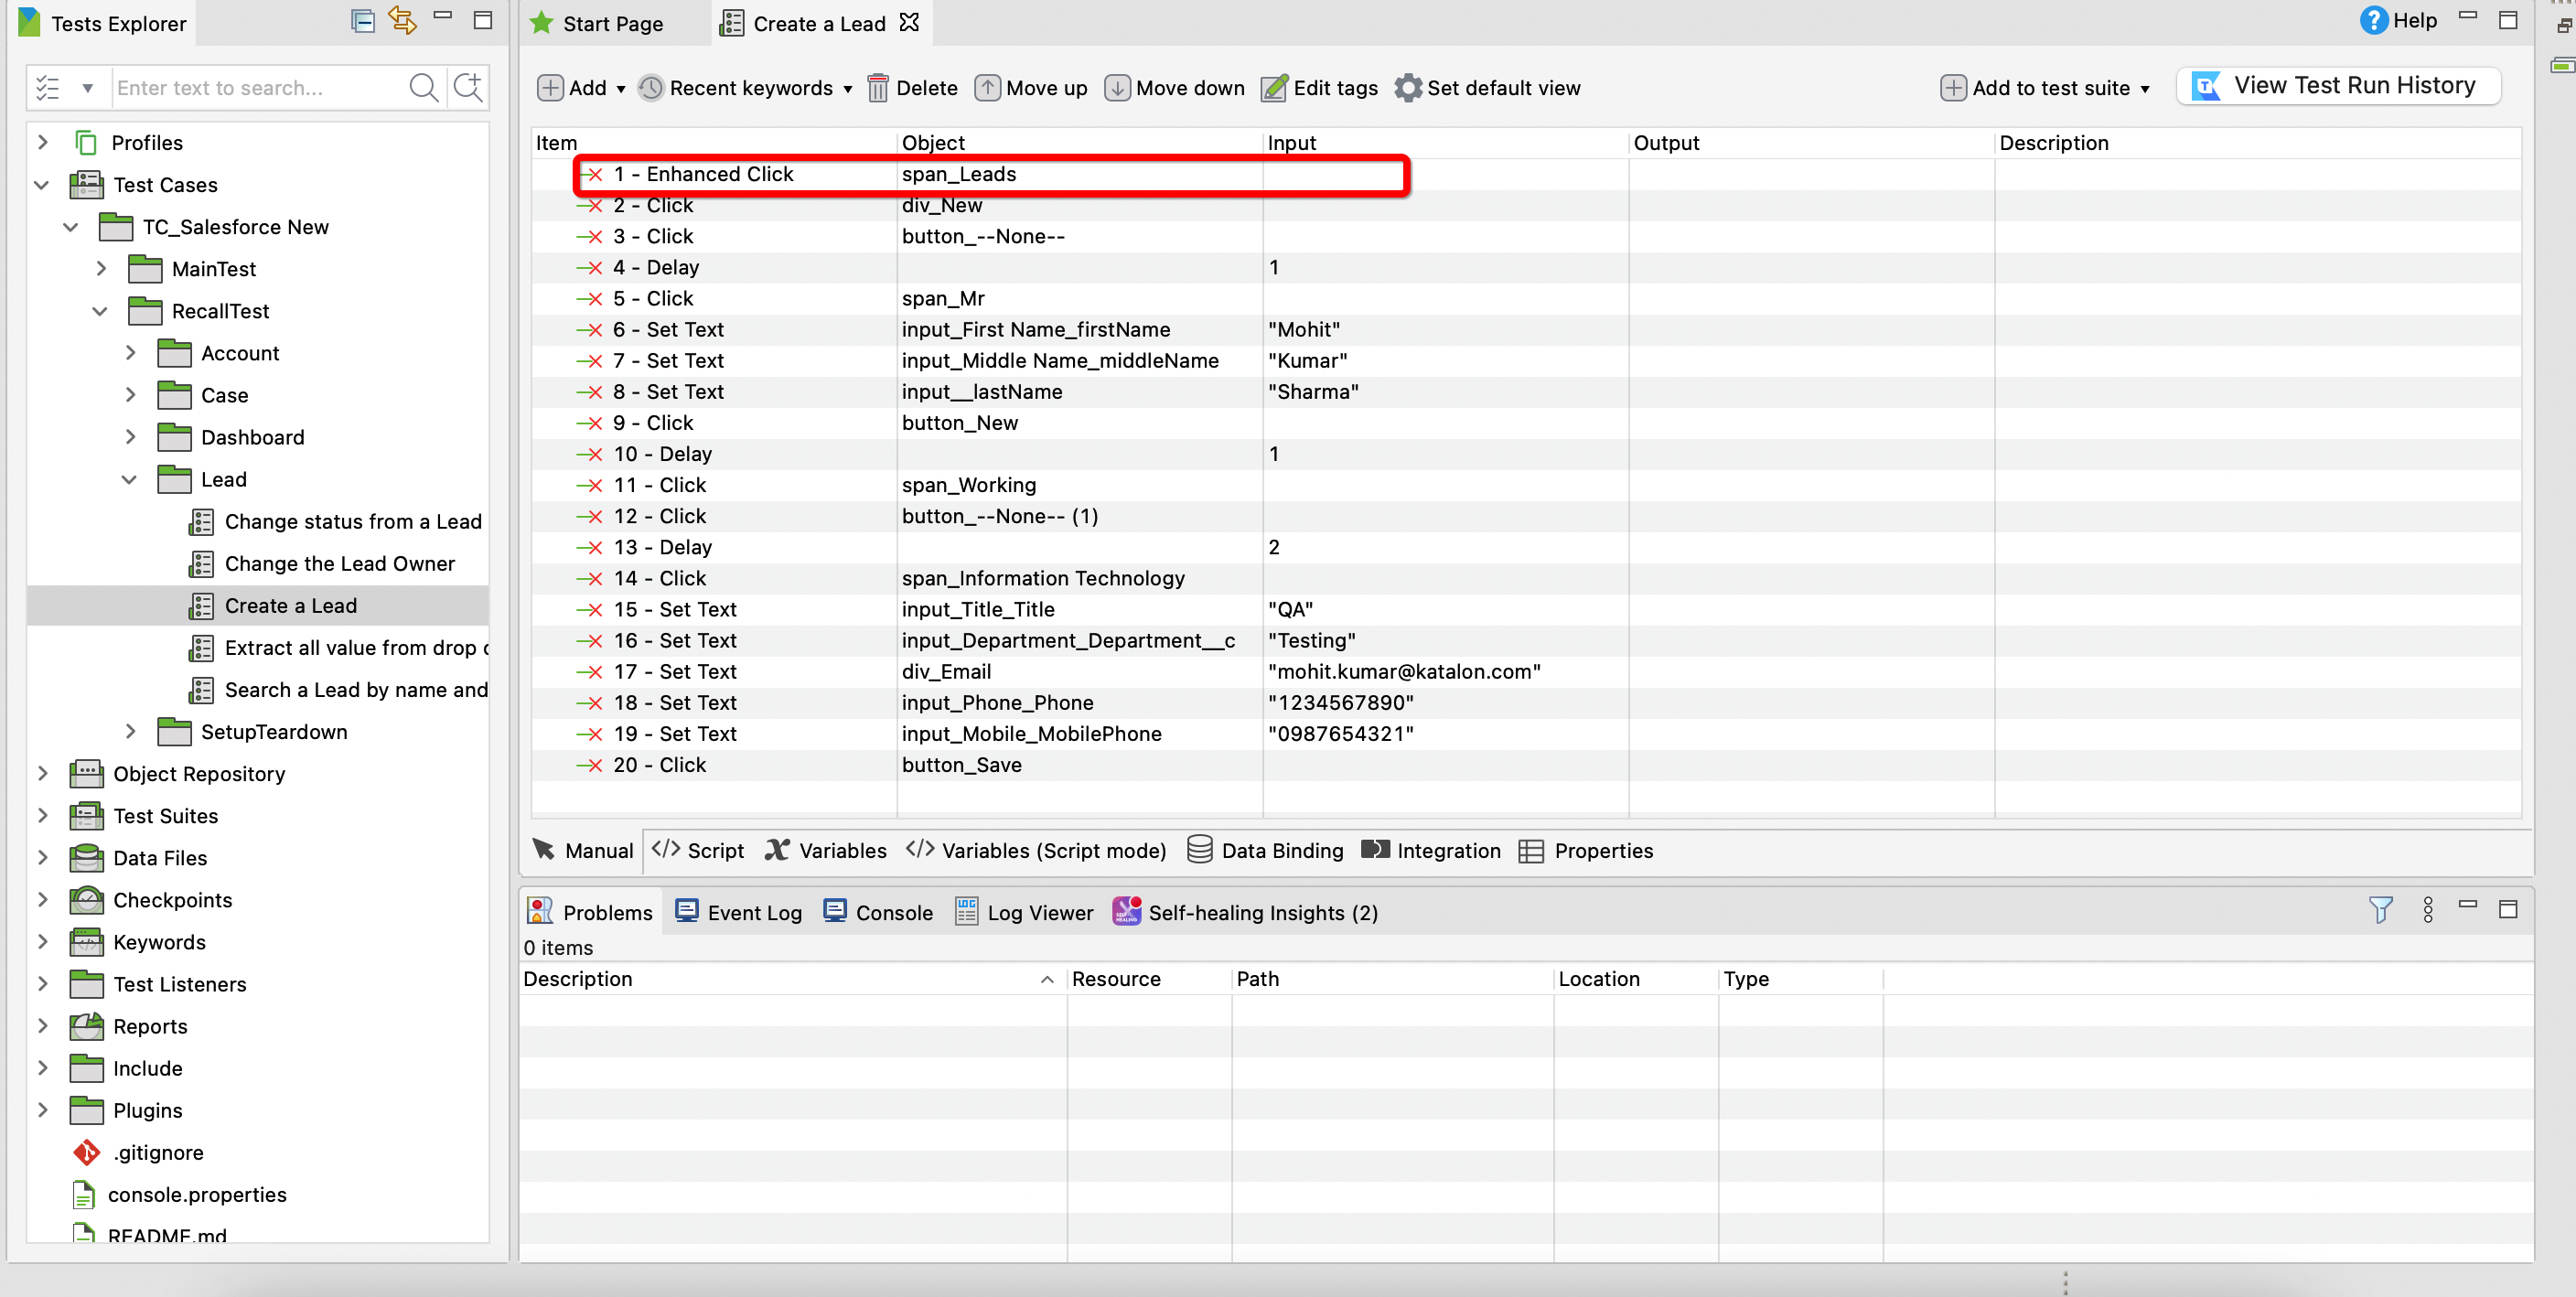
This tutorial illustrates how Katalon Studio facilitates the automation of Salesforce applications, covering test cases for lead, case, and account management. Additionally, the dashboard management test cases include an example involving an iframe.
Use cases for Salesforce testing
| Use Case | Actions |
|---|---|
| Lead management | Log in - Create a new lead - Change status - Change owner - Search and delete a lead - Close application |
| Case management | Log in - Create a new case - Edit and change status - Search and delete by ID - Close application |
| Account management | Log in - Create an account - Close application |
| Dashboard management | Log in - Create a dashboard - Add components and reports - Create filter - Delete dashboard - Close application |
Handling MFA and SSO within Salesforce orgs
Prerequisites
- Access rights to create a Connected App within Salesforce.
- Appropriate permissions and profiles to configure and use the Connected App.
Steps
-
Create a Salesforce app.
-
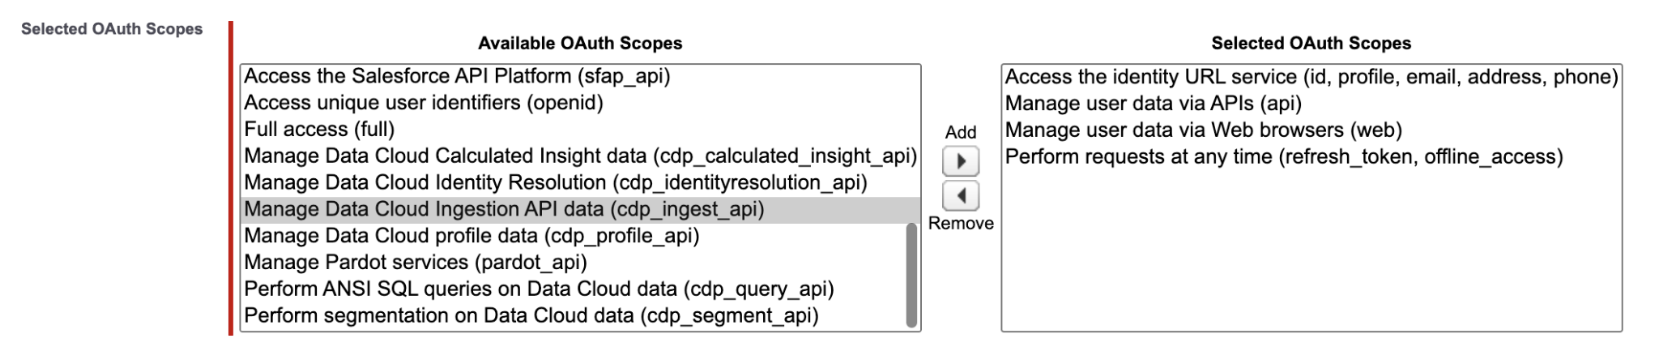
Make sure you enable the OAuth settings and add the required OAuth scopes as shown in the screenshot below:
-
To use the connected app in Salesforce, make sure you are added either via permission sets or you are assigned to the correct user profile to the connected app.
-
Use the connected app to retrieve a refresh token which will be used to generate an access token during runtime, login to Salesforce, and perform test automation.
-
-
Connect to connected app using Katalon Studio.
-
Open a new or existing project in Katalon Studio.
-
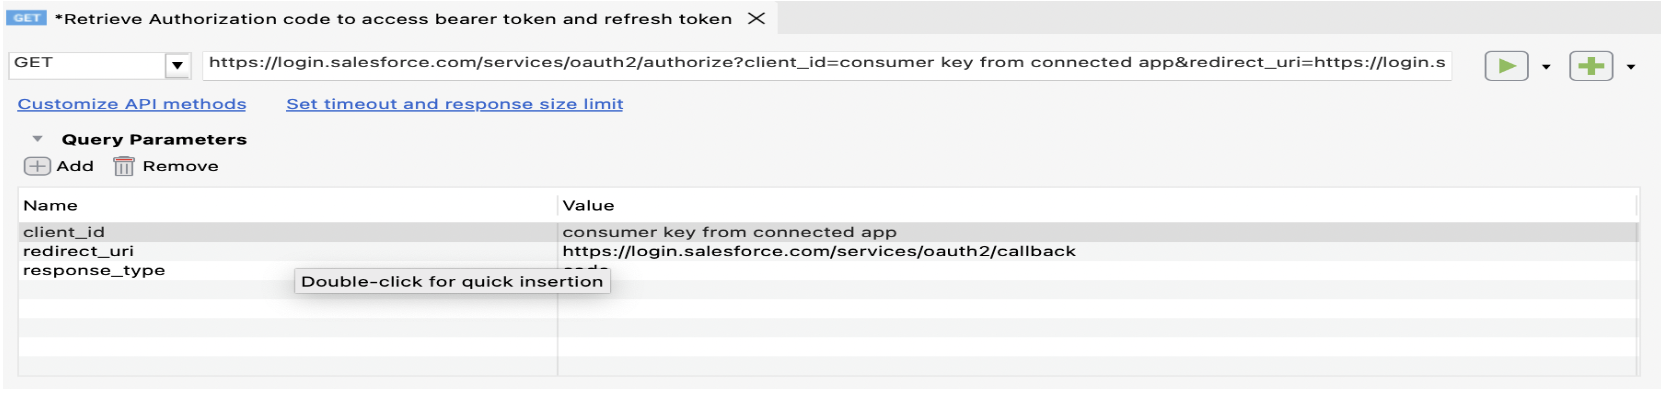
Create a new web service request of type - REST and name it as
Retrieve Authorization code to access bearer token and refresh token. You can name the request as per your choice as well. This request will be used to retrieve the Authorization Code from Salesforce for our next steps. -
Enter the following below:
- Base URL: https://login.salesforce.com/services/oauth2/authorize.
- Query Parameters:
client_id: Consume key from connected app.redirect_uri: As defined in the connected app during the setup.response_type: code (“code” is the actual value for this API call).
-
Run this request using the test request button.
-
Navigate to the header tab and copy the URL received under
Location: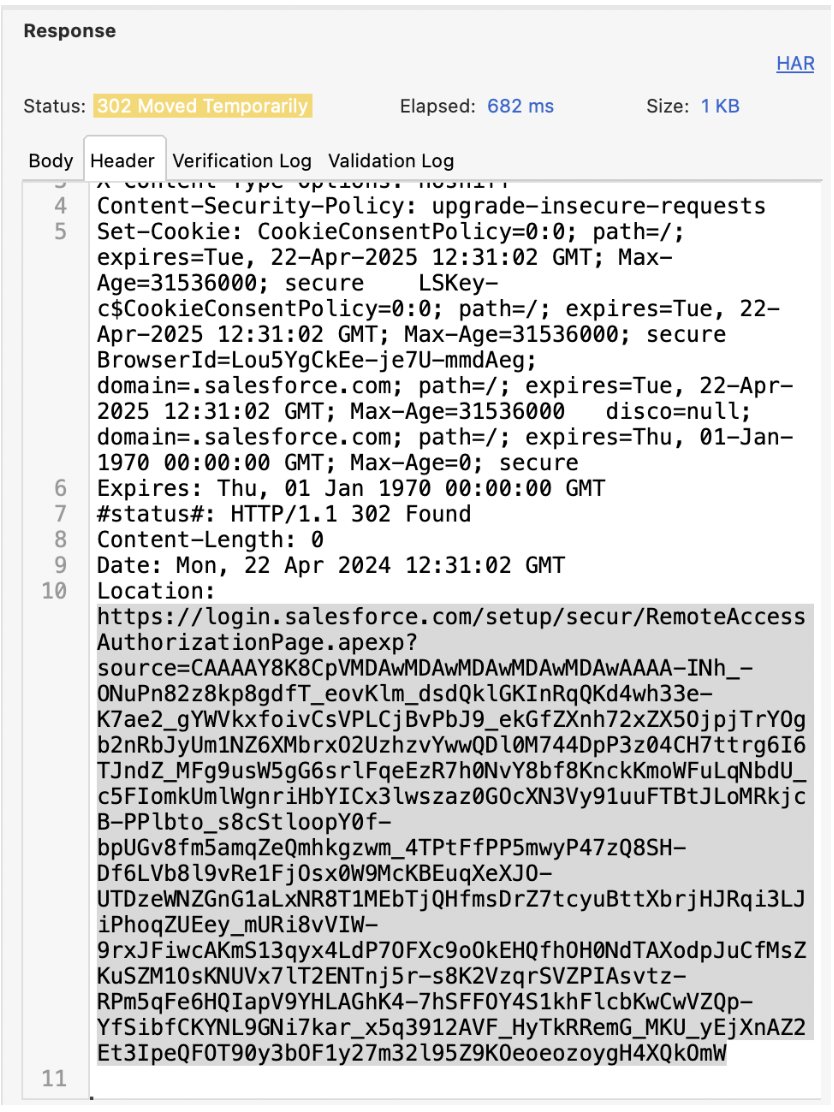
-
Paste the copied URL in the address field of your browser and follow the login instructions.
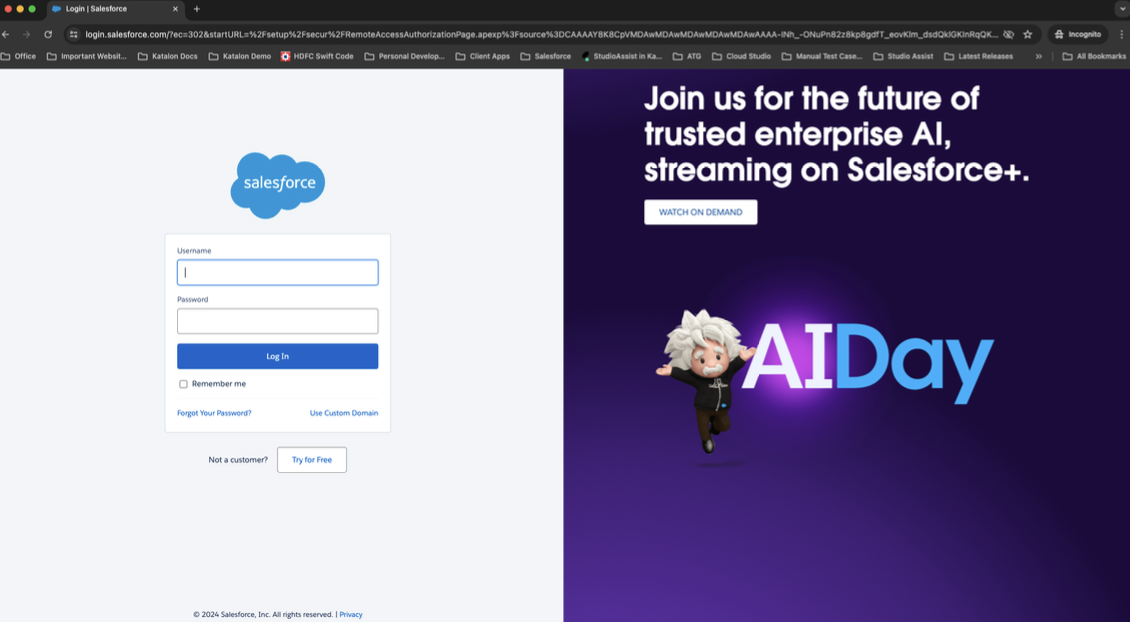
-
Once logged in, the generated callback code is displayed in the address bar. The callback code is the value after the code. For example, the callback code in
https://login.salesforce.com/services/oauth2/callbackcode=aPrxsdssXvusdaaJ4hOFlX4ZHYQMhdjsi9HOTTTw6mQZ%3D%3DisaPrxsdssXvusdaaJ4hOFlX4ZHYQMhdjsi9HOTTTw6mQZ%3D%3D.
-
Decode the retrieved code using any online URL Encode/Decoder.
-
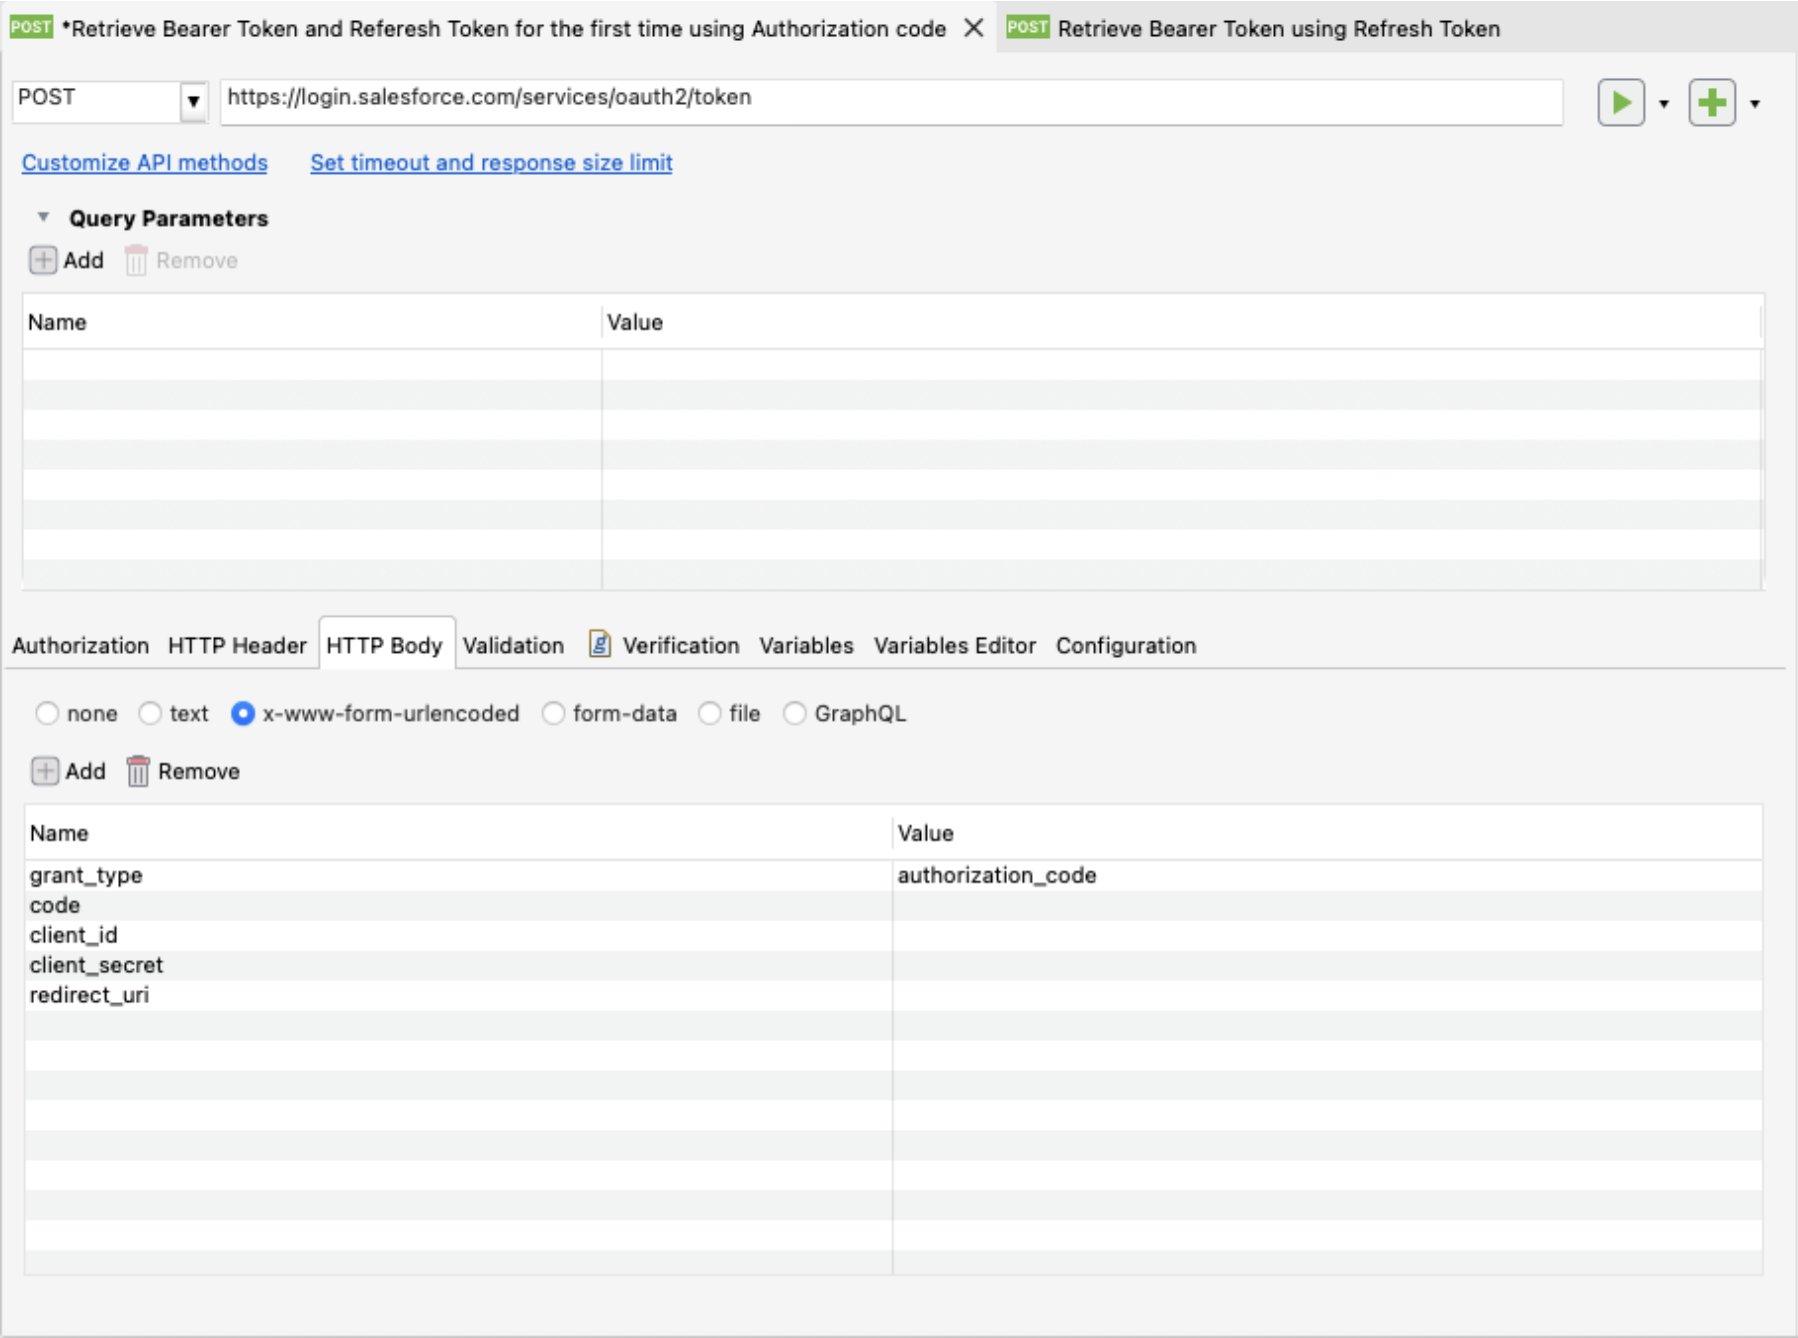
Create a new web service request in Katalon Studio and name it
Retrieve Bearer Token and Refresh Token for the first time using Authorization code. -
Enter the following below:
- Base URL: https://login.salesforce.com/services/oauth2/token.
- HTTP Body:
x-www-form-urlencodedgrant_type:authorization codecode: The code you decoded in the previous step.client_id: Consumer key from your connected app.client_secret: Consumer secret from connected app.
redirect_uri: As defined in the connected app during the setup.
-
Run this request and retrieve the refresh token from the response. This refresh token will be used to generate the access token during runtime, which will allow users to log into Salesforce without the need to revalidate credentials via MFA or SSO.
-
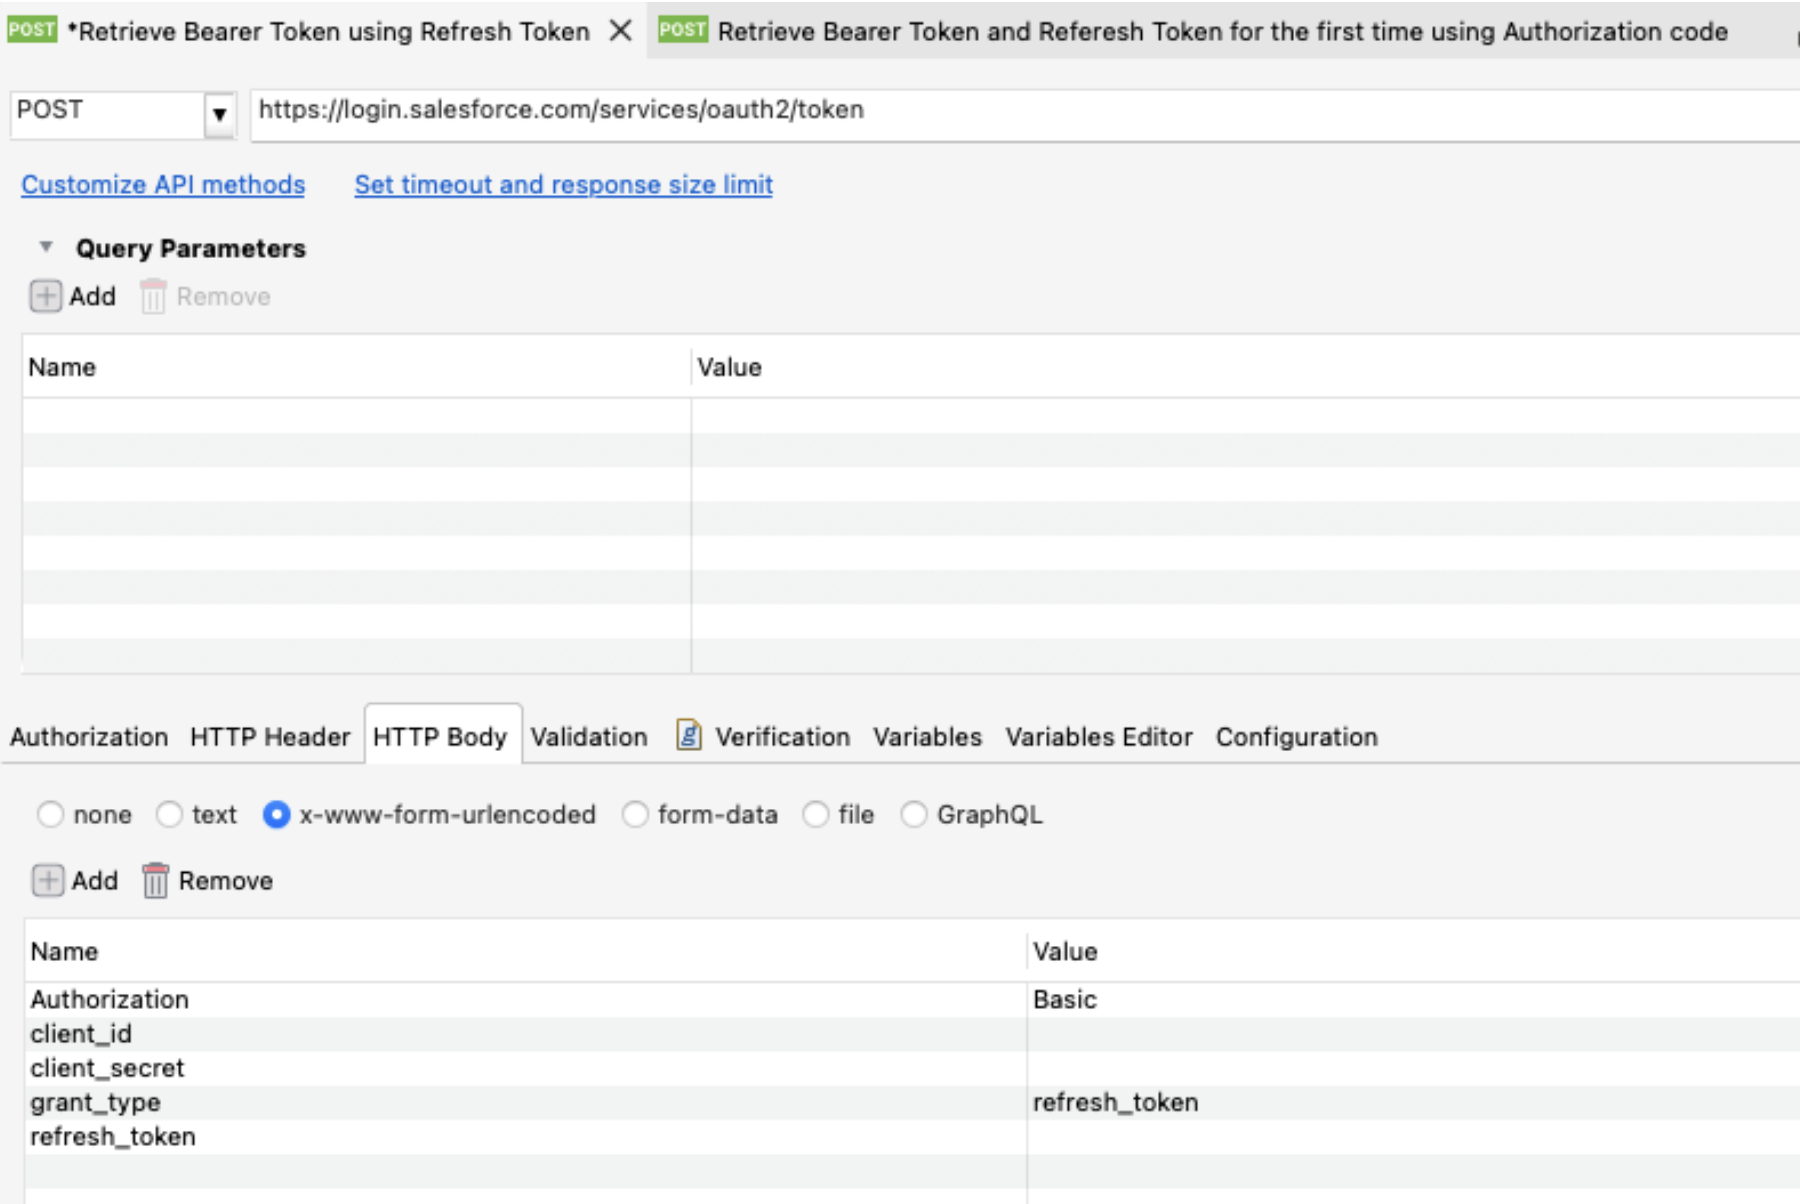
Create a new web service request in Katalon Studio and name it
Retrieve Bearer Token using Refresh Token. -
Enter the following below:
- Base URL: https://login.salesforce.com/services/oauth2/token.
- HTTP Body:
x-www-form-urlencoded- Authorization: Basic
client_id: Consumer key from connected app.Client_secret: Consumer secret from connected app.Grant_type:refresh_tokenrefresh_token: Retrieved from the response of the previous request.
-
Run this request and retrieve the access token. Start by pasting this address in a new browser: https://kataloninc-dev-ed.develop.my.salesforce.com/secur/frontdoor.jsp?sid='accessToken'&retURL=, and then you will successfully log in to your Salesforce instance by passing MFA and SSO.
-
-
Use this access token as part of your Katalon Studio test case.
-
Create a new test case.
-
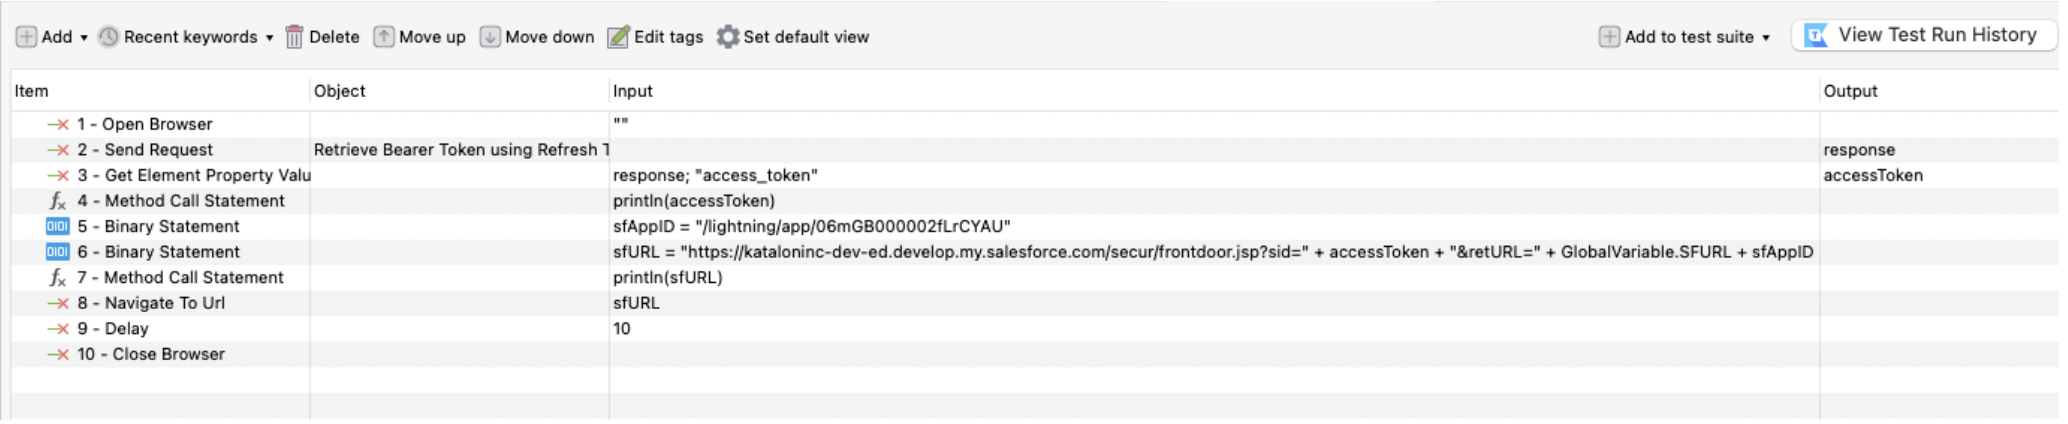
Use the web service keyword
Send Requestand select theRetrieve Bearer Token using Refresh TokenAPI requests under the Object column. Then, double-click on the Output column and add an output variable to store the response retrieve during runtime. You can do this by switching toScript modein Katalon Studio as well. -
Add another test step to parse the response received and retrieve the
Access Tokenand store it in a variable. -
Create another variable to create the Salesforce login URL (ex.
sfURL) using this access token and the URL format. -
Add the
Open Browserkeyword in your test case and pass thesfURLto the keyword. -
Save the test case and run it.
Manual view:
Script view:
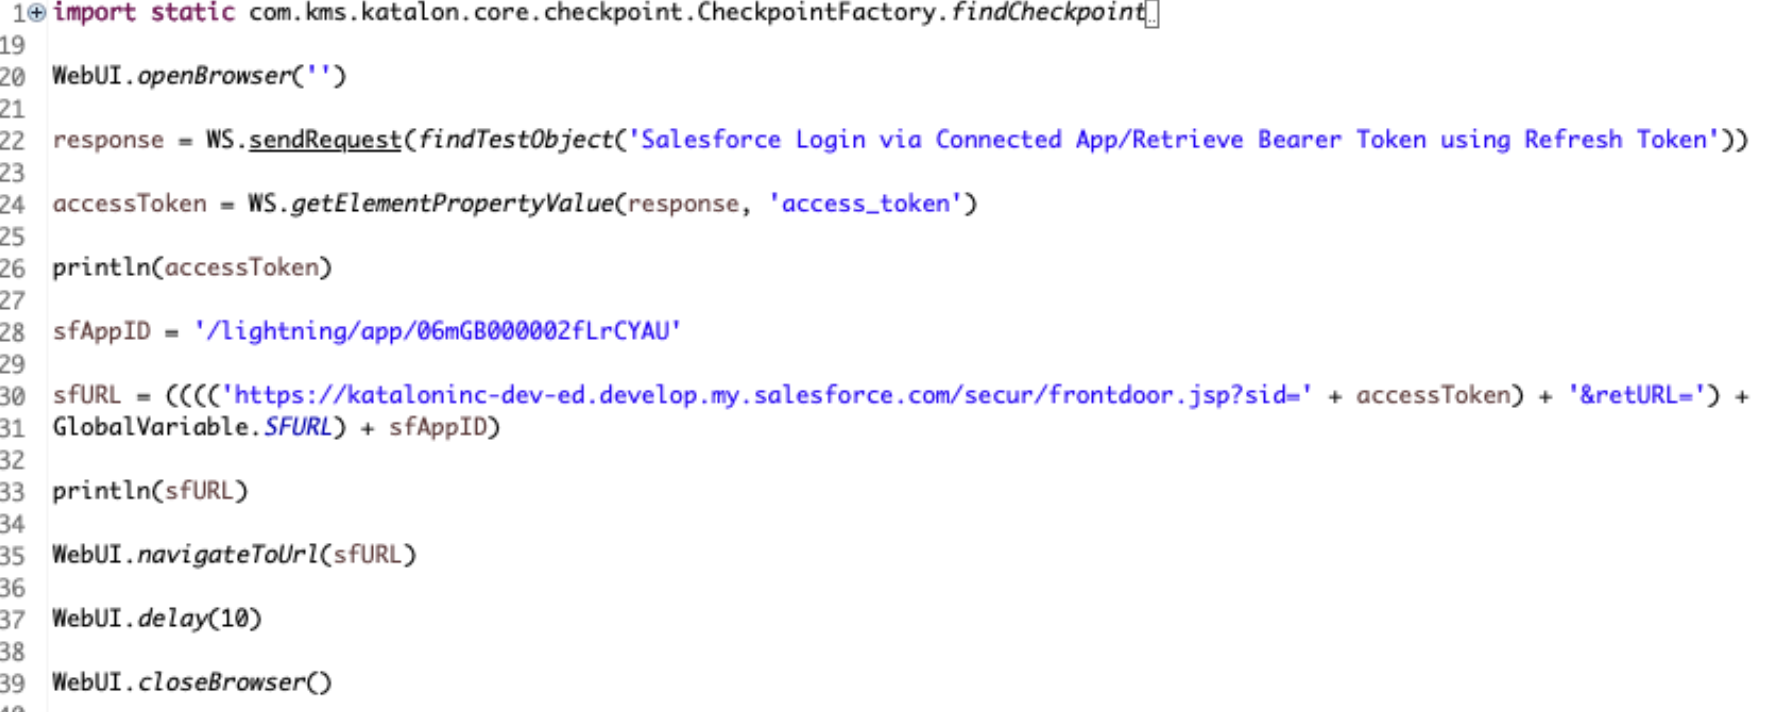
-
- With this method, we can log into Salesforce in a robust manner while adhering to both SSO and MFA. In this method, the
Retrieve Authorization code to access bearer token and refresh tokenandRetrieve Bearer Token and Refresh Token for the first time using Authorization coderequests need to be run manually from Katalon Studio and will only need to be ran when the refresh token is revoked. - Whenever the refresh token is revoked, you need to run the first two requests and update the refresh token in
Retrieve Bearer Token using Refresh Token.The test case itself doesn’t need to be changed.
Automate Salesforce test cases
Katalon Studio installed.
An active Salesforce account.
- You can refer to video demonstrations of the steps with Katalon Academy:
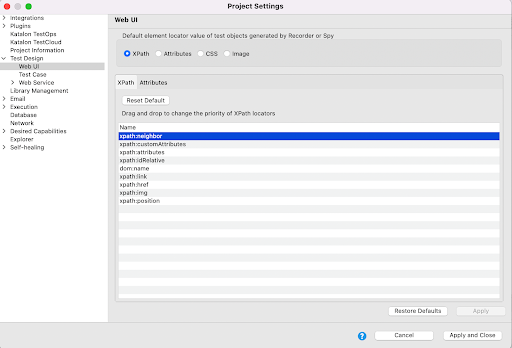
- Go to Project > Settings > Test Design > Web UI and change the priority of Xpath Locators.
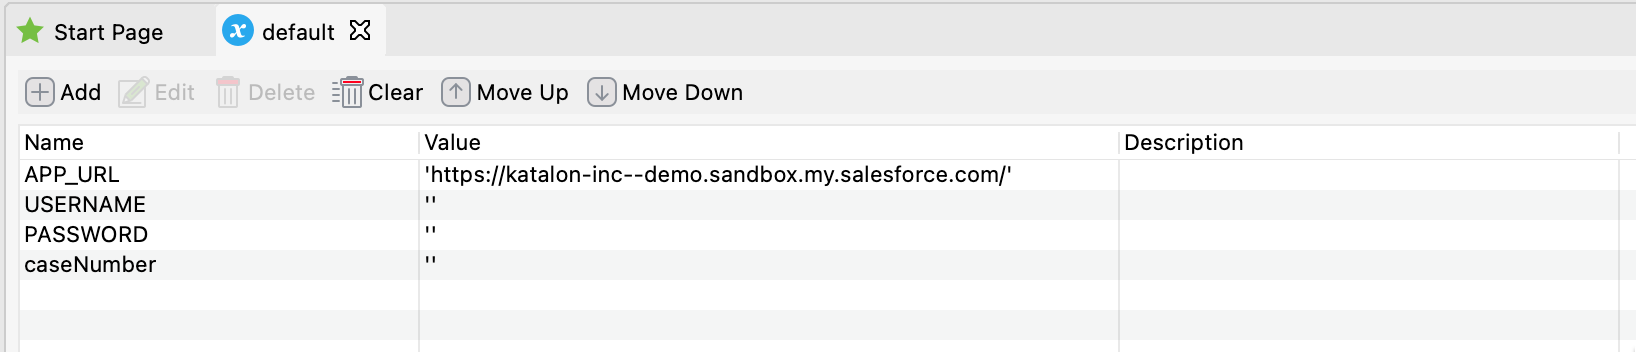
- Update the application URL, username, and password inside the Default profile.
Click to Enhanced Click.